This blog post may contain affiliate links. As an Amazon Associate I earn from qualifying purchases.
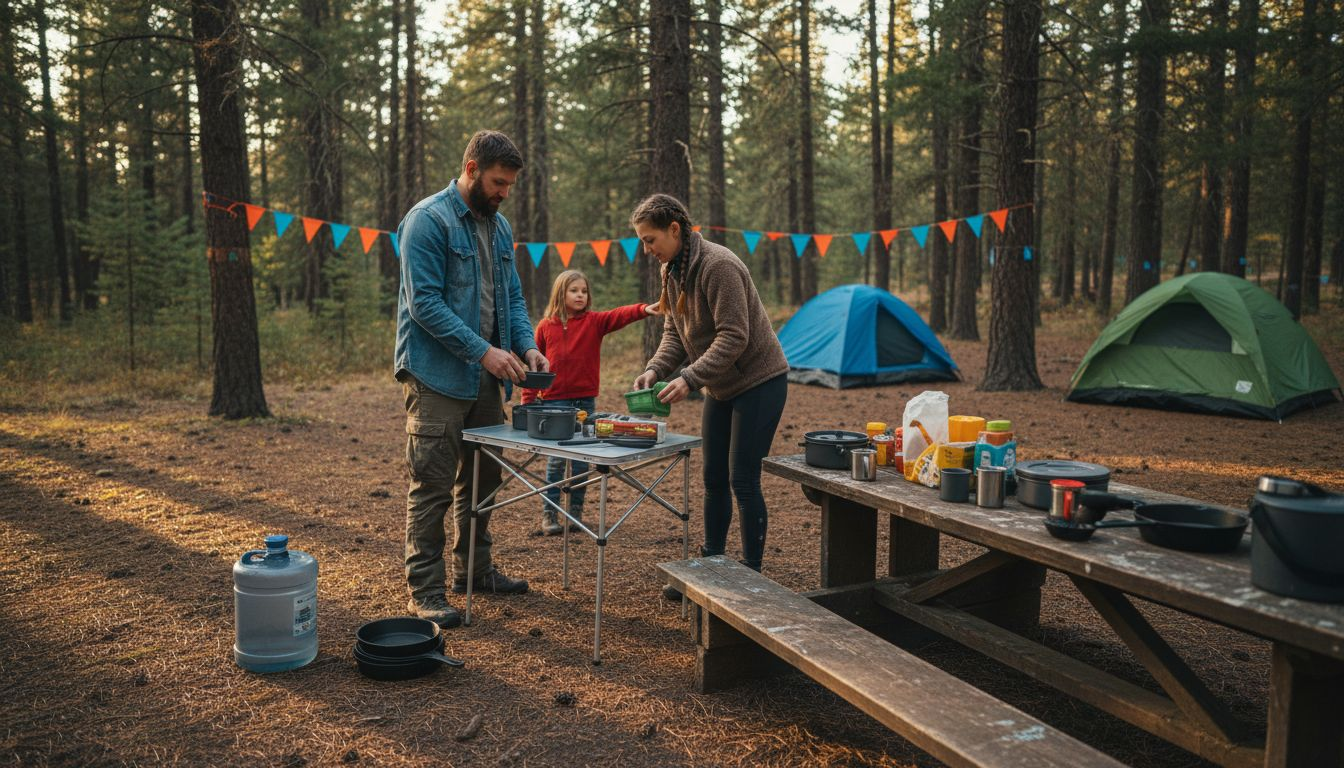
Nothing throws off a camping trip like struggling to cook outdoors when your kitchen setup is scattered and inefficient. For campers looking to create a smoother, safer experience, the right camp kitchen layout can make meal prep enjoyable instead of stressful. With guidance drawn from proven strategies such as creating distinct zones for food preparation, cooking, cleaning, and storage, you’ll discover practical tips to transform your tent camp kitchen into an organized, functional hub for outdoor meals.
Quick Summary
| Important Insight | Explanation |
|---|---|
| 1. Choose a safe kitchen location | Find dry, level ground at least 15 to 20 feet from sleeping areas to avoid hazards and ensure comfort while cooking. |
| 2. Select multipurpose kitchen gear | Focus on durable, space-saving items that can perform multiple functions to make outdoor cooking efficient and enjoyable. |
| 3. Organize your workspace into zones | Create distinct areas for preparation, cooking, cleaning, and storage to streamline your meal prep and keep your kitchen clean. |
| 4. Implement effective food storage practices | Use coolers for perishables and airtight containers for dry goods to prevent spoilage and pest issues, keeping food safe and accessible. |
| 5. Test your kitchen setup at home | Simulate meal prep using camp gear at home to identify inefficiencies and ensure everything works correctly before your trip. |
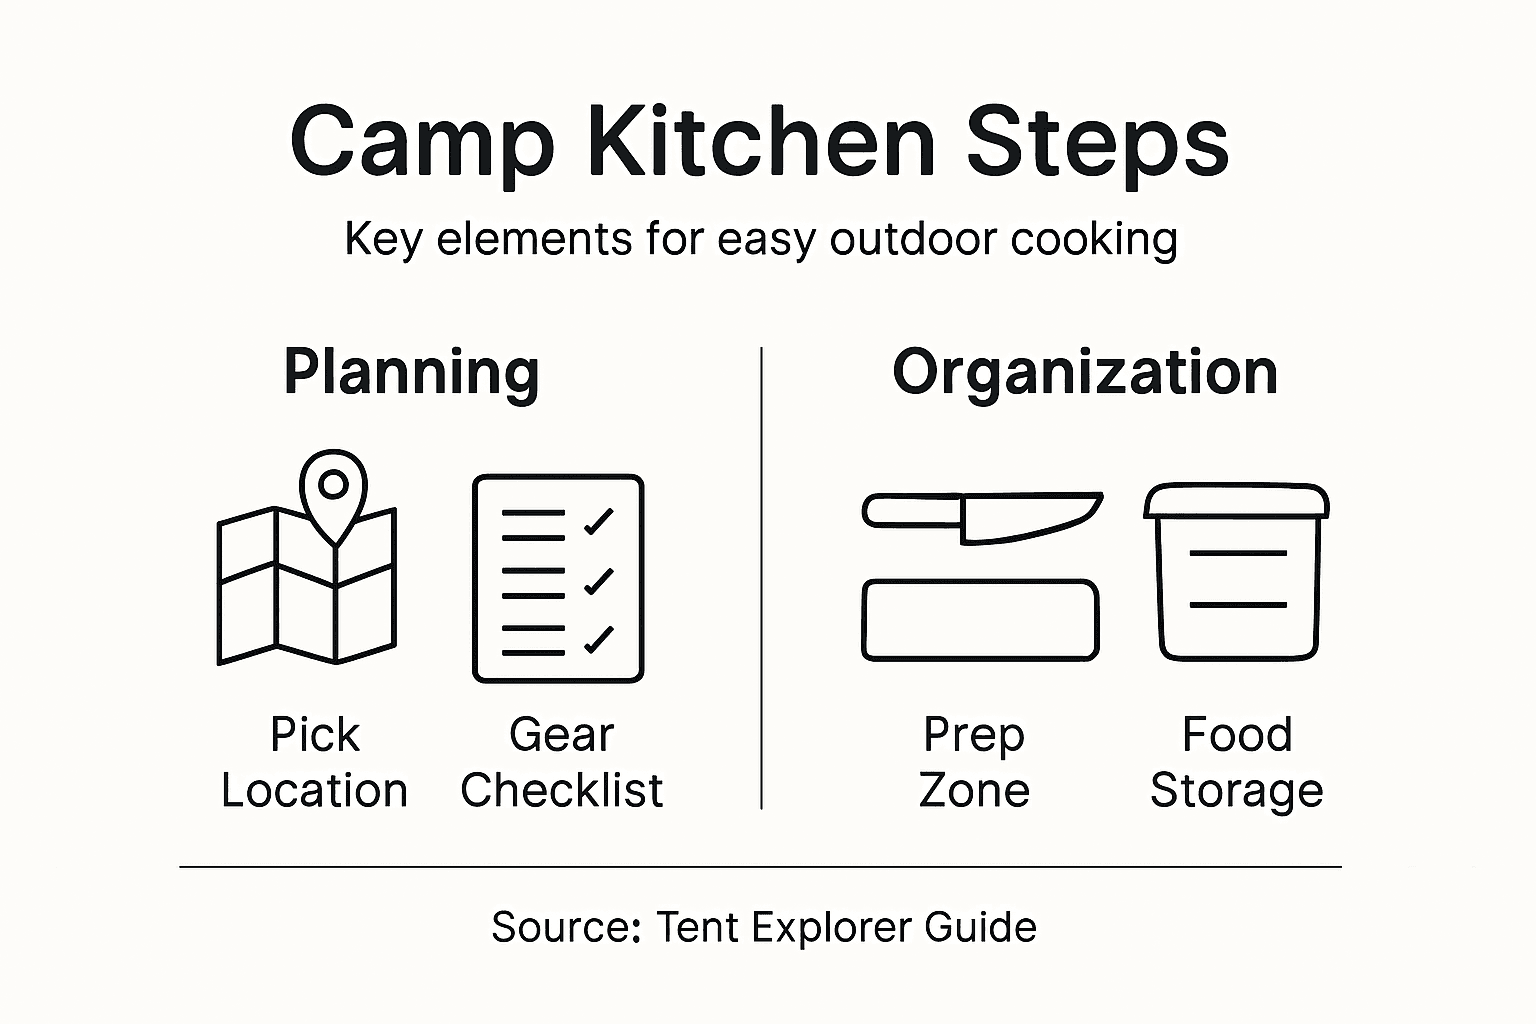
Step 1: Choose the ideal camp kitchen location
Finding the right spot for your camp kitchen sets the tone for your entire outdoor cooking experience. A poorly placed kitchen means wasted energy, safety risks, and meals that take twice as long to prepare. The good news is that choosing wisely takes just a few minutes of planning before you set up.
Start by assessing your campsite for natural drainage and level ground. Your kitchen area should sit on terrain that won’t collect water during rain, since wet ground leads to muddy conditions and potential flooding of your cooking supplies. Look for a spot that slopes gently away from your tent and sleeping areas. Avoid low-lying spots where water naturally pools, and steer clear of areas directly downhill from other campsites. A camp layout that balances safety with functionality ensures your kitchen stays dry and accessible throughout your trip.
Next, consider the relationship between your kitchen and sleeping area. You’ll want to keep cooking at least 15 to 20 feet away from where you sleep. This distance protects your tent from cooking odors, accidental spills, and heat that might damage fabric. More importantly, it keeps potential wildlife drawn to food smells away from your sleeping zone. Position your kitchen so prevailing winds carry cooking smells away from your tent, not toward it. Pay attention to the sun’s path too—a kitchen spot that gets afternoon shade saves you from heat exhaustion during meal prep, while morning sun helps dry out any damp areas after overnight dew.
Think about proximity to your water source and seating area. Your kitchen shouldn’t be so isolated that you’re hiking 50 feet for water every few minutes, but it shouldn’t sit directly next to where people relax either. Try to place it within 10 to 15 feet of water and within visible distance of your sitting area so you can socialize while cooking. This layout makes meal preparation feel less isolated and keeps food preparation integrated with camp life.
Also verify that your chosen spot allows safe emergency access. Make sure nothing blocks the path from your kitchen to the main camp area and vehicle access points. This matters if you need to quickly grab first aid supplies, move equipment, or allow emergency responders to reach your campsite. Avoid placing your kitchen under dead branches or in spots where falling debris poses a hazard.
Choose a kitchen location that is at least 15 to 20 feet from sleeping areas, sits on level and well-drained ground, and maintains clear access paths to water and vehicles.
If you’re camping at a location with established campsite setup guidelines, check those first. Many campgrounds have designated cooking areas or restrictions on where you can place kitchen equipment. Even at primitive sites, follow basic fire safety by keeping your cooking area away from dead vegetation, fallen branches, and anything combustible. When setting up a camp kitchen, organize it so fuel storage sits safely separated from your cooking zone—typically at least 10 feet away.
Pro tip: Mark your chosen kitchen location with a flag or bright tape before you start setting up, so you don’t accidentally place other gear there and waste time rearranging later.
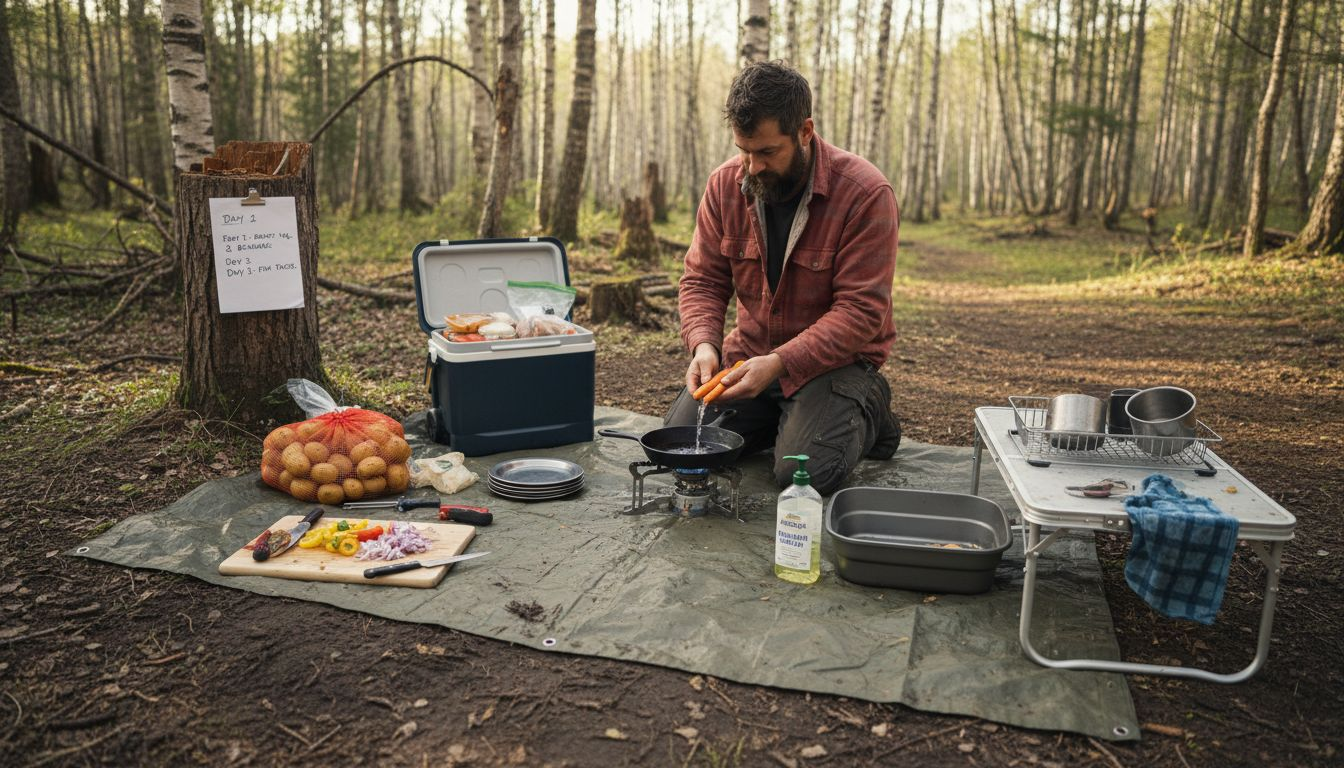
Step 2: Select essential kitchen gear and supplies
Choosing the right kitchen gear makes the difference between meals that feel like a hassle and meals that you actually enjoy preparing outdoors. You don’t need fancy equipment—in fact, you want the opposite. The goal is selecting multipurpose, durable items that won’t weigh down your pack or take up excessive space at your campsite.
Start with cooking and eating essentials. A good camp kitchen needs a sturdy pot and pan combo that can handle both cooking and serving. Look for pieces with heat-resistant handles and lids that fit securely. Add a mixing bowl that doubles as a serving dish, and grab a set of utensils including a spatula, spoon, and tongs. For eating, bring reusable plates, bowls, and cups that are lightweight but durable. Stainless steel or hard plastic options withstand the outdoor environment better than fragile ceramics. Include a sharp knife and cutting board since food preparation utensils like knives and cutting boards are essential for efficient meal prep, whether you’re chopping vegetables or portioning proteins.
Next, focus on cleaning and storage supplies. Bring a dish brush, sponge, and biodegradable soap for washing up after meals. Pack dish towels or microfiber cloths that dry quickly in outdoor conditions. Include several resealable bags and containers for storing leftover food and protecting ingredients from insects and moisture. A garbage bag or two keeps your kitchen area clean throughout your trip. Don’t forget a large colander or strainer for washing produce and draining pasta. Reusable water bottles or a water carrier help you access fresh water without making constant trips to your source.
Consider the items on an outdoor cooking checklist for essential supplies, which often highlights the importance of backup equipment. Bring at least two lighter or matchbooks since the first one might get wet or lost. Pack extra fuel or propane if you’re using a camp stove, and check that your fuel type matches your equipment. A basic tool kit with a small wrench, scissors, and multi-tool solves unexpected problems without requiring a trip back to your vehicle.
Select gear that serves multiple functions, fits in your pack, and can withstand weather and repeated outdoor use without breaking down.
Think about meal-specific needs based on what you plan to cook. If you’re making coffee, bring a simple percolator or pour-over setup with filters. For baking, include a cast iron skillet that works over an open flame or camp stove. If you’re fishing or hunting for your meals, pack a filleting knife and prep area. Keep your gear selection proportional to trip length—a weekend trip needs less than a week-long expedition.
One practical approach is grouping items by function. Store cooking equipment together, cleaning supplies in one section, and food storage items grouped separately. This organization saves time when setting up and packing down your kitchen. Assign each person in your group one category to manage, which spreads responsibility and keeps things organized.
Weight matters when you’re carrying everything on your back or fitting it in a vehicle. Avoid bringing redundant items like three types of knives when one quality blade handles multiple tasks. Consolidate whenever possible—a pot with a lid eliminates the need for separate containers. Look for lightweight alternatives without sacrificing durability, since flimsy gear fails when you need it most.
Pro tip: Test your complete kitchen setup at home before your trip by actually preparing a meal using only your camp gear, which reveals missing items and gives you confidence in your system.
Step 3: Organize your camp kitchen workspace
A well-organized kitchen workspace transforms cooking from chaotic to calm. When everything has its place and you can find what you need without searching through piles of gear, meal preparation becomes faster and actually enjoyable. The key is creating distinct zones that separate different activities so you’re not fumbling around in a jumbled mess.
Start by mapping out your kitchen layout with four functional areas. Your preparation zone is where you wash, cut, and assemble ingredients before cooking. This should be near your water source and have a flat surface like a portable table or cooler placed upside down. Keep your cutting board, knives, and fresh food storage here so everything you need for prep work is within arm’s reach. Your cooking zone sits a safe distance away from prep work and includes your stove, pots, pans, and any heat sources. Position this area where you can monitor food without stepping back and forth constantly. The cleaning zone should be far enough from cooking that splashing water doesn’t affect your meal preparation, yet close enough to be convenient. This is where your dish basin, soap, towels, and drying rack belong. Finally, your storage zone keeps food, gear, and supplies organized vertically on a table or portable shelving unit, away from ground moisture and pests.
Creating distinct zones for food preparation, cooking, cleaning, and storage streamlines your workflow and maintains hygiene during outdoor cooking activities. The physical separation prevents cross-contamination and keeps your workspace feeling less cramped, even at a small campsite.
Next, organize items within each zone by frequency of use. Items you grab multiple times during meal prep should sit at eye level and within easy reach. Less frequently used equipment can go higher on shelves or deeper in storage containers. Label everything clearly using waterproof markers or stickers so you and your camping companions know exactly where things belong. This saves time and prevents items from getting lost in the outdoor environment.
Use portable solutions that maximize space efficiency. Stackable storage bins keep similar items together and protect gear from moisture and insects. A hanging organizer with pockets works great for utensils, seasonings, and small tools. A sturdy folding table provides essential workspace without taking up much room when packed. Consider vertical storage on trees or structures rather than spreading items across the ground where they get dirty or damp.
Organize your camp kitchen into four zones: preparation, cooking, cleaning, and storage, with frequently used items at eye level for quick access.
Maintain a simple cleaning protocol that keeps your workspace sanitary throughout your trip. Wipe down surfaces after each meal preparation and wash dishes promptly to prevent attracting wildlife. Sweep or clear debris from your kitchen area regularly, especially before and after cooking. Keep a small trash bin or waste bag in your kitchen so litter doesn’t scatter around your workspace. This ongoing maintenance prevents problems from building up and keeps your kitchen functioning smoothly.
Below is a summary of camp kitchen workflow zones and their primary objectives:
| Zone | Main Purpose | Key Items Suggested |
|---|---|---|
| Preparation | Ingredient washing/cutting | Knife, cutting board, bowl |
| Cooking | Meal heating & assembly | Stove, pots, spatula |
| Cleaning | Dish & tool sanitation | Basin, soap, towels |
| Storage | Gear and food organization | Bins, labeled containers |
Responsibility sharing makes organization easier when you’re camping with others. Assign one person to manage food storage and meal planning, another to oversee cooking equipment maintenance, and someone else to handle cleaning protocols. When people know their roles, your kitchen runs like a team rather than descending into confusion. Rotate responsibilities each day so everyone learns the system and no one gets stuck with the same task repeatedly.
Think about how you’ll adapt your layout if weather changes. In heavy rain, move your prep zone under a tarp or canopy to protect ingredients and workspace from getting soaked. In strong wind, position your cooking zone strategically so smoke doesn’t blow into your prep area. A flexible approach to organization helps you maintain functionality even when conditions aren’t perfect.
Pro tip: Use a white dry-erase board mounted on a stand to track meal plans, supply inventories, and cleaning schedules, keeping everyone informed and preventing duplicate work.
Step 4: Set up safe food storage and waste systems
Proper food storage and waste management separate campers who enjoy meals without worry from those dealing with spoiled food and pest problems. When you control how food is stored and where trash goes, you eliminate the biggest sources of camp kitchen frustration. This step protects both your health and your campsite environment.
Start with cold storage solutions that keep perishable foods safe. If you brought a cooler, pack it with ice or frozen water bottles at the bottom, then layer perishables on top. Keep raw meats on the lowest shelf so juices don’t drip onto other foods. Separate raw and cooked foods into different sections of your cooler to prevent cross-contamination. Check food temperatures regularly—perishables should stay below 40 degrees Fahrenheit to remain safe. If your cooler doesn’t have enough space, consider a second cooler just for drinks so you’re not constantly opening your food cooler and letting cold air escape. Proper refrigeration and separating raw and cooked foods are essential practices that prevent foodborne illness in camp kitchens.
For non-perishable items, create a dry storage system that keeps food organized and protected from moisture and pests. Store grains, flour, sugar, and other dry goods in airtight containers rather than original packaging, which often tears easily outdoors. Label everything with waterproof markers so you know what’s inside each container and when it expires. Keep this storage elevated on a table or suspended from a tree branch away from ground-level pests. Never leave food sitting on the ground where insects and small animals can access it. Organize items by meal type—breakfast foods together, dinner ingredients grouped separately—so meal prep becomes intuitive.
Here is a comparison of common camp kitchen storage methods and their effectiveness:
| Storage Method | Pest Protection Level | Space Efficiency | Best For |
|---|---|---|---|
| Cooler with ice | High (when closed) | Medium | Perishable foods |
| Airtight bins | Medium | High | Dry goods, snacks |
| Suspended food bag | High (against animals) | Low | Overnight storage |
| Tabletop shelf unit | Low | High | Cooking utensils |
Manage your waste system strategically from day one. Designate a specific location away from your kitchen workspace where you’ll keep all garbage and compostable waste. Use a sturdy trash bin with a secure lid that animals can’t easily open, or hang a sealed bag from a tree branch at least 12 feet high and 6 feet from tree trunks. Separate your waste into categories: trash that goes to a landfill, compostable food scraps that break down naturally, and recyclables if you’re packing them out. This separation makes cleanup easier and reduces environmental impact. Never bury garbage at your campsite since animals dig it up and scatter it everywhere.
Maintain safe food storage at 40 degrees Fahrenheit or below, separate raw and cooked foods, and keep all waste sealed and elevated away from ground-level pests.
Establish a daily waste routine that prevents litter from accumulating. After each meal, immediately place food scraps and trash in your designated waste containers. Wipe down surfaces and sweep up crumbs before they attract insects. If you’re composting food waste, locate your compost container at least 50 feet from your sleeping area. Drain liquids from cans and containers before storing them so spills don’t attract wildlife. The key is not letting food residue sit around your kitchen—prompt cleanup prevents problems before they start.
When storing water for cooking and drinking, use clean containers maintained in sanitary conditions to prevent contamination. Keep your water storage separate from your waste system and elevated to prevent ground contamination. If you’re using untreated water from a natural source, boil it for at least one minute before consuming or store it in food-safe containers that have been thoroughly cleaned.
Think about how weather affects your storage plan. In hot weather, your cooler works harder to maintain safe temperatures, so minimize how often you open it and add extra ice. In rainy conditions, protect all storage from water infiltration by covering bins with tarps or moving them under your kitchen canopy. Store your waste containers under cover so rain doesn’t create leaks that spread odors and attract animals.
If you’re camping with others, clearly communicate your storage and waste protocols so everyone follows the same system. One person who understands the storage layout can designate where each item goes, preventing confusion and ensuring consistency. Assign someone to manage daily waste removal so nothing gets forgotten.
Pro tip: Freeze water bottles before your trip to serve double duty as cooler ice that gradually melts into drinking water, maximizing cold storage efficiency while reducing the weight of actual ice you need to carry.
Step 5: Test your camp kitchen for efficiency
Testing your camp kitchen setup before your actual trip reveals problems you can fix at home rather than discovering them miles from civilization. A quick trial run shows you whether your layout works, your gear functions properly, and your workflow makes sense. This dry run transforms your first camping trip from stressful to smooth.
Start by simulating a full meal preparation at home using only your camp kitchen equipment and your planned cooking method. If you’re using a camp stove, set it up in your backyard or driveway and actually cook breakfast, lunch, and dinner using it. Prepare a meal that mirrors what you’ll cook outdoors, complete with chopping vegetables, managing heat, and washing dishes with your camp setup. This real-world test exposes issues like discovering your cutting board is too small, your cooler doesn’t fit where you planned, or your stove takes twice as long to heat water as you expected. Pay attention to workflow efficiency by noting how many steps you take, how often you reach for items, and whether anything sits too far away or too close to other equipment.
Evaluate your cooking equipment performance under actual conditions. How long does your camp stove take to boil water compared to your home stove? Does your pot sit evenly on the burner or wobble? Can you safely regulate the heat or does it only switch between full blast and completely off? Testing cooking methods like matching pan sizes to burners for optimal heat transfer helps you understand exactly how your equipment performs. If you’re bringing multiple cooking tools, use each one during your test to confirm they all function as expected. Heat retention matters outdoors, so notice whether covering your pots actually makes a difference in cooking time.
Assess your storage and access patterns by tracking how often you reach for each item. Items you touch constantly should sit at eye level and within arm’s reach. Items you use once should be deeper in storage. This observation helps you reorganize before you leave home. Check whether your storage containers seal properly, whether labels stay visible, and whether everything fits in the space you allocated. Test your cooler’s actual cooling capacity by running it for a full day to see how well it maintains temperature with your specific ice and packing method.
Test your complete camp kitchen setup at home by preparing actual meals using only your camp equipment to identify inefficiencies before your trip.
Check your safety systems and protocols during this test. Practice proper fuel storage and handling if you’re using a camp stove or lantern. Test your waste management system by actually using it for a day’s worth of garbage. See how your cooler elevation works and whether animals can access it (use your pets as testers if you have them). Make sure you can reach everything safely without bending awkwardly or straining, which prevents injuries on your trip.
Time yourself completing specific tasks like filtering water, preparing a meal, washing dishes, and breaking down your kitchen. These measurements show you whether your 10-person meal plan is realistic or whether you need to simplify recipes when camping. If a task takes three times longer than you expected, you have time to adjust your plan or find equipment that speeds things up. Conducting this do-it-yourself assessment of your kitchen workflow identifies areas for improvement that seem minor at home but become major frustrations outdoors.
Create a written checklist of everything you discover during your test. Note items you forgot to pack, equipment that needs adjusting, and workflow changes that would improve efficiency. Take photos of your setup from different angles so you remember exactly how everything was arranged. Document cooking times, fuel consumption, and water usage so you can estimate how much of each you’ll need for your actual trip length.
Involve your camping partners in this test if possible. Have them use your kitchen setup and see what problems they encounter that you missed. Different people notice different inefficiencies, and what works smoothly for you might feel awkward for someone else. Their perspective helps you create a system that works for everyone in your group.
After your test run, make a second list of modifications you want to implement. Perhaps you need a taller table, different sized cookware, or a reorganized storage system. Making these changes now costs nothing except time, but discovering the same problems at your campsite costs frustration and hungry stomachs.
Pro tip: Record a short video of yourself preparing a complete meal using your camp kitchen setup, then watch it to identify inefficient movements or safety issues you might have missed while focused on cooking.
Master Your Camp Kitchen Setup with Expert Tips from Tent Explorer
Setting up a camp kitchen that is safe, organized, and efficient can be challenging without the right guidance. From choosing the perfect location at least 15 to 20 feet from your tent to managing your food storage and waste systems, this article highlights common pain points like avoiding cross-contamination, protecting food from wildlife, and maintaining a stress-free cooking environment outdoors. If you want to transform those basic principles into actionable strategies, gaining confidence as you gear up for your next adventure, Tent Explorer offers a wealth of practical advice and detailed guides.

Explore our Outdoor Living category for in-depth tips on organizing your campsite workspace and creating functional zones. Dive into our Tent Tips section for essential campground setup advice that complements your camp kitchen layout choices. Visit Tent Explorer now to learn how to empower your outdoor cooking experience with proven methods and expert recommendations. Start planning today so you can cook stress-free and enjoy every meal under the open sky.
Frequently Asked Questions
What is the best location for setting up my camp kitchen?
Choosing the best location for your camp kitchen involves finding level ground and ensuring proper drainage. Aim for an area at least 15 to 20 feet away from sleeping areas and avoid low-lying spots that could collect water. Scout the campsite for a gentle slope away from your sleeping zones before securing your kitchen setup.
How can I select essential gear for my camp kitchen?
Select multipurpose, durable kitchen gear that fits within your pack and withstands outdoor conditions. Start with a sturdy pot and pan combo, utensils, and necessary food storage solutions, prioritizing items you will use frequently to reduce overall weight. Organize gear by function and check off each item on your list as you pack.
What are the key zones to organize in my camp kitchen?
Your camp kitchen should have four distinct zones: preparation, cooking, cleaning, and storage. This organization keeps tasks separate and enhances workflow efficiency. Set up each zone with specific items—like cutting boards in the preparation zone and pots in the cooking zone—to streamline your cooking experience.
How do I ensure proper food storage and waste management while camping?
Maintain safe food storage by keeping perishables at or below 40 degrees Fahrenheit and separating raw from cooked foods. Use airtight containers for dry goods, label them clearly, and designate a specific location for waste management away from your cooking area. Regularly check your setup to prevent spoilage and pest issues.
How can I test my camp kitchen setup for efficiency?
Conduct a trial run at home by preparing a complete meal using only your camp kitchen gear. This practice helps identify layout issues, gear deficiencies, and workflow inefficiencies before your trip. Take notes on your process and make adjustments to maximize your camping cooking experience.
What should I do if I forgot essential camp kitchen items at home?
If you realize you’ve forgotten essential items, prioritize what you need most for meal preparation and adjust your plan accordingly. Seek alternatives using items already available at your campsite, such as using a clean rock as a cutting board or improvising utensils from sticks. Make a checklist for your next trip to ensure you have everything packed.
Recommended
- Master Outdoor Cooking Workflow For Efficient Camp Meals – Tent Explorer
- 7 Essential Outdoor Cooking Tips For Tent Campers
- Outdoor Cooking Checklist: 7 Essential Items In 2026
- Outdoor Cooking Step By Step: Master Camping Meals Easily – Tent Explorer
- Essential Camping Tips for Beginners: Master Your Adventure
- The Perfect Pan for Camping: Carbon Steel vs Cast Iron? – Brass & Steel
