This blog post may contain affiliate links. As an Amazon Associate I earn from qualifying purchases.
📋 Table of Contents
- Step 1: Plan Your Camping Trip Destination and Timeline
- Choose a Campsite That Matches Your Experience Level
- Book Early and Know the Regulations Before You Arrive
- Use the 3-3-3 Rule (or 2-2-2 Rule) for Road Trips
- Assign Sleeping Quarters Before You Leave Home
- Step 2: Build Your Camping Packing List
- The 7 Essential Camping Gear Categories
- Test Your Gear at Home First
- Plan Your Camp Meals to Avoid Going Hangry
- Step 3: Prepare for Your Specific Camping Conditions
- Camping in the Woods: Wildlife and Tent Safety
- Camping in the Rain: Waterproofing Your Campsite
- Family Camping: Keeping Kids Comfortable and Safe
- Step 4: Run a Backyard Trial Before You Leave
- What to Test During Your Trial Run
- Lazy Camping Hacks That Make Setup Effortless
- Common Mistakes to Avoid When Preparing for a Camping Trip
- Frequently Asked Questions
- What is the 3-3-3 rule for camping?
- What are the 7 C’s of camping?
- What is the 2-2-2 rule for camping?
- What should you do first before starting your camping trip?
- What is lazy camping?
- Your Next Step Starts Today
To prepare for a camping trip, follow four steps: plan your destination and dates, build your packing list by category, prepare for your specific conditions (rain, woods, or family), and run a backyard trial run. Most first-time campers can complete this prep in one to two weeks before departure — and the process is far more manageable than it looks when you break it into stages.
Planning your first camping trip doesn’t have to feel like organizing a military expedition — but only if you know the right order of steps. Most beginners don’t fail because they forget gear; they fail because they prepare in the wrong sequence, trying to pack, plan, and research all at once.
Arriving at a campsite after dark with an untested tent, no meal plan, and a group of hungry, hangry adults is the kind of wallet-buster that turns first-time campers into never-again campers. One avoidable mistake — skipping the planning phase — can unravel an entire trip before the first marshmallow hits the fire.
In this guide, you’ll learn exactly how to prepare for a camping trip — from choosing the right campsite to running a backyard trial run that guarantees nothing is forgotten. We’ll walk through four practical steps, plus specialized prep for woods, rain, and family trips — and answer the questions most guides skip entirely, like the 3-3-3 rule.
Preparing for a camping trip comes down to four sequential steps: plan your site, pack your gear, prepare for conditions, and run a trial — a framework we call the Camp-Ready Checklist Method.
- Start with your campsite: Book developed campgrounds first; reserve up to 6 months ahead for peak summer dates on Recreation.gov.
- The 3-3-3 rule: For road trips, drive no more than 300 miles/day, arrive by 3 PM, and stay 3+ nights to prevent travel fatigue.
- Test before you go: Set up your tent at home first — experienced campers call this the single biggest mistake beginners skip.
- Pack by category: Shelter, sleep system, kitchen, clothing, personal care, safety, and navigation.
- Specialize your prep: Rain, woods, and family trips each require dedicated gear adjustments — covered in Step 3.

- 【 Portable Camping Water Jug 】 This collapsible water container is lightweight, foldable, and easy to store — perfect as a camping water container. Ideal for travel, outdoor activities, and emergency storage.
- 【 Perfect 2-Gallon Capacity 】At 2.1 gallons ( 8 Liter ), it’s not too small and not too big — easy for anyone to carry and refill, convenient to handle during camping or travel.
- 【 Easy to Use 】Separated inlet & outlet design makes refilling simple and improve water flow by balancing air pressure. Works great as a 2 gallon water jug with spout for smooth pouring and control.
- 【 Clean & Odorless Design 】Crafted from durable, odor-resistant material to help keep your stored water fresh. Designed for camping trips, outdoor adventures, and emergency backup water storage.
- 【 Leakproof & Durable Construction 】 Built with reinforced seams and upgraded sealing tech to prevent leaks. A sturdy alternative to traditional 2 gallon container, or water gallon jug options.

- EXTENDED BURN TIME: The Coleman 70+ Hour Outdoor Citronella Lantern provides over 70 hours of continuous illumination, making it an essential item for your camping, picnic, or patio setup
- NATURAL CITRONELLA OIL: Infused with natural citronella oil, this lantern brightens your outdoor space and helps create ambiance; its dual function for light and ambiance makes it an essential addition to your camping gear
- CLASSIC LANTERN DESIGN: Featuring a timeless lantern shape with a durable red finish, this citronella candle lantern adds a vintage charm to your outdoor decor
- CONVENIENT CARRY AND HANG: Equipped with an easy-grip handle, this lantern offers convenient portability, allowing you to carry it wherever needed; also doubles as a hanging lantern
- REUSABLE CAP FOR PROTECTION: Designed with a resealable cap to shield the lantern from rain and debris; this practical feature enhances the lantern's durability, ensuring it remains a reliable lighting solution for a variety of outdoor environments

- Packaging May Vary - New Look, Same Great Product. You may receive either packaging during the transition
- DEET-Free* & Powered By Essential Oils – Active ingredients derived from plants
- Instant & Convenient – 10 individually-wrapped bracelets help keep mosquitoes away. *Not a safety claim
- One Size Fits All – Stretchy, comfortable and adjustable. Suitable for kids and adults**. **When used as directed
- Great For Outdoors – Perfect for parks, hiking, camping and traveling

- Compact, Long Lighting: Palm sized(5.7 X 2.1 inch) portable led tent light, takes up very little room, easy to carry and grip for kids. Powered by 3 x AAA alkaline batteries (Not Included), lighting time up to 10 to 15 hours in high light mode, avoid frequent battery changes, protable led camping lantern for outdoor adventure aficionados
- Brightness 150 Lumens: Each battery operated camping lights built in 3 LED tent lamps beads, camp night light easily illuminate the whole campsite, super bright protable LED camping light whatever you do like long talks, playing games, reading or walks at night. Muti colors mark different teams. Bring millions of practical uses
- 3 Light Modes Support Multi Application: The LED tent light bulbs comes with 3 light modes: HIGH, LOW, Strobe. Use protable LED lantern to illuminate a large area, as emergency lights, or create a flashing party atmosphere. Perfect camping gear fits different needs
- Water Resistanct: IPX8 water resistant, crafted from super-durable ABS plastic. With anti falling carabiner stroller hook design, camp lanterns can be fasten to tree, the stable, rope, backpack or tent, free worry about dropping and free your hands. Great for emergency hurricane, support all activities such as camping, hiking, hunting, fishing, sos lights and etc
- One Light, Endless Uses: Our camp tent lights also used as decorative indoor lights, night lights, battery operated lights, as a useful handy aid while you’re working, studying, or reading a book just before you go to sleep! Perfect gift for the people you love

- Benadryl itch-relief gel: Formulated with the relief of 2% diphenhydramine HCI topical analgesic; this soothing, cooling gel blocks the histamine that causes minor pain and itching when you need it most
- Anti itch medicine: Temporarily relieves pain and itching associated with insect bites, mosquito bites, scrapes, minor burns, sunburns, skin irritations, cuts and scrapes; dries out poison ivy, oak, and sumac
- Itch relief: Benadryl topical itch-relief analgesic gel also dries out poison ivy, oak and sumac; Whether at the beach, a soccer game, hiking or camping, be ready with Benadryl itch-stopping gel to feel better
- Benadryl itch relief: This soothing, cooling gel applies clear unlike some anti-itch cream; Benadryl is suitable for adults and children two years and older; for kids under 2 years of age, ask a doctor
- Analgesic: This anti-itch gel is an effective allergy medicine; apply to affected areas no more than 3 to 4 times a day; it’s easy to keep on hand as Benadryl is an FSA/HSA-eligible* product without a prescription
Last update on 2026-06-06 / Affiliate links / Images from Amazon Product Advertising API
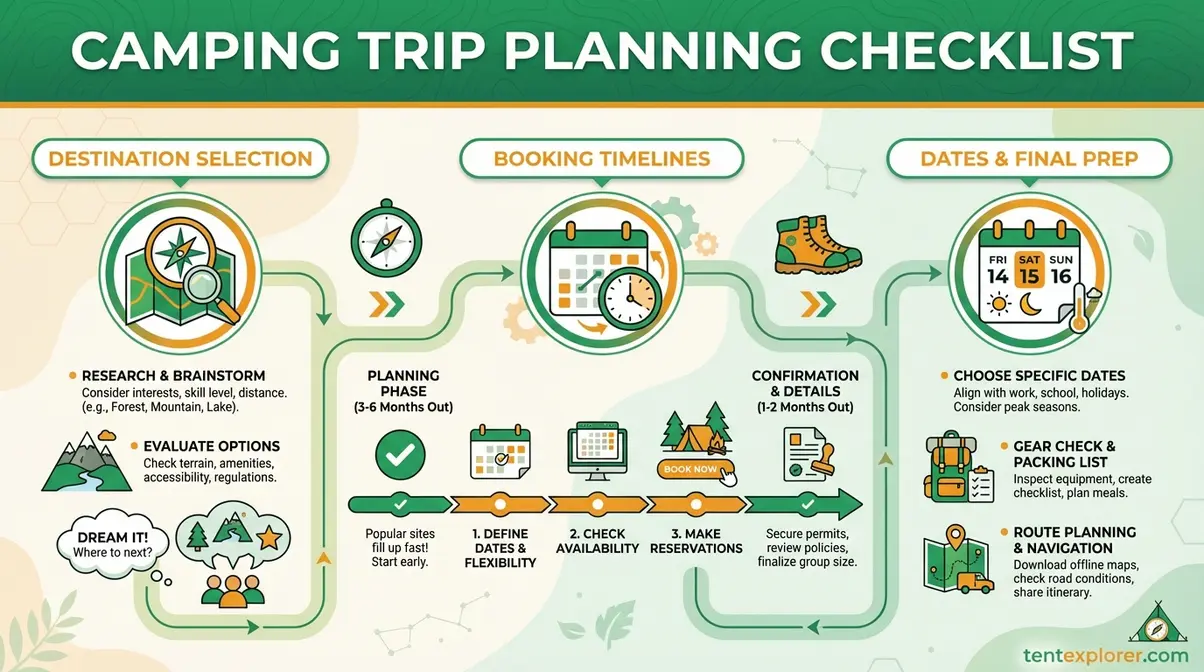
Step 1: Plan Your Camping Trip Destination and Timeline
The first step in how to prepare for a camping trip is choosing your destination and locking in your dates — everything else flows from that decision. The National Park Service pre-trip planning guidelines emphasize researching permit requirements, group size limits, and environmental hazards as the foundation of safe camping. Beginners who skip this step often arrive at full campgrounds, unprepared for local fire restrictions, or facing unexpected permit requirements that send them scrambling.
This is where the Camp-Ready Checklist Method begins — a three-phase (Plan → Pack → Prepare) sequential framework that converts overwhelming camping prep into a staged, anxiety-free process. Think of each phase as building on the last: you can’t pack intelligently until you know where you’re going, and you can’t prepare for conditions until you know what gear you’ve packed.
Choose a Campsite That Matches Your Experience Level
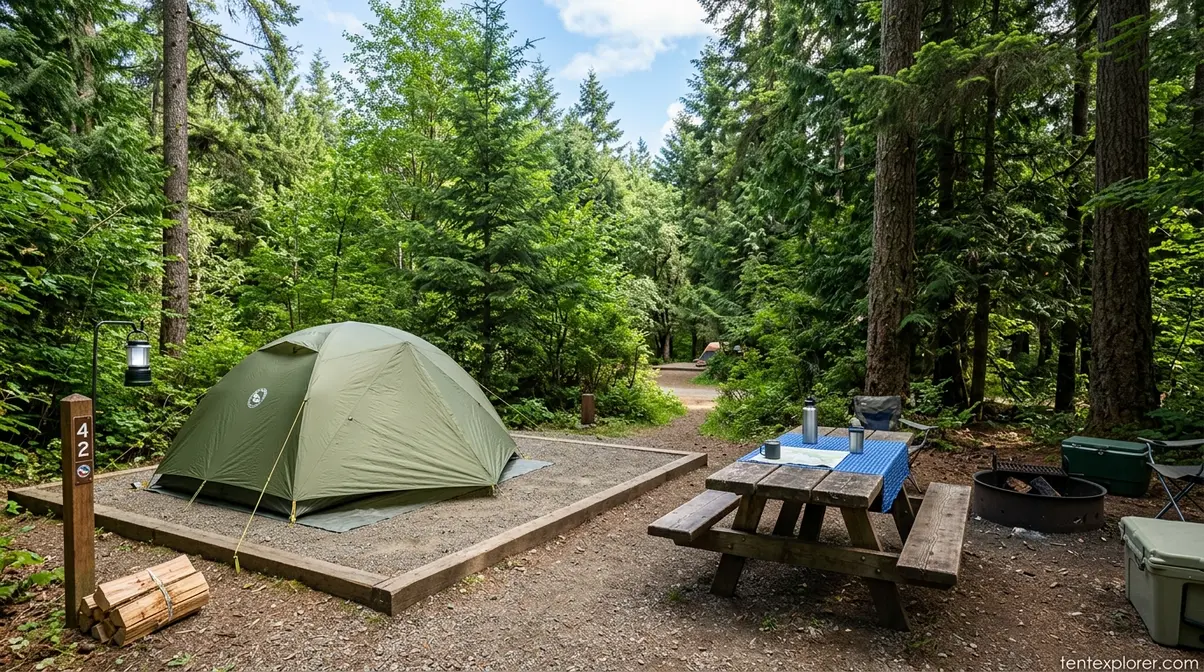
How to prepare for a camping trip starts with one decision that shapes everything else: developed campground or dispersed camping. A developed campground offers restrooms, running water, established fire rings, and often ranger-staffed hours — everything a first-timer needs to focus on enjoying the experience rather than solving infrastructure problems. Dispersed camping (primitive sites with no facilities, often requiring a separate permit) is excellent for experienced campers but adds three major burden points for beginners: water filtration, waste disposal, and fire starting from scratch.
For trip #1, choose a developed campground. Specific options include KOA campgrounds (privately operated, consistent amenities nationwide), state park campgrounds (well-maintained, ranger-staffed, moderately priced), and national forest developed sites. A first-timer choosing between a remote national forest dispersed site and a KOA — even if the KOA feels “less authentic” — will have a dramatically better experience at the KOA. Authenticity is earned over multiple trips; comfort builds the habit.
Before booking, ask these five questions:
- Are restrooms available on-site?
- Is drinking water provided at the campground?
- Are fire rings or grills already set up at each site?
- Is cell service available for emergencies?
- Are there ranger-staffed hours for questions or safety issues?
Recreation.gov, the centralized federal reservation system for 14 federal agencies, lets you filter campgrounds by amenity — making it straightforward to find sites that match your comfort requirements before committing. For a complete first-time framework, see our essential camping guide for beginners.
Once you’ve chosen your site, the next task — and the one most beginners do too late — is booking it and understanding the rules before you show up.
Book Early and Know the Regulations Before You Arrive
Popular campgrounds in national parks fill up fast. How to plan and prepare for a camping trip efficiently means treating the reservation as step one, not an afterthought. Recreation.gov releases most campsite reservations on a rolling six-month window — meaning a July 4th site becomes bookable around January 4th, and it will fill within hours for high-demand parks like Yosemite or Great Smoky Mountains. State park campgrounds typically open reservations one to three months out, giving you a slightly longer window but still requiring advance planning.
Beyond booking, research these regulations before you leave home:
- Fire restriction status — check InciWeb or the campground’s official website 48 hours before departure; restrictions change with weather conditions
- Bear canister requirements — mandatory in many Sierra Nevada sites and increasingly common elsewhere
- Quiet hours — typically 10 PM at most campgrounds; violating these is a fast way to create friction with neighbors
- Pet policies — leash requirements and breed restrictions vary widely between campgrounds
Leave No Trace (LNT), the official outdoor ethics framework adopted by the National Park Service, makes “Plan ahead and prepare” its very first principle — and that includes researching regulations before you arrive. The Seven Principles of Leave No Trace reinforce that responsible camping begins at home, not at the campsite. A beginner who arrives during a full fire ban with a bag of charcoal has made a preventable mistake; one who checked the forest service website 48 hours earlier hasn’t.
With your site booked and rules researched, road-trippers and RV travelers have one more critical planning step before departure: understanding the 3-3-3 and 2-2-2 rules.
Use the 3-3-3 Rule (or 2-2-2 Rule) for Road Trips
The 3-3-3 and 2-2-2 rules are entirely absent from most camping guides — which is a significant gap, since travel fatigue is one of the most common reasons first-time camping trips start badly before anyone even leaves the car.
The 3-3-3 rule for RV and road-trip camping means driving no more than 300 miles per day, arriving at your campsite by 3:00 PM, and staying for a minimum of 3 nights (Navy Federal Credit Union). Each component has a practical purpose: the 300-mile cap prevents driver exhaustion, the 3 PM arrival gives you full daylight for setup, and the 3-night minimum prevents the “drive more than you camp” trap that leaves travelers feeling like they saw nothing.
The 3-3-3 rule for RV travel is a widely cited pacing framework among experienced road-trippers. Its gentler counterpart — the 2-2-2 rule — is often the smarter choice for families or first-time RVers.
The 2-2-2 rule means driving no more than 200 miles per day, arriving by 2:00 PM, and staying a minimum of 2 nights. According to the RV Industry Association, experienced campers adapt both mileage and timing rules based on personal travel endurance — neither rule is rigid, but both provide a useful starting framework.
| Rule | Miles/Day | Arrive By | Min. Stay | Best For |
|---|---|---|---|---|
| 3-3-3 Rule | 300 miles | 3:00 PM | 3 nights | Experienced campers, longer trips |
| 2-2-2 Rule | 200 miles | 2:00 PM | 2 nights | Families, first-time RVers, shorter trips |
A practical example: a family driving from Denver to Arches National Park covers roughly 236 miles. The 2-2-2 rule fits this route perfectly — arrive by early afternoon, set up camp with time to explore, and stay two nights before moving on. The 3-3-3 rule would work too, but the extra buffer of the 2-2-2 is especially valuable when children are in the car.
With your destination planned and travel pace set, the final planning task is one most guides skip entirely — and it’s the one camping communities call the single biggest logistics mistake.
Assign Sleeping Quarters Before You Leave Home
Tent assignments decided at the campsite after dark — when everyone is tired, possibly hungry, and navigating by headlamp — create conflict and a genuine workflow choke that sours the first night. Before you pack the car, decide: who shares which tent, which sleeping bag belongs to which person, and which gear bag goes in which tent.
“Assign tents/sleeping quarters before you arrive.” — r/camping community consensus
For a group of four adults with two tents, this means settling who pairs with whom, which tent gets the gear vestibule, and whether the lighter sleeper gets the tent farther from the parking area. Settle it at home, not at the trailhead. Across the r/camping community, experienced campers consistently advise that this single pre-trip decision prevents more first-night friction than almost any piece of gear.
Planning complete. Now the part that overwhelms most beginners: figuring out exactly what to bring. The good news — it breaks down into seven clear categories.
Step 2: Build Your Camping Packing List
Building your camping packing list is the second phase of the Camp-Ready Checklist Method — and the step where most beginners either overpack or forget something critical. Gear breaks into seven clear categories, making it easier to check completeness without working through a 50-item list in one sitting. For a complete item-by-item breakdown, our essential tent camping gear checklist covers every category in full — this section covers the organizational framework.
The US Forest Service camping guidelines advise pitching tents a safe distance from campfires and using flame-retardant fabric to prevent accidents — a reminder that gear selection isn’t just about comfort, it’s also about safety.
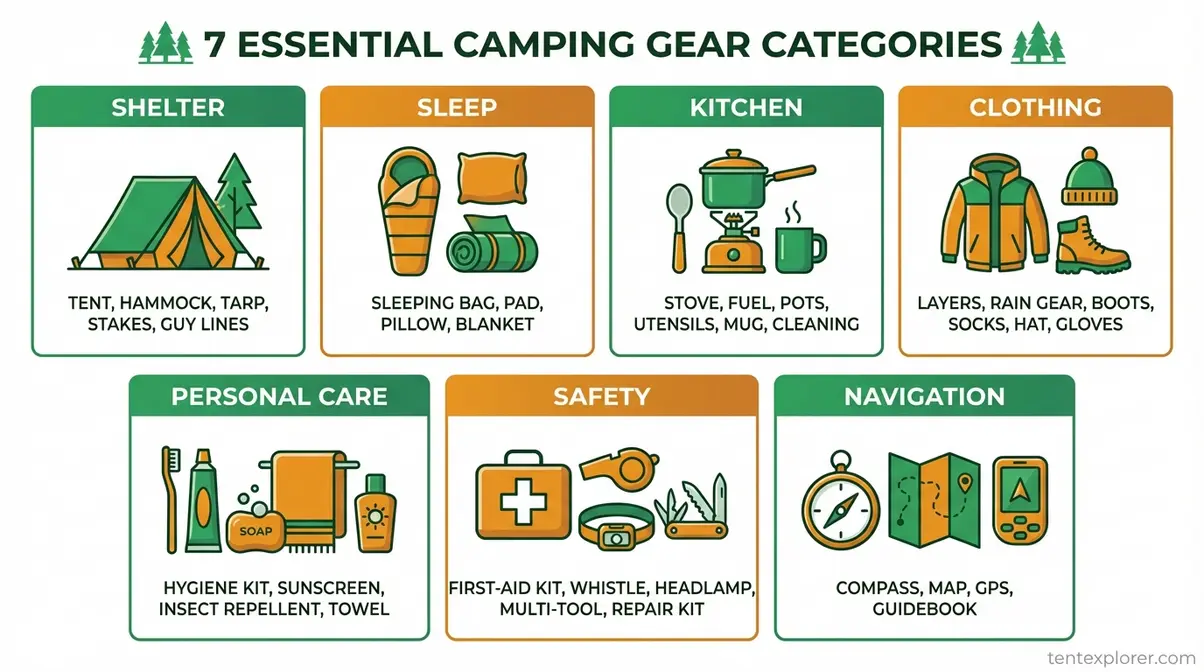
The 7 Essential Camping Gear Categories
The 7 C’s of camping — care, caution, courtesy, cleanliness, cooperation, conservation, and common sense — describe how to behave outdoors. The seven essential gear categories describe what to bring. Think of the categories below as your mental model for packing, not a rigid list:
- Shelter — 3-season tent (recommended for beginners), rain fly, stakes, tent footprint
- Sleep System — temperature-rated sleeping bag, sleeping pad or air mattress (R-value 2+ for summer, 4+ for shoulder season)
- Kitchen — camp stove, fuel canister, cookware, utensils, cooler, biodegradable dish soap
- Clothing — moisture-wicking base layers, fleece mid-layer, waterproof shell, extra socks (always more socks)
- Personal Care — biodegradable soap, toilet paper, hand sanitizer, blister kit, basic first aid kit
- Safety — headlamp with extra batteries, whistle, emergency contact card, bear spray (in applicable areas)
- Navigation — downloaded offline maps (Google Maps offline or AllTrails), compass, paper trail map as backup
One note if you encounter “FF” on a campground booking site: it stands for Full Hookup — electrical, water, and sewer connections for RVs. If you’re tent camping, skip those sites — they’re priced for RV amenities you won’t use.
The US Forest Service specifically recommends using flame-retardant tent fabric and pitching your shelter a safe distance from fire rings — a detail worth confirming when you purchase your tent.
Knowing the categories is step one. Step two — which almost no guide mentions — is testing every item before you pack the car.
Test Your Gear at Home First
Never use camping gear for the first time at the campsite. This single rule prevents the most common beginner failure scenario: discovering a broken tent pole, a seized sleeping bag zipper, or an unfamiliar stove ignition system after you’ve already driven two hours from home.
Before departure, run through this four-item test:
- Tent setup — can you pitch it in under 15 minutes? Are all poles, stakes, and rain fly present?
- Sleeping bag — does the zipper run smoothly? Is the temperature rating appropriate for your destination’s forecast lows?
- Camp stove — does it ignite? Test with a pot of water to confirm fuel flow
- Headlamp — are batteries charged? Pack a spare set regardless
Across r/camping, experienced campers consistently advise practicing gear setup at home before departure — it gives you more time to relax once you’re there, and it surfaces equipment issues when you still have time to fix them. This is a preview of the full backyard trial protocol in Step 4.
Gear sorted. Now the underrated secret to camp prep: food planning. Get this wrong and you’re facing a hangry group at dinnertime with no backup plan.
Plan Your Camp Meals to Avoid Going Hangry
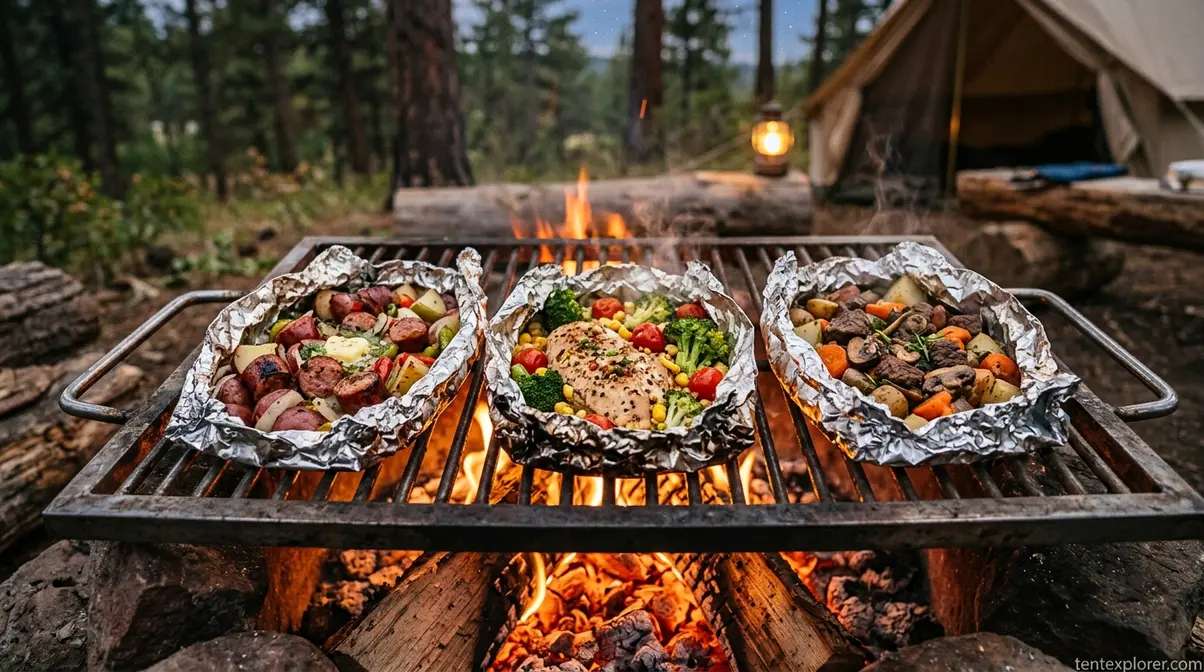
Plan meals by day before you pack — not by vibes, but by specific meal for each morning, afternoon, and evening. Breakfast: oatmeal packets, instant coffee, granola bars. Lunch: pre-made wraps, cheese sticks, crackers, fruit packs. Dinner: pre-assembled foil packets or the lazy camping approach.
Lazy camping, a simplified camping method where setup effort is minimized through home pre-preparation, works especially well for meals. The classic example: assemble burritos at home (beans, rice, cheese, salsa), wrap tightly in foil, and refrigerate. At camp, place directly on the grill grate for 10 minutes. Zero cooking skill required, zero dishes beyond the foil wrapper.
Food storage matters as much as food planning. In bear country, store all food, trash, and scented items in bear-resistant containers or hang a bear bag at least 200 feet from your tent and 10 feet off the ground. Camping communities consistently recommend salad kits — pre-washed, pre-dressed, sealed — as a top lazy camping lunch that requires zero prep and no cooler space beyond the bag itself.
- Duel Fuel – Compatible With Both Butane (Fuel Not Included) And Propane Fuel (Fuel Not Included), Operates On A Single Butane Cartridge 8 Oz Or A Propane Cylinder 16.4 Oz , Propane Converter Regulator Included
- Automatic Piezo Electric Ignition – Piezo-Electric Ignition That Eliminates The Use For Lighter/Matches In Order To Ignite Flame, No Need For Lighters Or Matches With This Stove
- Easy To Use – Our Gs-3400P Is Easy To Use With Adjustable Heat Dial And Automatic Piezo-Electric Ignition
- Safety Features – Built In Pressure Sensor Cartridge Ejection System And Gas Flow Cut Off Mechanism (Butane), Will Eject Cartridge When Irregular Pressure Is Detected

- High OUTPUT – Most Fuel Efficient Butane Portable Stove On The Market – Boils Water quickly with 7,650 BTU Evenly Compared To Compeititors Portable Stoves/ To Be used with 8oz Butane Canister Only (Fuel Sold Separately)
- SAFETY FEATURES – Highest Safety Standard: CSA (US & Canadian Standards Association) Approved Portable, Easy To Use, Reliable For Camping, Outdoor Cooking, Home Emergency Kit, Etc. Equipped with Fuel Cartridge Injection safety feature, If the stove defects 0.7 kilogram force from canister, It will automatically ejects butane canister from the stove
- AUTOMATIC IGNITION – Piezo-Type Electric Starter With Safety Shut-Off System; No Matches Or Lighters Required
- Portable – Easy To Use, Reliable For Camping, Outdoor Cooking, Home Emergency Kit, Etc. *(Comes With Carrying Case/Complete With User Manual
- Quiet Operation – This stove provides clean efficient burn along with silent operation *OUTDOOR USE ONLY*
- PORTABLE: Easy addition to the campsite, picnic, roadside, and more
- TWO WIND GUARDS: Help shield and protect burners from wind
- HEAVY-DUTY LATCH: Easy to open and keeps the stove closed when not in use
- EASY TO CLEAN: Durable, chrome-plated grate is removable for easy cleanup
- IMPROVED KNOB ROTATION: For precise temperature and simmering control of two independently adjustable burners
- UP TO 10,000 total BTUs of Cooking Power
- PRESSURE REGULATOR provides consistent performance in extreme conditions
- PERFECTHEAT DESIGN ensures efficient cooking with less fuel
- 1 ADJUSTABLE BURNER allows for precise temperature control; fits an 8 inch pan
- WIND BAFFLES shield burner from wind to maintain maximum heat

- HIGHLY EFFICIENT – Our industry leading heat exchange technology minimizes wind impact and reduces boiling times by up to 30% compared to traditional backpacking stoves.
- COMPACT AND LIGHTWEIGHT – All accessories including stove, bowl and fuel canister fit into the 1 liter cook pot. THIS SET DOES NOT INCLUDE A FUEL CANISTER, but is compatible with most canisters EXCEPT the COLEMAN fuel canisters. This item weighs only 18 oz!
- INTEGRATED AND EASY TO USE SYSTEM – The 1 liter cooking pot and the stove are one integrated unit, the built in piezoelectric ignitor ignites the stove instantly.
- SAFE, STURDY AND DURABLE – The sturdy, hard anodized aluminum pot features a locking stainless steel handle for secure and safe handling, this combined with the insulating neoprene cover on the pot will ensure years of safe outdoor cooking pleasure.
- Please use a windscreen when using the stove for better performance in windy conditions.
Last update on 2026-06-06 / Affiliate links / Images from Amazon Product Advertising API
For a complete meal-planning framework alongside your full gear list, see our first-time camper’s packing guide.
With your gear packed and meals planned, the next step is adapting your preparation to your specific camping environment — because rain, woods, and family trips each need their own adjustments.
Step 3: Prepare for Your Specific Camping Conditions
The third phase of the Camp-Ready Checklist Method is adapting your preparation to your specific conditions — because a rainy weekend at a lakeside campground requires completely different gear than a week in the woods with wildlife. Most general guides skip this step entirely, leaving campers unprepared for the specific challenges their trip type presents. Here are the three most common scenarios and exactly what each one requires.
Camping in the Woods: Wildlife and Tent Safety
How to prepare for a camping trip in the woods begins with understanding two things: where you pitch your tent, and how you store your food. Get both right and the woods are a remarkable place to sleep. Get either one wrong and you’re dealing with preventable hazards.
Tent placement rules per the US Forest Service tent safety guidelines:
- Pitch away from standing dead trees (called “widowmakers” — they fall without warning in wind)
- Stay at least 200 feet from water sources to protect riparian ecosystems and avoid flooding
- Keep your tent a safe distance from your cooking area to reduce wildlife attraction to your sleeping space
- Use flame-retardant tent fabric near fire rings
Wildlife safety checklist for wooded campgrounds:
- Store all food, trash, and scented items (including toothpaste and chapstick) in bear-resistant containers or a properly hung bear bag
- Never bring food into your tent — not even a granola bar wrapper
- Make noise on trails, especially near streams or dense brush, to avoid surprising wildlife at close range
If you do encounter wildlife, stay calm, do not run, and back away slowly while facing the animal. Protocols differ by species and region: in Appalachian black bear territory, making yourself large and loud typically works; in grizzly country in the Northern Rockies or Greater Yellowstone, carry bear spray and know how to deploy it. Check local park guidelines for your specific destination.

- FINISHED SIZE – The marked size is the exact finished size. When you choose your size, you will get the exact size tarps.
- DUSTPROOF & WATERPROOF – This tarp is designed to be dustproof and waterproof, making it ideal for outdoor use in harsh weather conditions.
- HEAT-SEALED & REINFORCED – The four sides of the tarp are heat-sealed and folded, with nylon ropes inside for reinforcement. There is no needle hole, and it will not crack easily.
- CONVENIENT TO USE – Our tarp has metal grommets every 36 inches, making it easy to use and secure. Additionally, the plastic corner reinforcements at the four corners of the tarp make it more sturdy and aesthetically pleasing.
- ECONOMICAL & VERSATILE – This tarp is a bit heavier than the 5 mil option and is recommended for temporary outdoor protection from the elements. It is great for covering construction materials and equipment, as well as for use as a ground cover or to cover livestock.

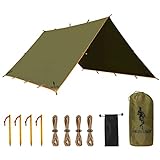
- [HEAVY-DUTY WATERPROOF PROTECTION] Made with durable rip-stop fabric featuring polyethylene lamination on both sides for maximum water resistance. Keeps your gear, tent, firewood, and equipment completely dry in rain, snow, or harsh outdoor conditions
- [RIP-STOP TECHNOLOGY & DURABILITY] Built with reinforced polyethylene construction that prevents tears from spreading, ensuring long-lasting use even in tough, rugged conditions. The tightly woven design makes it easier to repair if any damage occurs, providing reliable protection trip after trip
- [REINFORCED STRENGTH & STABILITY] Features reinforced corners and edges with strategically placed grommets for secure tie-down points. Engineered for maximum strength and stability, perfect for camping, picnics, car covers, or any outdoor activity requiring dependable protection
- [VERSATILE MULTI-PURPOSE USE] Ideal for placement under camping tents, covering vehicles, protecting firewood piles, creating emergency shelters, or any situation needing weather protection. Lightweight and portable design makes it easy to store and transport for all your outdoor adventures

- A MUST FOR TENT: An extra tent tarp doesn’t just give you extra waterproofing, it is used as ground cloths under tents to prevent wear and tear. There’s no question that an insulated tent footprint is a great idea to help protect your investment, definitely, the choice to extend your tent’s life
- HEAVY DUTY: A tough groudsheet that can be easily overlooked but it makes all the difference when setting up the campsite. It is made out of ripstop 210T Poly with superior waterproof coating and designed to not only be lightweight but also be waterproof and powerful
- LIGHT&COMPACT: Size 87″ x 59″, weighing a mere 9.8 oz, it isn’t going to add a lot of weight to your pack. Impressed compact and able to fold into the drawstring storage bag, just the size of a cellphone
- MULTIFUNCTIONAL: This multi-purpose tarp could work for your specific needs. While the main focus most of the time will be working as a tent footprint you can also use this for a sunshade, beach picnic setup, hammock rain fly, or even as a general tarp shelter
- This footprint fits to Clostnature 2 person tent. Clostnature is an innovative brand that continuously works to improve your outdoor and sports experience. Every product you purchase has one-year guarantee for material and workmanship defects. If you have any questions, please don’t hesitate to contact our customer support team

- Ultimate Puffy Camping Blanket: This puffy camping blanket is suitable for anyone who loves camping, hiking, and the outdoors. This blanket is easy to pack, carry, warm and lightweight that you can take just about anywhere
- Packable Puffy Blanket: This single person camping blanket measures 79X55 inches. Your purchase is including one camping blanket and one waterproof rip-stopped personalized design bag
- Water Resistant: The outdoor camping blanket has a nylon coating making it water resistant, dirt resistant, sand resistant and stain resistant. This blanket repels dirt, sand, spilled drinks, pet hair, and more. Do not worry about pets hair when you taking pets during camping holiday
- Versatile Outdoor Blanket: This personalized camping blanket is suitable for campers. Both adults and children can get the corresponding size. When outdoors, this blanket can be used not only as a mattress, but also as a blanket. It can also be worn on the body at night, observing the stars outdoors and gathering with friends
- Shawl & Cover Foot: The one-person blanket is wearable! You can wear this puffy blanket when you are cooking foods, or drinking beer all while staying warm. When drinking coffee with your family in the garden, you can cover this puffy blanket to keep warm in the morning
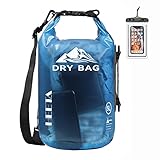
- Waterproof – Built with professional seamless technology, our dry bag keeps your items and valuables dry during water sports like boating and kayaking. Note: It can handle accidental submersion, but should not be kept underwater for extended periods
- Durable – Made with wear-resistant PVC material: 0.6 mm thick at the bottom and 0.3 mm on the sides, this waterproof bag is easy to wipe clean and suitable for all kinds of weather and environment. Comfortable to carry during long outdoor activities
- Multifunctional – Features adjustable shoulder straps and a side handle for both hand-carrying and backpack use. Perfect for kayaking, paddleboarding, rafting, water park, hiking, mountaineering, etc. Lightweight design reduces pressure on your arms or shoulders
- Visible – Transparent dry bag with 11 colors, easy to spot your clothes, towel, water bottle, phone, laptop and wallet. Quickly find what you items without digging. You can even read messages on your phone or pad through the bag
- 5 Sizes (5L/ 10L/ 20L/ 30L/ 40L) to choose – Great beach vacation and cruise ship essentials, perfect gift for both men and women. Each bag includes a free waterproof, touch-screen compatible phone case, bringing comprehensive waterproof protection to your water sports. Roll the top edge to adjust the bag’s capacity. WARNING: Risk of Cancer and Reproductive Harm from2exposure to Di(2-ethylhexyl) phthlate [DEHP]. Seewww.P65 Warnings.ca.gov.
Last update on 2026-06-06 / Affiliate links / Images from Amazon Product Advertising API
Wildlife and tent safety cover the woods scenario. The other condition that derails unprepared campers — and the one most beginners don’t plan for — is rain.
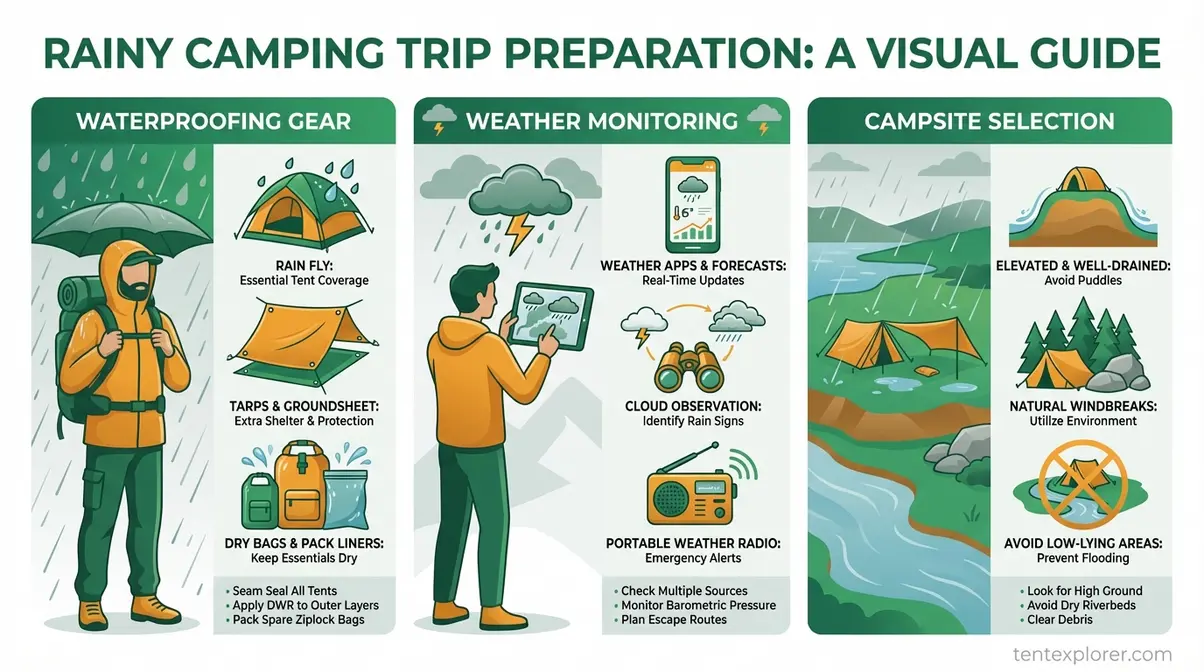
Camping in the Rain: Waterproofing Your Campsite
How to prepare for a rainy camping trip comes down to two things: waterproofing your gear before you leave home, and having a weather monitoring plan once you’re there. The National Weather Service campground weather safety guidelines recommend a four-step “Plan, Practice, Monitor, Act” approach for safe camping during unexpected rainy or stormy conditions — and it’s the most actionable weather framework available for campers.
Gear waterproofing checklist (complete before departure):
- Rain fly — confirm it’s properly attached and that seams are sealed with seam sealer
- Tent footprint — place a ground cloth beneath your tent to block moisture wicking up from soil
- Dry bags — pack electronics, your sleeping bag, and a change of clothes inside dry bags within your pack
- Footwear — waterproof boots or bring gaiters; wet feet on day one ruins the rest of the trip
- Tarp — rig a tarp over the cooking area to create a covered outdoor kitchen
The National Weather Service 4-step framework:
- Plan — check the detailed forecast 72 hours before departure and again at the trailhead
- Practice — know your shelter-in-place protocol before you need it (which tent, what gear to move inside)
- Monitor — download a weather app with live radar (Weather Underground or MyRadar work well in most areas)
- Act — know your decision threshold: when to shelter in place versus when to pack up and leave
For lightning specifically, apply the 30-30 rule: if thunder follows a lightning strike in under 30 seconds, seek shelter immediately; wait 30 minutes after the last thunder before resuming outdoor activity.
- [HEAVY-DUTY WATERPROOF PROTECTION] Made with durable rip-stop fabric featuring polyethylene lamination on both sides for maximum water resistance. Keeps your gear, tent, firewood, and equipment completely dry in rain, snow, or harsh outdoor conditions
- [RIP-STOP TECHNOLOGY & DURABILITY] Built with reinforced polyethylene construction that prevents tears from spreading, ensuring long-lasting use even in tough, rugged conditions. The tightly woven design makes it easier to repair if any damage occurs, providing reliable protection trip after trip
- [REINFORCED STRENGTH & STABILITY] Features reinforced corners and edges with strategically placed grommets for secure tie-down points. Engineered for maximum strength and stability, perfect for camping, picnics, car covers, or any outdoor activity requiring dependable protection
- [VERSATILE MULTI-PURPOSE USE] Ideal for placement under camping tents, covering vehicles, protecting firewood piles, creating emergency shelters, or any situation needing weather protection. Lightweight and portable design makes it easy to store and transport for all your outdoor adventures
- FINISHED SIZE – The marked size is the exact finished size. When you choose your size, you will get the exact size tarps.
- DUSTPROOF & WATERPROOF – This tarp is designed to be dustproof and waterproof, making it ideal for outdoor use in harsh weather conditions.
- HEAT-SEALED & REINFORCED – The four sides of the tarp are heat-sealed and folded, with nylon ropes inside for reinforcement. There is no needle hole, and it will not crack easily.
- CONVENIENT TO USE – Our tarp has metal grommets every 36 inches, making it easy to use and secure. Additionally, the plastic corner reinforcements at the four corners of the tarp make it more sturdy and aesthetically pleasing.
- ECONOMICAL & VERSATILE – This tarp is a bit heavier than the 5 mil option and is recommended for temporary outdoor protection from the elements. It is great for covering construction materials and equipment, as well as for use as a ground cover or to cover livestock.
- [HEAVY-DUTY WATERPROOF PROTECTION] Made with durable rip-stop fabric featuring polyethylene lamination on both sides for maximum water resistance. Keeps your gear, tent, firewood, and equipment completely dry in rain, snow, or harsh outdoor conditions
- [RIP-STOP TECHNOLOGY & DURABILITY] Built with reinforced polyethylene construction that prevents tears from spreading, ensuring long-lasting use even in tough, rugged conditions. The tightly woven design makes it easier to repair if any damage occurs, providing reliable protection trip after trip
- [REINFORCED STRENGTH & STABILITY] Features reinforced corners and edges with strategically placed grommets for secure tie-down points. Engineered for maximum strength and stability, perfect for camping, picnics, car covers, or any outdoor activity requiring dependable protection
- [VERSATILE MULTI-PURPOSE USE] Ideal for placement under camping tents, covering vehicles, protecting firewood piles, creating emergency shelters, or any situation needing weather protection. Lightweight and portable design makes it easy to store and transport for all your outdoor adventures
- WATERPROOF & UV PROTECTION – Hammock Camping Tarp made of 210T ripstop polyester fabric with 2500 PU waterproof rating, enhanced the shelter’s waterproof function and offers long-lasting protection, strengthen tear resistant & puncture resistant material without any worries. FREE SOLDIER Backpacking Tarp also can be put up as awning is effectively for blocking ultraviolet ray and protect your skin from the sun
- STRONG & STABLE – This Camping Awnings using heat sealing and melting process, well combined with the puncture-resistant fabric, water penetration would never happened. Reinforced ridgeline seam, well prevent the connector from falling off, showing excellent protection performance for continuous stormy weather, reliable, durable and safe
- HEAVY DUTY & PORTABLE – Large size in 118″ × 126″ when expended, enough for 2 persons. It’s convenient to folded and put into a lightweight stuff sack when not in use, essential tarp gear for your outdoor travel. Net weight: 1.2kg(42oz), not super light but heavy duty, you can consider of the thickness of the fabric, excellent quality, value for money price
- ACCESSORIES & SIMPLE TO OPERATE – Comes with everything of survival backpacking items: 1 hammock rain fly, 4 nylon guy lines with tensioners and 1 stuff sack. Rectangle shelter with 19 guy points and 5 strengthen grommet points which gives you the most coverage. Easy to set up into ground sheet and hammock shelter to avoid wind and rain
- OUTSTANDING QUALITY – FREE SOLDIER Waterproof Portable Tarp apply to heavy duty operating, tactical, military, shelter, hunting, fishing, backpacking, traveling, hiking, working, camping and other outdoor adventure etc. Your satisfaction and happy is our pursuit

- STAY DRY IN THE RAIN: Unigear tent tarp is made of super strong 210D rip-stop Oxford fabric, PU 3000mm waterproof. It offers an excellent protection against rain, sudden downpours, snow and high winds.
- NO MORE RIPPING & LEAKING: To offer a safer and tougher shelter, all the 8 fix points on the rain fly are reinforced a triangle dual layer. Besides, all fix points are used double reinforced stitches, which can prevent ripping and leaking even in extreme conditions.
- BLOCK THE SUN: Coated with PU Inner layer, Unigear lightweight tarp can provide a UV protection in the sun. Perfects for hammock camping, backpacking, hiking, or other adventure.
- MULTIPLE USES: The rain fly can be widely used as survival tarp, hammock shelter, outdoor kitchen cover, simple tent, tent footprint, ground sheet and instant shade. Come with 6 stakes and 6 ropes, you can set up different shapes easily.
- Camping Companion: No matter the occasion, our lightweight tarp tents are must-have camping and tent accessories for the adventurer in your life.
Last update on 2026-06-06 / Affiliate links / Images from Amazon Product Advertising API
Campsite selection for rain: Choose elevated ground away from low-lying areas that collect runoff, avoid dry creek beds (they fill fast in storms), and look for natural windbreaks like tree clusters on the windward side of your site.
Rain prep handled. The last specialized scenario — and arguably the most logistically complex — is camping with kids.
Family Camping: Keeping Kids Comfortable and Safe
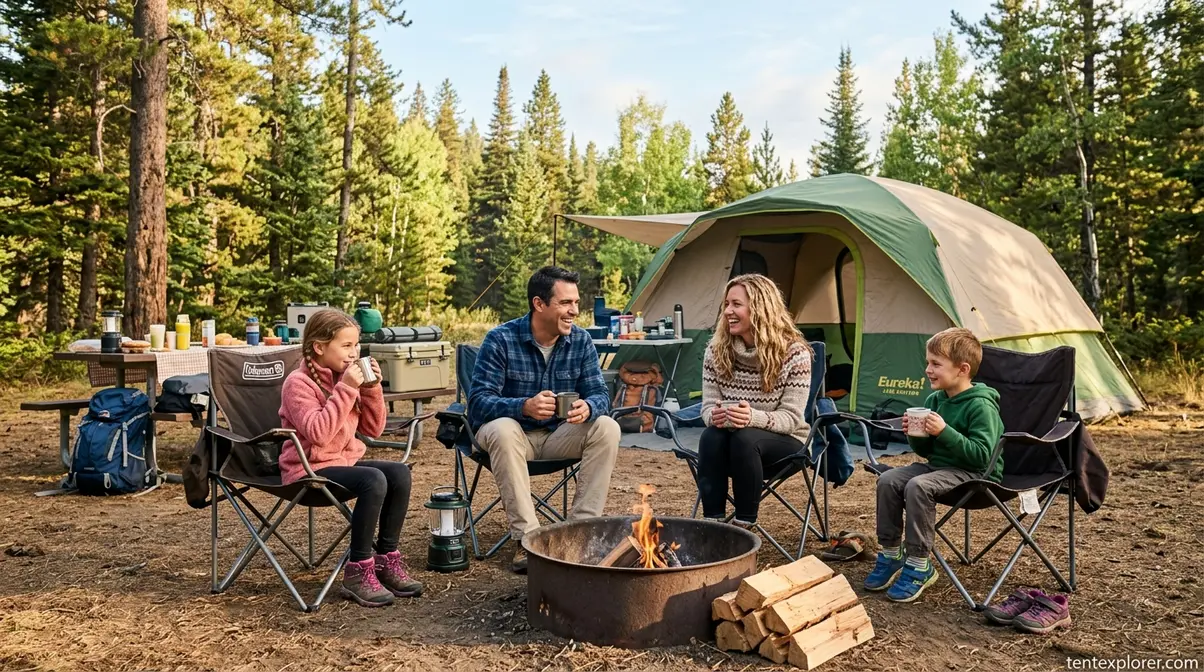
How to prepare for a family camping trip is really about two parallel tracks: gear that makes kids comfortable, and activities that keep them engaged. Nail both and family camping becomes one of the most rewarding outdoor experiences available. Miss either one and you’re managing complaints instead of making memories.
Family-specific gear additions beyond the standard seven categories:
- Extra sleeping pads (kids roll off mats in their sleep — bring one more than you think you need)
- Wet wipes or a portable camp shower for post-play cleanup (reduces the “I’m dirty and I hate this” meltdown)
- A small first aid kit stocked with children’s medications — pain reliever, antihistamine, blister pads
- Glow sticks for nighttime (dual purpose: entertainment and visibility — kids stay trackable after dark)
- A collapsible wagon for hauling gear from the parking area to the campsite
Entertainment pre-planning eliminates the “I’m bored” workflow choke. Pack a camp activity bag before you leave: nature scavenger hunt cards, a glow-in-the-dark frisbee, s’mores supplies, and one compact board game. Pre-register for one ranger program or nature walk at your campground — many national park and state park campgrounds offer free evening programs that kids genuinely enjoy.
Budget tip: Have each adult chip in a certain amount of money to a shared food fund before the trip. Splitting the cost of family-sized meals — cheese sticks, crackers, fruit packs, foil packet dinners — prevents the wallet-buster of buying individual meals for four or more people at a camp store where prices are inflated.
For additional family-specific packing ideas, the REI family camping checklist covers portable camp showers and dedicated children’s items in detail.
Conditions covered. There’s one final step that separates well-prepared campers from everyone else — and it takes just one afternoon in your backyard.
Step 4: Run a Backyard Trial Before You Leave
The final step in how to prepare for a camping trip is a backyard trial run — setting up every piece of gear at home, at least three days before departure. This single step eliminates the most common beginner failure: discovering a broken zipper, a missing stake, or an unfamiliar stove ignition system after you’ve already driven 200 miles. This is the final phase of the Camp-Ready Checklist Method — Plan, Pack, Prepare — and it takes less than two hours.
“Setting up your tent at home before your first trip is the single most-cited piece of advice in camping communities — it converts setup anxiety into setup confidence.” — r/camping community consensus
The Leave No Trace Center for Outdoor Ethics makes this explicit: their first principle — “Plan ahead and prepare” — includes practicing skills and testing equipment before arrival to minimize campsite impact and personal risk. Testing at home isn’t just anxiety reduction; it’s responsible outdoor practice.
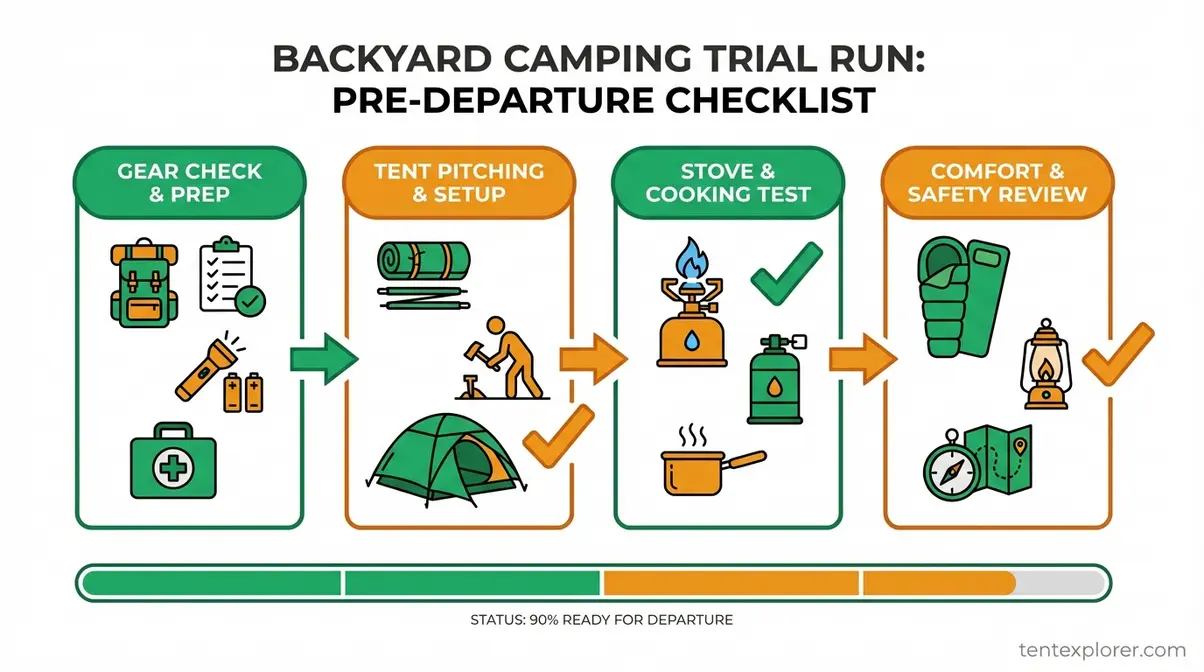
What to Test During Your Trial Run
Work through this numbered protocol in order — each step builds on the last:
- Set up your tent — time yourself; confirm all poles, stakes, and rain fly are present and functional; practice attaching the rain fly correctly
- Get into your sleeping bag — confirm the zipper runs smoothly and the temperature rating matches your trip’s forecast overnight lows
- Light your camp stove — confirm ignition on the first or second attempt; test with a pot of water to verify fuel flow and flame stability
- Turn on your headlamp — check battery level; pack spare batteries regardless of what the indicator shows
- Test your water filter or purification tablets — run a test cycle with tap water to confirm the filter isn’t clogged
- Pack and unpack your gear bags — confirm weight distribution feels manageable and that essential items (headlamp, first aid kit, stove) are accessible without unpacking everything
After each test, apply the checkpoint mindset: “If this failed at the campsite at 9 PM, what would I do?” If you don’t have a clear answer, add a backup to your pack. The National Park Service Leave No Trace guidelines reinforce this approach — testing skills and equipment before arrival is Principle 1 in action.
If something fails during your trial run, you have three options: order a replacement (two-day shipping solves most gear problems), borrow from a friend, or rent from REI’s gear rental program, which covers tents, sleeping bags, and stoves for a fraction of the purchase price.
Once your gear passes the trial, there’s a second use for your backyard session: testing lazy camping hacks that cut your setup time in half.
Lazy Camping Hacks That Make Setup Effortless
Lazy camping is a simplified camping approach where setup effort is minimized through pre-preparation at home, letting campers spend more time enjoying nature and less time wrestling with gear. It doesn’t mean being unprepared — it means being so thoroughly prepared that the campsite setup feels effortless.
Five specific hacks that camping communities consistently recommend:
- Pre-built meal kits — assemble foil packet dinners, pre-made burritos, and lunch wraps at home; label each package by day and refrigerate; at camp, heat directly on the grill grate with zero prep
- Pre-rolled sleeping kits — roll each person’s sleeping bag, pad, and pillow into one pre-packed stuff sack; no sorting at the campsite, no searching for whose bag is whose
- Color-coded gear bins — kitchen bin = red, sleep kit = blue, clothing = green; every family member can unpack their own bin without being directed
- Pre-charged power banks — charge all devices and power banks the night before departure; this also forces you to locate every device before the trip
- Separate chair bag — pack camp chairs in their own labeled bag, separate from the main gear pile; chairs are always the last thing you need and the first thing buried under everything else
Across camping communities, salad kits — pre-washed, pre-dressed, in a sealed bag — are a consistently recommended lazy camping lunch that requires zero prep, no cooler space beyond the bag itself, and produces no dishes.
Four steps complete. Before you head out, here are the most common mistakes first-time campers make — and exactly how to avoid each one.
Common Mistakes to Avoid When Preparing for a Camping Trip
The Camp-Ready Checklist Method is designed to prevent these specific failures — but they’re worth naming directly, because the National Park Service safety guidelines identify pre-trip preparation gaps as the root cause of the most common campsite accidents and oversights.
1. Skipping the gear test — Scenario: You packed the tent but never set it up. What goes wrong: A bent pole or missing stake becomes a crisis at 9 PM in the dark. How to avoid: Complete the Step 4 trial run protocol at least three days before departure.
2. Choosing a campsite without checking amenities — Scenario: You booked based on a scenic photo. What goes wrong: You arrive expecting restrooms and find a primitive site with a pit toilet a quarter-mile away. How to avoid: Always filter by amenity on Recreation.gov before confirming your reservation.
3. Ignoring fire restrictions — Scenario: You packed charcoal for a campfire dinner. What goes wrong: The campground is under a full fire ban due to drought conditions. How to avoid: Check the campground website and InciWeb 48 hours before departure — restrictions change with weather.
4. Underpacking food — Scenario: You planned “light” and brought two days of food for a three-day trip. What goes wrong: A hangry group on Day 2 leads to a wallet-buster emergency grocery run at a camp store with inflated prices. How to avoid: Use the meal-by-day planning method from Step 2 — plan every meal before you pack.
5. Deciding tent assignments at the campsite — Scenario: Four adults, two tents, everyone tired after a long drive. What goes wrong: Conflict, confusion, and a first night that starts on a sour note. How to avoid: Assign sleeping quarters at home, as covered in Step 1.
When this guide isn’t the right approach: If you’re planning backcountry or multi-day wilderness backpacking — not car camping at a developed site — this guide is a starting point only. Consult a wilderness first aid course and backpacking-specific gear lists before heading into the backcountry. The Camp-Ready Checklist Method is designed for car camping and developed campgrounds.
Frequently Asked Questions
What is the 3-3-3 rule for camping?
The 3-3-3 rule for camping means driving no more than 300 miles per day, arriving at your campsite by 3:00 PM, and staying for a minimum of 3 nights. This framework prevents travel fatigue and gives you enough daylight to set up camp comfortably. It’s especially popular among RVers and road-trippers who have learned the hard way that rushing the drive leaves you too exhausted to enjoy the destination. Following the 3-3-3 rule typically results in a more relaxed trip with fewer logistics headaches. If you’re traveling with children or in an unfamiliar area, consider the gentler 2-2-2 rule instead.
What are the 7 C’s of camping?
The 7 C’s of camping are care, caution, courtesy, cleanliness, cooperation, conservation, and common sense. These seven principles guide responsible outdoor behavior and respect for nature and fellow campers. They overlap significantly with the Leave No Trace framework adopted by the National Park Service. Practicing the 7 C’s means leaving your campsite cleaner than you found it, keeping noise levels respectful after quiet hours, and minimizing your environmental footprint throughout the trip. Think of them as the unofficial code of conduct for any shared outdoor space.
What is the 2-2-2 rule for camping?
The 2-2-2 rule for camping is a relaxed pacing framework that suggests driving no more than 200 miles per day, arriving at your campsite by 2:00 PM, and staying for a minimum of 2 nights. It’s designed for families with children, first-time RVers, or anyone who wants a low-stress travel pace with extra buffer time for setup and exploration. The earlier arrival means you reach camp with genuine energy rather than road fatigue. Experienced campers often adapt both the 2-2-2 and 3-3-3 rules based on personal endurance and route specifics. Neither rule is mandatory — they’re frameworks, not requirements.
What should you do first before starting your camping trip?
The first thing to do before starting your camping trip is choose and book your campsite. Research the campground’s amenities, regulations, and permit requirements before reserving — popular spots on Recreation.gov fill up to six months in advance for peak summer dates. Once your site is confirmed, build your packing list by category and test all gear at home. Assign sleeping quarters to each person before departure to prevent campsite logistics confusion on arrival night. This sequence — site, list, test, assign — is the foundation of stress-free camp prep.
What is lazy camping?
Lazy camping is a simplified camping approach where setup effort is minimized through pre-preparation done at home before the trip. It typically involves pre-assembled meals (foil packet dinners, pre-made burritos, salad kits), pre-rolled sleeping kits, and color-coded gear bins so unpacking at the campsite requires minimal effort or direction. Lazy camping is ideal for families with young children or first-time campers who want to focus on the experience rather than the logistics. It doesn’t mean being underprepared — it means front-loading all the work before you leave home so the campsite feels effortless. The result is more time around the fire and less time sorting gear in the dark.
Your Next Step Starts Today
For first-time campers, knowing how to prepare for a camping trip comes down to four sequential steps: plan your site and dates (reserving up to six months early for summer on Recreation.gov), pack by the seven gear categories, prepare for your specific conditions (rain, woods, or family), and run a backyard trial run before departure. The Camp-Ready Checklist Method — Plan, Pack, Prepare — turns an overwhelming task into a manageable, staged process with a clear start and a clear finish.
The reason most beginners feel overwhelmed isn’t that camping is complicated — it’s that they try to do everything at once. The Camp-Ready Checklist Method works because it sequences the steps, so each phase builds confidence before the next begins. You’re not packing and planning and researching simultaneously; you’re completing one phase, confirming it, and moving forward.
Start with Step 1 today — choose your campsite on Recreation.gov and lock in your dates. Then work through Steps 2–4 in the week before departure. Our essential camping guide for beginners covers the first-time camping framework in even more detail if you want a deeper dive before you book.
