The Camping Field Journal
Complete Camping Checklist Guide: 100+ Must-Have Items

Home/Outdoor Living

Outdoor Living

Complete Camping Checklist Guide: 100+ Must-Have Items

David KingDavid King Updated June 29, 2026 33 min read
This blog post may contain affiliate links. As an Amazon Associate I earn from qualifying purchases.

You’ve packed the car, driven two hours, and just realized you left the tent stakes at home. It’s a scenario that has ruined more first camping trips than bad weather ever will. A forgotten lighter, a missing sleeping pad pump, or the wrong sleeping bag temperature rating can turn an exciting adventure into a miserable night — and send you scrambling to the nearest gas station at 9 PM.

This complete camping checklist covers 100+ must-have items — organized by category and trip type — so you can pack with confidence and focus on enjoying your trip. We start with the 10 non-negotiable essentials, then work through every category — shelter, kitchen, clothing, and safety — before wrapping up with specialized lists for car camping, backpacking, and family trips. Whether this is your first overnight trip or your tenth, this guide is designed to be your go-to reference every time you pack.

Key Takeaways: Your Camping Checklist at a Glance

This camping checklists guide covers 10 core essentials first — shelter, sleep, water, fire, and navigation — then adds category-specific gear for kitchen, clothing, and safety.

  • The Scenario-Ready Packing System builds your list in 3 layers: universal essentials → category gear → trip-specific add-ons
  • Never skip: Tent, rated sleeping bag, headlamp, water supply, and first-aid kit
  • Beginner trap: Cotton clothing fails in rain and cold — always pack synthetic or wool layers
  • Food safety rule: Keep your cooler below 40°F (per USDA guidelines) to prevent foodborne illness
  • Printable PDF: Download the free checklist at the end of this guide so you never forget a thing

The 10 Core Camping Essentials

As you follow this camping checklists guide, you’ll notice that every camping trip — whether it’s a single night at a car-accessible campground or a week in the backcountry — starts with the same 10 essentials. The U.S. National Park Service (NPS), the federal agency responsible for managing America’s national parks and camping guidelines, organizes these as ten systems rather than ten individual items, because each category requires multiple components working together (NPS Ten Essentials, 2026). This is the foundation of The Scenario-Ready Packing System — master Layer 1 first, and everything else builds on top.

Camping checklist three-layer packing system diagram for beginners showing universal essentials category gear and scenario add-ons
The Scenario-Ready Packing System organizes your camping checklist into three layers — start with the universal essentials and build outward for your specific trip type.

Safety and Survival Essentials

These five items address the most dangerous scenarios you could face outdoors — getting lost, getting cold, getting hurt, or running out of water. Our team evaluated these against NPS guidelines and Red Cross first-aid protocols across multiple camping trips; every single one has proven its worth.

  1. Navigation (map, compass, GPS device). Getting disoriented on a trail is more common than beginners expect — cell service disappears fast in the backcountry. Pack a paper topographic map of your area plus a compass. A GPS device or downloaded offline map on your phone adds a useful backup, but never rely on it alone.
  1. Illumination (headlamp plus spare batteries). A headlamp is a hands-free flashlight worn on your head — essential for setting up camp after dark, finding your way to the bathroom at 2 AM, or signaling for help in an emergency. Always pack one extra set of batteries. A flashlight alone won’t cut it when you need both hands free.
  1. First-Aid Supplies (a stocked first-aid kit). Minor injuries — blisters, cuts, insect stings, sprains — happen on almost every trip. The American Red Cross recommends a camping kit that includes adhesive bandages, antiseptic wipes, antibiotic ointment, gauze pads, tweezers, an elastic wrap bandage, and pain relievers at minimum (American Red Cross Camping First Aid Kit Checklist, 2026). A pre-packed kit from an outdoor retailer covers most bases — more on this in the Safety section.
  1. Fire (lighter, waterproof matches, fire starter). Fire provides warmth, cooks your food, purifies water in emergencies, and signals rescuers. Always carry two ignition sources in case one gets wet. Fire starters (small wax-and-sawdust cubes) help you light wet wood in damp conditions — a beginner’s best friend.
  1. Hydration (water plus a treatment method). Water is your single most important survival need. The NPS recommends packing at least 2 liters of drinking water per person per day, and more in hot climates (NPS What to Bring — Camping, 2026). For backcountry trips without reliable water sources, plan for 1 gallon (3.8 liters) per person per day. Always carry a water filter, purification tablets, or a UV pen as a backup — water sources in the field are not always safe to drink untreated.

Comfort and Function Essentials

These next five items prevent the discomfort and gear failures that turn a good trip into a rough one. They’re easy to forget because they don’t feel “critical” — until you need them.

  1. Emergency Shelter (tent, tarp, or space blanket). Your tent is your home base, but a compact emergency space blanket (those crinkly silver sheets that fold to the size of a deck of cards) weighs almost nothing and can prevent hypothermia if you get caught out. Always carry one, even on day hikes.
  1. Sun Protection (sunscreen SPF 30+, sunglasses, sun hat). Sunburn happens faster at elevation and near water. Pack SPF 30 or higher, reapply every two hours, and wear a wide-brimmed hat. Sunglasses with UV protection protect your eyes from glare on lakes and open trails.
  1. Insulation and Extra Clothing (layers beyond what you plan to wear). Weather changes fast in the outdoors. Pack at least one extra mid-layer (a fleece or down jacket) and a waterproof shell even if sunny weather is forecast. Hypothermia (dangerously low body temperature) can occur in temperatures as mild as 50°F if you’re wet and wind-exposed.
  1. Nutrition (extra food beyond your planned meals). Pack at least one extra day’s worth of food — high-calorie, no-cook options like trail mix, energy bars, and jerky work well. If you get delayed, hurt, or weathered in, that extra food matters enormously.
  1. Repair Kit and Tools (multi-tool or knife, duct tape, gear repair tape). A multi-tool handles dozens of camp tasks — cutting rope, tightening screws, opening cans. Duct tape fixes broken tent poles, torn rain flies, and blown-out shoe soles. Pack a small roll; it weighs almost nothing and solves everything.

These 10 systems form Layer 1 of The Scenario-Ready Packing System. Every item on this list applies to every camping trip, regardless of type, season, or experience level. Never leave home without all 10.

Shelter and Sleep System Checklist

Camping shelter and sleep system checklist showing tent sleeping bag sleeping pad and stakes
A complete shelter and sleep system — tent, rated sleeping bag, sleeping pad, and stakes — is the foundation every camping trip is built on.

A solid shelter and sleep system is the difference between waking up rested and waking up miserable. Our team has found that beginners most often underestimate this category — they pack a tent but forget the footprint, or buy a sleeping bag without checking the temperature rating. Get this right and the rest of the trip falls into place.

Tent and Campsite Setup

Your tent is your shelter from rain, wind, insects, and morning dew. Buying the right one — and packing every piece of it — matters more than most beginners realize.

Tent setup checklist:

  1. Tent body and rain fly. These usually pack together, but double-check. The rain fly (the waterproof outer cover) is the piece beginners most often leave behind.
  1. Tent poles. Without poles, your tent is a pile of nylon. Count the pole sections before leaving home.
  1. Tent stakes (plus 4 extras). Stakes anchor your tent in wind. Standard kits include 6–8 stakes — bring 4 spares in case you lose some in rocky ground.
  1. Tent footprint or ground cloth. A footprint is a custom-fit tarp that goes under your tent floor. It protects the floor from abrasion and moisture, extending your tent’s life significantly.
  1. Guylines (tent guylines are pre-attached on most tents). These extra cords extend from the rain fly to the ground, adding wind stability. Stake them out in windy conditions.
  1. Mallet or rock for driving stakes. A small rubber mallet makes setup faster in hard ground.

Campsite extras: A tarp or canopy for shade and rain protection over your cooking area is a worthwhile addition for car campers.

Sleeping Bag Temperature Ratings

Choosing the wrong sleeping bag is one of the most common — and most fixable — beginner mistakes. Modern sleeping bags are tested to the EN/ISO 23537 standard, which provides three ratings: Comfort, Lower Limit, and Extreme. For beginners, only the Comfort rating matters — it tells you the lowest temperature at which an average person can sleep comfortably (Switchback Travel, 2026).

The Extreme rating is for survival emergencies only. Never plan your trip around it.

Quick temperature rating guide:

Trip Type Expected Night Temp Recommended Comfort Rating
Summer / warm camping Above 50°F (10°C) 32–45°F (0–7°C)
Three-season (spring/fall) 35–50°F (2–10°C) 20–32°F (-7 to 0°C)
Cold shoulder season 20–35°F (-6 to 2°C) 10–20°F (-12 to -6°C)
Winter camping Below 20°F (-6°C) 0–15°F (-18 to -9°C)

A practical rule: choose a bag with a comfort rating 10°F colder than the forecast low for your trip. If you tend to sleep cold, go 15°F colder. Temperature ratings are guidelines, not guarantees.

Sleeping bag temperature rating chart for beginner campers showing comfort limit and extreme zones on a thermometer scale
Always pack a sleeping bag rated 10°F colder than your forecast nighttime low — the Comfort rating is the only number beginners need.

Sleeping Pad or Air Mattress?

Most beginners skip the sleeping pad or treat it as optional. It isn’t. A sleeping pad’s job is not just comfort — it insulates you from the cold ground, which drains body heat far faster than cold air does.

R-value (a measure of insulation — the higher the number, the warmer you’ll stay) is the key spec. Therm-a-Rest engineers note that you need an R-value of at least 4.0 to fully realize the warmth of a sleeping bag rated to 20°F (Switchback Travel, 2026).

Sleeping pad options for beginners:

  • Foam closed-cell pad: Lightweight, indestructible, cheap ($20–$40). R-value around 2–3. Great backup or budget option.
  • Self-inflating pad: Foam core that expands when you open the valve. Comfortable, moderate R-value (2–4). Good all-rounder.
  • Air pad: Lightest and most comfortable option. R-value varies widely by model (1.5–7+). Requires inflation and is puncture-sensitive — always pack a patch kit.

For most beginner three-season camping, an R-value of 2–4 is sufficient. For cold-weather trips below 35°F, target R 4+.

Camp Comfort Extras

These items aren’t survival gear — but they transform your campsite from a survival exercise into an actual vacation.

Camp comfort checklist:

  1. Camping chairs (one per person). A lightweight folding camp chair weighs about 2–3 lbs and makes evenings around the fire dramatically more enjoyable.
  1. Camp table. A small folding table keeps your cooking area organized. Car campers have the luxury of bringing a full-size model.
  1. Hammock (optional). A lightweight nylon hammock (about 1 lb) works between two trees for afternoon napping or reading. Requires tree straps to avoid damaging bark.
  1. Lantern. A battery-powered or rechargeable LED lantern illuminates your campsite without the fire hazard of candles. Hang it from your tent’s interior loop for a cozy reading light.
  1. Earplugs. Campgrounds are louder than you expect — neighbors, wildlife, wind in the trees. Earplugs weigh nothing and can save your sleep.

Camp Kitchen and Cooking Gear Checklist

Camp kitchen and cooking gear checklist with stove pots skillet utensils and fuel canister
A two-burner stove, nesting pots, a skillet, and the right utensils cover nearly every camp meal — don’t forget an extra fuel canister.

Eating well at camp is one of the great pleasures of the outdoors — but it requires the right gear and the right food safety habits. This section covers everything from your stove to your dish soap, including USDA-backed food safety rules that most beginners don’t know until it’s too late.

What do I need to cook while camping?

Before you can cook anything, you need the right tools. The specific gear depends on your cooking style, but this list covers the core equipment for car camping beginners.

Cooking equipment checklist:

  1. Camp stove. A two-burner propane stove handles almost any camp meal. Single-burner backpacking stoves are lighter but slower for family cooking.
  1. Fuel canisters (bring more than you think you’ll need). Running out of fuel on day two is a classic beginner mistake. Pack one extra canister per stove.
  1. Lighter and waterproof matches. Keep these in a waterproof bag. You need fire to cook — two ignition sources is always smarter than one.
  1. Cooking pot (1–2 quart). A single medium pot handles boiling water, cooking pasta, and making soup. Nesting pot sets are space-efficient.
  1. Skillet or frying pan. For eggs, bacon, or sautéed vegetables. A lightweight aluminum or cast iron skillet works well.
  1. Cooking utensils: Spatula, tongs, long-handled spoon, and a can opener. A multi-tool can substitute for some of these in a pinch.
  1. Cutting board. A flexible plastic cutting board rolls up and weighs almost nothing.
  1. Camp knife. A dedicated kitchen knife is safer and more effective than your multi-tool for food prep.
  1. Aluminum foil. Endlessly useful — wrap vegetables for campfire cooking, cover pots, or improvise a pan.
  1. Oven mitts or silicone grips. Camp stoves and fire grates get very hot. Pot handles conduct heat faster than you expect.

Eating and Serving Supplies

Once the food is cooked, you need something to eat it with. This sounds obvious — but “forgotten plates” is a real thing that happens on real camping trips.

Eating and serving checklist:

  1. Plates or bowls (one per person). Lightweight enamel, stainless steel, or BPA-free plastic options all work well.
  1. Mugs or cups. For coffee, tea, hot cocoa, or soup. Insulated mugs keep drinks hot longer in cold mornings.
  1. Fork, knife, and spoon sets. Camping utensil sets are lightweight and nest together. One set per person.
  1. Reusable water bottles (one per person, plus camp water jug). Hydration is constant at camp. A large 2–3 gallon water jug at the campsite reduces individual bottle refills.
  1. Napkins and paper towels. Pack more than you think you need — camp cooking is messier than kitchen cooking.
  1. Tablecloth or picnic blanket. Keeps your eating surface clean and makes meals feel more civilized.

Food Storage and Cooler Packing

Food safety is one of the most overlooked topics in beginner camping — and one of the most important. The USDA recommends keeping all perishable food at or below 40°F to prevent bacterial growth in the “Danger Zone” (40°F–140°F), where bacteria can double in number in as little as 20 minutes (USDA Summer Food Safety Tips, 2026). Foodborne illness can ruin a trip — and in severe cases, requires medical attention.

Cooler packing checklist:

  1. Hard-sided cooler with tight-fitting lid. Soft-sided bags lose temperature faster. For trips of 2+ days, a quality hard cooler with thick insulation is worth the investment.
  1. Block ice and cubed ice. Block ice lasts 2–3 times longer than cubed ice. Use block ice at the bottom, cubed ice to fill gaps.
  1. Appliance thermometer. Place one inside your cooler and check it daily. It must read 40°F or below to keep food safe (USDA, 2026).
  1. Separate cooler for beverages. The USDA specifically recommends this — a drink cooler gets opened constantly, which spikes its internal temperature. Keep your food cooler closed as much as possible.
  1. Waterproof containers or zip-lock bags. Prevent melting ice from contaminating food with water.
  1. Bear canister or bear bag (where required). Many national parks and forest service areas require food to be stored in a certified bear canister (a hard plastic cylinder that bears cannot open) at night. Check your specific campground’s rules before you go.
Camping cooler packing diagram showing USDA food safety layering method with block ice meats and ready-to-eat foods
Pack your cooler in layers — block ice on the bottom, sealed meats in the middle, ready-to-eat foods on top — and check the thermometer daily to confirm it stays at 40°F or below.

Food safety rules to memorize:

  • Refrigerate perishable food within 2 hours of cooking (1 hour if temperature is above 90°F).
  • Never refreeze meat that has thawed in the cooler unless it still feels ice-cold.
  • When in doubt, throw it out. Food poisoning at a remote campsite is a serious situation.

Kitchen Cleanup Supplies

Leave No Trace (LNT) is a set of outdoor ethics principles, developed by the Leave No Trace Center for Outdoor Ethics and supported by the NPS, designed to minimize human impact on natural areas. The kitchen is where LNT compliance matters most — food scraps attract wildlife, and improper soap disposal pollutes water sources.

Cleanup checklist:

  1. Biodegradable camp soap. Regular dish soap harms aquatic ecosystems. Biodegradable soap (like Dr. Bronner’s) is safe to use when disposed of properly — at least 200 feet from any water source.
  1. Scrub pad and sponge. A small scrubber handles stuck-on food without a dishwasher.
  1. Three-basin wash system. The NPS recommends three separate basins for washing camp dishes: one with soapy water, one with rinse water, and one with a sanitizing solution (a few drops of bleach in water).
  1. Dish towel (quick-dry microfiber). Microfiber dries fast and resists mildew. Pack two.
  1. Trash bags (heavy-duty, multiple). Pack out everything you pack in. Bring more bags than you think you need.
  1. Food waste strainer. A small mesh strainer catches food particles from dishwater. Pack the strained bits out in your trash — don’t scatter them.
  1. Bear-proof trash bag or container. In bear country, even your trash requires secure storage overnight.

Clothing and Apparel Checklist

Camping clothing three-layer system showing base layer mid layer and waterproof outer shell apparel
The three-layer clothing system — moisture-wicking base, insulating mid, and waterproof shell — handles almost any weather condition with a fraction of the luggage.

Packing the right clothes for camping is less about quantity and more about system. Beginners typically make one of two mistakes: they pack too much (seven shirts for a two-night trip) or they pack the wrong materials (cotton everything). This section fixes both problems.

The Three-Layer Clothing System

Experienced outdoor enthusiasts rely on a three-layer clothing system — not because it’s complicated, but because it works in almost any weather condition. Our team has used this system across dozens of camping trips in varying conditions; it consistently outperforms the “pack a big jacket” approach.

Three-layer camping clothing system diagram for beginners showing base mid and outer shell layers with function labels
The three-layer system works by managing moisture (base), trapping heat (mid), and blocking wind and rain (outer shell) — each layer has a specific job.

The three layers:

  • Base layer: The layer touching your skin. Its job is to pull (wick) sweat away from your body and keep you dry. Materials: synthetic (polyester) or merino wool. Never cotton — cotton absorbs moisture and holds it against your skin, making you cold and increasing hypothermia risk.
  • Mid layer: The insulating layer that traps warm air close to your body. Materials: fleece, down, or synthetic insulation.
  • Outer shell: The waterproof and windproof layer that protects your inner layers from rain, wind, and snow.

This system is modular — you add and remove layers as temperature and weather change throughout the day.

Base Layer and Mid Layer Checklist

Pack these items for every camping trip, regardless of the forecast. Weather changes fast outdoors.

Base layer checklist (per person):

  1. Moisture-wicking t-shirts (2–3). Synthetic or merino wool. One to wear, one clean, one for emergencies.
  2. Long-sleeve base layer top (1). For cool evenings and cold mornings.
  3. Moisture-wicking underwear (3–4 pairs). Merino wool underwear resists odor better than synthetic over multi-day trips.
  4. Hiking socks (3–4 pairs). Wool or synthetic. Cotton socks cause blisters — this is not an exaggeration. Wool socks regulate temperature and dry faster.

Mid layer checklist (per person):

  1. Fleece jacket or hoodie (1). Fleece is warm, lightweight, and dries quickly. A zip-up allows easy temperature regulation.
  2. Down or synthetic insulated jacket (1). Packable down jackets compress to the size of a softball. Synthetic insulation performs better when wet.
  3. Lightweight fleece or thermal pants (1). For cold nights and mornings at camp.

Outer Shell: Rain and Wind Gear

Cotton is comfortable and breathable — but it is dangerous in wet and cold camping conditions. When cotton gets wet, it loses all insulating ability and can accelerate heat loss from your body. The NPS explicitly advises against cotton for camping in cold or wet weather for this reason. “Cotton kills” is a phrase you’ll hear from experienced hikers — it’s blunt, but accurate.

Outer shell checklist:

  1. Waterproof rain jacket (1 per person). Look for taped seams and a DWR (durable water repellent — a coating that makes water bead off the surface) finish. A hood is essential.
  2. Rain pants (1 per person). Often skipped, almost always regretted. Wet legs in cold wind make for a miserable hike back to camp.
  3. Packable wind shell (optional). For dry but windy conditions where a full rain jacket feels too warm.

What to look for: A jacket labeled “water-resistant” is not the same as “waterproof.” For camping, you need waterproof with sealed seams — especially if you’re camping in the Pacific Northwest, the Appalachians, or any area with variable weather.

Footwear, Sleepwear, and Accessories

Footwear checklist:

  1. Hiking boots or trail shoes (broken in before your trip). New boots cause blisters. Wear your hiking footwear on several walks before your camping trip.
  2. Camp sandals or flip-flops. Give your feet a break at camp and use in shared shower facilities.
  3. Gaiters (optional). Gaiters are fabric covers that wrap around your lower leg and boot top — useful in wet brush, mud, or light snow.

Sleepwear checklist:

  1. Dedicated sleep clothes. Don’t sleep in the clothes you hiked in — moisture from the day’s activity will make you colder overnight.
  2. Wool or fleece sleep socks. Cold feet are the primary reason people wake up cold at night.
  3. Stocking cap (beanie). You lose significant body heat through your head overnight. A lightweight wool or fleece beanie makes a measurable difference.

Accessories checklist:

  1. Sun hat with brim. Wide brim protects face, ears, and neck.
  2. Lightweight gloves. Even summer mountains get cold at night.
  3. Buff or neck gaiter. Versatile — works as a hat, neck warmer, or face shield in wind.
  4. Sunglasses (UV protection). Essential near water and at altitude.

Safety, First Aid, and Hygiene Checklist

Camping first aid and safety kit checklist showing bandages gauze antiseptic emergency blanket and whistle
A stocked first-aid kit — bandages, gauze, antiseptic, cold pack, emergency blanket, and a whistle — covers the injuries and emergencies most common on camping trips.

Safety gear is the category beginners most often trim to save space — and most often regret trimming. You don’t need to be a wilderness medic to pack a functional first-aid kit. You just need to pack the right things and know what they’re for.

First Aid Kit Essentials

The American Red Cross recommends that every camping first-aid kit include the following core items (Red Cross Camping First Aid Kit Checklist, 2026). We built our checklist by cross-referencing Red Cross protocols, NPS emergency guidelines, and feedback from experienced campers across dozens of trips.

First-aid kit checklist:

  1. Adhesive bandages (assorted sizes). For cuts, scrapes, and blisters.
  1. Sterile gauze pads (3×3 and 4×4 inch). For larger wounds.
  1. Elastic wrap bandage. For sprains and to secure dressings.
  1. Antiseptic wipes. Clean wounds before applying any dressing.
  1. Antibiotic ointment (packets). Prevents infection in minor cuts and scrapes.
  1. Hydrocortisone cream. Relieves itching from insect bites, rashes, and plant contact.
  1. Instant cold pack. For sprains, swelling, and insect stings.
  1. Tweezers. For splinters, thorns, and tick removal.
  1. Scissors. For cutting tape, gauze, and clothing in emergencies.
  1. Nonlatex gloves (2 pairs). Always wear gloves when treating another person’s wounds.
  1. Emergency blanket (space blanket). Reflects body heat back to prevent hypothermia.
  1. Pain relievers (ibuprofen and acetaminophen). Both types, for different situations.
  1. Antihistamines. For allergic reactions to insect stings, plants, or food.
  1. Personal prescription medications (7-day supply). Pack extra in a waterproof bag.
  1. First-aid instruction booklet. Knowledge matters as much as supplies.

Quotable fact: The American Red Cross 2026 first-aid guidelines specify a manufactured windlass tourniquet as a minimum kit item — a tool most beginners don’t know to pack but that can save a life in a severe limb injury far from help.

Sun, Bug, and Navigation Protection

Sun and bug protection checklist:

  1. Sunscreen (SPF 30 or higher). Reapply every 2 hours, more often if swimming or sweating.
  2. Lip balm with SPF. Lips burn faster than skin and are easy to forget.
  3. Insect repellent (DEET or picaridin-based). DEET is the most effective against mosquitoes and ticks. Picaridin is gentler on skin and gear.
  4. After-bite or hydrocortisone gel. For relief after bites happen.
  5. Tick removal tool or fine-tipped tweezers. Check your body for ticks daily in wooded areas.

Navigation and communication checklist:

  1. Paper map of your camping area. Download or purchase before you go. Cell service is unreliable in most campgrounds and nonexistent in backcountry.
  2. Compass. Learn basic compass use before your trip — it takes about 20 minutes to learn the fundamentals.
  3. Fully charged phone with offline maps downloaded. Apps like AllTrails, Gaia GPS, and Google Maps allow offline map downloads.
  4. Portable battery bank. A 10,000 mAh power bank charges a smartphone 2–3 times. Essential for multi-day trips.
  5. Whistle. A loud whistle carries much farther than a voice. Three blasts is the universal distress signal. Clip one to your pack.
  6. Personal locator beacon (PLB) or satellite communicator (for remote trips). A PLB (a device that sends a GPS-activated distress signal to rescue services via satellite) is a one-time purchase that could save your life in a remote emergency where no cell signal exists.

What toiletries do I need for camping?

Good hygiene at camp isn’t just about comfort — it’s about health and Leave No Trace responsibility. Many campgrounds have restroom facilities; some do not.

Hygiene and toiletry checklist:

  1. Toothbrush and toothpaste. Obvious but forgotten more often than you’d think.
  2. Biodegradable soap (for body and hands). One bottle handles both uses and is safe for the environment when used 200 feet from water sources.
  3. Toilet paper (extra rolls in a waterproof bag). Always bring more than you think you need.
  4. Trowel for cat holes (if no restrooms available). A cat hole (a 6–8 inch hole dug in soil for human waste) is the Leave No Trace standard when no facilities exist. Bury waste and pack out toilet paper in a sealed bag.
  5. Hand sanitizer. Use before eating and after using the bathroom — especially when handwashing facilities aren’t available.
  6. Wet wipes (unscented, biodegradable). For quick cleanups between showers on multi-day trips.
  7. Microfiber towel. Dries in minutes, compresses to almost nothing, and handles everything from post-swim drying to campsite cleanup.
  8. Feminine hygiene products (as needed). Pack in a sealed waterproof bag; dispose of in trash, not the ground.
  9. Deodorant. Unscented is preferred in bear country — scented products can attract wildlife.
  10. Prescription glasses or contacts (with solution and case). Don’t forget a backup pair of glasses.

Pro Tips for Packing and Organization

Knowing what to pack is half the battle. Knowing how to pack it — without overpacking, without forgetting anything, and without spending two hours digging through your car for the headlamp — is the other half.

How to Avoid Overpacking

Overpacking is the #1 complaint from first-time campers. The instinct to prepare for every possible scenario leads to a 100-pound car trunk, a sore back, and gear you never touched. Our team has reviewed dozens of beginner packing lists and identified three root causes of overpacking.

The three causes of overpacking — and how to fix them:

  1. Packing “just in case” duplicates. You don’t need three flashlights. You need one headlamp and one backup. Apply this logic to every category.
  2. Packing full-size toiletries. Transfer shampoo, soap, and sunscreen into small travel bottles. Full-size bottles are dead weight.
  3. Packing clothes for every weather scenario. The three-layer system solves this. Three base layers + one mid layer + one rain shell = every weather condition, with room to spare.

The one-bag test: Before loading the car, lay out everything you plan to bring. Remove anything you can’t justify using on at least two separate days of the trip. If it’s a “maybe I’ll need it” item that weighs more than a pound, leave it home.

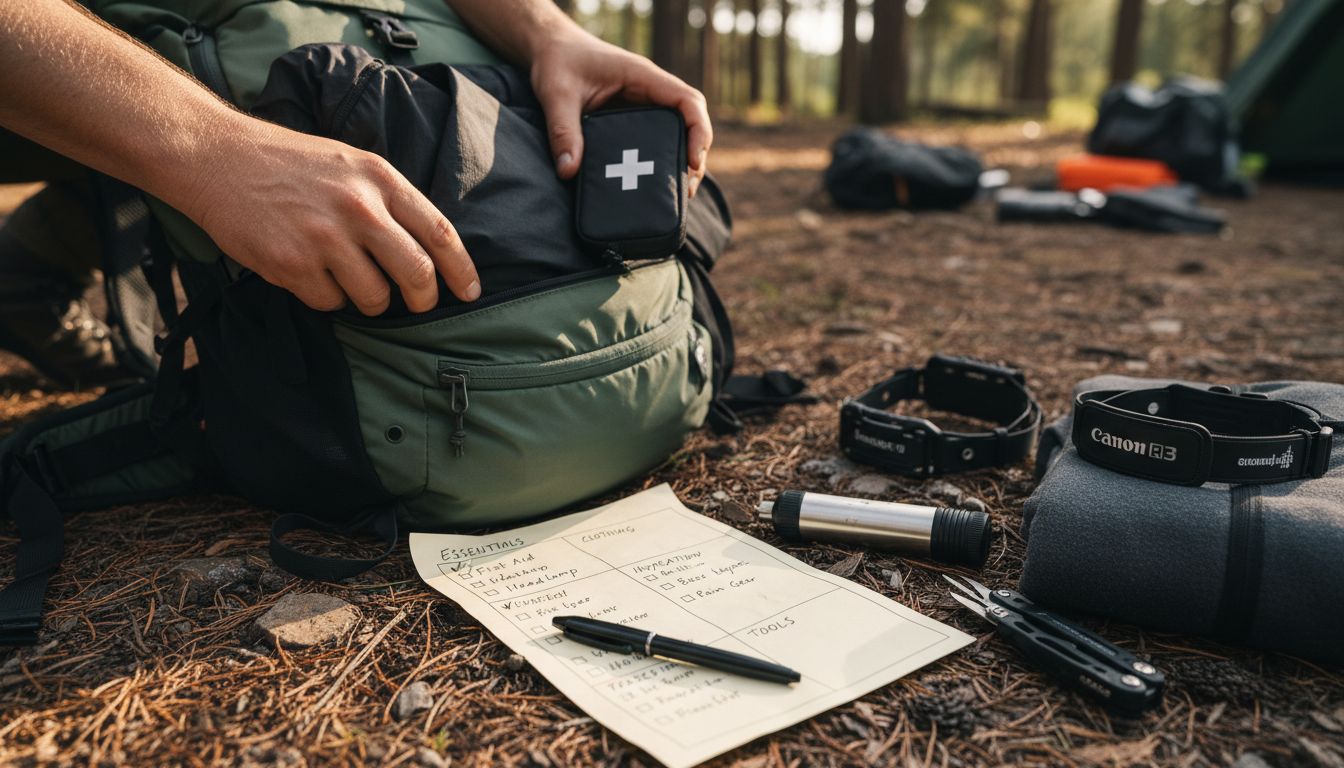
“I laminated our checklist for things to pack and left some blank spaces to add in things we realized we needed.”
— Experienced camper, reflecting on how a reusable checklist becomes more personalized with each trip

This is exactly the right instinct. Your checklist should evolve. The blank spaces are where your personal must-haves live — the camp chair you can’t sleep without, the specific coffee setup that makes mornings worth waking up for.

Scenario-Ready System in Action

The Scenario-Ready Packing System is the three-layer framework at the heart of this guide. It removes the guesswork from packing by giving you a repeatable process — not just a list.

How to apply it before every trip:

Layer 1 — Universal Essentials (always packed, never skipped):
Start with the 10 NPS-aligned essentials from the first section of this guide. These never change. Check them off first, every time.

Layer 2 — Category Gear (add based on trip length and style):
Add your shelter and sleep system, kitchen gear, clothing layers, and hygiene supplies. This section varies by trip length — a one-night car camp needs less kitchen gear than a four-night trip.

Layer 3 — Scenario-Specific Add-Ons (add based on trip type):
This is where the specialized checklists in the next section come in. Car camping adds comfort items. Backpacking removes weight. Family camping adds kid-specific gear. Layer 3 is what makes your packing list yours.

Build Your Reusable Checklist

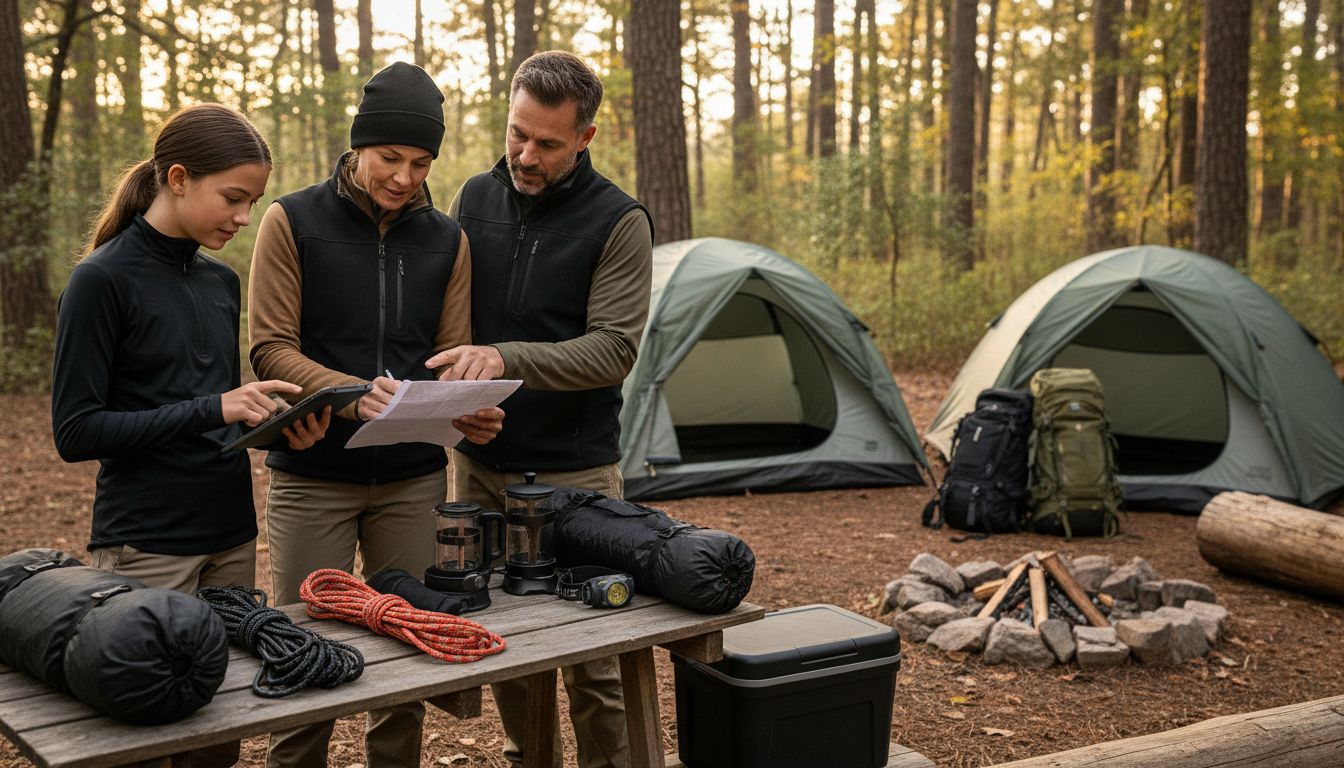
The most effective camping checklists guide is one you’ve personalized and tested. Here’s how to build one that works for every future trip.

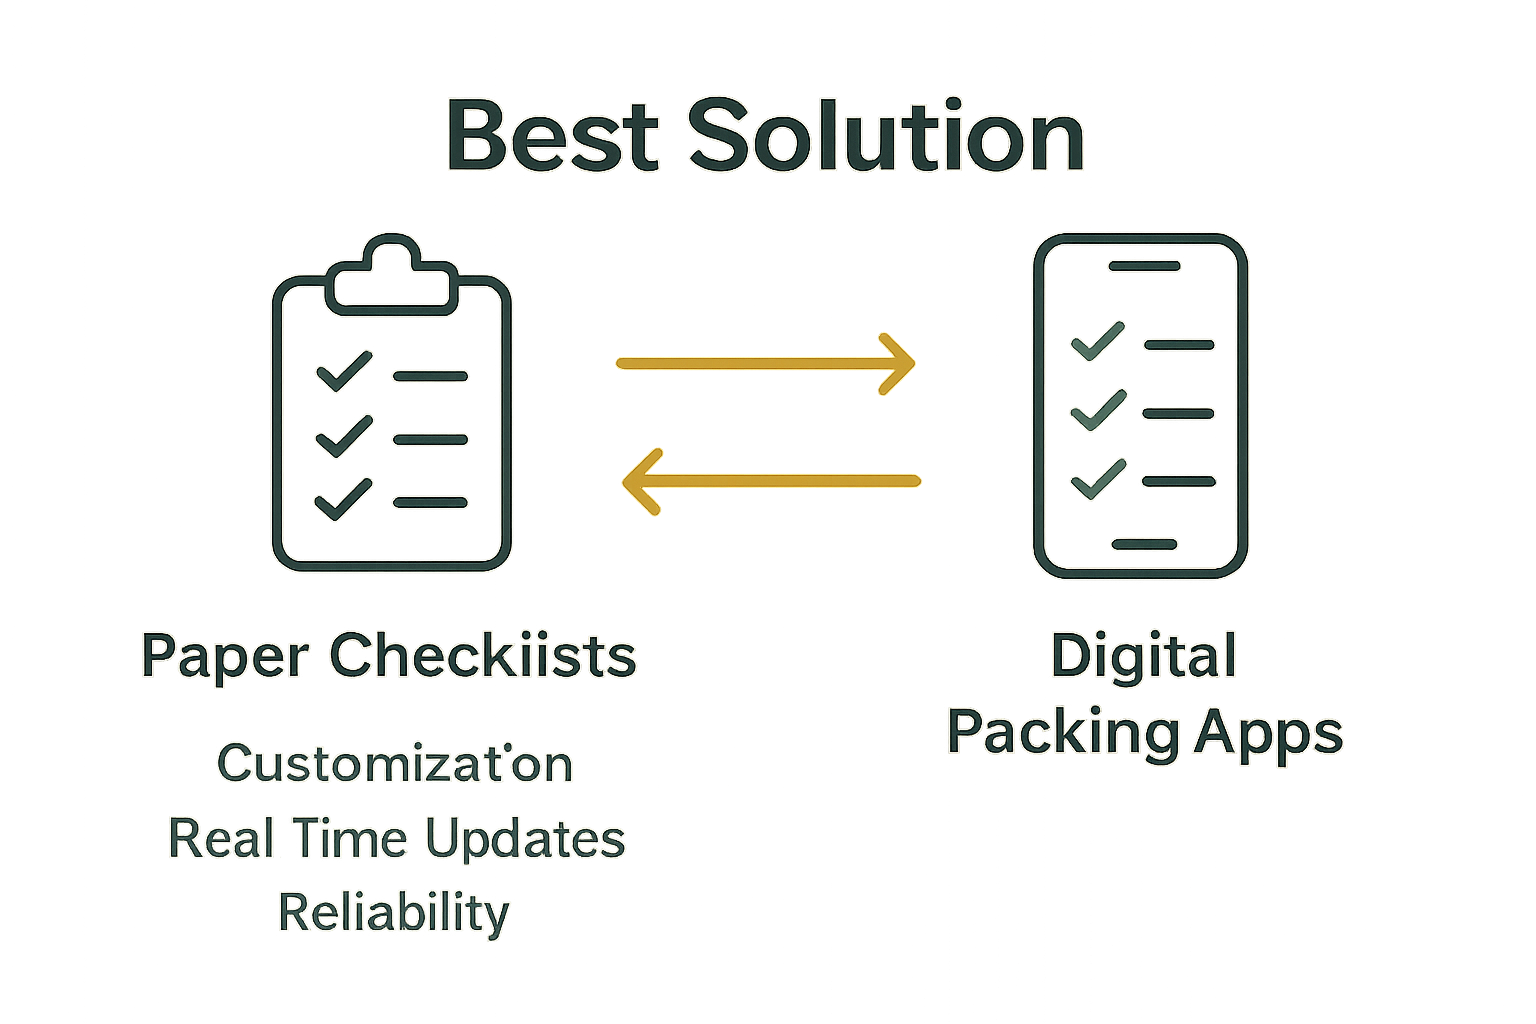
Step 1: Print or digitally copy the master checklist from this guide.
Step 2: On your first trip, check off every item as you pack it.
Step 3: After the trip, note anything you brought but never used (candidates to remove) and anything you wished you had (candidates to add).
Step 4: Update your list. Laminate it or save it as a PDF.
Step 5: Repeat the process after each trip until your list is perfectly calibrated to your style.

The blank spaces the experienced camper mentioned above are real — your personal must-haves (a specific camp pillow, a favorite spice kit, a hammock that’s non-negotiable) belong on your list. The Scenario-Ready Packing System gives you the foundation; your experience fills in the rest.

Specialized Camping Checklists

Layer 3 of the Scenario-Ready Packing System is where your checklist becomes specific to your trip type. Car camping, backpacking, and family camping each have fundamentally different gear requirements. This section gives you a focused list for each.

Car Camping Checklist

Car camping (camping at a drive-up campsite where your vehicle stays close to your tent) is the most beginner-friendly camping style. You’re not carrying everything on your back, so weight isn’t a constraint. Use that freedom to bring comfort items that make the experience more enjoyable.

Car camping Layer 3 add-ons:

  1. Large tent (4-person or larger, even for 2 people). Extra space means better sleep and more storage room. Car camping doesn’t require a lightweight tent.
  1. Camping chairs and a folding table. Non-negotiable for a comfortable campsite.
  1. Full-size sleeping pad or air mattress. Car camping is the perfect time for a thick, luxurious air mattress. Pack a battery-powered pump — hand-pumping a queen mattress is exhausting.
  1. Pillow (your actual bed pillow). Compressible camp pillows are fine for backpacking. For car camping, bring the real thing.
  1. Cooler (large hard-sided, 50–70 quart). A larger cooler means more food options, less frequent ice replacement, and room for the separate beverage cooler the USDA recommends.
  1. Camp kitchen setup: Full-size two-burner stove, coffee maker (percolator or pour-over), cutting board, and a complete set of pots and pans.
  1. Portable power station or generator (optional). For charging devices, running a fan, or powering a small LED string light setup.
  1. Outdoor rug for the campsite. Keeps dirt out of the tent and creates a defined “living room” area.
  1. Firewood (purchased locally, never transported from home). Many states and campgrounds prohibit bringing firewood from home due to invasive insect risks. Always buy firewood near your destination.
  1. Firestarter and fire grate tools: Newspaper, fatwood sticks, a fire poker, and a bucket of water for extinguishing.
  1. String lights (battery-powered or solar). Transform your campsite atmosphere after dark.
  1. Outdoor games: Cornhole, frisbee, a deck of cards, or a football — downtime at camp is a big part of the experience.

Backpacking Checklist

Backpacking means carrying everything on your back for miles of trail. Every ounce matters. The Scenario-Ready Packing System applied to backpacking means ruthlessly cutting Layer 2 items to their lightest equivalents and skipping everything that doesn’t earn its weight.

The backpacking mindset: Ask “do I need this, or do I just want it?” for every item. If the answer is “want,” leave it home.

Backpacking Layer 3 modifications:

  1. Ultralight tent (2–3 lbs). A standard car camping tent weighs 8–12 lbs. A quality backpacking tent weighs 2–4 lbs. The difference is felt on mile six.
  1. Backpacking sleeping bag (rated for conditions, 1–3 lbs). Down-filled bags compress smaller and weigh less than synthetic. Worth the extra cost for backpacking.
  1. Lightweight sleeping pad (R 2–4, under 1 lb). An inflatable air pad or a foam pad — not a full air mattress.
  1. Backpack (40–65 liters for overnight, 65+ liters for multi-day). A liter is a unit of volume — a 65-liter pack holds roughly 65 liters of gear, which is enough for 3–5 days of backpacking.
  1. Water filter (mandatory). Carry a lightweight filter like the Sawyer Squeeze or a SteriPen UV purifier. Never rely on campsite water sources without treating them first.
  1. Freeze-dried or dehydrated meals. These meals weigh ounces and rehydrate with boiling water. No refrigeration needed. They’re not gourmet — but they’re hot, filling, and lightweight.
  1. Backpacking stove (single-burner, canister fuel, under 3 oz). Tiny, efficient, and powerful enough to boil water in minutes.
  1. Bear canister (required in many wilderness areas). Check permit requirements for your specific trail. Fines for non-compliance can exceed $5,000 in some national parks.
  1. Trekking poles. Reduce knee strain on descents and improve balance on technical terrain. Highly recommended for beginners.
  1. Blister prevention kit: Moleskin (a padded adhesive pad for hot spots and blisters), body glide, and extra wool socks. Blisters are the #1 reason beginners cut trips short.
  1. Leave No Trace kit: Trowel, waste bags (WAG bags for areas with no soil), and a small bottle of biodegradable soap.
  1. Permit (if required). Many popular backcountry areas require a permit obtained weeks or months in advance. Check your destination’s requirements early.

Backpacking weight target: Most experienced backpackers aim for a “base weight” (everything except food and water) of 15–25 lbs. As a beginner, 20–30 lbs base weight is realistic and comfortable. Above 35 lbs, reconsider what you’re bringing.

Family Camping Checklist

Camping with kids is a different experience than camping solo or with adults. Kids need more entertainment, more safety considerations, and — without question — more snacks. The good news: children who camp young often become the most enthusiastic outdoor adults. Getting it right on the first trip sets the tone for years of adventures.

Family camping Layer 3 add-ons:

  1. Kid-sized sleeping bags (rated for conditions). Adult sleeping bags are too large for children and won’t insulate properly. Buy a properly fitted kids’ bag.
  1. Kids’ headlamps (one per child). Children love having their own headlamp. It reduces nighttime anxiety and teaches independence.
  1. Child-sized camp chairs. Small camp chairs sized for kids make evenings at the campfire more comfortable and safe.
  1. Kid-friendly first aid extras: Children’s pain reliever (acetaminophen or ibuprofen in appropriate dosages), children’s antihistamine, and extra bandages in fun designs (yes, this matters when a 6-year-old has a scraped knee).
  1. Insect repellent safe for children. Products with picaridin are generally safer for young children than high-DEET formulas. Always check the label for age recommendations.
  1. Sunscreen (SPF 50 for kids). Children’s skin is more sensitive to UV radiation. Apply generously and reapply every 90 minutes.
  1. Life jackets (if near water). If your campsite is near a lake or river, properly fitted Coast Guard-approved life jackets are non-negotiable for young children.
  1. Entertainment pack: A nature journal and crayons, a field guide to local birds or insects, a magnifying glass, and a deck of cards. Keep screens minimal — the outdoors is the entertainment.
  1. Glow sticks or LED wristbands. Keep track of kids after dark at the campsite. Glow sticks make kids feel like they’re wearing something fun, not a safety device.
  1. Extra change of clothes (2–3 sets per child). Kids get wet, muddy, and messy at rates that defy physics. Plan accordingly.
  1. Portable potty or toddler toilet seat. For very young children not comfortable with pit toilets or vault toilets common at campgrounds.
  1. Familiar comfort items (stuffed animal, favorite blanket). First-time camping can feel overwhelming for young children. A familiar item from home helps with the transition to sleeping in a tent.

Car Camping vs. Backpacking

Category Car Camping Backpacking
Tent Any size, 4–8 lbs okay Ultralight, 2–4 lbs max
Sleeping bag Synthetic, bulky okay Down, compressed, lightweight
Sleeping pad Air mattress fine Lightweight foam or air pad
Cooking Two-burner stove, full cookset Single-burner, minimal utensils
Food Fresh ingredients, cooler Freeze-dried, no refrigeration
Water Jugs from home Filter or purify from source
Clothing Pack freely Strict weight limits, layers only
Pack size No backpack needed 40–65L minimum
Weight limit Unlimited (car capacity) 20–30 lbs base weight target
Permit required? Usually no (pay campsite fee) Often yes (check in advance)

Safety Precautions & Limitations

Even the best camping checklist doesn’t remove all risk. Outdoor activities carry inherent risks — and knowing the limitations of your gear and your experience level is a critical safety skill.

Common Pitfalls to Avoid

Pitfall 1: Trusting gear ratings in extreme conditions.
A sleeping bag rated to 20°F keeps you comfortable at 20°F under normal conditions — dry bag, appropriate R-value sleeping pad, dry base layers, calm wind. If your bag is damp, your pad has a low R-value, or you’re underdressed, you’ll feel significantly colder than the rating suggests. Always build in a buffer of 10–15°F.

Pitfall 2: Assuming cell service for navigation.
Many popular campgrounds and virtually all backcountry areas have no reliable cell service. Download offline maps before you leave home. Carry a paper map and compass as backup. This is not optional — it’s the difference between a minor navigation error and a genuine emergency.

Pitfall 3: Underestimating fire danger.
Fire bans (restrictions on campfires due to dry conditions and wildfire risk) are common across the western U.S., Canada, and Australia during summer months. Always check current fire restrictions through your local U.S. Forest Service office or national park website before your trip. Violating a fire ban carries significant fines and, more importantly, can start a wildfire.

Pitfall 4: Ignoring food storage rules in bear country.
Bears that access human food become conditioned to seeking it — and are often euthanized as a result. Food storage is not just about your safety; it’s about the wildlife. Follow all posted regulations, use bear canisters or approved bear boxes, and never leave food unattended at your campsite.

Pitfall 5: Skipping the weather check.
Mountain weather changes in minutes. Check the forecast for your specific campground (not the nearest town, which may be at a very different elevation) within 24 hours of departure. Update your gear selection based on what you find.

When to Choose Alternatives

If you have no camping experience: Consider a glamping site (a fully equipped camping setup with amenities) or a cabin rental for your first trip. Getting comfortable outdoors in a lower-stakes environment builds the confidence to tackle a full tent camping trip with less anxiety.

If hiking into a backcountry area: A basic first-aid kit is insufficient. Consider taking a Wilderness First Aid (WFA) course — a 2-day course offered by the American Red Cross and other outdoor organizations that teaches hands-on skills for managing injuries far from medical help.

If camping with medical conditions: Consult your doctor before any trip involving strenuous hiking, high altitude, or remote locations. Carry documentation of your conditions and medications in your first-aid kit.

When to Seek Expert Help

If your planned trip involves any of the following, seek advice from a certified guide, ranger, or outdoor educator before going:

  • Backcountry travel more than 5 miles from a trailhead
  • River crossings, technical scrambling, or glacier travel
  • Camping above 10,000 feet elevation (altitude sickness is a real risk)
  • International wilderness travel

Frequently Asked Questions

Absolute Must-Haves for Camping?

The 10 core essentials are the absolute must-haves for any camping trip: navigation (map and compass), illumination (headlamp), first-aid supplies, fire-starting tools, water and a treatment method, emergency shelter, sun protection, insulation/extra clothing, extra food, and a repair kit with a multi-tool. These items, identified by the U.S. National Park Service, address the most dangerous scenarios — getting lost, getting cold, getting hurt, and running out of water. Even for a one-night car camping trip at a developed campground, all 10 should be in your vehicle.

Choosing a Camping Sleeping Bag?

Choose a sleeping bag by its Comfort rating, not its Extreme or Lower Limit rating — the Comfort rating tells you the lowest temperature at which an average person can actually sleep well. As a general rule, pick a bag with a comfort rating 10°F colder than your expected nighttime low. For most beginner three-season camping (spring through fall), a bag rated to 20–32°F handles the majority of conditions. Always pair your bag with an appropriately rated sleeping pad — a pad with an R-value of at least 4.0 is needed to fully realize the warmth of a 20°F bag (Switchback Travel, 2026).

What are the best camp foods?

For car camping, focus on meals that are easy to prep and cook on a two-burner stove. Pre-chopped vegetables, marinated meats, and one-pot pasta dishes are excellent choices. Equally important is food storage — keep perishable foods in a cooler at or below 40°F (USDA, 2026) to prevent foodborne illness. For backpacking, switch to lightweight freeze-dried or dehydrated meals that require only boiling water, eliminating the need for refrigeration entirely.

How to handle camping hygiene?

The camping hygiene essentials are: biodegradable soap, toothbrush and toothpaste, toilet paper (in a waterproof bag), hand sanitizer, sunscreen, insect repellent, and a quick-dry microfiber towel. The key distinction from home toiletries is the “biodegradable” requirement — regular soap, shampoo, and dish soap harm aquatic ecosystems when they reach water sources. Always use biodegradable products at camp, and dispose of soapy water at least 200 feet from any lake, river, or stream. Pack unscented deodorant in bear country, as scented products can attract wildlife.

Camping First-Aid Kit Contents?

A camping first-aid kit should include adhesive bandages (assorted sizes), sterile gauze pads, antiseptic wipes, antibiotic ointment, an elastic wrap bandage, tweezers, scissors, nonlatex gloves, an instant cold pack, an emergency space blanket, pain relievers (ibuprofen and acetaminophen), antihistamines, and a first-aid instruction booklet — per American Red Cross 2026 guidelines. For backcountry trips, add a windlass tourniquet and a compact moldable splint. Always include a 7-day supply of any personal prescription medications in a separate waterproof bag. Pre-built camping first-aid kits from outdoor retailers cover most of these bases and are a good starting point for beginners.

Ready to Pack? Start with Layer 1

Every great camping trip starts with the same foundation: 10 non-negotiable essentials that keep you safe, warm, fed, and found. The Scenario-Ready Packing System gives you a repeatable framework — Layer 1 for universal safety, Layer 2 for category gear, and Layer 3 for your specific trip type — that works whether you’re sleeping in a car-accessible campground or 10 miles into the backcountry.

Use this camping checklists guide as your living document. Print it, laminate it, add your personal must-haves in the blank spaces, and update it after every trip. The campers who never forget anything aren’t superhuman — they just have a system they’ve refined over time.

Your first trip is the start of that system. Pick your dates, check the REI family camping checklist for any category-specific additions, download offline maps, verify your cooler temperature, and go. The outdoors is waiting — and now you’re ready for it.

David King
Written by

David King

Field gear tester at Tent Explorer.