This blog post may contain affiliate links. As an Amazon Associate I earn from qualifying purchases.
You wake up at 2 a.m., shivering so hard your teeth chatter. Your sleeping bag cost $300. Your tent is waterproof. So why are you freezing? Knowing how to keep warm in a tent isn’t about owning better gear — it’s about understanding which gear actually matters, and in what order. Most campers who suffer cold nights are focused on the wrong layer entirely.
Every night you sleep wrong costs you more than comfort — it erodes your safety margin and kills the joy of a trip you spent months planning. Most guides hand you a list of five tips and call it done. This guide gives you the system behind all of them: The Warmth Stack, a four-layer framework that addresses heat loss from the ground up. You’ll find 50+ specific techniques, off-grid solutions, child safety protocols, and a bonus section on staying cool in summer — everything you need to never shiver through another night outdoors.
Knowing how to keep warm in a tent starts with the ground, not the sleeping bag — cold ground draws heat from your body far faster than cold air alone.
- The Warmth Stack works ground-up: sleeping pad R-value first, then sleeping bag rating, then air management, then tent choice — most campers start at the wrong end
- Sleeping pad R-value should be R-4 minimum for 3-season camping, R-6+ for sub-freezing nights (REI Expert Advice, 2026)
- The Nalgene trick — boiling water in a wide-mouth bottle placed at your feet — adds hours of radiant warmth at zero cost
- Never use fuel-burning heaters inside a closed tent; carbon monoxide risk is severe and fast-acting — the CPSC links at least 12 camping-related CO deaths to portable heating equipment since 2020
- Dry layers beat warm layers — moisture-wicking merino wool outperforms thick cotton in cold conditions because cotton loses all insulating value when wet
Why Your Tent Feels Like a Freezer
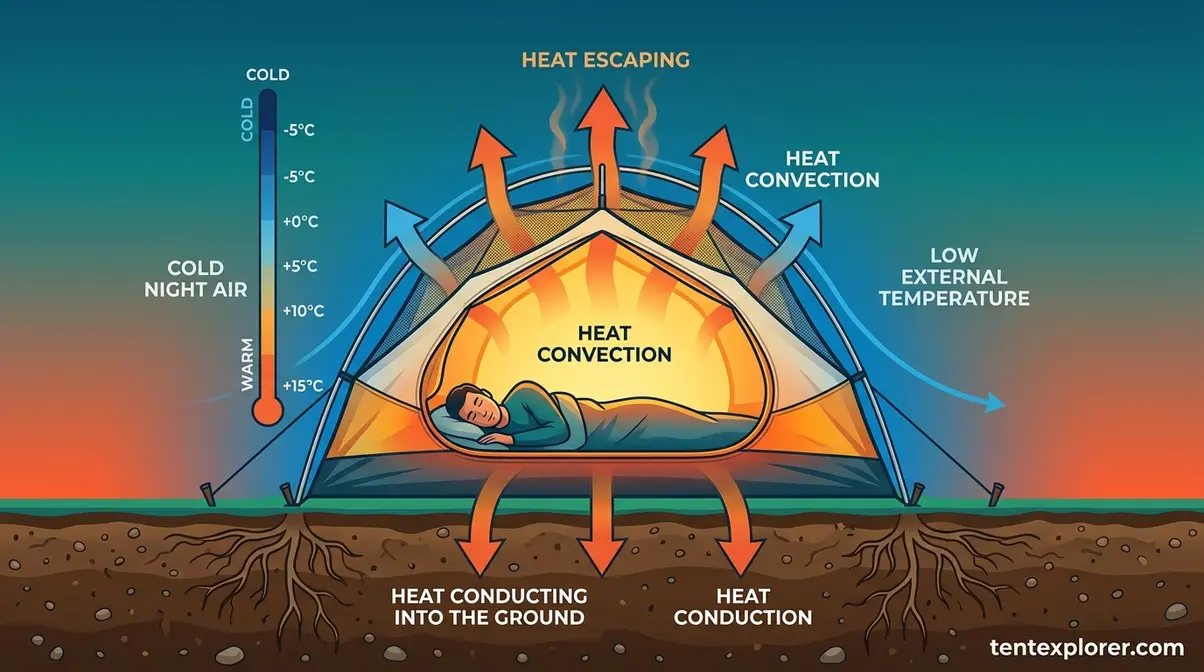
A tent doesn’t generate any warmth. That single fact explains more cold camping nights than any gear deficiency ever could. Understanding how to keep warm in a tent starts with accepting that your body is the only heat source in that shelter — and your job is to stop heat from escaping.
Heat escapes through three pathways: conduction (direct contact with cold surfaces, especially the ground), convection (heat carried away by moving air through drafts and tent vents), and radiation (heat radiating outward from your body). Ground conduction is the fastest and most overlooked of the three — NCBI research on human thermoregulation confirms that maintaining safe core body temperature in cold environments depends on balancing heat generation against heat loss, and cold ground contact accelerates that loss dramatically (NCBI, 2026).
This is why The Warmth Stack starts at the ground, not the sleeping bag.
The gear recommendations in this guide draw on community consensus from Reddit r/camping threads (10,000+ votes across relevant discussions), cross-referenced with laboratory standards from Kansas State University’s Institute for Environmental Research and ISO 23537-1:2022 sleeping bag testing protocols. Safety data comes from the U.S. Consumer Product Safety Commission (CPSC) and Princeton University’s Outdoor Action program.
“You need insulation between you and the air to keep you warm.”
This sounds obvious until you realize most campers act as if the tent itself provides warmth. It doesn’t. A tent is a windbreak and moisture barrier — nothing more. The warmth comes entirely from your body, and how well you trap it determines whether you sleep soundly or shiver until dawn. Read more about how I keep warm in my tent during extreme winter conditions.
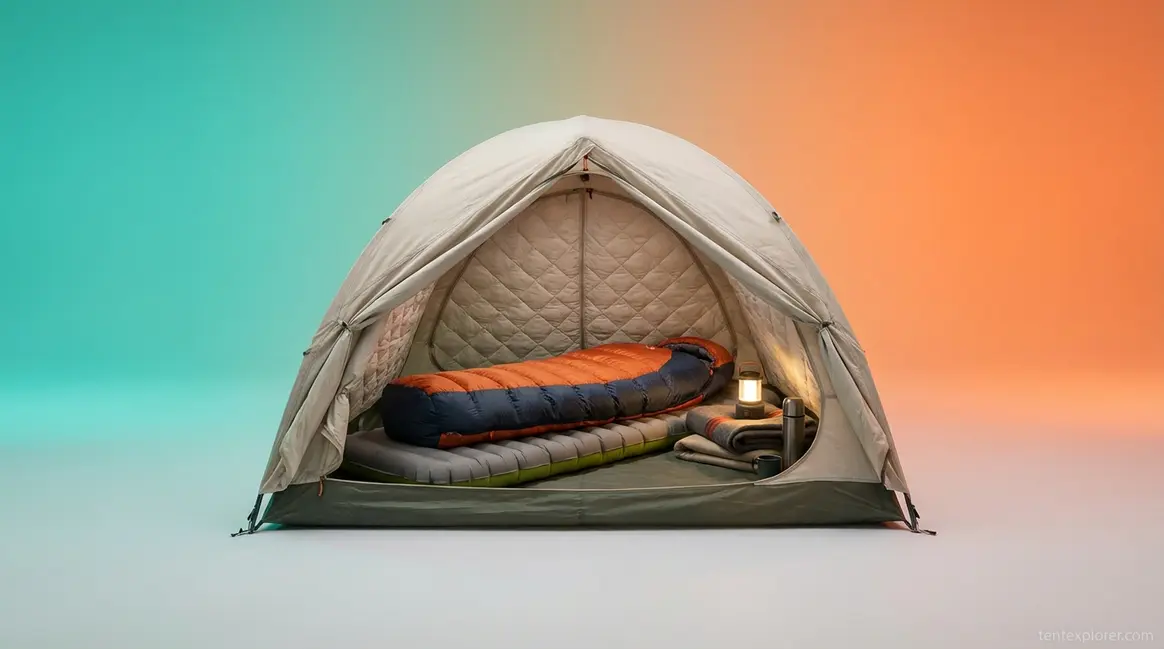
Caption: The Warmth Stack works from the ground up — Layer 1 (sleeping pad) has the highest impact at the lowest cost for cold-weather camping.
The Thermos Effect Explained
The thermos effect describes how a well-insulated system retains heat without generating it — and your tent works exactly the same way. Just as a thermos keeps coffee hot by preventing heat from escaping rather than reheating it, your tent, sleeping bag, and sleeping pad form a chain of insulating layers that slow the rate at which your body heat dissipates into the cold outside world. Remove any link in that chain and the whole system underperforms.
Think about sitting on a cold metal park bench wearing a heavy winter coat versus sitting on a wooden one. The coat is identical. The warmth you feel is not — because the bench material (the ground) drains heat through direct contact far faster than the cold air around you. Your sleeping bag is the coat. Your sleeping pad is the bench. Most people buy a better coat when they need a better bench.
The Warmth Stack organizes this into four actionable layers: Layer 1 is Ground (your sleeping pad stops conduction), Layer 2 is Body (your sleeping bag and clothing stop radiation and convection), Layer 3 is Air (condensation management keeps the tent interior dry and functional), and Layer 4 is Shell (tent choice and site selection reduce wind-driven convection). Most people shop for Layer 4 first — a bigger, more expensive tent. Start with Layer 1. As the diagram above shows, The Warmth Stack works from the ground up, and the cheapest upgrade is almost always at the bottom.
Choosing the Right Pad R-Value
The best way to stay warm in a tent — bar none — is placing adequate insulation between your body and the ground. This is Layer 1 of The Warmth Stack, and it’s where most cold nights are lost or won.
R-value (a measure of a material’s resistance to heat transfer) is the number you need to understand. The higher the R-value, the more heat it keeps between you and the cold ground. According to Kansas State University sleeping bag insulation testing, Kansas State University’s Institute for Environmental Research uses advanced heat loss models to determine comfort ratings across temperature ranges — and their findings reinforce what winter campers learn the hard way: pad insulation is not optional.
Here’s how to match R-value to conditions:
| Temperature Range | Minimum R-Value | Pad Type Recommendation |
|---|---|---|
| Above 35°F (2°C) — Summer | R-1 to R-2 | Basic inflatable or foam |
| 20–35°F (-7 to 2°C) — 3-Season | R-3 to R-4 | Insulated inflatable |
| 0–20°F (-18 to -7°C) — Winter | R-5 to R-6 | High-insulation inflatable |
| Below 0°F (-18°C) — Extreme Winter | R-7+ | Layered (foam + inflatable) |
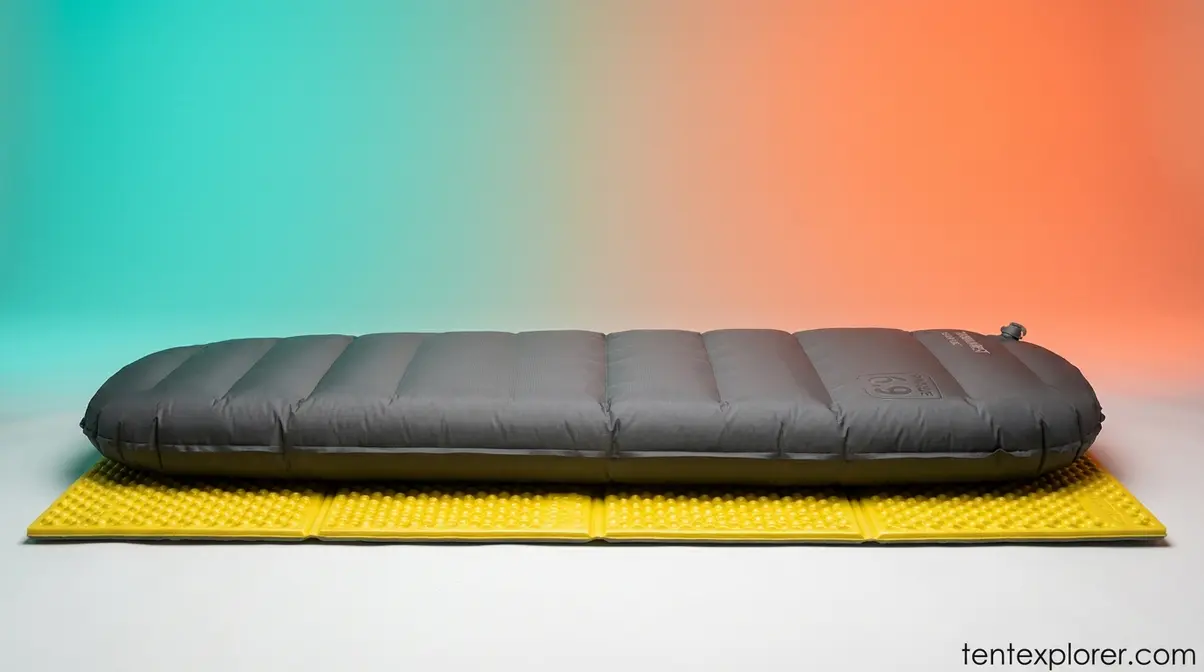
Caption: R-values are additive — layering a closed-cell foam pad under an inflatable is the most cost-effective way to hit R-7+ for extreme winter camping.
Closed-cell foam vs. inflatable: Closed-cell foam pads (like the Therm-a-Rest Z Lite Sol) deliver R-2 to R-3, never lose insulation if punctured, and are practically indestructible. Inflatable pads can reach R-4 to R-7+ but are vulnerable to puncture in rocky or icy terrain. For winter camping, the best practice is to layer both — closed-cell foam underneath, inflatable on top. R-values are additive, so an R-2 foam pad under an R-4 inflatable gives you R-6 total.
The single most common mistake: using a basic air mattress (R-0 to R-1) under an expensive sleeping bag. An uninsulated air mattress places a column of cold, convecting air directly beneath your body. You could own a $600 down sleeping bag and still sleep cold on a $30 air mattress. Fix the foundation first. The ground can drain body heat significantly faster than cold air — making sleeping pad insulation the highest-impact, lowest-cost upgrade for cold-weather camping.
Once your ground game is solid, the next layer of The Warmth Stack is your sleeping bag — and the rating number most campers misread.
Sleeping Bag Comfort vs. Extreme Rating
How to keep warm in a tent in winter often comes down to a single misunderstood number on your sleeping bag’s label. Most campers buy a bag based on its lowest-listed temperature and assume they’ll be comfortable at that temperature. They won’t — and the ISO 23537-1:2022 sleeping bag temperature standard explains exactly why. The ISO 23537-1:2022 standard is the internationally recognized benchmark for scientifically determining sleeping bag thermal performance ratings down to -20°C.
Under ISO 23537-1:2022, every sleeping bag carries three ratings:
- Comfort rating — the temperature at which an average female sleeper is comfortable in a relaxed position
- Lower Limit — the temperature at which an average male sleeper is comfortable in a curled position
- Extreme/Survival rating — the minimum temperature at which a person can survive (not sleep comfortably, survive)
Buying a bag rated “-20°C” and expecting comfort at -20°C is a dangerous misreading. That -20°C number is the survival threshold — you’ll be miserable long before you reach it.
The practical rule: Buy a bag rated 10°F (5–6°C) colder than the coldest temperature you actually expect to encounter. If you’re camping at 25°F, buy a 15°F bag. This gives you a genuine comfort buffer, not just a survival buffer.
Mummy-style sleeping bags (a form-fitting design that minimizes dead air space, with a fitted hood) are dramatically more efficient for cold conditions than rectangular bags. A rectangular bag traps large volumes of unheated air around your legs and torso — your body must warm all of that air before you feel warm. Mummy bags eliminate that wasted energy. Use rectangular bags for summer only. Camping at 30°F with a comfort-rated 30°F bag means you’re at the exact edge of comfort. Add any wind, moisture, or restless movement, and you’re cold. A 20°F bag at 30°F means you’re genuinely warm.
Your pad and sleeping bag form the foundation. Now let’s address what goes inside the bag — because what you wear to bed matters more than most campers realize.
Layering Clothing for Sleep
Never wear cotton to sleep in cold conditions. This is the single most common mistake among beginner and intermediate campers alike. Cotton absorbs moisture — from sweat, breath, and ambient condensation — and loses virtually all insulating value when wet. A damp cotton shirt against your skin actively pulls heat away from your body.
Switch to merino wool (naturally moisture-wicking, odor-resistant, and warm even when slightly damp) or synthetic base layers like polyester fleece. User consensus across r/camping threads consistently highlights this swap as the most impactful free upgrade in cold-weather camping — no gear purchase required.
The correct sleep layering system for cold-weather camping:
- Base layer — thin merino wool or synthetic long johns, top and bottom
- Mid layer — a fleece or lightweight down jacket if temperatures are severe
- Wool socks — hiking-weight wool, not thick ski socks (which restrict circulation and can actually make feet colder)
- Beanie — a wool or fleece hat to bed; up to 30% of body heat escapes through the head, making this one of the highest-impact, zero-cost warmth upgrades available
Critically: do not sleep in the clothes you wore during the day. Daytime clothes are damp from sweat and exertion. Change into fresh, dry base layers before getting into your sleeping bag — this single habit can make a 5–8°F effective difference in perceived warmth.
Finally, avoid over-layering. If you’re genuinely too warm inside your sleeping bag, you’ll sweat, and that moisture will make you cold within an hour. Aim to feel slightly cool when you first zip up — your body will warm the bag within 10–15 minutes. Dry layers beat warm layers every time.
Gear and clothing covered — now for the community tricks that experienced winter campers swear by.
5 Community-Proven Warming Hacks
These field-tested techniques come from user consensus across outdoor communities including Reddit r/camping, Hipcamp, and Backpacker Magazine forums — methods with thousands of upvotes and years of real-world validation behind them.
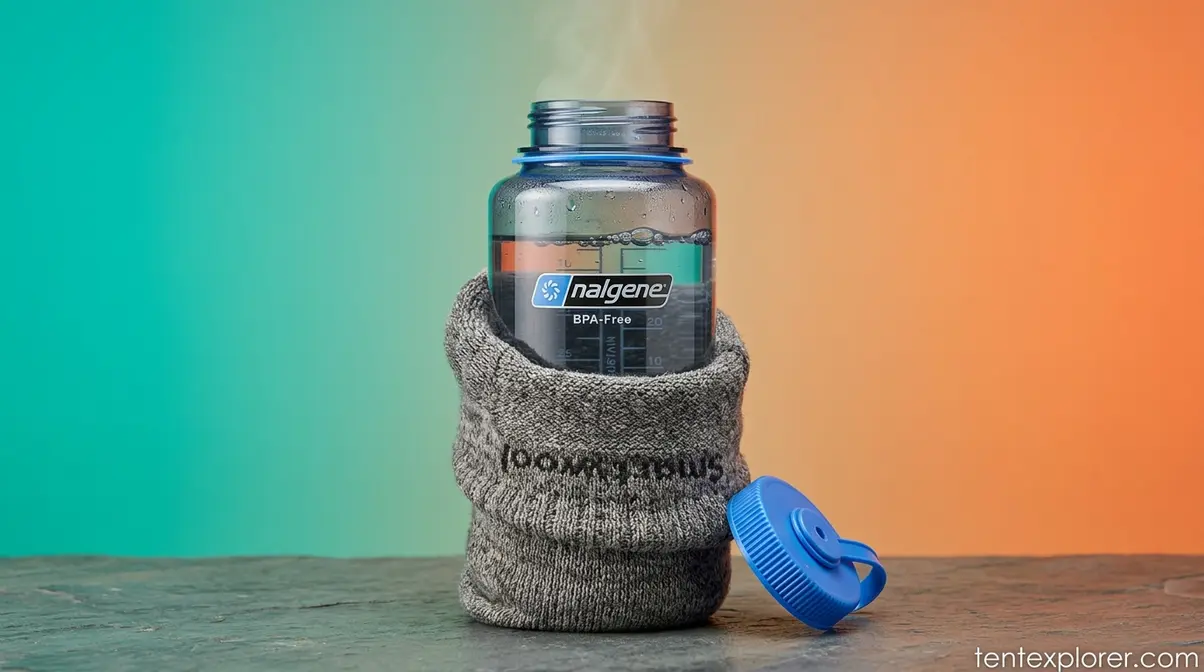
Hack 1 — The Nalgene Hot Water Bottle Trick: Fill a wide-mouth Nalgene bottle (32 oz or 1L) with boiling water. Seal it tightly, then wrap it in a wool sock or fleece layer to prevent direct skin contact and extend heat duration. Place it at your feet inside your sleeping bag before getting in. This provides 4–6 hours of radiant warmth and costs nothing if you already have a camp stove and a Nalgene — which most campers do. The Nalgene trick works because it adds a localized heat source directly into the microclimate of your sleeping bag, warming the dead air space around your feet where cold tends to pool first.
Hack 2 — Eat a High-Calorie Snack Before Bed: Your body generates heat through metabolism. Eating a high-fat, high-protein snack 30–45 minutes before sleep — nuts, cheese, peanut butter, or a full hot meal — gives your metabolism fuel to burn through the night. This is the biological equivalent of adding wood to a fire before you go to sleep.
Hack 3 — Pre-Warm Your Sleeping Bag: Never get into a cold sleeping bag and expect it to warm you quickly — you’re spending your body heat warming the bag, not yourself. Instead, put a heat source inside the bag (the Nalgene trick works perfectly here) 15–20 minutes before you get in. Alternatively, do 20 jumping jacks outside the tent to raise your core temperature before climbing in.
Hack 4 — Layer Underneath, Not Just Over: Most campers focus on what goes on top of their sleeping bag (a blanket, a jacket). The far more effective approach is layering underneath — an extra foam pad, a folded fleece blanket, or even a spare jacket spread beneath your sleeping bag adds significant insulation precisely where you need it most (between you and the ground).
Hack 5 — Keep a Dry Change of Clothes in Your Sleeping Bag: Tuck tomorrow’s base layers inside your sleeping bag at night. They’ll be warm and dry when you wake up, which makes the psychological and physical transition out of the bag far less brutal — and reduces the time you spend exposed to cold air while changing.
Your Before-Bed Routine
The Warmth Stack framework maps directly onto your nighttime routine: Layer 1 (pad) is set up at camp, Layer 2 (bag + clothing) is prepared before you get in, and Layer 3 (air management) is managed throughout the night. Getting the sequence right matters as much as the gear itself.
How cold is too cold for tent camping?
Most healthy adults with appropriate gear can camp safely down to around 0°F (-18°C) (according to Kansas State University testing), though genuine comfort requires expedition-grade equipment below 20°F (-7°C). Understanding these temperature limits is the foundation of safe cold-weather camping. Below your gear’s threshold, the margin for error narrows quickly — a wet sleeping bag, a punctured sleeping pad, or a missed meal can shift a cold night into a dangerous one.
A practical threshold framework:
- Above 40°F (4°C): Minimal risk with basic gear; a 3-season sleeping bag and standard pad are sufficient
- 20–40°F (-7 to 4°C): Shoulder season; requires R-4+ pad, a properly rated sleeping bag, and dry layering discipline
- 0–20°F (-18 to -7°C): Winter camping territory; R-6+ pad, a bag rated for the low end of the range, and active heat management are essential
- Below 0°F (-18°C): Expert-level conditions; requires a layered pad system (R-7+), expedition-grade sleeping bag, and ideally a partner in the same tent for shared warmth
The critical mistake at every threshold: underestimating how quickly conditions can change after dark. Temperatures typically drop 10–15°F between sunset and 3 a.m. — always plan for the coldest point of the night, not the temperature at camp setup.
See our guide on how to improve sleep camping naturally for a complete packing checklist by temperature range.
The Nalgene Hot Water Bottle Trick
The Nalgene trick is the most widely recommended community hack across outdoor forums — and for good reason. It requires no special gear, adds negligible pack weight, and delivers measurable warmth for hours. Here’s the exact process:
- Boil water on your camp stove — full boil, not just hot.
- Fill a wide-mouth Nalgene bottle (32 oz or 1L) to within one inch of the top; never use narrow-mouth bottles, as pressure from hot water can compromise the seal.
- Seal the lid firmly — twist until tight, then check by inverting once over the ground (not over yourself).
- Wrap in a wool sock or fleece buff — this prevents direct skin contact (which can cause low-temperature burns) and extends heat retention by approximately 1–2 hours.
- Place at your feet inside your sleeping bag 15–20 minutes before you get in — this pre-warms the foot box, where cold air pools first.
- Optional: A second bottle placed at your core provides additional warmth on extreme nights.
Important: Only use bottles rated for boiling water — standard Nalgene wide-mouth HDPE bottles are rated for this use. Do not use standard water bottles, hydration bladders, or any bottle with a compromised seal.
Caption: The Nalgene trick works because it introduces a localized heat source into your sleeping bag’s microclimate — pre-warm for 15 minutes before getting in.
For boiling water efficiently at altitude, see our complete guide to the best hot tent for winter camping and stove setups.
Managing Condensation
Condensation is the invisible enemy of tent warmth — and it’s the one topic almost no competitor guide addresses. When warm, moist air from your breath and body contacts the cold tent fabric, it condenses into water droplets. Those droplets drip onto your sleeping bag, slowly saturating the insulation. A wet sleeping bag loses a significant portion of its thermal rating, turning a well-prepared camper into a cold one by 3 a.m.
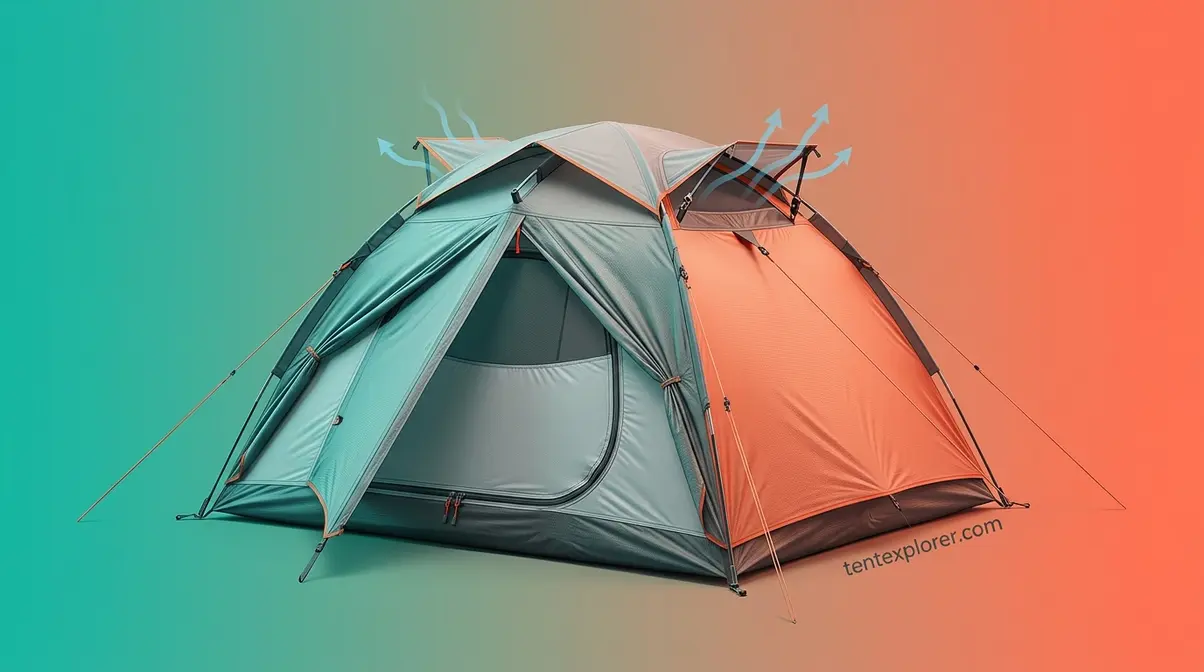
The paradox: the instinct is to close every vent to retain heat. This is the wrong move. Sealed tents trap moisture-laden air, accelerating condensation. The correct approach is controlled ventilation — opening roof vents or the top of the door slightly to allow moist air to escape while maintaining wind protection.
Caption: Strategic ventilation — opening roof vents while keeping lower doors sealed — allows moisture to escape without creating a cold draft at body level.
Practical condensation management steps:
- Open roof vents even in cold weather — allow moist air to exit from the top
- Pitch with the door facing away from prevailing wind — reduces cold air intrusion while maintaining airflow
- Never breathe inside your sleeping bag — exhaled moisture saturates insulation rapidly; pull the drawcord snug around your face but keep your mouth outside the bag
- Shake your sleeping bag out in the morning — redistributes loft and removes condensed moisture before it sets into the insulation
- Wipe tent walls in the morning with a camp cloth — prevents accumulated moisture from dripping onto gear when you pack up
Down sleeping bags lose loft — and therefore warmth — when wet far faster than synthetic bags. If you’re camping in consistently high-humidity or precipitation conditions, a synthetic-fill bag is a more reliable choice despite its weight penalty. Read our tent ventilation guide for camping to master airflow and prevent condensation.
Sleep Habits for Warmer Nights
Beyond gear and preparation, several behavioral habits significantly affect how warm you stay through the night. User consensus across outdoor communities points to these as the most consistently underestimated factors:
Don’t tuck your head inside your sleeping bag. It feels warmer initially, but exhaled breath saturates the insulation around your head and neck with moisture. Instead, pull the hood drawcord snug so only your face is exposed. Wear a beanie for additional head insulation.
Let nature take its course before bed. Getting up at 2 a.m. to use the bathroom exposes you to cold air and interrupts the microclimate you’ve spent hours building inside your sleeping bag. Empty your bladder immediately before getting in — a full bladder also forces your body to expend energy keeping urine warm, which is energy not spent keeping you warm.
Shake your sleeping bag before getting in. Compressed insulation — from being stuffed in a sack all day — doesn’t trap air effectively. Shaking the bag redistributes the fill and restores loft, improving its thermal performance by a meaningful margin.
Stay hydrated. Dehydration reduces your body’s ability to generate and regulate heat. Drink water (not alcohol — alcohol dilates blood vessels and accelerates heat loss) throughout the evening. A warm, non-caffeinated drink like herbal tea 30 minutes before bed both hydrates and adds internal warmth.
How to Stay Warm Without Electricity
Remote camping — away from power hookups, RV parks, and electrical outlets — demands creative solutions. The good news: some of the most effective warming methods cost almost nothing and have been used reliably for generations.
How to stay warm without electricity?
Staying warm camping without electricity relies on passive insulation, safe radiant heat, and metabolic fuel. When campers ask how the Amish keep warm in winter — a question that reflects genuine curiosity about low-tech, off-grid warmth — the answer comes down to mastering these exact principles. Here are the most effective non-electric methods:
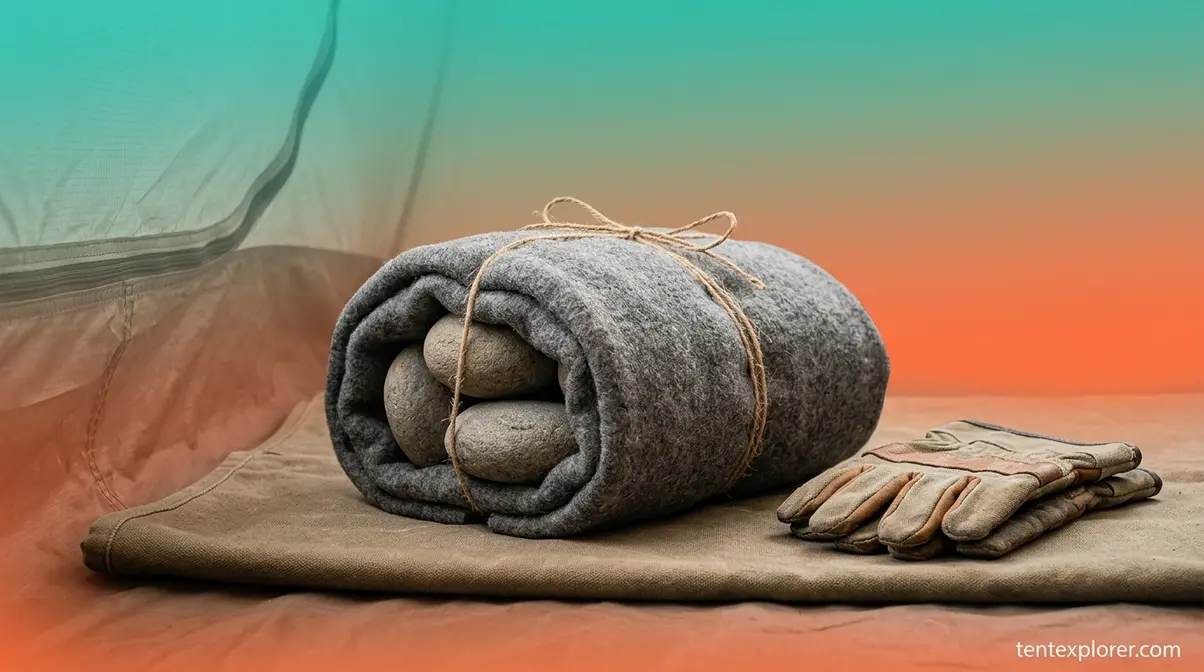
1. Hot Rocks Method: Build a fire well before bedtime. Once you have a strong coal bed, select several medium-sized, dry rocks (never wet or river rocks — trapped moisture can cause them to crack explosively when heated). Warm the rocks near the fire’s edge for 30–45 minutes. Wrap them in a towel or spare clothing and place them at the foot of your sleeping area inside the tent. They release gentle radiant heat for several hours. Never place hot rocks directly on tent floor fabric — always use an insulating layer.
2. Titanium Wood-Burning Stove (Hot Tent Setup): A hot tent is a canvas or heavy-duty nylon tent with a stove jack — a heat-resistant port through which a flue pipe passes. Titanium wood-burning stoves like the Pomoly T-Brick or similar models are designed specifically for this use, venting combustion gases safely outside while providing radiant heat inside. This is the most effective non-electric heating method for extended winter camping. It requires a purpose-built tent and careful fire management, but user consensus across r/camping and bushcraft communities rates it as transformative for shoulder-season and winter trips.
3. Catalytic Propane Heaters (Tent-Safe Models Only): Catalytic heaters like the Mr. Heater Buddy use a catalytic combustion process that produces significantly less carbon monoxide than open-flame propane heaters. However, no fuel-burning device is safe in a fully sealed tent — always crack a vent, use a CO detector, and check that the specific model is rated for indoor/enclosed use. Never use a standard propane burner or camp stove for heating.
4. Hand Warmers and Body Warmers: Chemical hand warmers (air-activated iron oxidation packets) provide 8–12 hours of sustained warmth and weigh almost nothing. Place them in your sleeping bag’s foot box, inside gloves, or against your core under a mid layer. They’re an excellent supplement to a sleeping bag that’s slightly under-rated for conditions.
5. Vapor Barrier Liners (VBL): Used by mountaineers in extreme conditions, a vapor barrier liner is a thin waterproof layer worn next to the skin or placed inside the sleeping bag. It prevents moisture from escaping your body into the sleeping bag insulation, keeping the insulation dry and at full loft. This is an advanced technique — it feels unusual at first — but it’s highly effective for multi-day winter trips where drying gear is impossible.
6. Eat a High-Fat Meal at Camp: Caloric intake is a non-electric heating method that most campers overlook. Fats provide approximately 9 calories per gram — more than double carbohydrates or protein. A high-fat dinner (nuts, olive oil, cheese, fatty meats) provides sustained metabolic heat generation through the night. This is the biological equivalent of adding a slow-burning log to your internal fire.
Chemical Warmers and Mylar Blankets
Mylar emergency blankets reflect approximately 90% of radiant body heat back toward you — making them one of the most effective, lightest, and cheapest thermal tools available. A single Mylar blanket weighs about 1.5 oz and costs under $2. Use it as a sleeping bag liner on cold nights, or line the interior walls of your tent to reflect body heat back into the living space.
For emergency situations, Mylar blankets are essential. According to Backpacker Magazine’s winter warmth guide, the combination of a Mylar liner and a properly rated sleeping bag can extend a bag’s effective temperature rating by several degrees — a meaningful margin when conditions deteriorate unexpectedly.
Chemical toe warmers and body warmers are air-activated and use an exothermic iron oxidation reaction. Key points:
- Activation time: 15–20 minutes to reach full heat
- Duration: 8–12 hours for standard models, up to 24 hours for long-duration variants
- Placement: Foot box of sleeping bag, against the torso under a base layer, or inside mittens
- Storage: Keep in original sealed packaging until use — exposure to air before activation depletes the chemical reaction
Do not place activated chemical warmers directly against bare skin — they can cause contact burns, particularly during sleep when you can’t monitor sensation. Always place between a clothing layer and skin.
Keeping Kids Warm and Heating Party Tents
Standard warmth advice needs adjustment for two scenarios where the stakes and logistics are meaningfully different: camping with children, and heating large event or party tents.
Keeping Kids Warm and Safe in a Tent
Children lose body heat faster than adults — they have a higher surface-area-to-mass ratio, less metabolic reserve, and less capacity to recognize and communicate that they’re cold. This makes child-specific warmth protocols essential, not optional.
Sleeping bag sizing matters critically. A sleeping bag that’s too large for a child creates excessive dead air space that their small body cannot warm — the bag actually makes them colder. Use youth-specific sleeping bags sized for your child’s height, and look for bags with a comfort rating at least 10°F below the expected overnight low.
No loose blankets for young children. Loose blankets in a tent create entanglement and suffocation risks, particularly for children under three. Use a properly sized sleeping bag with a fitted hood instead. For toddlers, wearable sleep sacks with a temperature rating appropriate for conditions are the safest option.
Layer the same way you would for adults — but size everything correctly. Merino wool or synthetic base layers, wool socks, and a fitted beanie. Check in on children during the night — they may not wake themselves up when cold, or may not be able to articulate that they’re uncomfortable.
Positioning in the tent: Place children in the center of the tent, away from the walls. Tent walls are the coldest surfaces inside the shelter — direct contact with them accelerates heat loss. An adult sleeping on each side of a child creates a warm, protected microclimate. The Florida Sheriffs Association’s family camping safety guidelines (2026) recommend planning for an adult to sleep near the tent entrance while keeping children positioned toward the center.
Hot water bottles for kids: The Nalgene trick works well for children, but use a lower water temperature (hot, not boiling) and wrap more thoroughly to prevent any risk of contact burns. Check the bottle’s temperature before placing it near a child.
How to Heat a Party Tent in Winter
Party tents and event canopies present a fundamentally different challenge: large volumes of air, minimal insulation, and often a hard or ground-level floor. The approach shifts from personal insulation to structural heat management.
Sidewalls are non-negotiable. An open-sided party tent in winter is essentially a wind tunnel. Full sidewalls — preferably with a second layer for air-gap insulation — are the starting point for any winter event tent setup.
Industrial propane forced-air heaters (like those from Mr. Heater or Dyna-Glo) are the standard for heating large party tents. Size the heater to the tent volume: a rough guideline is 1,000 BTU per 50 cubic feet of tent space. For a 20×20 tent (8-foot ceiling = 3,200 cubic feet), you need approximately 64,000 BTU. Always position heaters near entrances with venting, never in the center of the tent, and maintain CO detection.
Flooring insulation matters as much as air heating. Bare ground in a winter party tent will make guests cold regardless of how hard the heaters work — cold ground radiates upward and chills feet and ankles. Use interlocking foam floor tiles, carpet over a vapor barrier, or temporary raised flooring systems.
Tent liners and ceiling baffles trap heated air near occupant level rather than letting it rise to the peak. A simple inner liner hung from the tent frame at 7–8 feet creates a lower ceiling that retains heat far more efficiently. For specific recommendations, read our reviews of the 10 best outdoor tents for a party.
Bonus: How to Keep a Tent Cool
Cold-weather camping gets most of the attention, but the physics of tent temperature management applies in both directions. Understanding how to keep a tent cool in summer uses the same framework — you’re just managing heat escape rather than heat retention.
Cross-Ventilation and Airflow
Cross-ventilation is the most effective passive cooling technique for tents. It works by creating airflow through the tent that carries heat away from the interior — the same convection principle that makes cold tents colder also makes hot tents cooler when directed correctly.
To maximize cross-ventilation:
- Position tent doors facing the prevailing breeze — even a light wind creates meaningful airflow through opposing vents
- Remove the rainfly on clear, warm nights — most tent bodies are mesh or thin nylon that allows air to move freely; the rainfly blocks this entirely
- Open all vents and doors — cross-ventilation requires air to enter and exit from opposite sides of the tent
- Elevate your sleeping pad slightly — hot air pools at ground level in summer; a cot or raised sleeping surface keeps you in the cooler air layer a few inches above the floor
- Avoid zipping the tent body during the hottest afternoon hours — let the tent breathe before you need to sleep in it
Timing matters: Set up your tent in a shaded location in the afternoon to prevent solar heat gain during the hottest part of the day. A tent left in direct afternoon sun can reach 130°F+ inside — even a brief shade period reduces this dramatically.
Shade, Tarps, and Tent Placement
Site selection for summer camping follows the same strategic logic as winter camping — the environment around your tent affects its interior temperature as much as the tent itself.
Pitch in natural shade when possible — under a tree canopy, on the east side of a ridge (morning sun, afternoon shade), or near a north-facing slope. Shade reduces solar heat gain by 30–50% compared to direct sun exposure, according to Sea to Summit’s cold-weather camping guide.
Reflective tarps suspended above the tent (not touching the tent surface) block direct UV radiation before it reaches the tent fabric. The air gap between the tarp and tent surface creates a convective buffer that dissipates heat. Use a silver-side-up emergency tarp or a purpose-built reflective shade tarp — these can reduce interior tent temperature by 15–20°F on a clear summer afternoon.
Water proximity provides natural cooling — campsites near lakes, rivers, or streams benefit from evaporative cooling in the ambient air. However, remember the 200-foot rule (discussed in the Safety section below) — camp at least 200 feet from any water source for both ethical and practical reasons. Check out our top picks for the best tent for hot weather camping.
Safety First: CO and Hypothermia Rules
This is the section most guides skip or minimize. Common pain points reported by winter campers — beyond being cold — include dangerous shortcuts taken in desperation: bringing a propane stove inside to warm up, or dismissing shivering as normal. These decisions cost lives every year.
Carbon Monoxide Risks Inside Tents
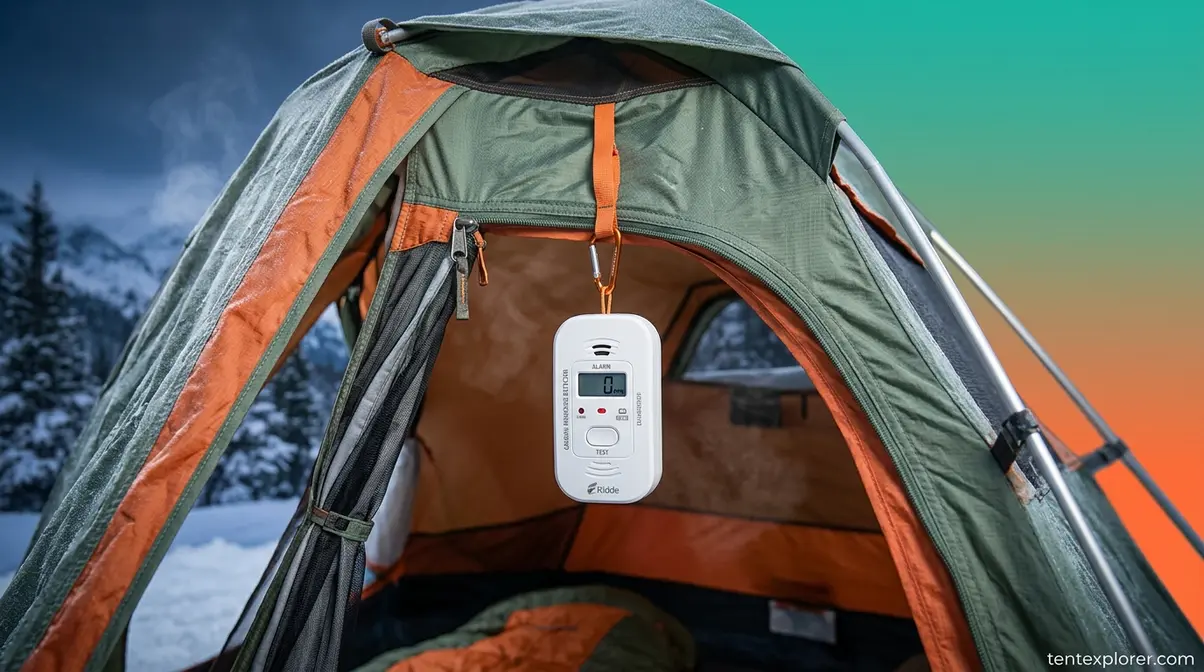
Never use any fuel-burning device inside a closed or poorly ventilated tent. This includes propane heaters, camp stoves, gas lanterns, charcoal grills, and wood fires. The risk is not fire (though that’s real) — the primary risk is carbon monoxide (CO) poisoning, which is odorless, colorless, and fast-acting.
The CPSC Safety Alert on camping equipment portable heaters documents at least 12 deaths linked to camping equipment — including portable heaters, grills, and lanterns — since 2020 (CPSC, 2026). The American Alpine Institute estimates approximately 30 deaths per year in the U.S. from CO inhalation in tents or campers. These are preventable deaths, almost universally caused by bringing heat sources indoors.
CO poisoning symptoms begin with headache, dizziness, and nausea — symptoms easily confused with fatigue or altitude sickness. Unconsciousness and death can follow within minutes in an enclosed space. You cannot smell, see, or taste CO.
- Mandatory safety protocols:
- Install a battery-powered CO detector in your tent if using any catalytic or combustion heat source nearby
- Never run a generator, vehicle engine, or camp stove within 20 feet of a tent opening
- If using a catalytic heater rated for enclosed spaces, crack a vent and monitor continuously
- If anyone in your group shows symptoms of CO poisoning (sudden headache, dizziness, confusion), exit the tent immediately and call emergency services
This is not medical advice. Consult emergency services immediately if you suspect CO poisoning.
Recognizing Hypothermia Early
Hypothermia occurs when your core body temperature drops below 95°F (35°C) — and it can happen faster than most campers expect, even in temperatures well above freezing when combined with wind and wet conditions.
According to the Mayo Clinic’s hypothermia diagnosis and treatment guidance (updated 2026), early recognition is the most critical factor in preventing a cold night from becoming a medical emergency.
- Early warning signs (mild hypothermia):
- Persistent, uncontrollable shivering
- Clumsiness, fumbling hands, slurred speech
- Confusion or difficulty making decisions
- Unusual fatigue disproportionate to exertion
- Severe hypothermia warning signs:
- Shivering stops (this is not improvement — it means the body has lost the ability to generate heat)
- Slow, shallow breathing
- Weak or irregular pulse
- Loss of consciousness
- Immediate first-aid response:
- Move the person to a warm, dry location or shield from wind
- Remove wet clothing carefully — avoid rough movements that can trigger cardiac complications
- Cover with dry blankets, including the head (leaving the face clear)
- Apply warm compresses to the neck, chest, or groin only — never to extremities
- If conscious and able to swallow, offer warm, sweet, non-alcoholic fluids
- Call emergency services immediately for moderate to severe cases
Common mistake: Giving alcohol to a cold person. Alcohol dilates blood vessels and accelerates core heat loss — it makes hypothermia significantly worse despite the initial sensation of warmth.
This is not medical advice. If you or a camping partner shows symptoms of hypothermia, seek emergency medical assistance immediately. Consult a physician if symptoms of hypothermia develop.
The CDC’s documentation on carbon monoxide poisoning deaths associated with camping and Princeton University’s Outdoor Action hypothermia prevention program both emphasize that the most dangerous phase of cold-weather emergencies is the period when symptoms are subtle — when they can still be dismissed as tiredness or mild discomfort.
The 200 Rule for Site Selection
The 200 Rule is a Leave No Trace principle requiring campers to pitch their tent at least 200 feet — approximately 70–80 adult steps — from any lake, stream, or other water source (Leave No Trace Center for Outdoor Ethics, 2026). This distance protects riparian ecosystems, preserves wildlife access corridors, and reduces contamination of water sources from human activity.
For winter campers, the 200 Rule has an additional practical benefit: proximity to water dramatically increases ambient humidity, which accelerates condensation inside your tent and increases the rate of moisture absorption in your sleeping bag and insulation. Camping 200+ feet from water means drier air, better insulation performance, and a warmer night’s sleep.
- Site selection checklist for warmth and safety:
- 200+ feet from any water source
- Sheltered from prevailing wind (behind a ridgeline, in a tree cluster) — but not directly under dead branches
- On elevated, well-drained ground — cold air is denser and sinks into low-lying areas, making depressions and valley floors significantly colder than slopes
- Away from avalanche zones in mountain terrain — steep, treeless slopes above your camp are a warning sign in winter
- Clear of widow-makers (dead overhead branches that can fall under snow load)
Frequently Asked Questions
How do you keep yourself warm in a tent?
Keeping yourself warm in a tent starts with insulation between your body and the ground, not the sleeping bag. Use a sleeping pad with an R-value appropriate for your conditions (R-4 minimum for 3-season, R-6+ for winter). Layer moisture-wicking base layers (merino wool or synthetic), wear a beanie to bed, and use the Nalgene hot water bottle trick for additional warmth. User consensus across r/camping consistently identifies the sleeping pad upgrade as the single most impactful change most cold campers can make.
How do you avoid freezing in a tent?
Avoiding freezing in a tent requires addressing all four layers of The Warmth Stack: a high R-value sleeping pad (Layer 1), a properly rated sleeping bag and dry clothing (Layer 2), controlled ventilation to prevent moisture buildup (Layer 3), and a well-sited tent sheltered from wind (Layer 4). The most common reason campers freeze is an underinsulated sleeping pad — a basic air mattress (R-0 to R-1) under a high-end sleeping bag is a losing combination. Fix the ground layer first. Add the Nalgene trick, eat a high-calorie meal before bed, and change into dry base layers before sleeping.
How do you not be cold in a tent?
Not being cold in a tent is primarily a preparation problem, not a gear budget problem. The most frequent mistake is sleeping in damp or cotton clothing, on an underinsulated sleeping pad, without pre-warming the sleeping bag. Change into fresh, dry merino wool or synthetic base layers before bed. Shake your sleeping bag to restore loft. Use the Nalgene trick to pre-warm the foot box. Open roof vents slightly to prevent condensation from saturating your insulation. Each of these steps costs nothing — and together they address the most common causes of cold nights before you spend a dollar on new gear.
The Warmth Stack Delivers
For intermediate campers frustrated by cold nights, tent warmth is a solvable problem — and the solution is almost always cheaper and simpler than you expect. The Warmth Stack framework makes the priority order clear: fix the ground first (sleeping pad R-value), then the body system (sleeping bag rating and dry layering), then the air (condensation management and ventilation), then the shell (tent choice and site selection). Research from Princeton University’s Outdoor Action program and NCBI thermoregulation studies confirms that ground conduction is the fastest pathway of heat loss — making the sleeping pad the highest-impact, lowest-cost upgrade available to most cold campers.
The Warmth Stack isn’t just a framework for gear selection — it’s a diagnostic tool. When you wake up cold, it tells you exactly where to look. Cold from the bottom up? Layer 1 problem — your pad R-value is insufficient. Cold all over despite a good pad? Layer 2 — check your bag rating and whether you’re sleeping in damp clothing. Waking up wet? Layer 3 — condensation management. Buffeted by wind all night? Layer 4 — site selection and tent placement.
Start with one change tonight: check your sleeping pad’s R-value against the temperature you’re camping in. If it falls short, add a closed-cell foam pad underneath your current setup before your next trip — it costs under $40 and stacks directly with whatever you already own. Then work through the Nalgene trick, the dry-layer swap, and the ventilation adjustments. You don’t need to rebuild your kit from scratch. You need to address the right layer, in the right order.
