How to Stay Warm Camping: The Thermal Stack System Guide
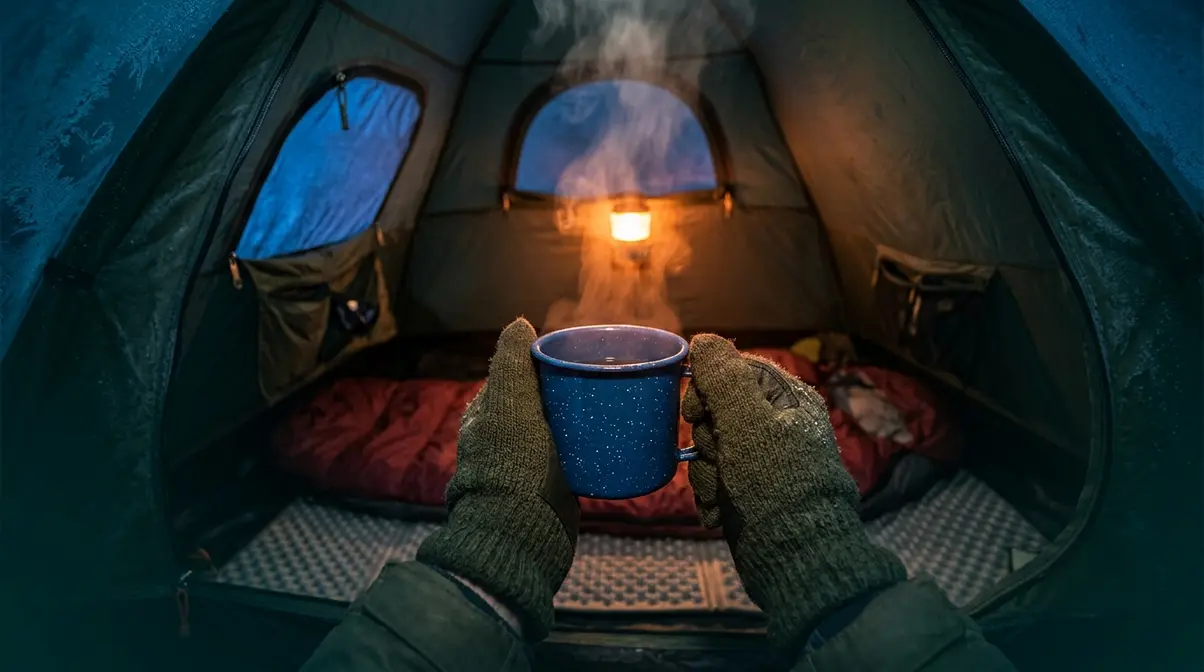
You’ve done everything “right.” You bought a decent sleeping bag, you wore socks to bed, and you even remembered to bring an extra blanket — yet you still woke up shivering at 2 a.m., staring at the roof of your tent, wondering what went wrong. Knowing how to stay warm camping isn’t about any single piece of gear. It’s about understanding how your body loses heat and building a system that stops each pathway simultaneously.
“How does everyone stay warm in tents??? I have a great sleeping bag but still is cold. My air mattress deflates too.”
— Frustrated camper, Reddit r/camping
This question echoes across every camping forum online because the advice most articles give — “just layer up” — is incomplete. Your sleeping bag isn’t failing you. Your air mattress deflating is draining your warmth from below. Your base layer is trapping moisture against your skin. Each problem is fixable, and this guide shows you exactly how.
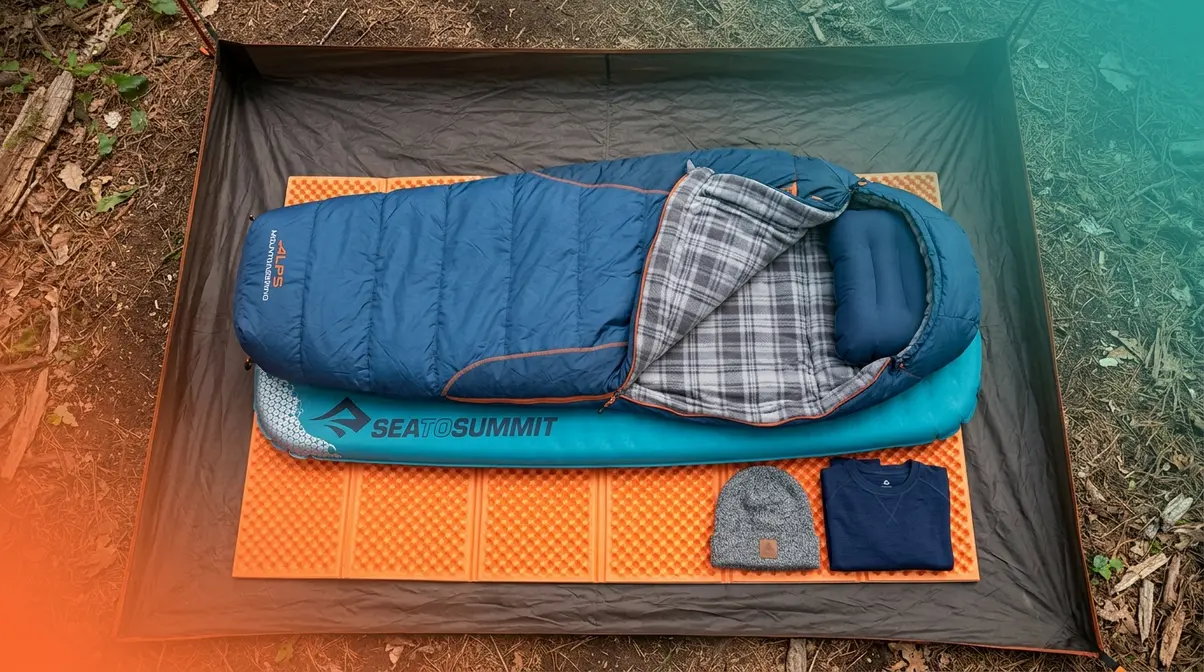
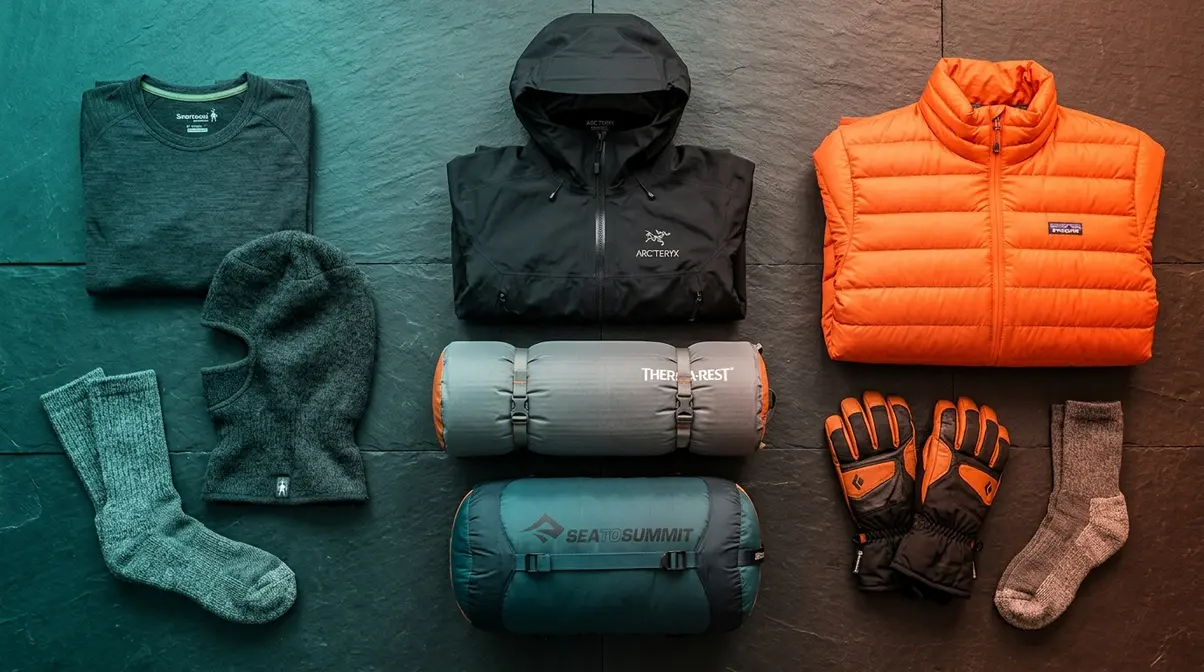
What You’ll Need: A sleeping bag rated for your conditions, a sleeping pad (foam or inflatable), moisture-wicking base layers, a mid-layer fleece or down jacket, a wind-blocking shell, and a reliable thermometer to check overnight forecasts.

Last update on 2026-06-15 / Affiliate links / Images from Amazon Product Advertising API
No products found.

Last update on 2026-06-20 / Affiliate links / Images from Amazon Product Advertising API

Last update on 2026-07-01 / Affiliate links / Images from Amazon Product Advertising API

Last update on 2026-06-20 / Affiliate links / Images from Amazon Product Advertising API

Last update on 2026-06-20 / Affiliate links / Images from Amazon Product Advertising API

Last update on 2026-06-20 / Affiliate links / Images from Amazon Product Advertising API

Last update on 2026-06-20 / Affiliate links / Images from Amazon Product Advertising API
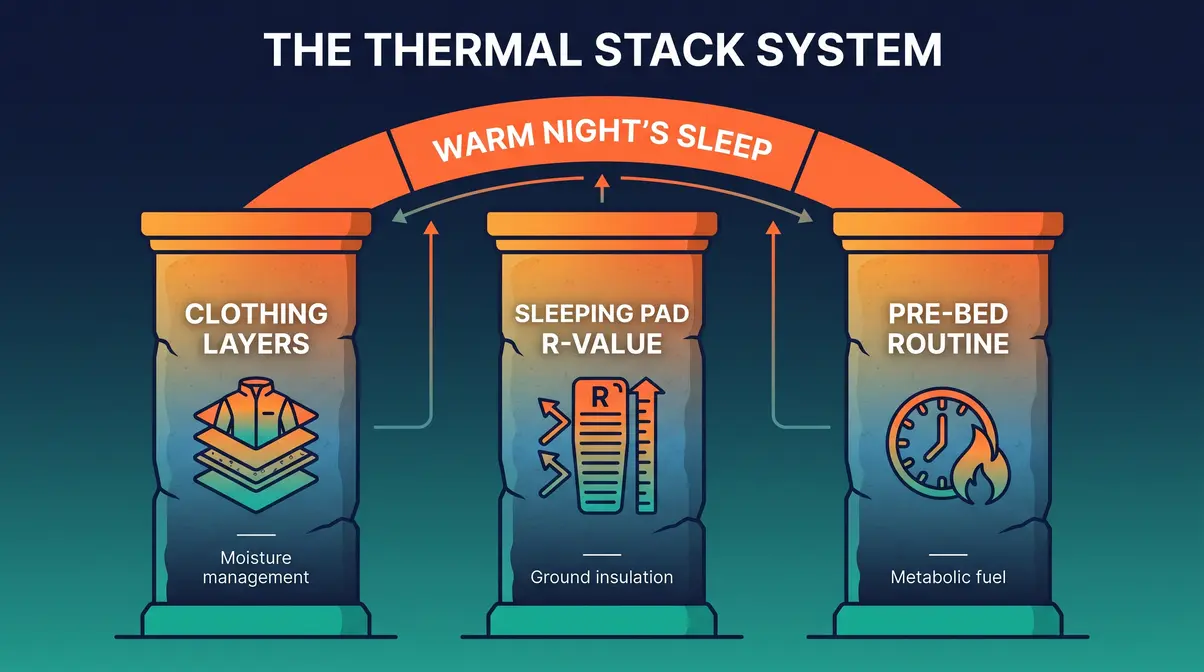
Staying warm camping requires The Thermal Stack System — integrating your clothing layers, sleeping pad R-value, and pre-bed routine into one coordinated approach, not isolated tips.
- Ground insulation first: Up to 80% of heat loss in a tent occurs through conduction into the ground — your sleeping pad matters more than your sleeping bag in many conditions.
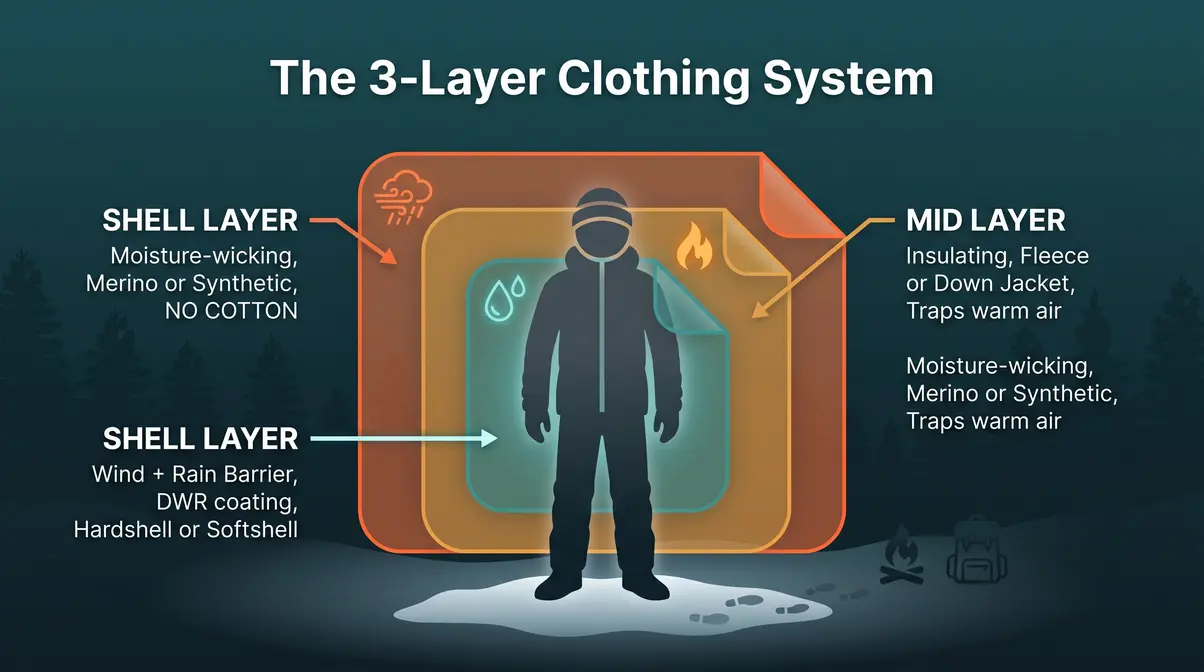
- Layer with purpose: A 3-layer clothing system (moisture-wicking base, insulating mid, wind-blocking shell) traps heat and manages sweat simultaneously.
- Pre-bed nutrition works: Eating a small high-fat snack 30 minutes before sleep gives your body fuel to generate heat through the night.
Why You’re Still Cold: The Science of Heat Loss
Most campers focus entirely on their sleeping bag rating and wonder why they’re still cold. The honest answer: your body loses heat through four distinct pathways, and a sleeping bag only addresses one of them. Understanding these pathways is the foundation of staying warm while camping — and the reason a systems-based approach outperforms any single gear upgrade.
Our editorial team cross-referenced guidance from Princeton University’s Outdoor Action program, the National Outdoor Leadership School (NOLS), the CDC, and the National Park Service to verify each mechanism described below. What follows isn’t theory — it’s the consensus of wilderness medicine professionals.
Why Campers Get Cold: The 4 Types of Heat Loss
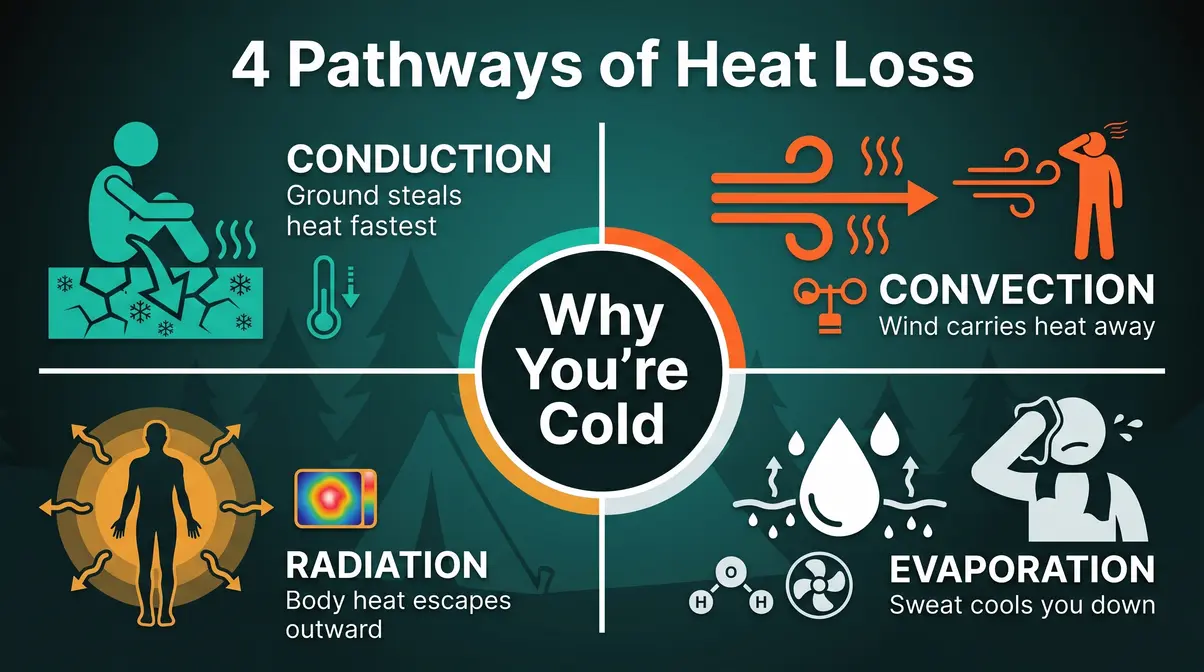
Your body loses warmth through four simultaneous processes. Addressing only one — which is what most gear purchases do — leaves the other three unchecked.
- Conduction — Direct heat transfer from your warm body into a cold surface. When you lie on the ground, cold earth pulls heat away from you at a rate far faster than cold air does. This is why your air mattress deflating is so catastrophic: you lose your insulating air buffer and press directly against the cold ground.
- Convection — Heat carried away by moving air or water. Wind cutting through a tent’s ventilation panels, or cold air pooling around an improperly zipped sleeping bag, accelerates convective loss significantly. The CDC notes that wind chill can make a 40°F night feel closer to 25°F in terms of actual heat drain.
- Radiation — Your body continuously radiates infrared heat outward. In a tent with no reflective barrier, that heat escapes into the cold air around you. A sleeping bag’s insulation slows this process; a reflective emergency blanket can reduce radiant loss by up to 90% in emergency scenarios (American Red Cross, 2024).
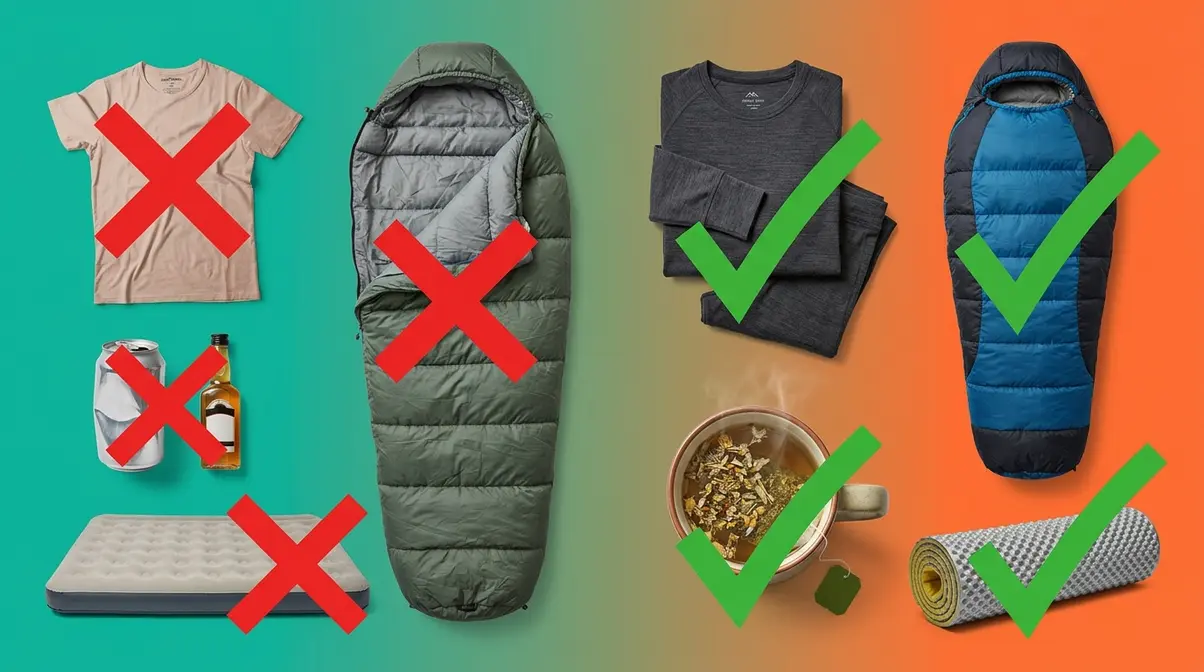
- Evaporation — Sweat evaporating from your skin draws heat away rapidly. This is the sneaky one: you feel warm when you get into your bag, sweat slightly, and then that moisture cools you down for the rest of the night. Cotton base layers are particularly guilty here — they absorb sweat and stay wet against your skin.
Quotable: The ground steals more of your body heat than cold air does — which means a $30 foam pad can outperform a $400 sleeping bag upgrade in below-freezing conditions.
The Thermal Stack System: Your Complete Warmth Framework
The Thermal Stack System is the principle that your clothing layers, sleeping pad insulation, and pre-bed routine function as a single integrated warmth engine — not a checklist of independent tips. When all three components are calibrated together, they create compounding warmth; when any one component fails, the others can’t fully compensate.
Think of it like a three-legged stool. A $600 down sleeping bag can’t save you from a deflated air mattress (conduction failure). A high R-value pad can’t help if your base layer is soaked with sweat (evaporation failure). The Thermal Stack System treats these as interdependent variables, not separate purchases.
Experienced cold-weather campers consistently report that switching from an isolated gear-upgrade mindset to a systems approach eliminates the “cold spot” problem — the one area (usually the back, hips, or feet) that no single piece of gear seemed to fix.
According to Princeton University’s Outdoor Action program, hypothermia can begin at temperatures as high as 50°F when a person is wet, tired, or underfueled — reinforcing why nutrition and moisture management are inseparable parts of any warmth system.
The 3-Layer Rule: Base, Mid, and Shell Explained
The 3-layer system is the most efficient clothing architecture for cold-weather camping. Each layer performs a specific function, and removing any one layer breaks the system.
Layer 1 — Base Layer (Moisture Management):
Your base layer’s only job is to move sweat away from your skin. Merino wool and synthetic polyester are the two reliable options. Merino wool (100–200 gsm weight for camping) regulates temperature naturally and resists odor — useful on multi-day trips. Synthetic fabrics like polyester fleece dry faster after heavy exertion. Cotton is banned from this layer: it absorbs moisture, loses all insulating value when wet, and has contributed to hypothermia cases documented by NOLS instructors.
Layer 2 — Mid Layer (Heat Retention):
Your mid layer traps warm air close to your body. A 100-weight fleece jacket works well down to about 40°F. Below that, a down or synthetic insulated jacket (look for 600–800 fill power for the best warmth-to-weight ratio) provides significantly more thermal retention per ounce. Down compresses better for packing; synthetic insulation retains warmth even when damp — an important consideration in humid or rainy conditions.
Layer 3 — Shell Layer (Wind and Moisture Barrier):
Your shell blocks wind (convective loss) and precipitation. A hardshell with a DWR (durable water repellent) coating handles rain and snow. A softshell is sufficient for dry, windy conditions and offers better breathability. The shell should never be your only layer — it doesn’t insulate on its own.
What Temperature Is Too Cold for Camping?
There’s no universal “too cold” threshold — it depends on your gear, experience, and health. However, evidence-based guidelines give useful benchmarks.
- Above 40°F: Comfortable with a 3-season sleeping bag (rated to 20–35°F) and standard layers. Most beginner-to-intermediate campers camp safely in this range.
- 30°F–40°F: Requires deliberate attention to all three Thermal Stack pillars. A sleeping pad with R-value of at least 2.0 is necessary. A 20°F-rated sleeping bag provides appropriate margin.
- 20°F–30°F: Cold-weather camping requiring a sleeping pad R-value of 4.0+, a sleeping bag rated to 0°F or below, and a complete 3-layer clothing system. NOLS recommends a buddy system and regular overnight temperature checks in this range.
- Below 20°F: Winter camping territory. Requires expedition-grade gear and prior cold-weather training. The National Park Service advises campers to take a wilderness first aid course before camping solo below 20°F.
According to the CDC, hypothermia can occur at temperatures well above freezing — particularly when a person is wet, exhausted, or has consumed alcohol (CDC, 2024). If you hate the cold and your forecast dips below 30°F unexpectedly, retreating to your vehicle or a shelter is always the right call.
How to Stay Warm in a Tent at Night
Staying warm in a tent at night is primarily a ground insulation and moisture management problem — not a sleeping bag problem. This surprises most campers, who immediately shop for a warmer bag when they should be shopping for a better pad. The steps below address the complete overnight warmth system, starting from the most impactful intervention first.
Start from the Ground Up: Sleeping Pad R-Value Explained
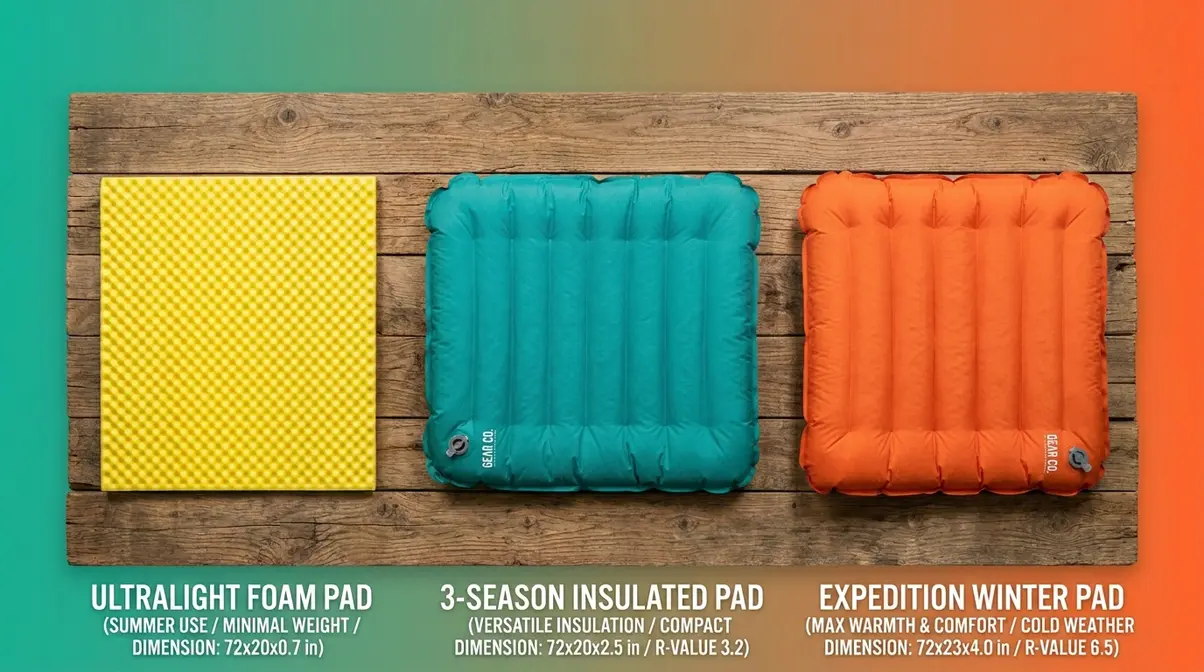
R-value (thermal resistance value) measures how effectively a sleeping pad blocks heat transfer from your body to the ground. Since 2020, all sleeping pads sold in the U.S. must be tested using the standardized ASTM F3340-18 protocol, making R-values directly comparable across brands.
| R-Value | Suitable Temperature | Pad Type Examples |
|---|---|---|
| R-1 to R-2 | Above 40°F (summer) | Ultralight foam, basic inflatables |
| R-2 to R-4 | 30°F–40°F (3-season) | Mid-weight foam, insulated inflatables |
| R-4 to R-6 | 20°F–30°F (cold weather) | High-loft foam, premium insulated pads |
| R-6+ | Below 20°F (winter) | Stacked pads, expedition-grade inflatables |
Source: ASTM F3340-18 standard; REI sleeping pad guide, 2025.
The stacking trick: You can combine two pads to add their R-values. A foam pad (R-2) under an inflatable pad (R-3.5) gives you a combined R-5.5 — enough for cold-weather camping — at a fraction of the cost of a single expedition pad. Experienced cold-weather campers consistently report this as one of the highest-impact, lowest-cost warmth upgrades available.
If your air mattress keeps deflating mid-trip, it’s not just a comfort issue — it’s a heat-loss emergency. Every hour you sleep on a deflated pad, you’re losing body heat directly into the ground. Carry a lightweight foam pad as a backup; it weighs almost nothing and can save your night.
How to Keep Your Tent Warm Without Electricity
Keeping your tent warm overnight without a heater (which poses carbon monoxide risks and is banned in most campgrounds) relies on four passive strategies that work together.
Step 1: Choose your campsite deliberately.
Avoid valley floors and open clearings — cold air pools in low-lying areas and wind exposure accelerates convective heat loss. Look for natural windbreaks: dense tree lines, rock formations, or gentle hillside slopes that block prevailing winds. The National Park Service advises camping on slightly elevated ground when possible to avoid cold air drainage.
Step 2: Insulate your tent floor.
Lay down a foam pad, a folded tarp, or a dedicated tent footprint before your sleeping setup. Even a single layer of foam between the tent floor and your sleeping pad meaningfully reduces conductive loss.
Step 3: Reduce dead air space inside your sleeping bag.
A sleeping bag traps your body heat in the air surrounding you. If your bag is oversized, you’re heating too much air. Fill the gap: wear a hat and socks to sleep, use a sleeping bag liner (silk or fleece adds 5–15°F of warmth according to Sea to Summit’s internal testing, 2024), or stuff a soft jacket into the foot box.
Step 4: Vent strategically.
Counterintuitively, cracking a tent vent slightly reduces condensation buildup — which matters because wet insulation loses 50–90% of its thermal value (Backpacker Magazine, 2023). A small vent opening lets moisture escape without significantly increasing cold air infiltration.
Managing Condensation So Your Gear Stays Dry
Condensation is one of the most overlooked warmth destroyers. When warm, moist air from your breath meets the cold inner surface of your tent, water droplets form — and if they drip onto your sleeping bag, your insulation loses its ability to trap heat.
Three rules for condensation management:
- Never close all vents. Even in very cold weather, keep at least one vent partially open. The goal is airflow, not warmth retention — warmth comes from your sleeping system, not a sealed tent.
- Don’t breathe inside your sleeping bag. Your breath carries enormous amounts of moisture. Tuck a balaclava or neck gaiter around your face instead of pulling the bag over your head — this keeps your face warm while directing exhaled moisture away from your insulation.
- Shake out and air your bag each morning. Even a 20-minute exposure to dry air on a sunny morning removes accumulated moisture from your bag’s insulation. Experienced campers report this habit alone extends the effective warmth of a sleeping bag significantly over a multi-day trip.
Temperature-Specific Gear Checklists
Knowing the science is useful. Having an exact gear list for your specific forecast is better. The checklists below are calibrated to three common camping temperature ranges based on guidance from REI, NOLS, and Backpacker Magazine’s cold-weather gear testing.
40°F Camping Gear Setup
At 40°F, the Thermal Stack System requires moderate attention. This is comfortable camping territory for well-prepared intermediates.
| Gear Category | Specification |
|---|---|
| Sleeping Bag | Rated to 20°F–35°F (provides buffer) |
| Sleeping Pad | R-value 2.0–3.0 |
| Base Layer | Merino wool or synthetic, lightweight |
| Mid Layer | 100-weight fleece jacket |
| Shell | Softshell or light hardshell |
| Accessories | Wool hat, light gloves |
Key action: At 40°F, your biggest risk is moisture. Focus on a moisture-wicking base layer and keep the tent vented. A sleeping bag liner adds inexpensive warmth insurance.
30°F Camping Gear Setup
At 30°F, all three Thermal Stack pillars need deliberate attention. This is where unprepared campers consistently get cold.
| Gear Category | Specification |
|---|---|
| Sleeping Bag | Rated to 15°F–20°F |
| Sleeping Pad | R-value 3.5–4.5 (stacking two pads is valid) |
| Base Layer | Merino wool mid-weight (150–200 gsm) |
| Mid Layer | Down or synthetic insulated jacket (600+ fill) |
| Shell | Hardshell with DWR coating |
| Accessories | Balaclava, insulated gloves, wool socks |
Key action: At 30°F, ground insulation is your highest priority. Verify your pad’s R-value before departure — not all pads marketed as “3-season” meet R-3.5 under the ASTM F3340-18 standard.
20°F Camping Gear Setup
At 20°F, you’re in cold-weather camping territory. Margin for error is slim, and gear quality matters more than at higher temperatures.
| Gear Category | Specification |
|---|---|
| Sleeping Bag | Rated to 0°F–10°F |
| Sleeping Pad | R-value 4.5–6.0+ (stacked pads recommended) |
| Base Layer | Merino wool heavyweight (250+ gsm) |
| Mid Layer | High-loft down jacket (800+ fill) + fleece |
| Shell | Waterproof hardshell, taped seams |
| Accessories | Expedition balaclava, mittens over gloves, vapor barrier socks |
Key action: At 20°F, add a sleeping bag liner and pre-warm your bag with a hot water bottle before getting in. The pre-bed routine (covered in the next section) becomes critical at this temperature.
According to REI’s cold-weather camping guide, sleeping bag ratings assume you’re wearing a base layer and using a sleeping pad — sleeping in just your underwear on a bare tent floor will make even a 0°F bag feel inadequate.
The Pre-Bed Warmth Routine
The pre-bed routine is the third and most underestimated pillar of the Thermal Stack System. Your body generates heat through metabolism, and you can meaningfully influence your overnight warmth by managing your body’s fuel and temperature in the 60 minutes before sleep.
Step-by-Step Pre-Bed Routine
Follow this sequence every night — experienced cold-weather campers report it reliably adds 1–3 hours of comfortable sleep in sub-freezing conditions.
Step 1: Eat a small high-fat snack (30–45 minutes before sleep).
Fat digestion generates heat through thermogenesis — the metabolic process of converting food to body warmth. A small handful of nuts, a piece of dark chocolate, or a spoonful of peanut butter provides enough fuel to sustain overnight heat generation. NOLS wilderness instructors specifically recommend calorie-dense, high-fat snacks as a cold-weather warmth tool (NOLS Wilderness Medicine, 2023).
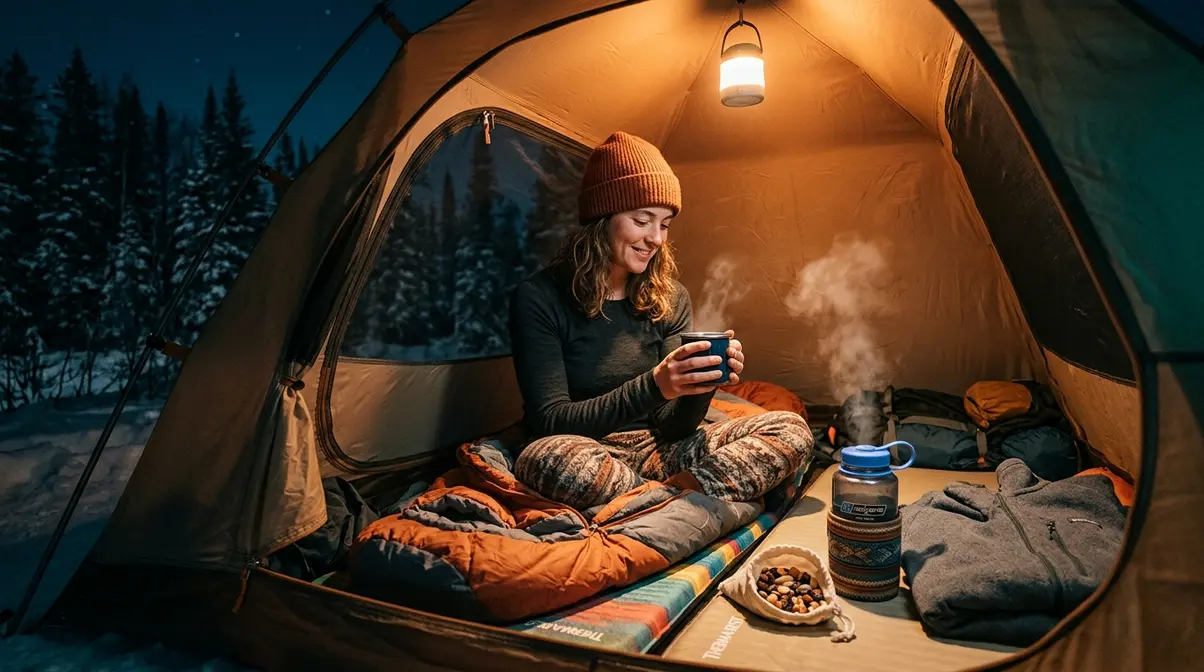
Step 2: Drink something warm (not alcohol).
A hot cup of herbal tea or broth raises your core temperature slightly before bed and provides psychological warmth that promotes relaxation. Avoid alcohol — it creates a sensation of warmth by dilating blood vessels near the skin, but this actually accelerates heat loss and lowers your core temperature (CDC, 2024).
Step 3: Do 20–30 jumping jacks or a brief walk before getting in your bag.
Light aerobic activity raises your core temperature by 1–2°F. Get your heart rate up, then get directly into your sleeping bag before you cool down. Don’t work up a sweat — the goal is mild warmth activation, not exercise.
Step 4: Pre-warm your sleeping bag.
Fill a Nalgene or similar wide-mouth bottle with near-boiling water, cap it tightly, and place it in the foot box of your sleeping bag 10–15 minutes before you get in. This pre-warms the insulation and eliminates the “cold bag shock” that causes most people to shiver for the first 20 minutes of sleep.
Step 5: Change into dry base layers.
Any moisture in your current base layer — even imperceptible sweat from the day — will cool you overnight. Designate a dry set of base layers exclusively for sleeping. This single habit, which costs nothing extra, is one of the most consistently recommended practices in Backpacker Magazine’s winter camping guides.
Step 6: Put on your hat.
Research consistently shows that a significant portion of body heat escapes through an uncovered head. A lightweight wool or fleece hat adds meaningful warmth for almost no weight or cost. Your sleeping bag’s hood, if it has one, adds another layer of protection.
Camping-Specific Scenarios: Adapting the System
The Thermal Stack System adapts to different camping formats. Each scenario below adjusts the core framework for its specific warmth challenges.
Car Camping
Car camping gives you access to gear that backpackers can’t carry — use it. A 4-inch foam mattress topper on top of your sleeping pad creates an R-value stack that rivals expedition sleeping setups. Bring extra blankets as supplementary mid-layer insulation over your sleeping bag. Park your vehicle as a windbreak on the upwind side of your tent if site rules allow.
The biggest car camping warmth mistake: relying on a vehicle heater. Running a car engine overnight for heat creates carbon monoxide risk, depletes fuel, and provides uneven warmth. Build your sleeping system to work independently of the car.
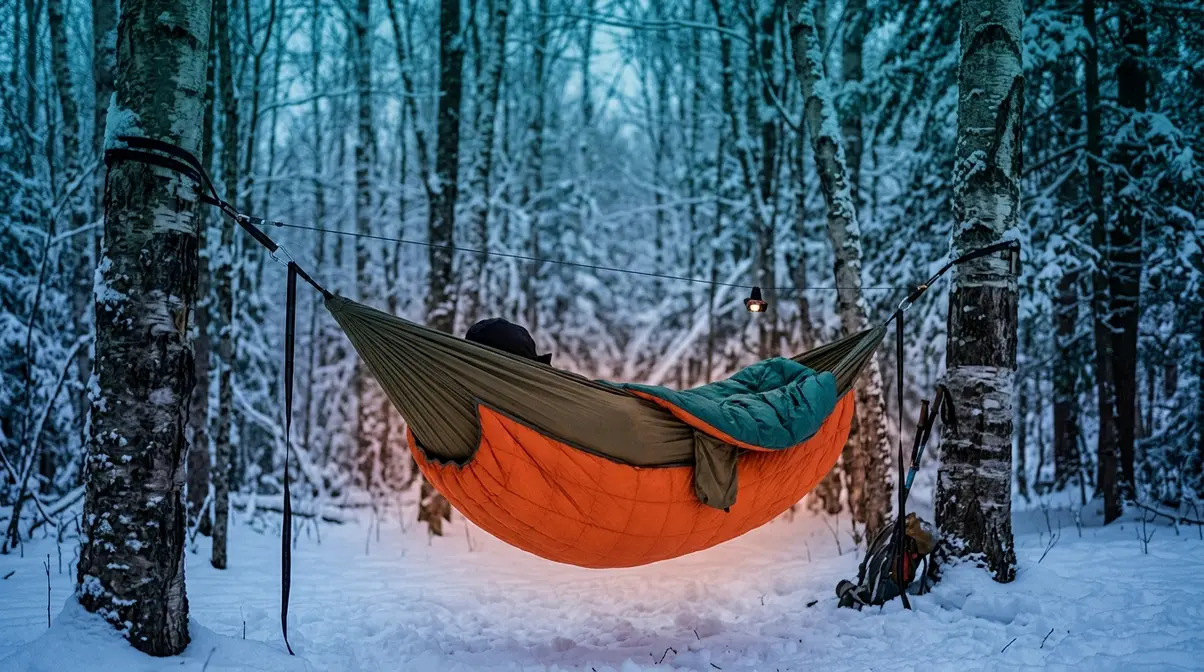
Hammock Camping
Hammock campers face a unique problem: your body is suspended in cold air on all sides, meaning conductive loss (normally just from below) now comes from below and the sides. A sleeping bag provides almost no protection against this — you need an underquilt (insulated blanket that hangs beneath the hammock, trapping heat from below) combined with a top quilt or sleeping bag above.
For temperatures below 40°F, a hammock underquilt rated to your forecast temperature is non-negotiable. Hipcamp’s winter camping guide notes that hammock campers in cold weather without an underquilt will consistently sleep colder than tent campers using even a basic sleeping pad.
Minimalist/Ultralight Camping
Weight constraints limit your options, but the Thermal Stack principles still apply. Prioritize R-value per ounce in your sleeping pad selection — the Therm-a-Rest NeoAir XTherm, for example, achieves R-7.3 at under 1 lb. A sleeping bag liner adds 5–15°F of warmth for 4–8 oz. The pre-bed routine costs zero grams and delivers reliable results.
The minimalist warmth mistake: cutting base layer weight by choosing lighter cotton-blend fabrics. Lightweight merino wool costs more but maintains moisture management at lower weight — a trade-off that pays off on every cold night.
Common Mistakes and How to Fix Them
Even experienced campers make warmth mistakes. Our editorial team cross-referenced reports from NOLS instructors, NPS wilderness rangers, and REI’s gear guides to identify the most consistent patterns. Recognizing these mistakes in your own setup is often faster than buying new gear.
Common Pitfalls
Pitfall 1: Sleeping bag rating confusion.
A sleeping bag’s temperature rating (e.g., “20°F”) indicates the lowest temperature at which a cold sleeper can survive — not sleep comfortably. The happiestoutdoors.ca sleeping warm guide explains that comfort ratings (typically 10–15°F warmer than survival ratings) are the more useful benchmark for recreational camping. If your bag is rated to 20°F and you’re camping at 30°F, you may still be cold if you’re a cold sleeper. Buy 10–15°F warmer than your expected low temperature.
Pitfall 2: Wearing too many layers to bed.
Counter-intuitively, wearing a bulky insulated jacket inside your sleeping bag can make you colder. Your sleeping bag is designed to trap your body heat in the air around you. A thick jacket compresses the bag’s insulation and reduces that air space. Stick to a dry base layer and a lightweight fleece — let the bag do its job.
Pitfall 3: Eating a large meal immediately before bed.
A large meal right before sleep diverts blood flow to your digestive system, away from your extremities. The high-fat snack recommendation in the pre-bed routine works because it’s small — enough to trigger thermogenesis without redirecting circulation. Eat your main dinner 2–3 hours before sleep.
Pitfall 4: Drinking alcohol for warmth.
This is one of the most dangerous warmth myths. Alcohol causes peripheral vasodilation — blood vessels near your skin widen, creating a feeling of warmth while actually accelerating heat loss from your body’s core. The CDC explicitly warns against alcohol use as a cold-weather warming strategy (CDC, 2024).
Pitfall 5: Ignoring wet gear.
A down sleeping bag that has absorbed moisture loses 50–90% of its insulating value (REI, 2025). Store your bag in a waterproof stuff sack during the day, and if it gets wet, prioritize drying it before the next night — even partial drying makes a significant difference.
When to Choose Alternatives
If you run cold naturally: Consider a sleeping bag liner as a first upgrade before buying a new bag. A quality liner (fleece or thermolite) adds 10–15°F of effective warmth at $40–$80 — far cheaper than a new bag.
If weight is your constraint: A closed-cell foam pad (like the Therm-a-Rest Z Lite Sol) is lighter than most ultralight inflatables, indestructible, and never deflates. Its R-2.0 rating is sufficient for 3-season camping as a standalone pad or as a base layer under an inflatable.
If you’re car camping in extreme cold: An electric blanket on a battery bank, a properly ventilated catalytic heater (never a propane heater inside an enclosed tent), or a heated sleeping bag pad are options that backcountry campers don’t have access to.
When to Seek Expert Help
If you’re planning a solo winter camping trip below 20°F, complete a Wilderness First Responder (WFR) or NOLS wilderness medicine course first. Hypothermia progresses quickly and impairs judgment before most people realize they’re at risk. Group camping with experienced cold-weather partners, a clear emergency plan, and a satellite communicator is strongly recommended for sub-20°F conditions.
Frequently Asked Questions
What is the 200 rule for camping?
The “200 rule” isn’t a universally standardized camping warmth guideline, but it commonly refers to selecting a sleeping bag rated at least 200 grams of insulation fill weight for cold-weather camping. In practice, most cold-weather campers use the temperature rating system (e.g., 20°F bag) rather than fill weight as their primary selection criterion. If you’ve seen this rule cited, verify which specific protocol the source is referencing — fill weight standards vary by insulation type.
How do you keep yourself warm camping?
The most effective approach combines three simultaneous strategies: ground insulation, clothing layers, and a pre-bed warmth routine — the core components of the Thermal Stack System. Start by upgrading your sleeping pad to an R-value appropriate for your forecast temperature (R-3.5+ for 30°F nights). Add a 3-layer clothing system with a moisture-wicking base, insulating mid-layer, and wind-blocking shell. Complete a pre-bed routine that includes a hot drink, a high-fat snack, light exercise, and a switch to dry base layers before sleep. According to Madelyne on the Move’s camping warmth guide, combining ground insulation with moisture management accounts for the majority of cold-tent complaints.
What temperature is too cold for camping?
There’s no single “too cold” temperature — it depends entirely on your gear, experience level, and physical condition. As a practical guideline: above 40°F is comfortable for most intermediate campers with standard 3-season gear. Between 30°F and 40°F requires deliberate attention to all three Thermal Stack components. Below 20°F is winter camping territory requiring expedition gear and prior cold-weather experience. The CDC notes that hypothermia risk begins well above freezing when a person is wet, exhausted, or underfueled (CDC, 2024) — meaning conditions matter as much as the thermometer reading.
What is the 3-3-3 rule for camping?
The 3-3-3 rule is a campsite safety guideline, not a warmth-specific protocol. It advises arriving at your campsite by 3 p.m., camping at least 3 miles from the nearest trailhead, and leaving your campsite by 3 a.m. (or 3 days maximum at the same site, depending on the version). Some campers apply a warmth-adjacent version: check your forecast 3 days out, 3 hours before departure, and 3 hours before sunset. This triple-check system catches rapidly dropping overnight temperatures that daytime forecasts miss.
Is a sleeping bag liner worth it for warmth?
Yes — a sleeping bag liner is one of the highest-value warmth upgrades available, especially for campers who already own a bag that’s slightly under-rated for their conditions. A quality thermolite liner (such as Sea to Summit’s Reactor Extreme) adds up to 25°F of warmth at under 10 oz and approximately $80. A silk liner adds 5–8°F for even less. Liners also keep your sleeping bag cleaner, extending its effective life and maintaining loft (which directly affects warmth). For any camping trip below 40°F, a liner provides meaningful insurance against an unexpected temperature drop.
How do I stay warm in a tent without a heater?
Staying warm without a heater relies on passive thermal management across four areas: campsite selection, ground insulation, sleeping system optimization, and the pre-bed routine. Choose a sheltered campsite that blocks wind. Stack sleeping pads to maximize R-value. Use a sleeping bag liner and pre-warm your bag with a hot water bottle. Follow the six-step pre-bed routine (high-fat snack, warm drink, light exercise, bag pre-warming, dry base layer swap, hat). These strategies, applied together, reliably maintain warmth through the night at temperatures down to 20°F without any electrical heat source.
Putting It All Together: Your Warmth Starts Tonight
For intermediate campers who’ve woken up cold and frustrated, the Thermal Stack System delivers a clear answer: warmth is a systems problem, not a gear shopping problem. The ground beneath you steals more heat than the air around you. Your base layer manages moisture that would otherwise cool you for hours. Your pre-bed routine gives your metabolism the fuel it needs to generate heat through the night. Each pillar reinforces the others — and when all three are calibrated to your forecast temperature, the results are reliable.
The Thermal Stack System works because it eliminates the guesswork. Instead of buying a warmer sleeping bag and hoping for the best, you now have a complete protocol: match your pad’s R-value to your forecast, build your 3-layer clothing system around moisture management, and run through the six-step pre-bed routine every night. These steps have saved plenty of cold nights for campers across every temperature range from 40°F down to 20°F.
Start with the highest-impact change for your situation. If your air mattress deflates, a foam pad backup is your first purchase. If you’re sleeping in cotton, a merino base layer is your first upgrade. If you’re already past both of those, the pre-bed routine costs nothing and works tonight. Pick the weakest link in your Thermal Stack and fix it before your next trip — your 2 a.m. self will thank you.
David King
Field gear tester at Tent Explorer.