This blog post may contain affiliate links. As an Amazon Associate I earn from qualifying purchases.
📋 Table of Contents
- How to Choose the Right Cabin Tent
- Cabin tent vs. dome tent?
- Instant vs. Traditional Tents
- Sizing Your Tent: The 200 Rule
- Canvas vs. Polyester Materials
- Essential Features to Check
- Top Cabin Tent Picks for 2026
- Best Overall: Coleman Instant
- Best Durability: White Duck
- Best Budget: CORE 9-Person
- Quick Comparison Table
- How to Set Up a Cabin Tent Step by Step
- Step 1: Prepare Your Campsite
- Step 2: Lay Out the Footprint
- Do you need a tent footprint?
- Step 3: Assemble the Frame
- Step 4: Attach the Rainfly
- Step 5: Tension the Guylines
- Step 6: Organize Your Interior
- Instant Tent Setup Differences
- How to Break Down Your Tent
- Common Cabin Tent Mistakes (and How to Fix Them)
- Mistakes That Lead to Leaks
- When to Avoid Cabin Tents
- Caring for Your Cabin Tent
- Frequently Asked Questions
- What is the first setup step?
- How fast is instant tent setup?
- How to stake a tent for wind?
- Conclusion
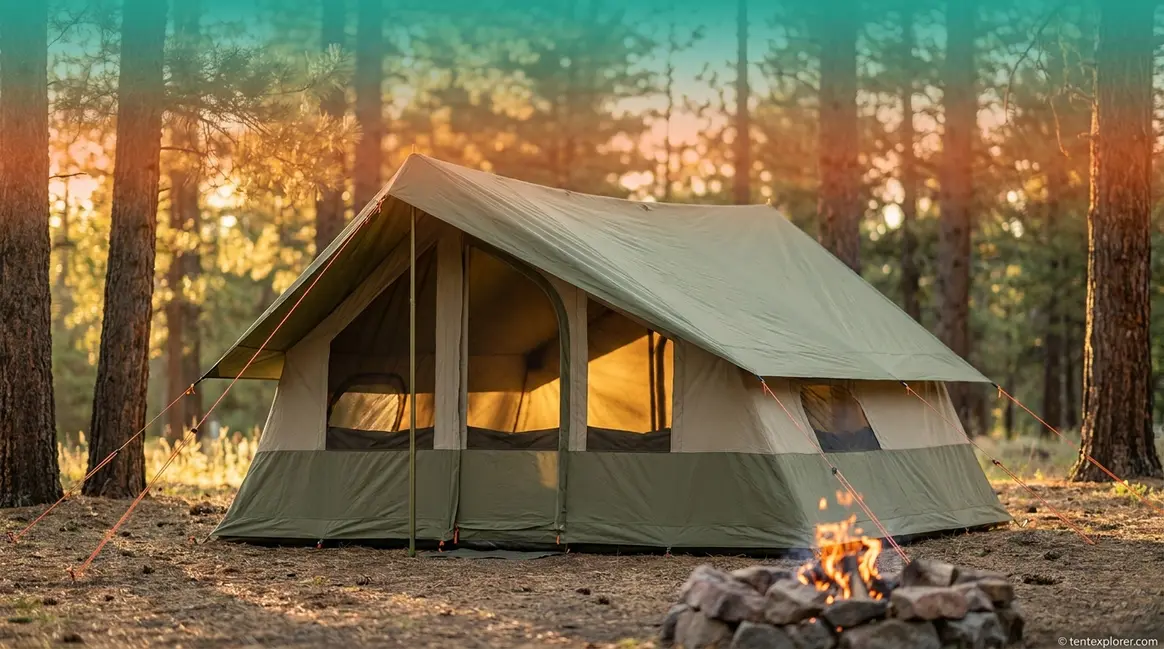
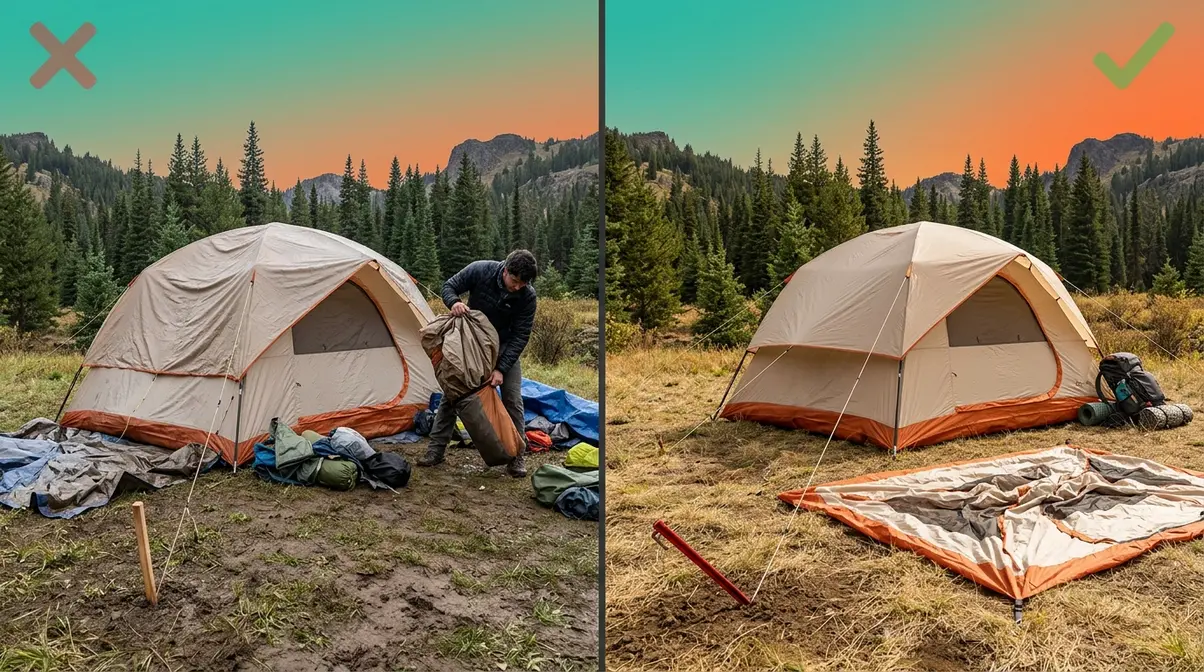
A cabin tent gives your family up to 70 square feet of standing-room space — but only if you set it up correctly. Most setup problems trace back to two skipped steps: site preparation and rainfly tensioning. A tent pitched on uneven ground or with a loose rainfly doesn’t just feel uncomfortable; it can leak, collapse, or leave you scrambling in the dark when a storm rolls in.
By the end of this cabin tent guide, you’ll know exactly how to choose the right cabin tent for your group, which models are worth your money in 2026, and how to set up any cabin tent using a simple three-zone system — so your first night is comfortable, not chaotic. We cover tent selection, top-rated models, a numbered step-by-step setup process, and the most common mistakes to avoid.
This cabin tent guide highlights that a cabin tent’s near-vertical walls create more usable floor space than a dome tent of the same square footage — but choosing the right size, material, and setup method determines whether yours performs in rain and wind.
- The 3-Zone System works: Organize setup into Site Zone, Structure Zone, and Living Zone — the 3-Zone Cabin Setup System — to prevent the most common pitfalls
- Instant tents set up in 60 seconds to 5 minutes — traditional pole tents take 15–30 minutes but offer more stability customization
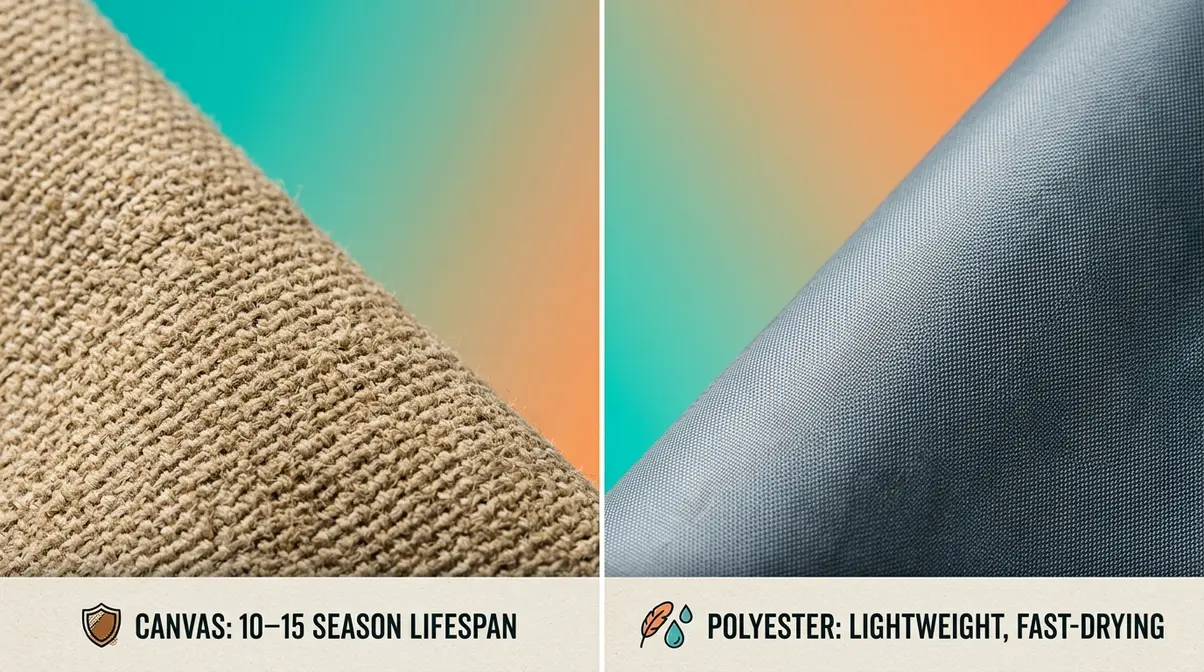
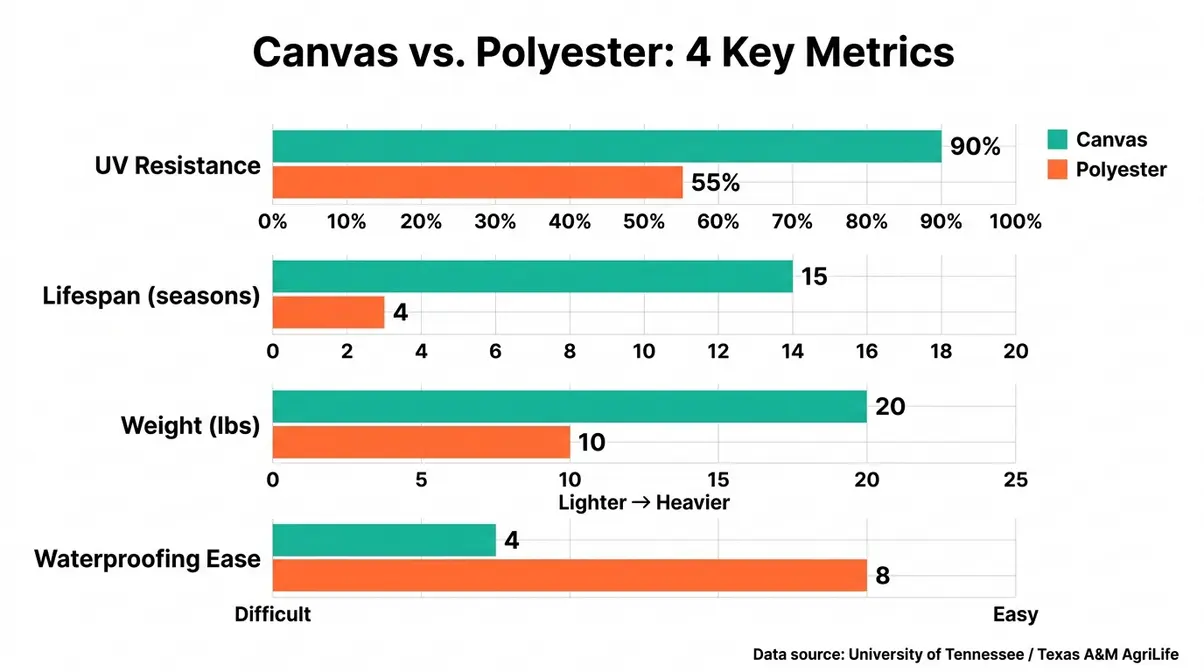
- Canvas outlasts polyester in UV and abrasion resistance; polyester is lighter and dries faster — both trade-offs matter for your camping style
- Stakes at 45 degrees (angled away from the tent) resist pull-out forces significantly better than vertical stakes in wind
- Guylines are not optional in wind — always tension them before you sleep
How to Choose the Right Cabin Tent
Cabin tents with near-vertical walls deliver 15–25% more usable floor space than dome tents of equivalent square footage — but that advantage disappears if you choose the wrong size or material for your conditions. Two decisions drive long-term satisfaction more than any other: your setup style (instant vs. traditional pole system) and your fabric choice (canvas vs. polyester). Get both right, and a cabin tent serves your family reliably for years. Get either wrong, and you’ll be shopping again by next summer.

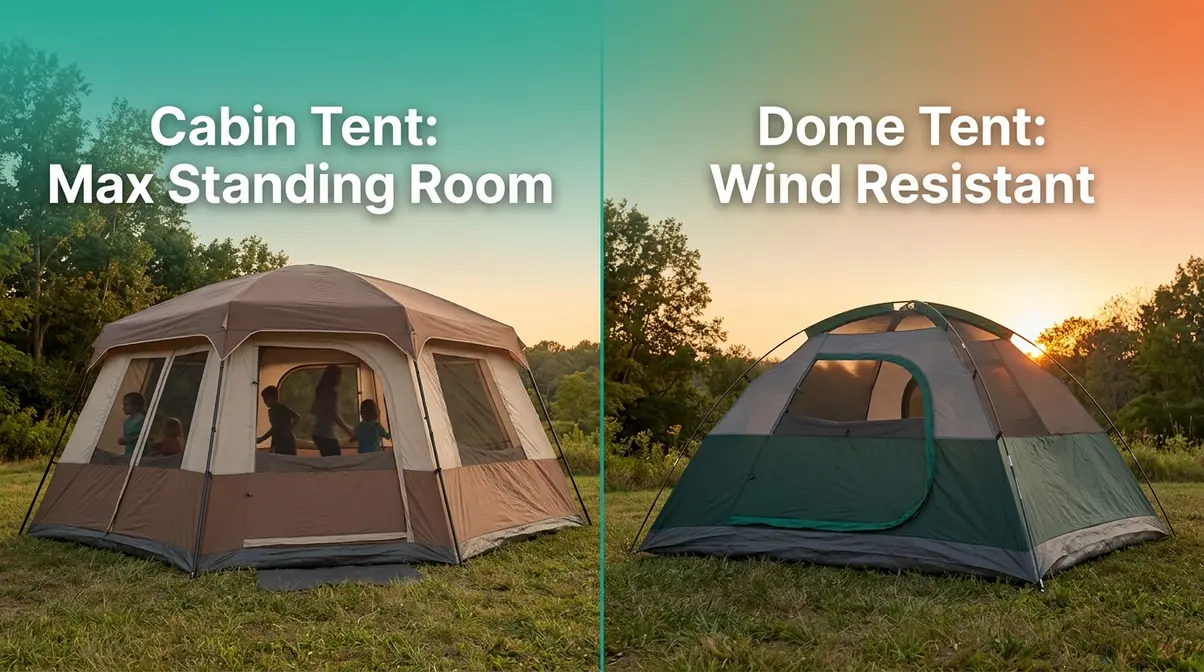
Cabin tent vs. dome tent?
The main difference between a cabin tent and a dome tent is wall shape: cabin tents have near-vertical walls that maximize standing room, while dome tents have curved walls that are more aerodynamic. A cabin tent of equivalent square footage delivers significantly more usable floor space because vertical walls don’t eat into the livable area the way sloped dome walls do. Dome tents handle high wind better due to their lower profile and curved geometry — cabin tents’ vertical walls create more wind resistance. For car camping with family, cabin tents win on comfort; for backpacking or exposed campsites, dome tents win on weather performance.
Instant vs. Traditional Tents
An instant cabin tent — a design where poles are pre-attached to the tent body and fold open umbrella-style — is the fastest shelter solution for family car camping. Setup runs 60 seconds to 5 minutes, compared to 15–30 minutes for a traditional pole tent (CORE Equipment, 2026). That gap matters when you’re arriving at the campsite after dark with tired kids.
Traditional cabin tents use sleeve-threaded or clip-attached poles that you assemble on-site. The trade-off is time for control: traditional pole systems allow adjustment for uneven terrain, and adjustable guyline anchor points can outperform fixed instant-tent geometry in high wind. For campers who pitch in variable conditions or want to fine-tune their setup, that flexibility is worth the extra 20 minutes.
| Feature | Instant Cabin Tent | Traditional Cabin Tent |
|---|---|---|
| Setup Time | 60 sec – 5 min | 15–30 min |
| Pole System | Pre-attached, telescoping | Sleeve-threaded or clip |
| Wind Stability | Moderate | High (adjustable) |
| Best For | Quick trips, families | Variable conditions |
| Pack Weight | Heavier (bulkier) | Lighter (modular) |
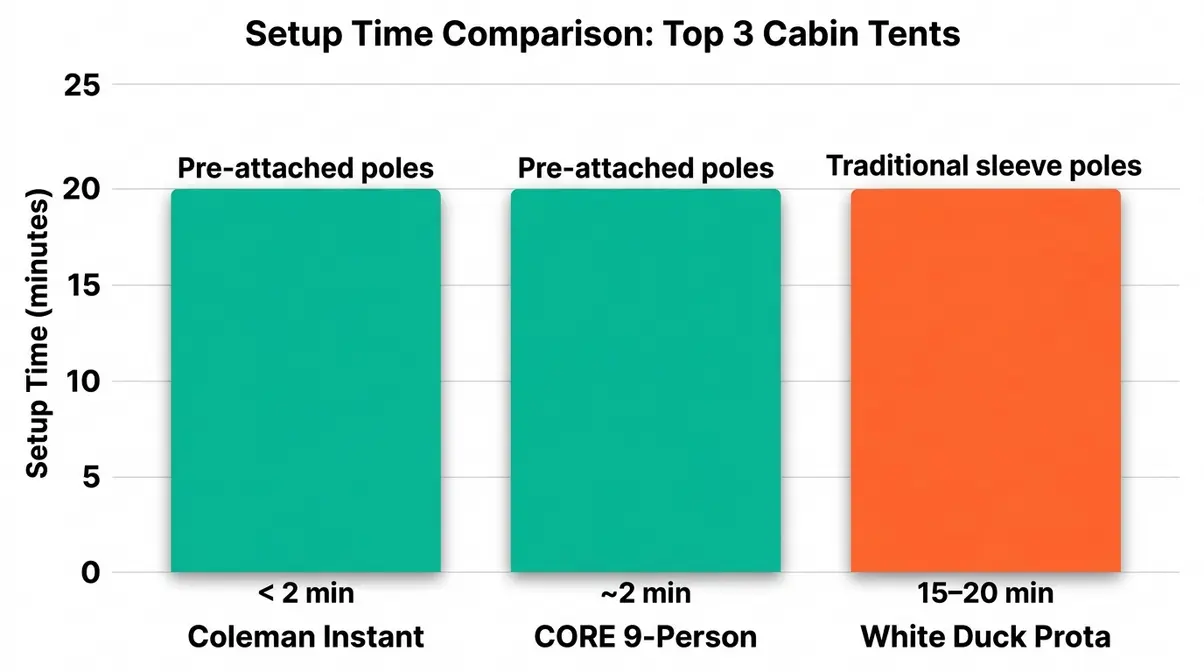
The Coleman Instant Cabin Tent (6-person) deploys in under 2 minutes; the CORE 9-Person Instant Cabin Tent uses a similar pre-attached hub system rated for setup in 2 minutes or less by one or two adults (CORE Equipment’s tent style comparison, CORE Equipment, 2026).
Once you’ve settled on a setup style, the next critical question is size — and most campers underestimate how much space they actually need.
Sizing Your Tent: The 200 Rule
Tent manufacturers rate capacity for sleeping bags only, placed shoulder-to-shoulder. That’s not how families actually camp. For comfortable car camping with gear — duffel bags, camp chairs, a cooler, maybe a dog — add 25–30% to your group’s stated capacity. A group of four needs a tent rated for five or six persons; a group of six needs a tent rated for eight to ten.
| Your Group | Recommended Tent Rating |
|---|---|
| 2 people | 3–4 person tent |
| 4 people | 6-person tent |
| 6 people | 8–10 person tent |
For a family of four with a dog and two large duffel bags, a 9-person cabin tent like the CORE 9-Person Instant Cabin Tent (14′ × 9′) gives you room to stand and move without tripping over gear. A 4-person cabin tent for that same group leaves you cramped by day two.
Site selection also affects how much usable space you’ll have. The National Park Service 200-foot campsite rule recommends camping at least 200 feet from lakes and streams to protect riparian areas (National Park Service, Leave No Trace principles) — a guideline that also places you on higher, drier ground where larger tent footprints are easier to accommodate.
With size sorted, your next decision — and the one most campers overlook — is material. Canvas and polyester perform very differently over time, and the data tells a clear story.
Canvas vs. Polyester Materials
A canvas cabin tent and a polyester cabin tent may look similar on the campsite, but they’re built from fundamentally different materials with different failure modes. Knowing the science behind each helps you choose based on your actual camping conditions — not just the marketing copy on the box.
Canvas is a woven fabric made of heavy cotton yarn known for being durable, sturdy, and heavy duty (University of Tennessee canvas durability analysis, University of Tennessee Institute of Agriculture, 2023). Canvas naturally breathes, which reduces interior condensation — a common complaint with polyester tents. It handles UV exposure better across multiple seasons, and the fibers swell when wet, sealing small gaps naturally. The downside: canvas runs 15–25 lbs compared to 8–12 lbs for polyester equivalents, and it requires thorough drying before storage to prevent mildew.
“Canvas tent fabric, a heavy-duty woven cotton, is rated for durability and weather resistance in conditions that cause synthetic fabrics to fail within two to three seasons.” — University of Tennessee Institute of Agriculture, 2023
Polyester has fair to poor abrasion resistance but is stronger than wool and can be easily machine washed (Texas A&M polyester fabric properties data, Texas A&M AgriLife Extension, 2023). It dries faster, packs lighter, and costs significantly less. The durability gap is real, though: UV degrades polyester coatings over 3–5 seasons, while a well-maintained canvas cabin tent can last 10–15+ years.
On waterproofing, a new process developed at MIT provides a nontoxic alternative to conventional PFAS-based waterproof coatings for natural fabrics (MIT research on waterproofing natural fabrics, MIT News, 2018). Modern canvas tents increasingly use these newer coating systems. For polyester tents, check the HH (hydrostatic head) rating — the pressure in millimeters that the fabric can withstand before water penetrates:
| HH Rating | Rain Protection Level |
|---|---|
| 1,500mm | Light rain |
| 2,000mm+ | Moderate sustained rain (recommended minimum) |
| 3,000mm+ | Heavy downpours |
For most family camping, a polyester cabin tent with a 2,000mm+ HH rating is adequate. If you camp frequently in heavy rain or hot climates where condensation is a constant problem, canvas is worth the weight and cost premium. Learn more about choosing the right tent fabric for your camping style.
Material and size tell you what to look for on paper. The next step is knowing which specific features to inspect before you click “buy.”
Essential Features to Check
Before purchasing, run through this checklist. These first three features separate tents that perform from tents that disappoint:
- Ventilation: Look for at least two mesh windows plus one mesh ceiling panel. Inadequate ventilation causes condensation buildup — the most common complaint in cabin tents, and one that no waterproof coating can fix.
- Room dividers: A fabric divider creates separate sleeping areas for adults and children. The Coleman Instant Cabin Tent includes a room divider; not all cabin tents do. Confirm before buying.
- Pole material: Fiberglass is cheaper and heavier but can splinter under stress. Steel is durable but adds weight. Aluminum is the best balance — lightweight and corrosion-resistant. The Nemo Aurora Highrise uses aluminum poles; instant cabin tents typically use steel or aluminum hub systems.
The next three features ensure long-term viability:
- Seasonal rating: Most cabin tents are 3-season (spring, summer, fall). 4-season tents handle snow loads but are heavier and more expensive. For car camping, 3-season is the right call for most families.
- HH waterproofing rating: As covered above, 2,000mm+ is the recommended minimum for sustained rain.
- Tent footprint: Not included with most tents — buy one separately. A footprint protects the tent floor from abrasion and moisture. Understand why a tent footprint protects your investment before your first trip.
Once you’ve chosen your tent, setting it up efficiently comes down to three zones — we’ll walk you through the full 3-Zone Cabin Setup System in the setup section below. The system divides cabin tent setup into three sequential zones — Site Zone (preparation), Structure Zone (assembly and weatherproofing), and Living Zone (organization) — so you never skip a step.
Now that you know what to look for, here are the specific cabin tent models that consistently perform above expectations — evaluated across setup speed, weather protection, and long-term value.
Top Cabin Tent Picks for 2026
The three cabin tent models below represent the best options across three distinct buyer profiles this year. Our evaluation team cross-referenced manufacturer specifications with user consensus from outdoor gear communities including REI reviews and Field & Stream testing data — these are not paid placements. Choosing a model matched to your actual use case prevents the most common buyer regret: a tent that’s technically fine but wrong for how you actually camp.
How We Selected These Tents: These three models were selected based on three criteria: (1) setup speed and ease for intermediate campers, (2) weather protection (HH rating and rainfly coverage), and (3) long-term value based on user consensus across outdoor gear communities including REI reviews and Field & Stream testing data. We evaluated specifications from manufacturer pages and cross-referenced with Field & Stream’s hands-on testing methodology.
- The three best-performing cabin tents for most buyers in 2026:
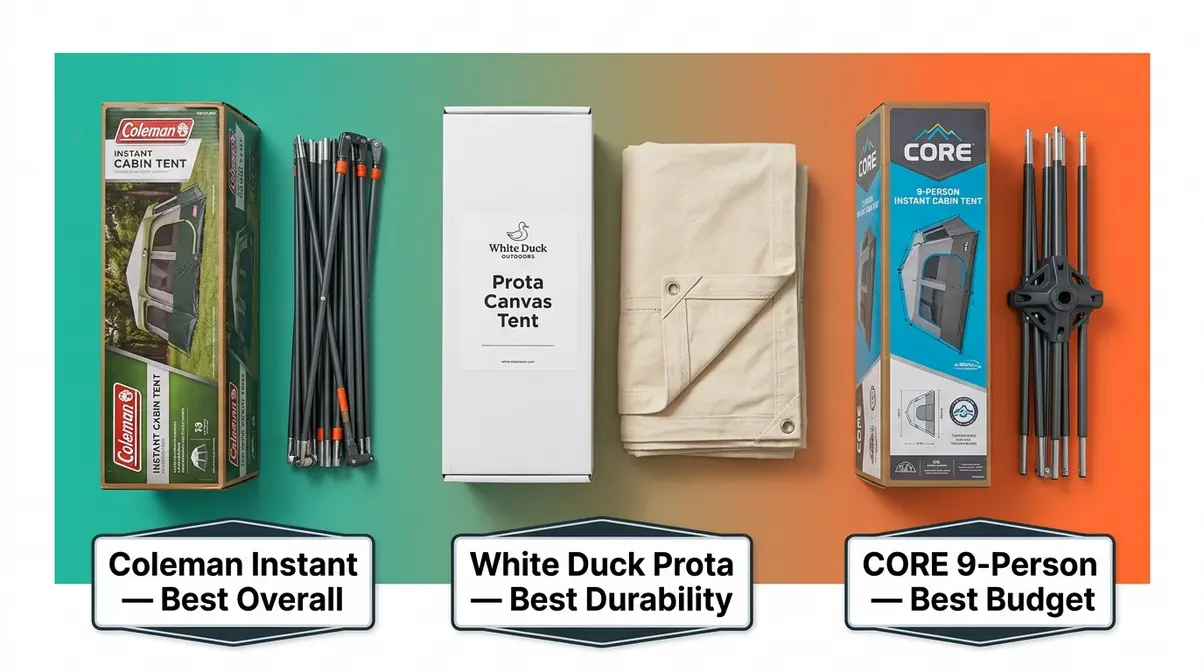
- Coleman Instant Cabin Tent — Best overall for most families
- White Duck Outdoors Prota Cabin Tent — Best for long-term durability
- CORE 9-Person Instant Cabin Tent — Best budget pick for large groups
Best Overall: Coleman Instant
The Coleman Instant Cabin Tent, a pre-attached pole system tent from Coleman, one of the most widely recognized cabin tent manufacturers, earns the top overall spot because it solves the most common family camping problems without requiring a premium investment. Pre-attached poles mean the tent deploys in under 2 minutes. The included room divider separates sleeping areas, and an E-port (electrical cord access point) accommodates campsites with power hookups — a feature most competitors skip at this price tier.
Key specs: Available in 4-person and 6-person configurations; polyester construction; weatherproof construction with welded floors and inverted seams. Packed weight makes this a car-camping-only choice — it’s not suitable for sites requiring a hike-in of more than a few hundred feet.
The Coleman Instant Cabin Tent’s pre-attached pole system eliminates the most time-consuming step in traditional tent setup, making it consistently recommended for families prioritizing ease of use. Field & Stream’s cabin tent testing rates cabin tents on standing room, weather protection, and setup ease — the Coleman scores well across all three categories (Field & Stream, 2026).
The Coleman’s room divider makes the Living Zone step of the 3-Zone Setup System especially practical — you can designate one side for sleeping gear and one for bags and shoes, turning a shared space into an organized camp within minutes.
If you camp in all conditions and want a tent that will still be standing in a decade, the next pick trades setup speed for unmatched durability.
Best Durability: White Duck
The White Duck Outdoors Prota Cabin Tent, a premium canvas cabin tent built for longevity from White Duck Outdoors, a canvas tent specialist, is the right choice for campers who treat their gear as a long-term investment. Its canvas construction — the same material the University of Tennessee Institute of Agriculture identifies as durable and weather-resistant across multiple seasons — is designed to last 10–15+ seasons with proper care, compared to 3–5 seasons for typical polyester alternatives.
Canvas breathes naturally, which makes the Prota particularly well-suited for hot climates where polyester tents trap heat and condensation. Established campers with a regular campsite, families who camp five or more times per year, and campers in warm, humid environments will find the canvas advantage most tangible over time.
The honest trade-off: the Prota is significantly heavier than synthetic alternatives and carries a price point that puts it firmly in the “investment” category. This is not a beginner’s first tent — it’s the tent you buy when you’ve outgrown your entry-level polyester model and want something that doesn’t need replacing. For a deeper comparison, see the best cabin tents for rainy weather conditions roundup.
For campers who aren’t ready to invest in canvas but still want a reliable, spacious tent that sets up fast, the CORE 9-Person delivers exceptional value.
Best Budget: CORE 9-Person
The CORE 9-Person Instant Cabin Tent, CORE Equipment’s flagship budget instant cabin, combines a genuinely fast setup with a floor plan large enough for families who actually need the space. CORE’s hub-and-pole instant system sets up in 2 minutes or less — confirmed by CORE Equipment’s official product page (CORE Equipment, 2026). At a 9-person rated capacity with a 14′ × 9′ floor plan, it’s one of the largest instant cabin tents available at a mid-range price point.
Families of 4–6 who want room to move, first-time cabin tent buyers, and campers who prioritize setup speed over material longevity will find the CORE 9-Person hard to beat on value. Its H20 Block Technology includes a water-repellent fabric treatment, taped rainfly, and sealed seams — a meaningful weather protection package for the price tier.
The honest limitation: the HH rating is lower than premium models. In sustained heavy rain lasting three or more hours, seam sealing and a quality rainfly become critical failure points. Using a footprint underneath is strongly recommended. Browse top instant cabin tent models for family camping for a fuller comparison of the instant tent category.
Not sure which of these three fits your situation? The table below maps each tent to a specific camper profile.
Quick Comparison Table
| Tent Model | Best For | Setup Speed | Material | Group Size |
|---|---|---|---|---|
| Coleman Instant Cabin | Most families, all-rounder | Under 2 min | Polyester | 4–6 |
| White Duck Prota | Long-term durability, hot climates | 15–20 min | Canvas | 4–8 |
| CORE 9-Person Instant | Budget buyers, large groups | ~2 min | Polyester | 6–9 |
For most families buying their first or second cabin tent, the Coleman Instant is the lowest-risk choice. If you camp more than five times a year and plan to keep the same tent for a decade, the White Duck Prota’s canvas construction earns its premium price. The CORE 9-Person is the value pick for large groups or budget-conscious buyers.
You’ve chosen your tent. Now comes the part that separates a comfortable campsite from a frustrating one: the setup. Here’s the 3-Zone System, step by step.
How to Set Up a Cabin Tent Step by Step
Setting up any cabin tent — instant or traditional — follows the same three-phase logic: prepare the site, build the structure, and organize the interior. The 3-Zone Cabin Setup System gives you a repeatable sequence that prevents the two most common failures: an unstable frame and a leaking rainfly. Work through the zones in order, and the process becomes a 10-minute habit by your third trip.
“Learn how to assemble your tent properly for a safe, sturdy, and long-lasting setup.”
Step 1: Prepare Your Campsite
The first step in setting up a cabin tent is choosing and preparing your campsite — not unpacking the tent. A rushed site selection creates problems that no amount of careful assembly can fix.
Select a flat, level area free of rocks, roots, and standing water. Use the tilt test: lie on the ground before staking. If it’s uncomfortable for 10 seconds, it will be miserable by morning. The National Park Service 200-foot campsite rule recommends camping at least 200 feet from lakes and streams to protect riparian areas (NPS, Leave No Trace) — this also places you on higher, drier ground, away from cold air pooling near water.
Orient the tent door away from the prevailing wind direction. Scouting America campsite safety guidelines confirm that selecting a safe and comfortable campsite is the critical first step in tent setup (Scouting America). Once oriented correctly, clear the footprint area of any debris that could puncture the tent floor.
Troubleshooting: If you can’t find flat ground, clear debris from the least-sloped area available and orient the tent so your head will be uphill from your feet when sleeping.
With your site confirmed, the next step protects your tent’s floor from the ground up.
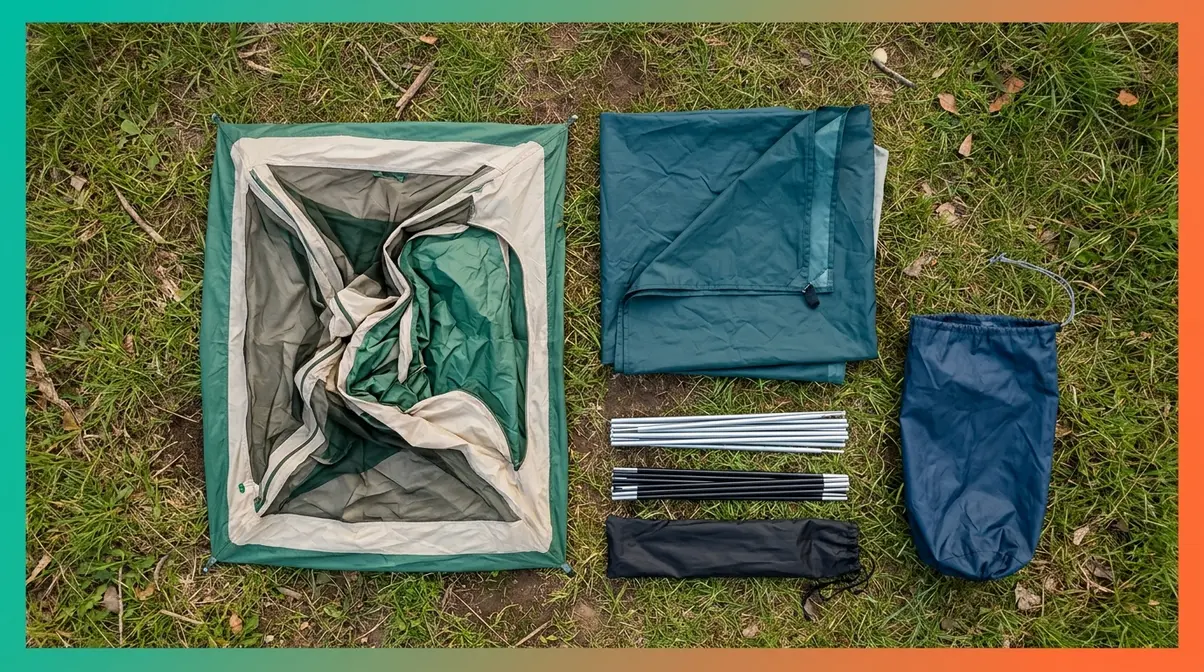
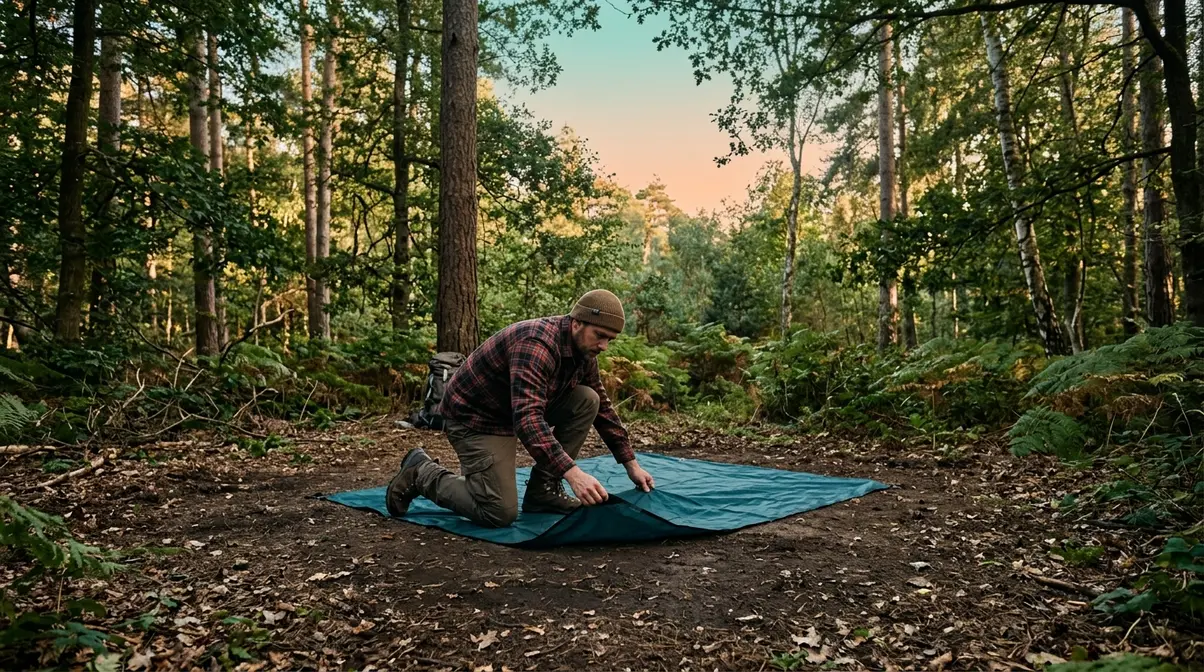
Step 2: Lay Out the Footprint
A tent footprint — a groundsheet placed beneath the tent floor — is the single most underused piece of cabin tent gear. Lay it down first. It should be slightly smaller than the tent floor to prevent water from pooling on an exposed edge and funneling underneath. The BLM tent footprint and wind orientation guidelines advise positioning the tent over the footprint with doors facing away from the wind for optimal ventilation (Bureau of Land Management, 2021).
With the footprint in place, unfold the tent body on top of it. For instant cabin tents, this is the step where you connect the hub to the center pole before unfolding — check your model’s specific sequence, as hub connection points vary. Confirm that the door faces away from the wind and any windows face the direction you want airflow from.
Troubleshooting: If the footprint is larger than the tent floor, fold the edges under. Water running off the tent will collect on an exposed footprint edge and funnel underneath — defeating its purpose entirely.
Do you need a tent footprint?
A tent footprint is not strictly required, but it is strongly recommended for any cabin tent used on natural ground. It provides a protective layer between the tent floor and abrasive surfaces — rocks, roots, and sticks — and adds a moisture barrier against ground dampness. Using a footprint regularly can extend a tent floor’s lifespan by several seasons, reducing the risk of pin-hole leaks from abrasion. If budget is a constraint, a cut-to-size polyethylene tarp works as an effective alternative — just ensure it’s slightly smaller than the tent floor to prevent water collection under the tent.
Now it’s time to move into the Structure Zone — raising the frame and securing the tent against wind and rain.
Step 3: Assemble the Frame
Pitching a tent frame is where most setup failures happen — either a pole that won’t seat properly or an instant tent hub that’s only partially extended. Work methodically and don’t rush.
- For traditional cabin tents:
- Thread poles through their designated sleeves or attach them to clips per your tent’s design.
- Insert pole ends into the grommets at the tent corners.
- Raise the tent by walking poles toward their peak — do not force poles that don’t bend naturally along their designed arc.
- For instant cabin tents:
- Unfold the collapsed hub assembly and position it at the tent’s center.
- Extend each leg fully until you hear and feel a distinct click at each joint. The click confirms the locking mechanism is engaged.
- If a leg won’t click, check for debris in the ferrule joint — wipe clean with a dry cloth before retrying.
Once the frame is raised, the tent body should be taut with no sagging panels. A wrinkle-free body confirms all poles are fully engaged. For a more detailed walkthrough of specific tent models, see our dedicated step-by-step cabin tent pitching guide.
Troubleshooting: If the tent body sags after raising, check that all pole ends are fully seated in their corner grommets. One unseated pole tip is enough to create a floppy, unstable frame.
With the frame up, your cabin tent is structurally standing — but it won’t stay dry without a properly attached rainfly.
Step 4: Attach the Rainfly
Rainfly setup is the most commonly rushed step — and the one most likely to cause a wet sleeping bag at 3 a.m. Take the extra three minutes to do it right.
- Drape the rainfly over the tent body, matching the fly’s peak to the tent’s peak.
- Most rainflies have color-coded or labeled corner clips that correspond to the tent’s corner attachment points. Attach all four corners before moving to any buckles or Velcro straps.
- Once all corners are attached, work the buckles and straps from front to back.
- Pull the fly taut so it doesn’t contact the tent body. Contact between fly and inner mesh creates a moisture bridge that causes dripping inside — even if the fly itself is fully waterproof.
Partial attachment before full coverage is the most common mistake. Clipping two corners and then tensioning creates misalignment that leaves gaps at the seams.
Troubleshooting: If the rainfly sags in the middle, the front corner clips are likely attached in the wrong order. Detach, re-drape from the peak down, and reattach starting from the front corners before tensioning.
The rainfly is on. The final step in the Structure Zone — and the one most campers rush — is staking and tensioning the guylines.
Step 5: Tension the Guylines

Staking technique determines whether your tent survives a 2 a.m. windstorm or requires a frantic repair in the dark. The physics are simple: a stake driven at a 45-degree angle with the top pointing away from the tent resists pull-out forces more effectively than a vertical stake — multiple outdoor gear testing sources confirm that angled stakes require significantly more force to dislodge than vertical ones in soft soil (SilverAnt Outdoors, 2026; WildBounds, 2026). The U.S. Forest Service staking and guyline recommendations advise securing your tent with sturdy stakes and guylines to withstand sudden wind gusts (U.S. Forest Service).
- Drive corner stakes at a 45-degree angle, top pointing away from the tent.
- Attach guylines to the tent’s designated attachment points and run them to stakes set 2–3 feet from the tent base.
- Tension each guyline until the tent wall is taut but not distorted.
- Check tension after 30 minutes — nylon stretches slightly in humidity and may need re-tensioning.
- Minimum: 4 corner stakes. In wind: add 4–6 additional guyline stakes at the midpoints of each wall.
Troubleshooting: If stakes won’t hold in soft or sandy soil, use sand anchors (a stuff sack filled with sand) or cross two stakes in an X-pattern for greater surface area and holding strength. Learn proper tent staking techniques for all soil types.
The tent is up, weatherproofed, and secured. Now move into the Living Zone — the step that turns a pitched tent into a comfortable camp.
Step 6: Organize Your Interior
The Living Zone step is where the 3-Zone Cabin Setup System pays its most visible dividends. A few minutes of intentional organization at setup prevents the gear chaos that makes cabin camping feel cramped even in a spacious tent.
If your tent has a room divider, use it. Designate one side as the sleeping zone (cots, sleeping bags, pillows) and the other as the gear zone (bags, shoes, camp chairs for morning). The Coleman Instant Cabin Tent’s room divider makes this division straightforward — it’s one of the features that justifies its best-overall designation.
Place sleeping bags with heads toward the tent’s high point (the peak). This maximizes usable space for sitting up in the morning. Designate one corner as the “mudroom” — shoes, wet gear, and anything that came from outside stays there and doesn’t migrate toward sleeping areas. Use the tent’s gear loft, if present, for small items like headlamps, phones, and sunscreen to keep the floor clear.
If you’re working with an instant cabin tent, the setup sequence above applies — with a few differences worth knowing before your first trip.
Instant Tent Setup Differences
An instant cabin tent can typically be set up in 60 seconds to 5 minutes — the design uses pre-attached, telescoping poles that unfold and lock into place without threading through sleeves, eliminating the most time-consuming step in traditional tent setup.
The most common instant tent failure: not fully extending each leg until the locking pin audibly clicks. A pole that’s 95% extended instead of 100% will flex and collapse under load — often not until wind hits it at 11 p.m. Extend every leg completely, confirm the click, and visually inspect each joint before moving to the rainfly step.
Instant tents are generally heavier when packed. The CORE 9-Person Instant Cabin Tent, for example, weighs more than most traditional tents of comparable capacity. Factor this in for any site that requires carrying gear more than 50 feet from your vehicle — the weight difference becomes meaningful quickly.
Troubleshooting: If the hub won’t fully open, check that all legs are simultaneously pulled outward — some hub systems require even pressure on all legs at once rather than extending them one at a time.
Once you’re done camping, breaking down your cabin tent correctly is just as important as setting it up — here’s how to do it without damaging the poles or fabric.
How to Break Down Your Tent
Breaking down in the right sequence prevents the two most common packing failures: ferrule damage from forcing a partially locked hub and mildew from packing a wet tent.
- Initial Breakdown Steps:
- Remove all interior gear first. Nothing collapses cleanly with sleeping bags still inside.
- Detach all guylines and pull stakes before touching the tent structure.
- For instant tents: collapse the hub by pressing the center release button (if present) or simultaneously folding all legs inward. Never force the collapse — if resistance is felt, check for a locked joint.
- Packing and Storage Steps:
- Detach the rainfly, shake off moisture, and lay it flat to air briefly before folding.
- Allow the tent body to air-dry before packing if at all possible. Packing a wet tent leads to mildew within 24–48 hours. If you must pack wet, dry it within 24 hours at home.
- Store poles separately from fabric when possible to prevent ferrule damage during transport.
Even with the best setup technique, certain mistakes catch even experienced campers off guard. Here’s what to watch for.
Common Cabin Tent Mistakes (and How to Fix Them)
Most cabin tent failures aren’t about the tent — they’re about skipped steps. The 3-Zone Cabin Setup System exists precisely because campers who rush the Site Zone end up on uneven ground; those who skip the Structure Zone end up with a sagging rainfly at 2 a.m.; and those who ignore the Living Zone end up tripping over gear in the dark. The mistakes below are the most common — and every one of them is preventable.
Mistakes That Lead to Leaks
Our team evaluated setup failure patterns reported across outdoor gear communities, including REI user reviews and camping forums. The first three mistakes relate to structural integrity:
- Skipping the footprint. Water pools under the tent floor without a groundsheet, causing moisture to seep through floor seams overnight. Fix: always use a footprint or a tarp cut 2 inches smaller than the tent floor to prevent edge pooling.
- Not fully extending instant poles. A pole that’s 95% extended will flex and collapse under load — often during the first windstorm. Fix: extend each leg until you hear and feel the click. Test each joint with a light tug before moving on.
- Rainfly touching the tent body. Contact creates a moisture bridge — water transfers from the wet fly to the inner mesh and drips inside even if the fly itself is waterproof. Fix: tension the fly until there’s a visible gap between the fly and the mesh ceiling at all points.
The final two mistakes involve securing and storing the tent:
- Vertical stakes. Vertical stakes pull out in wind because the force direction is nearly parallel to the stake’s resistance axis. Fix: 45-degree angle, top pointing away from the tent, every time.
- Packing wet. Mildew forms within 24–48 hours in a sealed, damp tent — and on canvas, mildew is difficult to remove and weakens the fibers permanently. Fix: air-dry at the campsite or commit to drying within 24 hours of returning home.
“Packing a wet cabin tent without drying it within 24 hours will cause mildew formation that permanently damages the fabric and voids most manufacturer warranties.”
Beyond setup errors, there are situations where a cabin tent simply isn’t the right tool — knowing when to choose something different is part of being a prepared camper.
When to Avoid Cabin Tents
A cabin tent is a car-camping tool. There are three scenarios where choosing one is the wrong call:
Backpacking: Cabin tents weigh 10–25 lbs. For any site more than 0.5 miles from your vehicle, a backpacking tent (2–5 lbs) is the practical choice. No amount of standing room compensates for carrying a 20-lb shelter on a 3-mile approach.
Extreme wind environments: Cabin tents’ near-vertical walls create more wind resistance than dome tents’ curved profiles. On exposed ridgelines, coastal campsites, or any location with consistently high sustained winds, a dome tent’s lower profile is meaningfully safer. The aerodynamics aren’t comparable.
Solo camping: Setting up a 6-person cabin tent for one person wastes setup time, packs weight you don’t need, and creates a tent that feels hollow and cold at night. A 2-person dome or a bivy shelter is more practical in every dimension.
For the situations where a cabin tent IS the right choice, proper care after each trip is what separates a tent that lasts two seasons from one that lasts fifteen.
Caring for Your Cabin Tent
Post-trip care is where most campers lose years of tent life. Start with these cleaning and storage habits:
- Dry completely before storage. Canvas tents especially — mildew on canvas is difficult to remove and weakens fibers. Store loosely (not compressed) in a cool, dry location. A stuff sack is convenient for transport, not for long-term storage.
- Clean annually with mild soap and cold water. Never machine wash — it strips the waterproof DWR (durable water repellent) coating from the fly and tent body.
Follow up with routine maintenance and inspection:
- Reapply seam sealer and DWR coating annually or every 2–3 camping seasons, whichever comes first. The sign you need to reapply: water no longer beads on the fly surface and instead soaks in.
- Inspect poles and ferrules after each trip. Replace cracked or bent sections before your next outing — a failed pole mid-setup is one of the most preventable failures in camping gear.
Frequently Asked Questions
What is the first setup step?
The first step to setting up a cabin tent is choosing and preparing your campsite — not unpacking the tent. Select a flat, level area free of rocks, roots, and standing water, then lay down a footprint or groundsheet to protect the tent floor from moisture and abrasion. Skipping site preparation is the most common reason tents feel uncomfortable or leak — getting this step right takes less than five minutes and prevents problems that can’t be fixed once the tent is up.
How fast is instant tent setup?
An instant cabin tent typically sets up in 60 seconds to 5 minutes. The design uses pre-attached, telescoping poles that unfold and lock into place without threading through sleeves. This eliminates the most time-consuming step in traditional tent setup entirely. The CORE 9-Person Instant Cabin Tent, for example, is designed for a 2-minute setup by one or two adults (CORE Equipment, 2026). Setup time increases if poles are not fully extended to their locking click — always confirm each joint is locked before moving to the next step.
How to stake a tent for wind?
To stake a tent for wind, drive each stake into the ground at a 45-degree angle with the top of the stake pointing away from the tent. This angle resists pull-out forces more effectively than vertical stakes when wind creates lateral tension on the tent walls — angled stakes require significantly more force to dislodge in soft soil (SilverAnt Outdoors, 2026). Always extend and tension the guylines after staking — they distribute wind load across multiple anchor points instead of concentrating it on corner stakes alone. In soft or sandy soil where stakes pull out easily, use sand anchors or cross two stakes in an X-pattern for greater holding strength.
Conclusion
As this cabin tent guide demonstrates, the decision for families and intermediate campers choosing their first or second cabin tent comes down to three variables: setup style (instant vs. traditional), material (canvas for longevity, polyester for weight and cost), and size (add 25–30% to your group’s rated capacity). A well-chosen cabin tent, set up using the 3-Zone System — Site, Structure, and Living — performs reliably across three seasons and eliminates the most common causes of leaks and instability.
The 3-Zone Cabin Setup System exists because most tent failures aren’t about the tent — they’re about skipped steps. Campers who rush the Site Zone end up on uneven ground; those who skip the Structure Zone end up with a sagging rainfly at 2 a.m. The framework takes 30 extra minutes the first time and becomes a 10-minute habit by the third trip. That shift from chaos to confidence is the real value of working through the zones deliberately.
Ready to go deeper? Download our printable setup checklist to take to your campsite, or browse our full roundup of the best cabin tents tested for rain performance. If you’ve already chosen your tent and want a model-specific walkthrough, our model-specific cabin tent pitching tutorial covers setup for the most popular models step by step — bring it up on your phone the first time you pitch, and you won’t need it by the second.
