 Dave King
You wake up at 2 a.m., your sleeping bag is soaked, and the air inside your tent feels like a sauna that’s been running since noon. Summer heat above 80°F turns a sealed tent into a trap — a phenomenon so predictable it has a name.
Campers who don’t fix their setup will keep losing sleep, cutting trips short, and dreading summer camping season. The problem isn’t the heat outside — it’s the heat you’re trapping inside. In this guide, you’ll learn a 6-step system to eliminate The Tent Greenhouse Effect and stay cool while camping — even without electricity. You’ll cover campsite selection, tent setup, gear, personal habits, and critical safety thresholds.
To stay cool while camping, start with campsite selection, then optimize your tent setup, and layer in personal cooling habits. This 6-step system — from removing your rainfly to staying hydrated with electrolytes — works without electricity and takes under 30 minutes to implement at any campsite.
Staying cool while camping comes down to controlling your environment before you feel the heat. Research from the University of Connecticut (2023) shows passive cooling can drop tent temperature 20°F below ambient — no electricity required.
- The Tent Greenhouse Effect is the #1 cause of nighttime overheating — remove your rainfly first
- Campsite placement in natural shade cuts internal tent temperature before any gear is needed
- Hydrate aggressively: drink 2–3 liters of water daily in summer heat (80°+), and add electrolytes
- Battery-powered fans + reflective tarps are the most cost-effective gear combination
- Above 103°F: the National Weather Service considers outdoor conditions dangerous — know when to cancel


Last update on 2026-07-06 / Affiliate links / Images from Amazon Product Advertising API

Last update on 2026-07-06 / Affiliate links / Images from Amazon Product Advertising API

Last update on 2026-07-06 / Affiliate links / Images from Amazon Product Advertising API

Last update on 2026-07-06 / Affiliate links / Images from Amazon Product Advertising API

Last update on 2026-07-06 / Affiliate links / Images from Amazon Product Advertising API

Last update on 2026-07-06 / Affiliate links / Images from Amazon Product Advertising API

Last update on 2026-07-06 / Affiliate links / Images from Amazon Product Advertising API
Last update on 2026-07-06 / Affiliate links / Images from Amazon Product Advertising API

Last update on 2026-07-06 / Affiliate links / Images from Amazon Product Advertising API
Last update on 2026-07-06 / Affiliate links / Images from Amazon Product Advertising API
What You’ll Need Before You Start
Before implementing any of these steps, gather the following:
- Reflective tarp or emergency space blanket — deflects solar radiation from tent fabric
- Battery-powered or USB-rechargeable fan — rechargeable preferred for multi-night trips
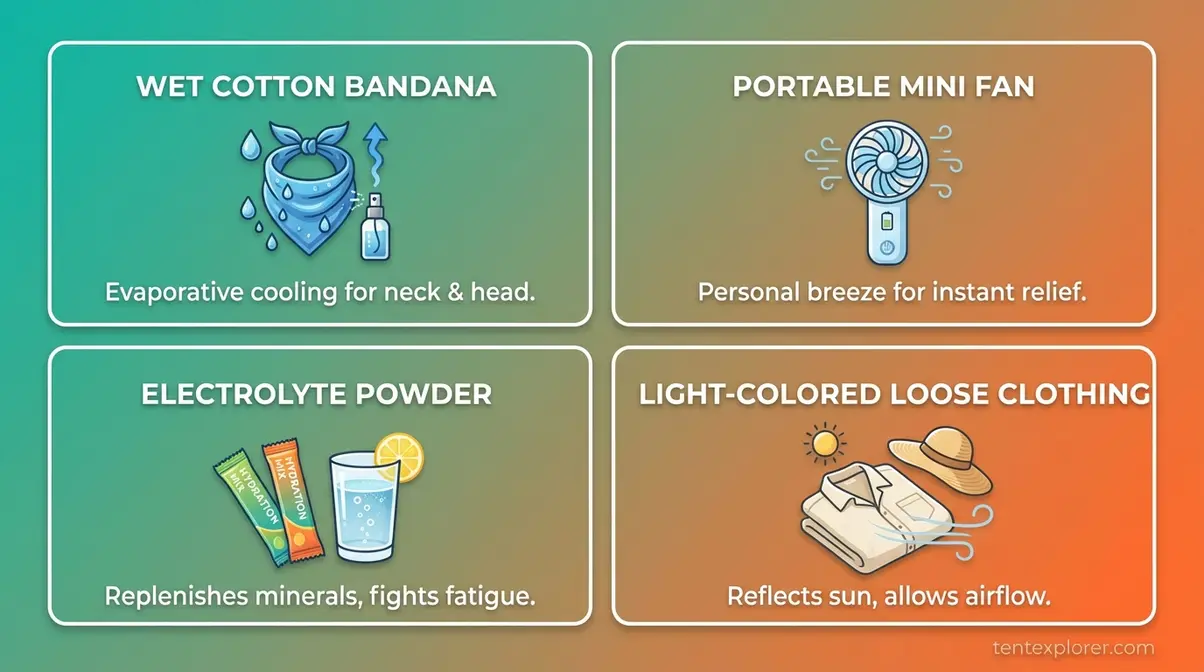
- Light-colored, loose-fitting clothing — cotton for camp rest, moisture-wicking synthetics for hiking
- Cooler with ice or frozen water bottles — dual-use: passive cooling and cold drinking water
- Electrolyte packets or sports drink powder — lightweight and critical for heat safety
- Cotton bandana — soak it, wear it around your neck; a free, effective cooling tool
Most of these strategies take under 30 minutes to set up at your campsite. Steps 1–4 work entirely without electricity; Step 3 includes powered options for campers with battery banks.
Step 1: Choose a Campsite That Works With the Sun
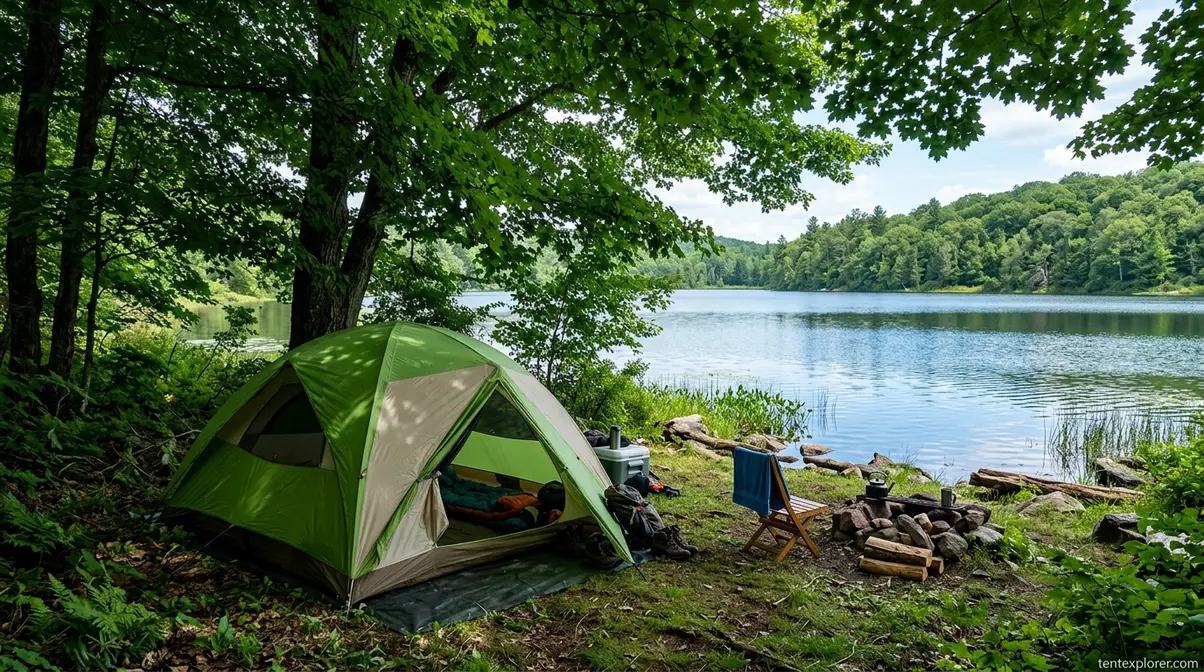
Campsite selection is the single highest-leverage decision you’ll make for heat management — it costs nothing and determines how hard every other step has to work. Camping near water sources creates natural evaporative cooling that lowers ambient temperature around your site. A well-chosen site reduces the burden on your gear, your fan, and your body. For the right tent to pair with your site strategy, see our guide to best tent for hot weather camping.
Choosing the wrong site is the first step toward creating a Tent Greenhouse Effect before you’ve even pitched your poles.
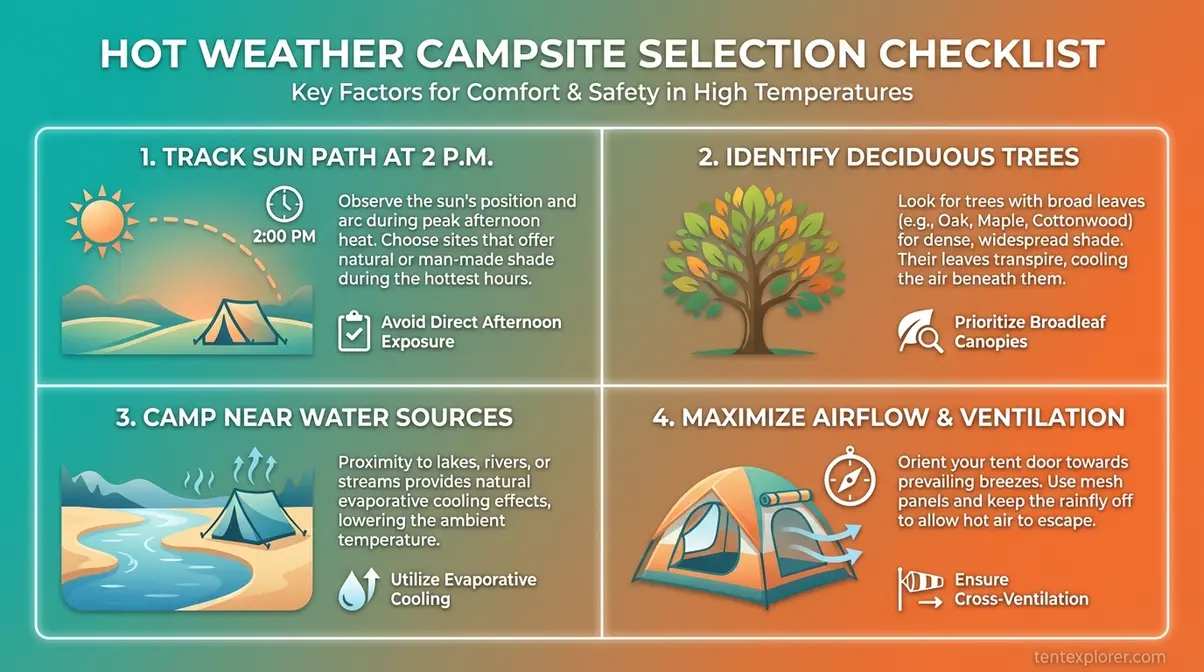
Track where shade falls at 2 p.m. — not at 8 a.m. This is the detail competitors consistently miss. When you arrive in the morning, a spot might look shaded under a tall pine. By peak heat hours, the sun has shifted and that pine is casting its shadow 30 feet away. Deciduous trees — oak, maple, ash — provide the densest canopy during summer because their full leaf coverage blocks direct solar radiation. Conifers offer sparser protection. Walk your potential site at setup time and mentally map where shade will fall mid-afternoon.
Camp near water. Rivers, lakes, and streams lower ambient temperature through natural evaporative cooling — the same physics behind a swamp cooler, happening at landscape scale. Beyond temperature, a nearby water source gives you immediate cooling options: soaking your feet, wetting a bandana, or swimming during the hottest hours. NC State University confirms that engaging in water activities like swimming or kayaking provides a safe way to stay cool during extreme heat (2026).
Elevation and airflow matter. Higher ground catches more breeze; valley floors trap hot air and humidity. If two sites are otherwise equal, choose the one with more vertical exposure to prevailing winds.
Before moving to tent setup: your site should have natural shade at 2 p.m. and ideally face a prevailing breeze.
For a visual walkthrough of sun path tracking, watch our step-by-step video: How to Choose the Coolest Campsite: Sun Path & Elevation Tips
Once you’ve chosen the right site, the next step is setting up your tent to block heat before it enters — which starts with understanding why tents become ovens in the first place.
Step 2: Set Up Your Tent to Fight the Greenhouse Effect
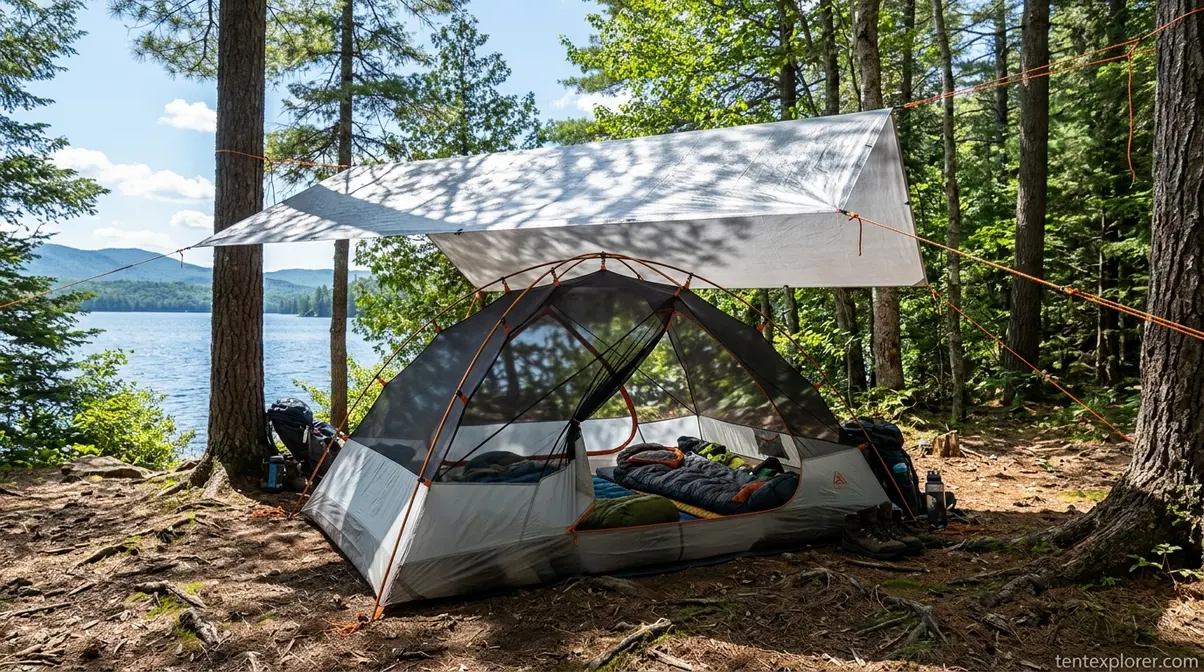
A tent sealed with a rainfly in direct sunlight traps radiant heat like a greenhouse — internal temperatures can exceed ambient by 20–30°F, making sleep physically impossible. This is The Tent Greenhouse Effect, and it’s the core enemy of summer camping comfort. Researchers at the University of Connecticut developed a passive cooling system using evaporative fabric and water that drops tent temperature 20°F below ambient — no electricity required (University of Connecticut, 2023). This section’s two-step fix — remove the rainfly and create external shade — applies that same principle using gear you already own.
Remove the Rainfly and Orient Your Tent for the Breeze
Staying cool while tent camping starts with one action that costs nothing: remove the rainfly when no rain is in the forecast. The rainfly, a waterproof outer layer that sits over your tent body, is designed to keep water out — but it also seals in heat and blocks airflow. Without it, your tent’s mesh walls allow full cross-ventilation, turning the tent body into a breathable screen rather than a sealed chamber.
Orient your tent doors and windows perpendicular to the prevailing breeze direction. If you’re unsure which way the wind is blowing, check the campsite’s flag, watch how nearby vegetation bends, or use a weather app’s wind direction reading. Even a light breeze through mesh walls can drop perceived temperature by several degrees.
The National Weather Service recommends disassembling your tent after waking and reassembling it after sunset — eliminating hours of daytime heat accumulation inside the fabric. It’s an extra five minutes of effort that pays off dramatically by bedtime. Review additional tent ventilation strategies to maximize airflow for your specific tent model.
Checkpoint: You should feel airflow through the tent mesh when standing inside. If you don’t, reposition the door to face the wind.
Ventilation handles airflow — but if the sun is still beating directly on your tent fabric, you need a physical barrier.
Block the Sun with a Reflective Tarp
Hang a reflective tarp or silver emergency space blanket 12 inches above the tent — not directly on it. That air gap is critical. Without it, you’re just adding an insulating layer. With it, convective airflow moves between the tarp and tent fabric, carrying heat away before it penetrates. The tarp deflects solar radiation; the gap lets convection do the rest.
This 12-inch spacing rule is a specific, actionable measurement absent from virtually all competing guides. A budget-friendly alternative: a $3–$5 emergency space blanket from any outdoor retailer works just as well as a purpose-built reflective sunshade for this application — the reflective surface is the functional element, not the brand.
University of Connecticut research confirms that passive cooling technology using water and sunshine can drop tent temperature 20°F below ambient conditions (2023) — validating the physical principles behind every shade-and-ventilation strategy in this guide.
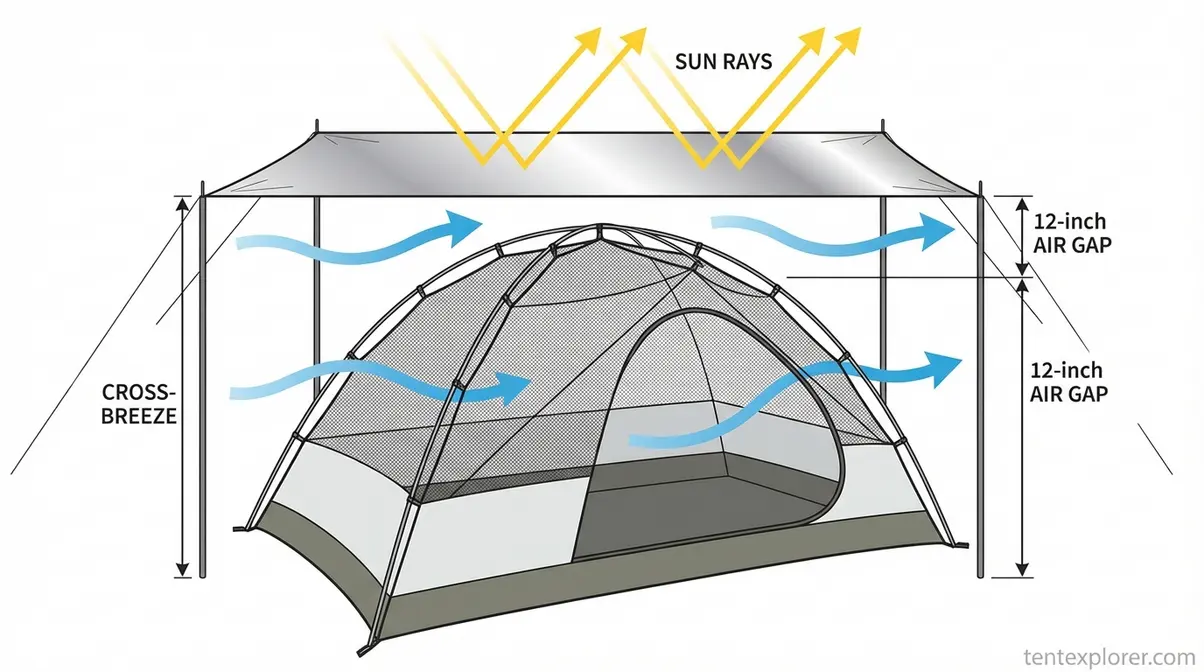
With your site optimized and tent set up correctly, the next layer is gear — specifically the tools that cool the air inside your tent without needing a power hookup.
Step 3: Use Cooling Gear and DIY Solutions Without Electricity
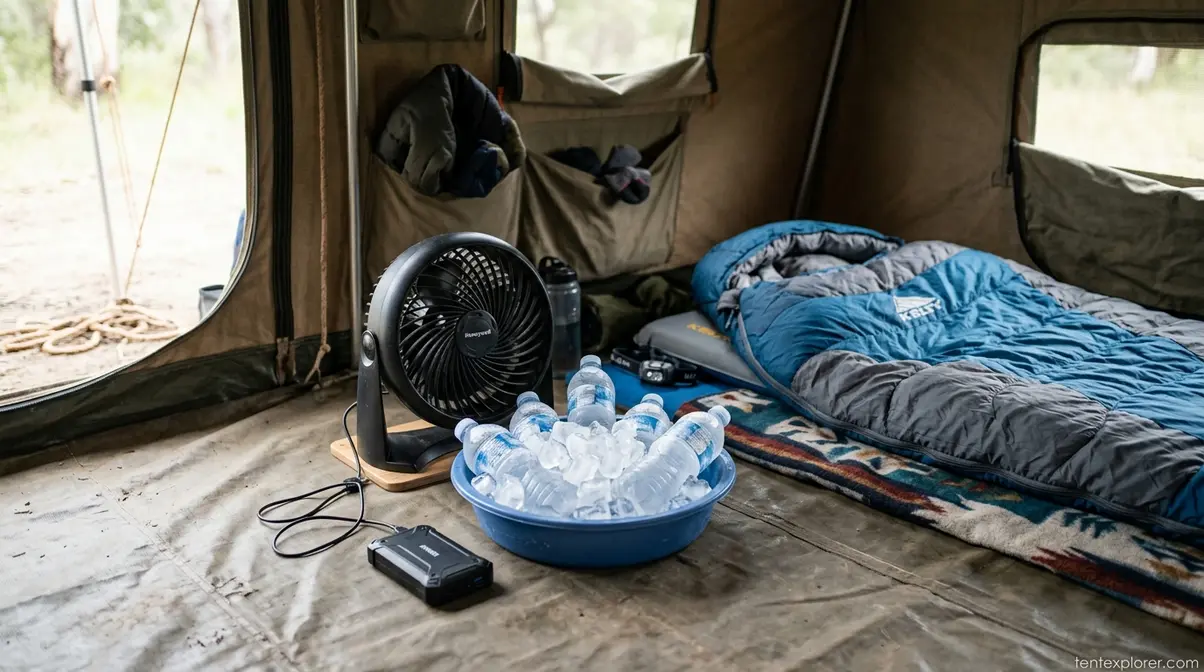
Gear for staying cool while camping without electricity falls into two categories: passive tools (reflective materials, cooling wraps, frozen bottles) and active tools (battery-powered fans, DIY evaporative coolers). Outdoor cooling research consistently identifies the battery-powered fan as the single most impactful piece of gear for summer camping comfort. Even a $20 rechargeable fan can transform sleep quality when paired with the tent setup from Step 2. These tools are your active countermeasures against the Tent Greenhouse Effect that your campsite and tent setup couldn’t fully prevent.
Battery-Powered Fans and Portable Coolers
A battery-powered or rechargeable fan is the most consistently recommended gear item across camping communities — and for good reason. When shopping, prioritize three specs: 200+ CFM airflow (enough to move air through your sleeping area), 8+ hours of battery life on a single charge, and noise under 40 dB for sleeping. Campers in outdoor communities regularly report that fan selection makes a bigger difference than any other single gear purchase for summer trips.
Frozen water bottles in your cooler serve a dual purpose: they passively cool the air near your sleeping area when the cooler lid is left open near the fan, and they become cold drinking water as they melt through the night. The Ivins City cooling guide recommends frozen water bottles specifically as dual-use cooling tools for no-power scenarios.
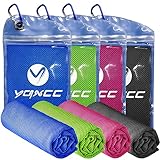
Cooling neck wraps soaked in water cost $5–$15 and deliver immediate relief. Soak one before bed, drape it around your neck, and it can lower perceived body temperature for one to three hours per soak — a lightweight addition that earns its place in any summer kit. For campers with access to battery banks, browse our full guide to portable air conditioners for tent camping for higher-output options.
If you want to go beyond a fan, you can build an effective DIY air conditioner for under $10 in about five minutes.
The DIY Evaporative Cooler Hack
A DIY evaporative cooler — also called a swamp cooler — uses water evaporation to lower air temperature. Here’s how to build one at your campsite:
- Fill a shallow bowl or pot with ice (or frozen water bottles)
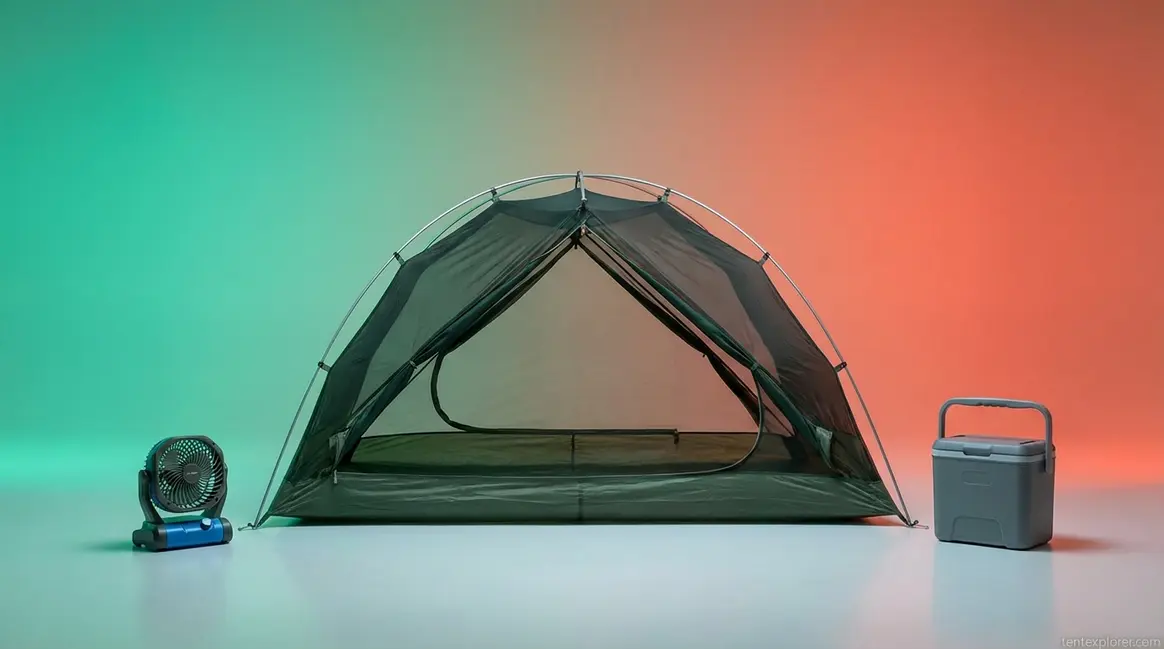
- Position the bowl 6–12 inches in front of your battery-powered fan
- Angle the fan so air passes over the ice surface, not through it
- Point the cooled airflow toward your sleeping area
The physics are straightforward: air moving across ice picks up cold moisture and drops the ambient temperature in a 6–8 foot radius. University of Colorado Boulder health guidance confirms that placing a battery-powered fan in front of a bowl of ice effectively cools air in enclosed spaces during summer heat (2024).
One important qualifier: this method works best in low-humidity environments. In desert camping (humidity below 20%), evaporative cooling is highly effective because dry air absorbs moisture quickly, amplifying the temperature drop. In humid climates — the Southeast, Pacific Northwest summer — the air is already moisture-saturated, so the fan-only approach delivers more benefit. This humidity variable is the detail most guides skip entirely.
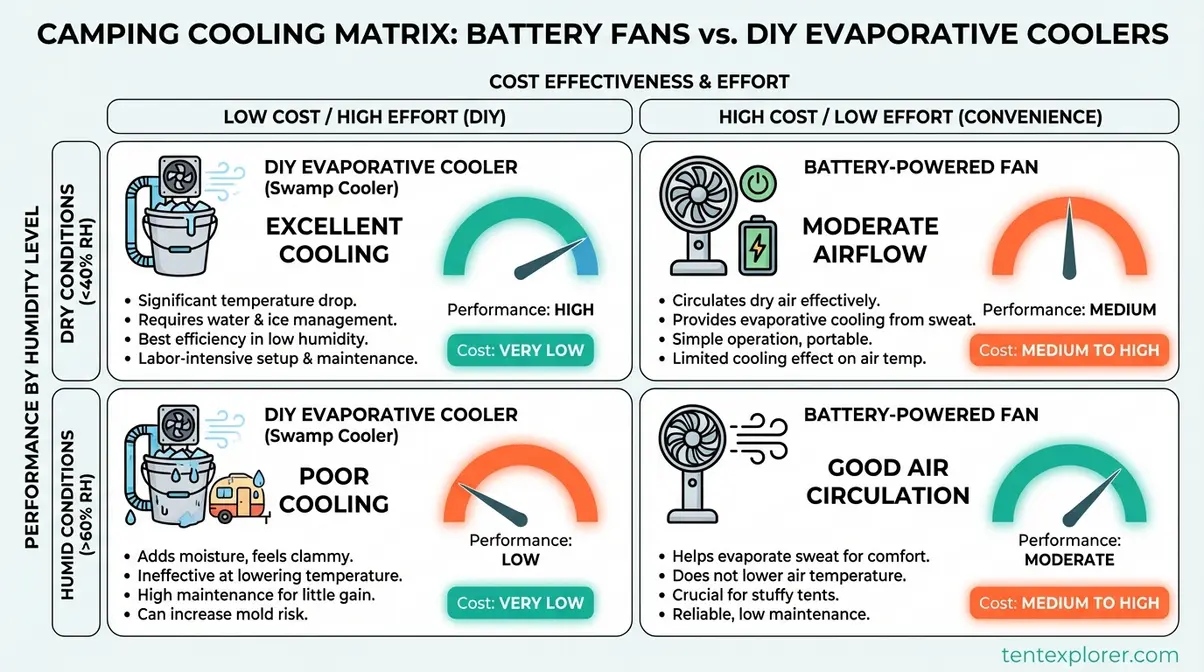
Gear handles the environment around you — but the most reliable cooling system is your own body. The next step covers how to use it effectively.
Step 4: Apply Personal Cooling Techniques All Day
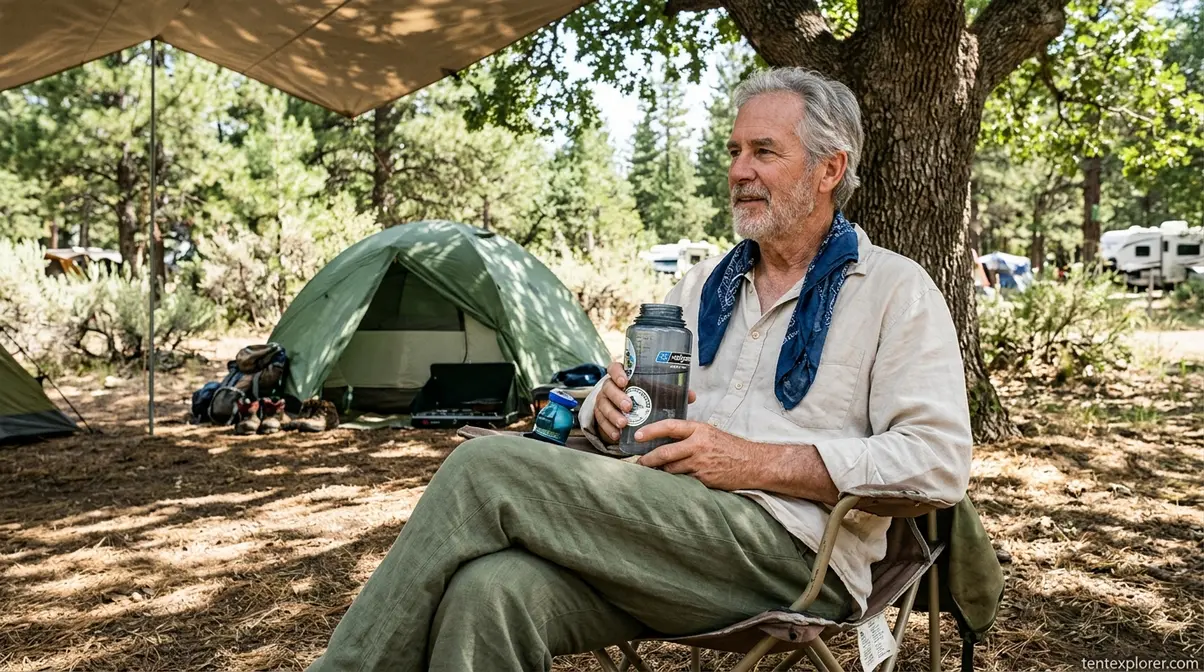
Staying cool while camping in hot weather combines three elements that cost nothing to implement: what you wear, how much you drink, and when you’re active. Texas Parks and Wildlife recommends light, loose-fitting, breathable clothing paired with a wet bandana as the most effective personal cooling combination for outdoor summer heat (Texas Parks and Wildlife Department, 2023). These techniques work independently of your campsite, your tent, and your gear — making them the most universally reliable layer of your system. While Steps 1–3 fight the Tent Greenhouse Effect externally, this step manages your body’s internal heat load.
What to Wear and How Much to Drink
Clothing: Wear loose-fitting, light-colored clothing in breathable fabrics. For passive camping — sitting in shade, cooking, relaxing — cotton is the better choice. Cotton retains moisture against your skin, which promotes evaporative cooling as you perspire. For active hiking, switch to moisture-wicking synthetics that move sweat away from your skin more efficiently. Texas Parks and Wildlife specifically recommends light, loose, breathable clothing for outdoor summer heat (2023).
The nuance matters: cotton works at camp when you’re relatively still. On a strenuous trail in summer heat, moisture-saturated cotton becomes heavy and can actually slow cooling. Know the difference, and pack both.
“In the summer: wear cotton. The moisture retention will keep you cooler. Wear a water soaked bandana around your neck or head. Camp near water!”
— Experienced camper, r/CampingGear
Hydration: Drink 2–3 liters of water per day in summer heat (80°+), and add electrolyte packets to replace sodium and potassium lost through sweat. Plain water alone, consumed in very large quantities, can cause hyponatremia — a sodium dilution condition that mimics heat exhaustion. This is the nuance most hydration advice skips. Electrolyte powder packets are lightweight, inexpensive, and significantly reduce heat exhaustion risk on multi-day trips.
Timing: Avoid strenuous activity from 10 a.m. to 3 p.m. — peak heat hours. The U.S. Department of Veterans Affairs recommends restricting strenuous activities to the coolest parts of the day during extreme heat (2025). Schedule hikes for early morning or after 4 p.m., and use midday for shade rest, swimming, or a visit to an air-conditioned visitor center.
Daytime cooling is manageable — the real challenge is sleeping when temperatures stay above 70°F at night.
How to Stay Cool at Night While Camping
Night cooling requires a different approach than daytime heat management. Start by swapping your sleeping bag for a single cotton sheet. Cotton’s moisture retention keeps you cooler than synthetic sleeping bag material in warm conditions — the same principle behind the cotton clothing recommendation. If temperatures drop below 60°F overnight (common in desert environments and at elevation), keep a light layer within arm’s reach.
Freeze a water bottle before your trip — or grab one from a campground ice machine — and place it at the foot of your sleeping area. The Ivins City government cooling guide recommends this as a “bed-friendly ice pack” for no-power cooling. It works by drawing heat away from your feet and lower legs, which are major heat-dissipation points.
Position your battery fan to blow air across your body rather than directly at your face. Cross-ventilation from open tent mesh combined with a fan circulating that air is the most effective night cooling system available without power. The combination of passive airflow and directed fan movement creates a consistent cooling effect across your sleeping surface.
One critical note for desert campers: temperatures can drop 30–40°F between midday and midnight in arid environments. Set an alarm or leave a fleece accessible — hypothermia risk is real even in summer desert camping, and it catches people off guard after a brutally hot afternoon.
Standard camping setups work for most summer conditions — but desert and car camping present unique heat challenges that require specific adaptations.
Step 5: Adapt Your Strategy for Desert and Car Camping
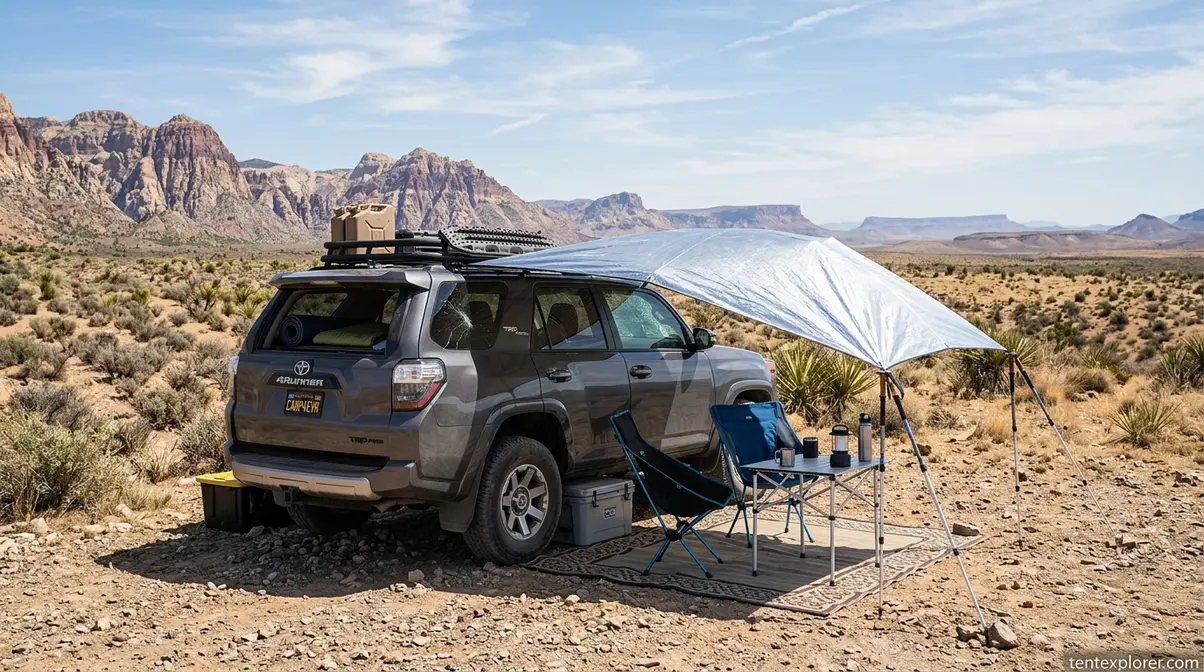
Desert and car camping each introduce specific heat challenges that require adjustments to the standard system. In desert camping, where daytime temperatures regularly exceed 100°F but humidity stays below 20%, the DIY evaporative cooler from Step 3 becomes significantly more effective than in humid climates — dry air absorbs moisture faster, amplifying the cooling effect. Shade is scarce in open desert terrain, so bring your own: a large reflective tarp stretched over trekking poles creates a standalone shade structure that works independently of tree cover.
The cold-night flip side is real. Desert temperatures can drop 30–40°F overnight — from 105°F at 2 p.m. to 65°F at midnight. Pack a mid-layer and have it accessible without digging through your pack. Camping communities in r/camping consistently recommend the biggest battery-powered fan you can afford paired with cold foods (sandwiches, salads) — avoiding cooking at camp eliminates a significant heat source during the hottest parts of the day.
For car camping, your vehicle introduces its own greenhouse effect. Park in shade whenever possible and crack windows for cross-ventilation. A 12V fan powered via a car adapter is a meaningful upgrade over battery fans for extended car camping — it runs indefinitely without draining a battery bank. Use a reflective windshield sunshade to prevent vehicle heat accumulation between uses; the same radiant-heat physics that apply to your tent apply to a parked car in direct sun.
For extended car camping in extreme heat, a portable 12V evaporative cooler or compact portable AC unit is worth considering — your vehicle’s power access makes options available that backpackers simply can’t carry.
Most summer camping heat is manageable — but there’s a threshold where heat becomes a medical issue, not just a comfort issue. Step 6 covers how to recognize that line.
Step 6: Recognize Heat Danger Signs and Know Your Limits
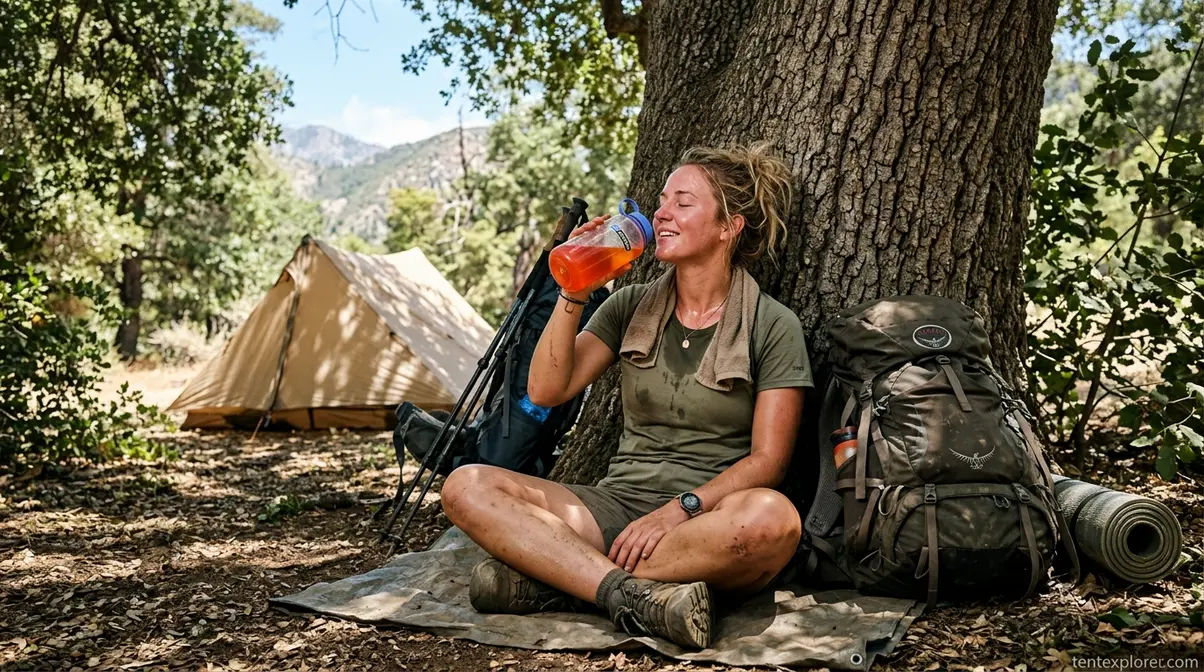
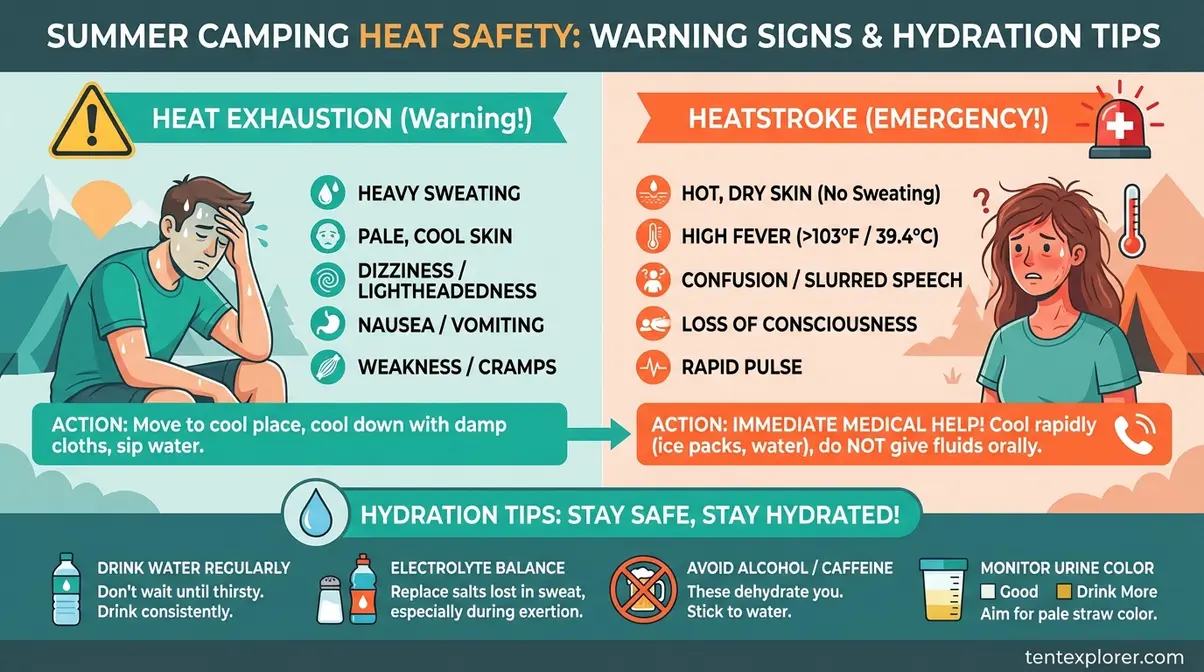
Camping at 100°F is possible but carries significant health risk — the National Weather Service considers outdoor heat index values at or above 103°F dangerous, with heat stroke, cramps, and exhaustion becoming likely with prolonged exposure or physical activity (National Weather Service, 2026). Most outdoor safety experts recommend reconsidering camping plans before temperatures reach triple digits, especially without reliable shade or water access. This is a safety threshold, not a comfort preference.
Know the difference between heat exhaustion and heatstroke. Heat exhaustion presents as heavy sweating, weakness, nausea, and cool or pale skin — your body is working but struggling. Move to shade, drink water with electrolytes, and rest. Heatstroke is a medical emergency: hot and dry skin, confusion, no sweating, and body temperature exceeding 104°F. Call emergency services immediately. Do not wait to see if it resolves on its own.
The U.S. Department of Veterans Affairs recommends restricting strenuous activities to the coolest parts of the day during extreme heat (2025) — before 10 a.m. and after 4 p.m. Use midday heat for shade rest, swimming, or in-town activities. An air-conditioned diner or library during the 11 a.m.–3 p.m. window is not a failure of camping spirit. It’s smart heat management.
This article provides general informational guidance and is not a substitute for professional medical advice in a heat emergency. If someone shows signs of heatstroke — confusion, hot and dry skin, loss of consciousness — call emergency services immediately.
Knowing the limits of what heat management can do is as important as the techniques themselves. The next section covers common mistakes — and the cold-weather risk that catches summer campers off guard.
When Cooling Isn’t Enough: Limitations and Risks
Common Mistakes That Make Heat Worse
Even experienced campers make these errors in summer heat:
- Removing the rainfly without checking the forecast — if rain arrives overnight, you’re soaked and cold by 3 a.m. Always check a 48-hour weather forecast before leaving the rainfly behind.
- Over-hydrating with plain water — drinking more than 3 liters of plain water without electrolytes can cause hyponatremia in extreme heat. Add electrolytes whenever you’re drinking heavily.
- Skipping the cold-layer pack — summer desert nights regularly drop to 50–60°F. The Penn State health guide recommends bringing adequate bedding and clothing even in summer to prevent hypothermia during cool nights (2025). Review winter camping warmth strategies if you’re camping at elevation.
- Assuming shade lasts all day — sun position shifts significantly between 8 a.m. and 3 p.m. Recheck your campsite shade at 2 p.m. and be ready to reposition your tarp or relocate your sleeping setup.
When to Choose a Cold-Weather Strategy Instead
Two scenarios call for cold-weather gear even in summer months. First, high-altitude camping — at elevations above 8,000 feet, overnight temperatures can drop below 40°F regardless of the season, and a summer sleeping bag becomes dangerously inadequate. Second, shoulder-season camping in spring or fall — daytime temperatures may hit 80°F while nighttime lows drop into the 30s, requiring dual preparation for both heat and cold.
For campers navigating both extremes, explore best hot tents for winter as a starting point for understanding insulated shelter options that handle temperature swings across a single trip.
Frequently Asked Questions
How do people stay cool when camping?
The most effective way to stay cool while camping is to combine campsite selection, tent ventilation, and personal hydration into a system rather than relying on any single method. Prioritize pitching in natural shade, removing your rainfly for airflow, and drinking 2–3 liters of water daily with electrolytes. A battery-powered fan used with a bowl of ice can reduce tent temperature noticeably without any power hookup. Results vary based on humidity, elevation, and access to shade.
What is the 200 rule for camping?
The 200 Rule requires campers to pitch their tent, dispose of waste, and wash dishes at least 200 feet from all water sources, trails, and other campsites. This protects water quality, minimizes environmental impact, and reduces conflicts with other campers. 200 feet is roughly 70 adult paces — a practical measurement any camper can apply without a tape measure. Individual campgrounds may have stricter rules; always check posted regulations before setting up.
What are the 7 C’s of camping?
The 7 C’s of camping are Cover, Cooking, Comfort, Clothing, Cleanliness, Care, and Communication — a framework for packing and preparing for any outdoor adventure. Each category ensures a specific need is met: Cover protects from weather; Clothing manages temperature; Care addresses first aid. Applying the 7 C’s before a summer camping trip helps prevent common oversights like forgetting sun protection or electrolytes. Different sources list slight variations; these seven are the most widely cited.
Is 100 degrees too hot for camping?
Camping at 100°F is possible but carries significant health risk — the National Weather Service considers heat index values at 103°F dangerous, with heat exhaustion and heat stroke becoming likely with prolonged exposure. At 100°F, heat exhaustion risk rises sharply, especially without reliable shade or water access, and most outdoor safety experts recommend reconsidering camping plans before temperatures reach triple digits. If you do camp in these conditions, restrict activity to before 10 a.m. and after 4 p.m. Consult a medical professional if you have heat sensitivity, cardiovascular conditions, or are camping with young children or elderly individuals.
What is the 3-3-3 rule for camping?
The 3-3-3 rule for camping is a safety preparedness guideline: carry 3 sources of light, 3 ways to make fire, and 3 days’ worth of food and water. This redundancy principle ensures you’re prepared for unexpected situations — a dead flashlight, wet matches, or an extended stay due to weather. Some versions also include: arrive at your site by 3 p.m., camp no more than 3 nights in one spot, and maintain 3 emergency contacts. Variations exist across outdoor organizations; confirm which version applies to your trip’s guidelines.
What are the best ways to keep a tent cool in hot weather?
The best way to keep a tent cool in hot weather is to eliminate the Tent Greenhouse Effect through three actions: pitch in shade, remove the rainfly, and hang a reflective tarp 12 inches above the tent. These passive cooling methods require no electricity and work by blocking solar radiation while maximizing cross-ventilation through mesh walls. Researchers at the University of Connecticut found passive cooling can reduce tent temperature up to 20°F below ambient conditions (University of Connecticut, 2023). Adding a battery-powered fan inside the tent significantly amplifies these passive methods.
What gear helps you stay cool while camping without electricity?
The most effective gear for staying cool while camping without electricity includes a rechargeable battery-powered fan, a reflective tarp, cooling neck wraps, and frozen water bottles. A battery fan paired with a bowl of ice creates a DIY evaporative cooler effective in a 6–8 foot radius in low-humidity environments. Cooling neck wraps soaked in water can lower perceived body temperature for one to three hours per soak. Gear effectiveness varies by humidity — evaporative methods work best in dry desert air below 30% relative humidity.
How can I stay hydrated effectively during hot weather camping?
Effective hydration during hot weather camping requires drinking 2–3 liters of water daily and supplementing with electrolytes to replace sodium and potassium lost through sweat. Freezing water jugs before your trip serves a dual purpose: they act as ice packs in your cooler and become cold drinking water as they melt through the day. Electrolyte powder packets or sports drink tabs are a lightweight, inexpensive addition that significantly reduces heat exhaustion risk on multi-day trips. Avoid alcohol and caffeine during peak heat hours, as both accelerate dehydration.
What clothing should I wear to stay cool while camping?
Wear loose-fitting, light-colored clothing in breathable fabrics — cotton for passive camping activities and moisture-wicking synthetics for active hiking. Cotton retains moisture against your skin, which promotes evaporative cooling when you’re sitting or resting in the shade at camp. Texas Parks and Wildlife specifically recommends light, loose, breathable clothing paired with a wet bandana around the neck as the most effective personal cooling combination for outdoor summer heat (Texas Parks and Wildlife Department, 2023). Avoid dark colors, tight fits, and heavy synthetics, which trap heat and accelerate dehydration throughout the day.
For summer campers, knowing how to stay cool while camping comes down to one root problem: The Tent Greenhouse Effect. University of Connecticut research confirms passive cooling can drop tent temperature 20°F below ambient — no electricity needed (University of Connecticut, 2023). The most reliable system combines strategic campsite selection, rainfly removal with reflective tarp shade, a battery-powered fan, and aggressive hydration with electrolytes.
The Tent Greenhouse Effect reframes heat as an engineering problem with a solvable sequence — not a discomfort you simply endure. Every step in this system addresses one specific mechanism: where heat enters, where it accumulates, and how your body responds. That’s the difference between camping in summer and suffering through it.
Start with your next campsite booking: check the site’s shade map, add a reflective tarp and rechargeable fan to your kit, and freeze two water bottles the night before you leave. These three changes alone will transform your summer camping experience — and you’ll have the system running in under 30 minutes after you park.

Dave King
I'm Dave King. I publish Tent Explorer, a site built to answer the questions people actually ask before they buy.