 David King
⚠️ Safety Notice: Winter camping carries real risks, including hypothermia, frostbite, and carbon monoxide poisoning. This guide is for informational purposes only and does not replace professional wilderness training. Always start in mild conditions, never camp alone without experience, check weather forecasts and avalanche reports from official sources before your trip, and tell someone your plans and expected return time.
“Please share your trips for a newbie to winter camping. I do camp in all other seasons but time to take on some winter camping.”
— A first-time winter camper, r/camping
That’s exactly where thousands of beginners start — excited, capable, and a little unsure. The good news: staying warm in a tent at 15°F is not about toughness. It’s about a system.
The #1 beginner mistake is treating winter camping like a cold version of summer camping and packing accordingly. According to the CDC, hypothermia can begin at temperatures above 40°F when sweat or moisture is left unmanaged — a threshold that surprises most people who assume cold weather alone is the only danger (CDC, 2026). Wet clothing at 45°F is genuinely more dangerous than dry clothing at 20°F.
In this guide, you’ll find 15 specific, field-tested winter camping tips for tent campers covering everything from choosing the right tent to recognizing the early signs of frostbite. We cover five areas in sequence: shelter, clothing, sleep system, food and water, and safety — so you can build your plan layer by layer.
Disclosure: tentexplorer.com is a participant in the Amazon Services LLC Associates Program, an affiliate advertising program designed to provide a means for sites to earn advertising fees by advertising and linking to Amazon.com. The products listed below were selected based on their relevance to winter camping — we earn a small commission if you purchase through our links at no extra cost to you.
Recommended Products
| # | Image | Product | Best For | Buy |
|---|---|---|---|---|
| 1 |  |
32°F Winter Camping Sleeping Bag | Cold-weather overnight sleep | Buy on Amazon |
| 2 |  |
Cordless Heated Wearable Blanket | Hands-free camp warmth | Buy on Amazon |
| 3 |  |
Foam Foil Insulating Camping Mat | Cold ground insulation | Buy on Amazon |
| 4 |  |
Down Booties Camp Foot Warmers | Warm feet at camp | Buy on Amazon |
| 5 |  |
Rechargeable Smart Hand Warmers 2-Pack | Cold hands outdoors | Buy on Amazon |
| 6 | No products found. | REDCAMP Sherpa-Lined Camping Blanket | Windproof camp lounging | No products found. |
| 7 |  |
Arcturus Military Wool Blanket | Durable all-weather warmth | Buy on Amazon |
| 8 |  |
Mylar Emergency Survival Blankets 4-Pack | Emergency heat retention | Buy on Amazon |
Key Takeaways: Winter Camping Tips for Tent Campers
Staying warm in a tent this winter is about building “The Warmth Stack” — a layered system of shelter, clothing, and sleep gear that compounds protection at every level. The CDC confirms hypothermia can begin above 40°F when moisture is mismanaged.
- Layer up correctly: Base (moisture-wicking) → Mid (insulating) → Shell (windproof)
- Insulate from the ground: Use a dual sleeping pad system with a combined R-value of 5.0+
- Stay dry: Sweat is your #1 enemy — ventilate your tent even in freezing temps
- Prevent frozen water: Store bottles upside down in an insulated sleeve overnight
- Know the warning signs: Hypothermia’s earliest signal is uncontrolled shivering — act immediately
Tips 1-3: Shelter and Camp Setup
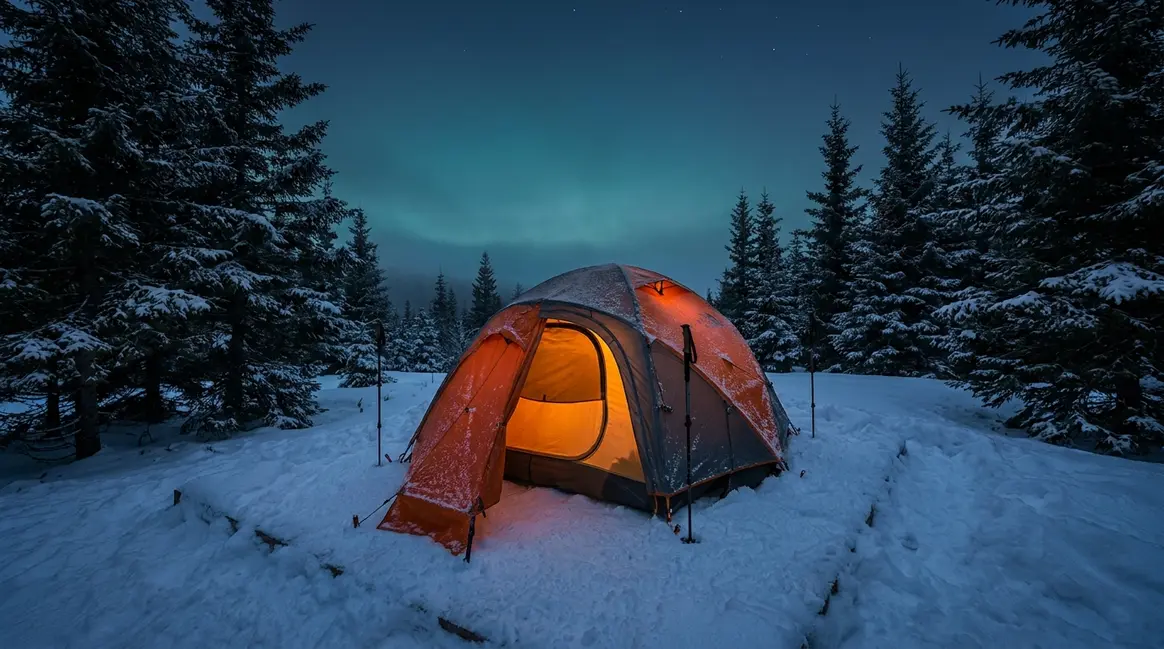
Your tent is the first and most critical layer of warmth in winter camping — choosing the wrong one can make every other tip irrelevant. Leave No Trace winter camping principles recommend setting up camp on deep, consolidated snow cover, which acts as a durable surface that insulates the ground and protects underlying vegetation (Leave No Trace, 2026). Think of your tent as the outermost layer of The Warmth Stack — it sets the ceiling for how warm everything inside can get.
Tip 1: 3-Season vs. 4-Season Tents
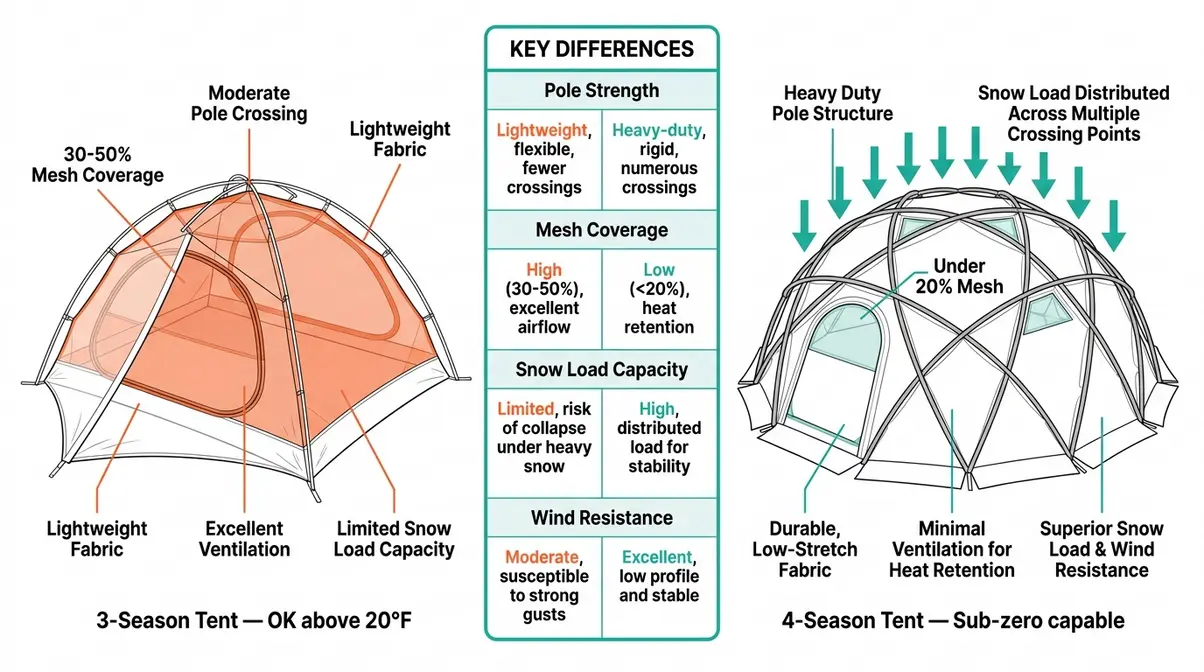
A 3-season tent is the standard tent used for spring, summer, and fall camping. It’s designed for airflow, with large mesh panels covering 30–50% of the interior walls. A 4-season tent (also called a mountaineering tent) is a shelter designed specifically to handle snow load, high winds, and sub-freezing temperatures. The structural differences are significant — and they directly affect your safety.
| Feature | 3-Season Tent | 4-Season Tent |
|---|---|---|
| Pole Strength | Thinner aluminum, fewer poles | Heavier-gauge aluminum, geodesic/semi-geodesic pattern |
| Mesh Coverage | 30–50% of wall surface | Under 20% of wall surface |
| Snow Load Capacity | Moderate (fails under heavy wet snow) | High — designed for sustained snow accumulation |
| Wind Resistance | Moderate | High — low-profile dome deflects wind |
| Best Temp Range | 25°F and above | Sub-zero capable |
| Beginner Verdict | OK for mild winter car camping | Required for backpacking, heavy snow, or temps below 20°F |
A 4-season tent’s geodesic pole structure distributes snow load across multiple crossing points, dramatically reducing the risk of pole collapse under accumulation. Most 3-season tents, by contrast, are not engineered for that stress distribution.
The practical decision rule: If there’s snow on the ground at your site and you can’t see your car from your tent, use a 4-season tent. If you’re car camping in temperatures above 20°F (-6°C) with no forecast snowfall and low wind, your 3-season tent can work — provided you check it for snow accumulation every few hours overnight.
For a deeper look at the options, see our guide to best tents for winter camping or read more about understanding four-season tents before your trip.
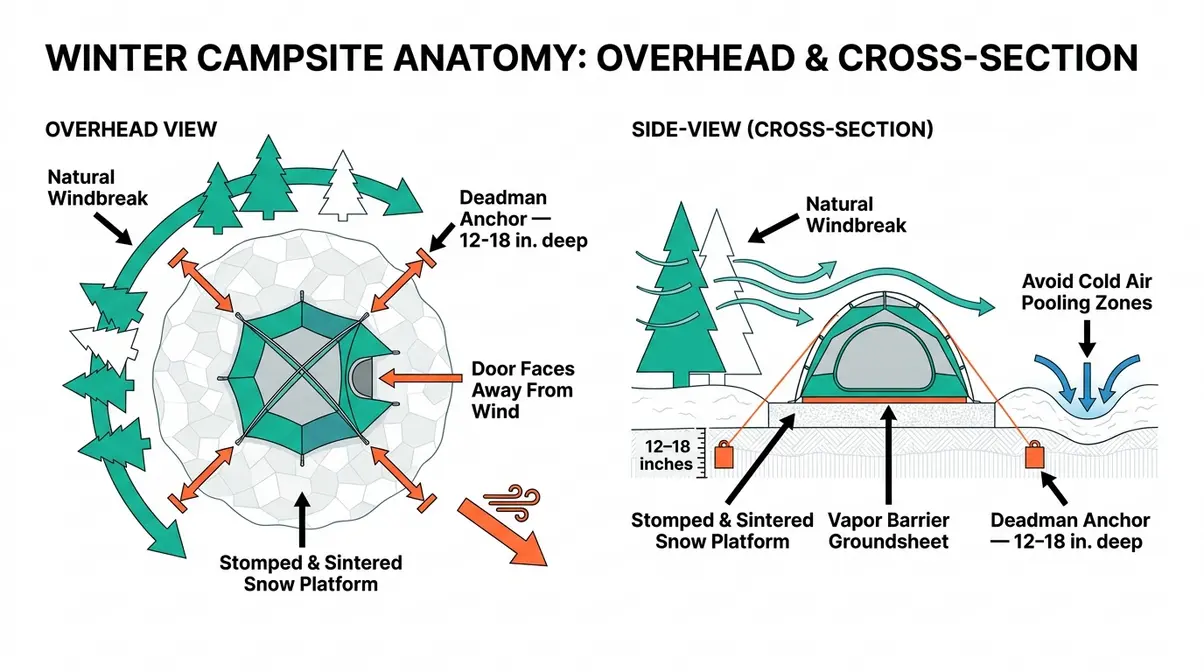
Tip 2: Tent Setup in Snow
Knowing where and how to pitch your tent matters as much as which tent you own. Outdoor educators at NOLS (National Outdoor Leadership School) consistently emphasize that site selection is the single highest-impact decision a winter camper makes — it determines wind exposure, snow stability, and warmth for the entire night.
Follow this sequence:
- Choose a sheltered spot. Look for natural windbreaks — a stand of trees, a boulder, or a gentle hill. Avoid depressions where cold air pools overnight. Never camp below overhead snow loading: heavy-laden branches or cornices can collapse without warning.
- Avoid avalanche terrain. Stay away from steep slopes (generally 30–45°), bowl-shaped gullies, and the runout zones below open faces. When in doubt, consult the avalanche forecast from the regional avalanche center before you leave home.
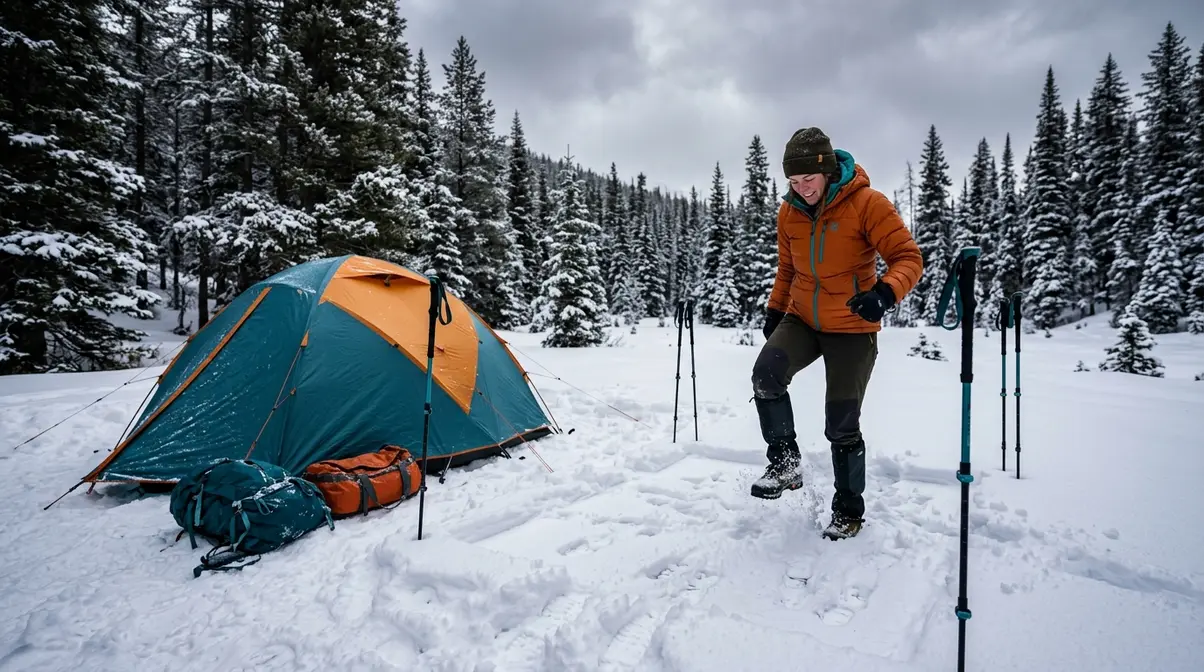
- Stomp a snow platform. Use your boots to pack down a flat area at least two feet wider than your tent footprint on all sides. Walk the same path repeatedly to compress the snow evenly.
- Let it sinter for 15–20 minutes. Sintering is the process by which snow crystals bond and harden after compression. This step is non-negotiable — a platform that hasn’t set will compress unevenly under tent poles overnight, leaving you sleeping on a lumpy, uneven surface.
- Mark your platform edges. Stick a trekking pole or a branch at each corner. In low visibility or a snowstorm, it’s easy to step off the edge while setting up.
- Lay your footprint or groundsheet. A tent footprint (a cut-to-fit tarp that goes under the tent floor) adds a vapor barrier between the snow and your tent floor, slowing ice formation underneath.
- Use deadman anchors instead of standard stakes. Standard tent stakes pull out of snow easily. A deadman anchor is a stake, stuff sack filled with packed snow, or a short log buried horizontally in the snow with your guy line attached to the center. Bury it 12–18 inches deep, perpendicular to the pull direction, and it holds remarkably well.
- Orient the tent door away from prevailing wind. Check your weather app’s wind direction before setup. Your back wall should face the wind — the low, curved profile of a dome tent deflects wind most efficiently in this orientation.
- Stake all guy lines. In winter, every guy line is a structural line, not optional. A sudden gust can collapse an unstaked tent.
A foam foil insulating camping mat placed beneath your sleeping pad adds a meaningful layer of insulation between the snow and your sleep system — a small upgrade with a noticeable impact on overnight warmth.
Tip 3: Managing Tent Condensation
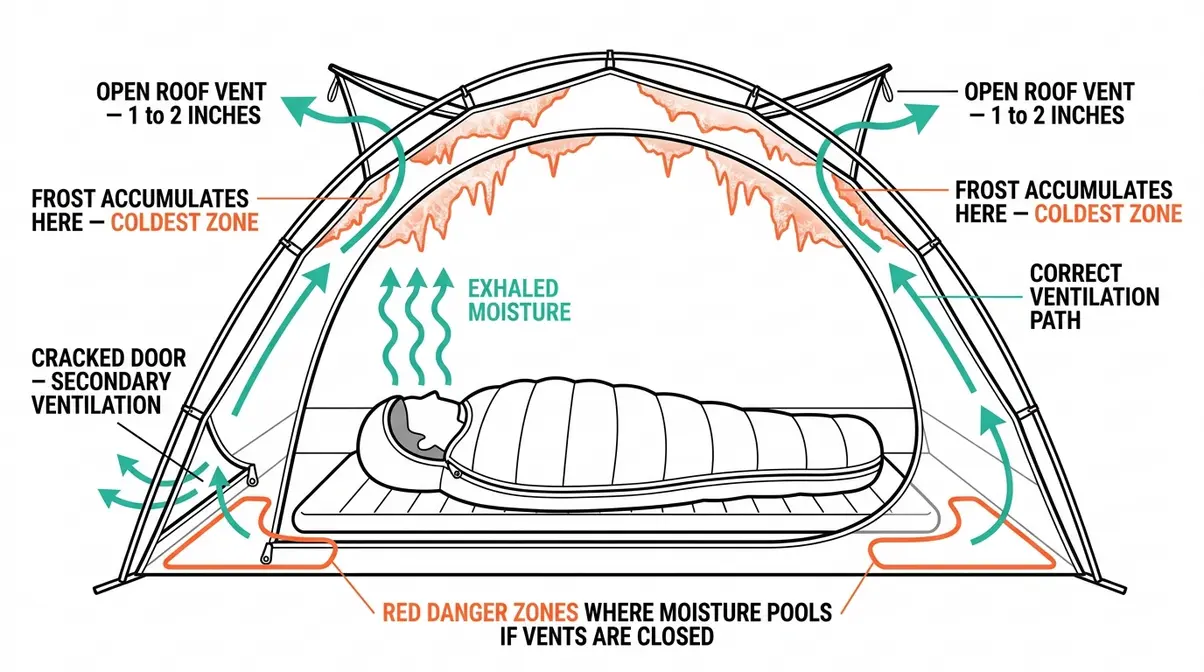
Condensation is one of the most underestimated challenges of winter tent camping. Every breath you exhale releases moisture-laden air. In a sealed tent at sub-freezing temperatures, that moisture freezes on the tent walls overnight — and thaws back onto your gear in the morning. Across winter camping communities, the consistent feedback is that wet sleeping bags from condensation are the second most common cause of a miserable night, right after insufficient insulation.
Here are three specific methods to manage it:
- Crack the vents, even when it’s freezing. Most 4-season tents have roof vents for exactly this reason. Open them 1–2 inches. Yes, you’ll lose a small amount of warmth — but you’ll prevent moisture accumulation that soaks your down sleeping bag and halves its insulating capacity.
- Never cook inside your tent. Cooking produces significant moisture and carbon monoxide. If you use a vestibule (the covered porch area outside the tent door), cook there with the inner door open and the outer vestibule door cracked for CO ventilation.
- Shake your tent walls each morning. Before the frost on the inner walls melts, shake the tent to dislodge ice crystals. Pack your gear before the sun hits the tent and the ice turns to water.
Tips 4-6: Cold Weather Layering
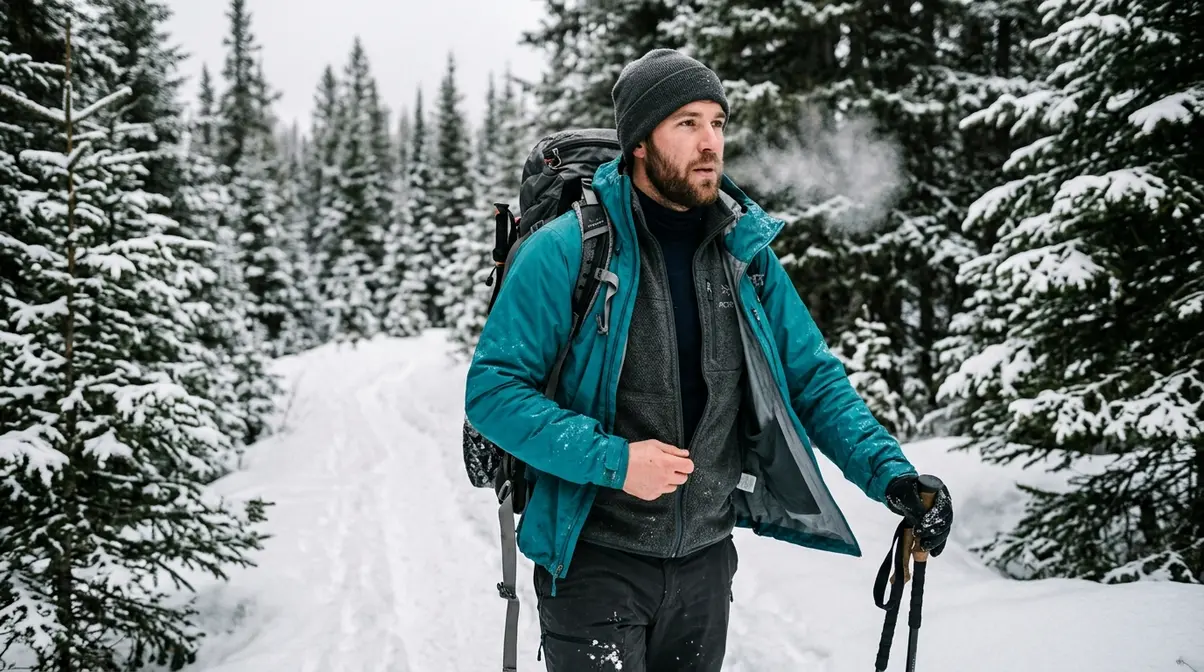
Effective layering is the clothing equivalent of The Warmth Stack — each layer has a specific job, and removing one breaks the system. The key insight most beginner guides miss: layering isn’t about adding warmth. It’s about managing moisture and trapping air. Research from Princeton University’s Outdoor Action program confirms that a three-layer system — base, mid, and shell — is the most effective framework for regulating body temperature across changing activity levels in cold environments (Princeton Outdoor Action, 2026).
Tip 4: Three-Layer System Explained
Think of your clothing as three distinct systems working together:
Layer 1 — The Base Layer (Moisture Management)
Your base layer sits against your skin and its only job is to move sweat away from your body. This is called wicking — pulling moisture outward so it can evaporate rather than sitting on your skin and cooling you. Materials that work: merino wool, polyester, or polypropylene. Material to avoid: cotton. Cotton absorbs moisture and holds it against your skin — outdoor educators summarize this as “cotton kills” because a wet cotton base layer in 30°F temperatures accelerates heat loss dramatically.
Layer 2 — The Mid Layer (Insulation)
Your mid layer traps warm air close to your body. Down fill (measured in fill power — the higher the number, the more loft per ounce) is the warmest option by weight. Synthetic insulation (PrimaLoft, Thinsulate) works when damp, making it a more forgiving choice for beginners who are still learning moisture management. A fleece jacket works well as a mid layer for moderate winter temperatures.
Layer 3 — The Shell Layer (Wind and Moisture Barrier)
Your shell blocks wind and precipitation from penetrating your insulation. A hardshell jacket (waterproof-breathable membrane like Gore-Tex) is the most protective. A softshell (stretchy, wind-resistant but less waterproof) works in dry, cold conditions with low precipitation risk. The shell doesn’t add warmth — it preserves the warmth your mid layer creates.
Tip 5: The Golden Rule is Stay Dry
Sweat is the primary enemy of warmth in winter camping. When you generate heat through hiking, setting up camp, or chopping wood, your body produces sweat. If that sweat saturates your base layer, it begins evaporating — and evaporation is a cooling process that strips heat from your body faster than the cold air alone. Common pain points reported by winter campers include overheating on the trail and then shivering violently at camp — a direct result of sweat-dampened clothing.
The solution is active ventilation, also called “pit-zipping” in the outdoor community. As soon as you feel warm while moving, open your jacket vents or remove your mid layer before you start sweating — not after. This is one of the hardest habits to build because it feels counterintuitive to take off a layer when it’s cold outside.
- Practical rules for staying dry:
- Start every hike feeling slightly cool. If you’re comfortable at the trailhead, you’re overdressed.
- Unzip vents or remove layers at the first sign of warmth — not after you’re sweating.
- Change into dry base layers immediately when you reach camp. Never get into your sleeping bag in the clothes you hiked in.
- Store a dry set of camp clothes sealed in a waterproof bag inside your pack.
Tip 6: Protect Your Extremities
Your body protects its core temperature by restricting blood flow to your hands, feet, and face first — a survival response that leaves your extremities vulnerable to frostbite while your core stays warm. Outdoor medicine educators at the Wilderness Medical Society note that frostbite most commonly affects the toes, fingers, nose, and ears, and that early intervention (rewarming before tissue freezes solid) is dramatically more effective than treating established frostbite (Wilderness Medical Society, 2026).
Hands: Wear a liner glove (thin merino or synthetic) under a waterproof mitten. The mitten traps warm air; the liner lets you use your fingers without fully exposing them. Rechargeable hand warmers in your outer pockets provide supplemental heat during rest stops.
Feet: Wool socks (not cotton) in waterproof boots rated to at least 10°F below your expected low temperature. At camp, change into dry socks immediately and slip on down booties — insulated camp footwear that keeps your feet warm without the weight of hiking boots. Your feet lose heat rapidly when you stop moving, and cold feet are one of the fastest routes to a miserable night.
Head and face: A wool or synthetic beanie worn to sleep retains significant body heat — your head radiates heat efficiently, and covering it matters even inside a sleeping bag. A balaclava (a full-face covering with a mouth/nose opening) adds face protection in wind.
Tips 7-9: Build a Warm Sleep System
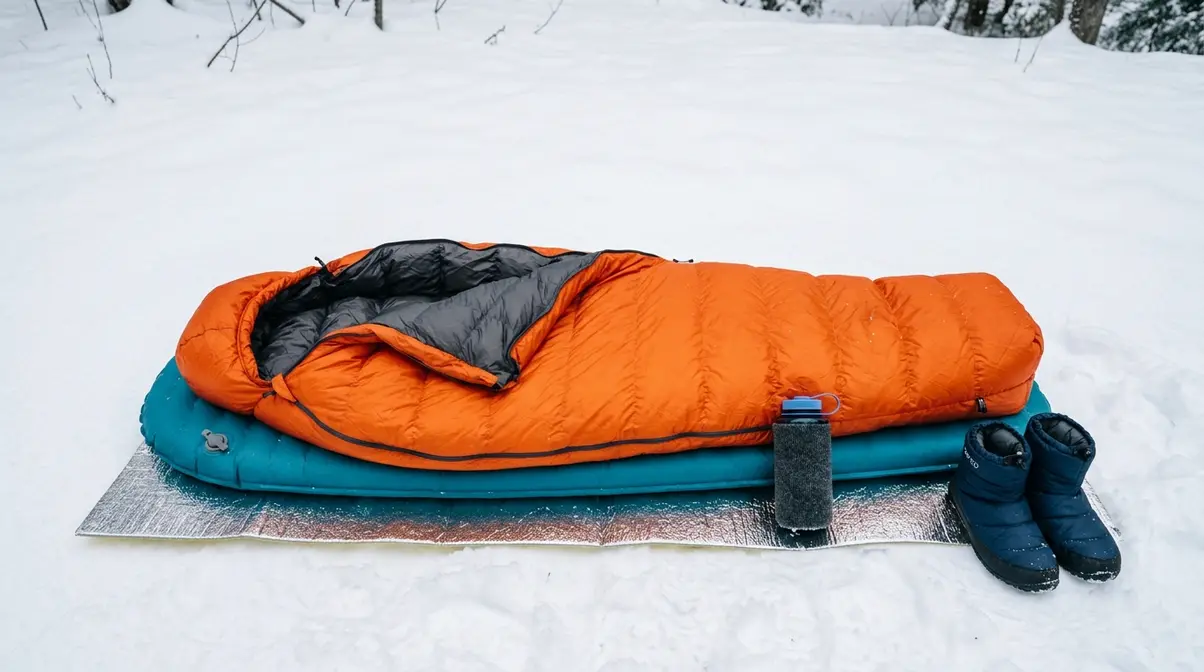
Your sleep system is the heart of The Warmth Stack. You can layer perfectly all day and still have a terrible night if your sleep setup is inadequate. The critical insight: most beginner cold-weather campers focus exclusively on their sleeping bag and neglect ground insulation — yet the ground conducts heat away from your body far more aggressively than cold air does. A sleeping bag rated to 0°F provides almost no protection if you’re lying on bare snow without adequate pad insulation beneath you.
Tip 7: R-Values & Dual-Pad Systems
R-value is a measure of how well a sleeping pad resists heat transfer — the higher the number, the better the insulation. The ASTM F3340-18 standard (the official testing protocol established by ASTM International for sleeping pad thermal resistance) requires manufacturers to test and report R-values using a consistent methodology, making direct comparisons between brands reliable (ASTM International, 2026).
For winter camping, the general guidance from the outdoor community is:
| Condition | Recommended Minimum R-Value |
|---|---|
| 3-season (above 32°F) | R-2 to R-3 |
| Mild winter (20–32°F) | R-4 |
| Cold winter (0–20°F) | R-5 to R-6 |
| Extreme cold (below 0°F) | R-6+ |
Here’s the key insight beginners miss: R-values stack additively. If you place a foam pad (R-2) beneath an inflatable pad (R-3.5), your combined system delivers R-5.5 — enough for temperatures well below 20°F. This is the dual-pad system, and it’s one of the most cost-effective upgrades available to winter campers.
The foam component of the dual-pad system serves a secondary purpose: it acts as a backup if your inflatable pad develops a leak overnight. Waking up on a deflated inflatable pad at 2 a.m. with only snow beneath you is a scenario that has ended many winter trips. A foam foil insulating camping mat as the bottom layer eliminates this vulnerability entirely.
Tip 8: Winter-Rated Sleeping Bags
Sleeping bag temperature ratings follow the EN/ISO 13537 standard — an international testing protocol that defines three ratings: Comfort (the lowest temperature at which a standard female sleeper stays comfortable), Lower Limit (the lowest temperature at which a standard male sleeper stays comfortable), and Extreme (the survival-only threshold, not for routine use). When shopping for a winter sleeping bag, match the Comfort rating — not the Lower Limit — to your expected overnight low temperature.
- Down vs. synthetic fill:
- Down fill (measured in fill power, typically 550–900+) offers the best warmth-to-weight ratio and compresses small. Its weakness: it loses insulating capacity when wet. If your tent management is solid and your sleeping pad keeps you dry from below, down is the superior choice for weight-conscious campers.
- Synthetic fill maintains roughly 70–80% of its insulating capacity when damp, making it more forgiving for beginners still building moisture-management habits.
The temperature rating buffer rule: Select a sleeping bag rated at least 10–15°F below your expected overnight low. If the forecast low is 20°F, use a bag rated to 5°F or 10°F. Sleeping bag ratings assume you’re wearing base layers and using a sleeping pad — they are not standalone ratings.
A 32°F-rated winter sleeping bag works well for mild winter conditions, but for serious cold-weather camping in temperatures regularly below 20°F, invest in a bag rated to 0°F or below.
Tip 9: 5 Tricks to Boost Bag Warmth
Even with a properly rated bag and adequate pad insulation, there are practical techniques that meaningfully improve overnight warmth. Across outdoor communities, these five are consistently recommended by experienced winter campers:
- Fill a Nalgene with boiling water and place it at your feet. A wide-mouth Nalgene bottle (not a standard bottle — check the lid for boiling water compatibility) filled with near-boiling water and wrapped in a sock placed at the foot of your sleeping bag acts as a radiant heat source for 3–4 hours. This is the single most commonly cited “game-changing” technique in winter camping forums — except we won’t call it that. It works because it pre-warms the foot box before you get in.
- Eat a high-fat, high-calorie snack right before bed. Digestion generates body heat. A handful of nuts, a piece of dark chocolate, or a small amount of peanut butter eaten within 30 minutes of getting into your bag gives your body a metabolic heat boost precisely when you need it. Winter campers often enjoy hot cocoa and schnapps by the fire for this exact reason — the fat content and warmth work together.
- Do 20 jumping jacks before getting in. Get your blood moving before you climb into a cold bag. A cold sleeping bag doesn’t warm you — you warm the bag. Starting warm means the bag reaches sleeping temperature faster.
- Store tomorrow’s base layers in the foot box overnight. Putting on pre-warmed, dry clothes in the morning is a small luxury that makes a real difference. It also ensures your base layers don’t freeze solid overnight.
- Use a VBL (Vapor Barrier Liner) in extreme cold. A VBL is a thin waterproof liner placed between you and your sleeping bag that prevents your body’s moisture from saturating the bag’s insulation overnight. It feels strange at first (you’ll notice humidity inside the liner) but it preserves a down bag’s loft on multi-day trips where you can’t dry your bag. This is an advanced technique — most beginners won’t need it for a single overnight, but it’s worth knowing for trips of three or more nights in sub-zero conditions.
Tips 10-12: Food & Water in Freezing Temps
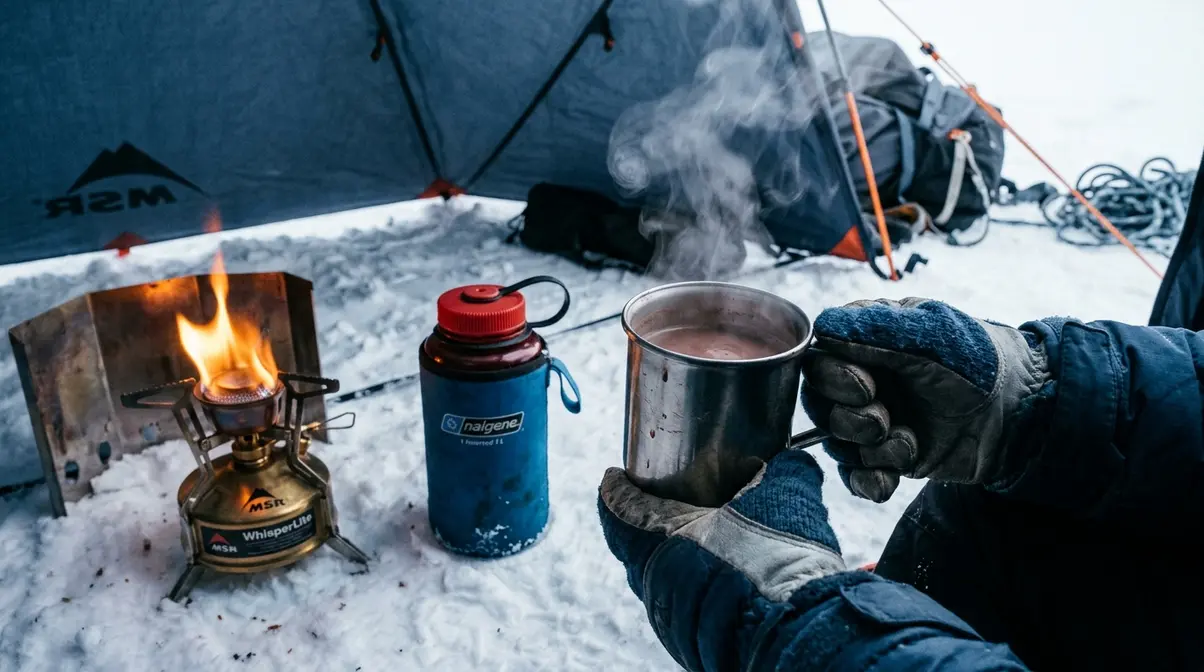
Hydration and nutrition are often the most underestimated parts of winter camping preparation. In fact, following proper winter camping tips for tent campers regarding food and water is just as important as your sleep system. Freezing water will be an issue — it’s not a question of if, but when. Cold air also dramatically increases your caloric needs: your body burns significantly more energy in cold temperatures to maintain core temperature, meaning the same meal that sustained you on a summer trip will leave you running low on fuel by morning.
Tip 10: Preventing Frozen Water Gear
Water freezes at 32°F (0°C), but the practical freezing timeline at your campsite depends on wind, humidity, and temperature. At 15°F with any wind, an uninsulated water bottle left outside your sleeping bag will freeze solid in under two hours. Here are the most effective prevention strategies:
Store bottles upside down. Ice forms from the outside in. The mouth of your bottle — the part you drink from — is on the bottom when stored upside down, meaning it’s the last part to freeze. This simple trick buys you hours of additional usable water without any extra gear.
Keep water in your sleeping bag. Tuck your water bottle inside the bottom of your sleeping bag or in the foot box area overnight. Your body heat keeps it liquid. This works for Nalgene bottles and soft-sided collapsible bottles — avoid hard-sided metal bottles without insulation, as they conduct cold rapidly.
Use an insulated sleeve. A neoprene water bottle sleeve adds meaningful insulation for bottles kept outside your bag during the day. Combine with a hand-warmer packet placed inside the sleeve for extended protection.
Water filter care: Most water filters (membrane-based filters like squeeze filters) will crack permanently if the membrane freezes while wet. At camp, dry your filter by blowing air through it, then store it inside your sleeping bag or jacket against your body. Never leave a wet filter outside overnight. Freezing water will be an issue for your filter before it’s an issue for your bottle — it’s a more expensive mistake.
Tip 11: Liquid vs. Canister Stoves
Not all camping stoves perform equally in cold temperatures, and this matters practically: a stove that fails to boil water at 10°F leaves you without hot food, hot drinks, and — critically — the ability to melt snow for water in an emergency.
Canister stoves (isobutane/propane mix) are lightweight, simple, and excellent in 3-season conditions. However, isobutane’s vapor pressure drops sharply below 20°F (-6°C), which means the fuel vaporizes poorly and the stove produces significantly less heat output — or fails to light at all. In mild winter conditions (temperatures above 20°F), canister stoves work if you warm the canister in your jacket for 10–15 minutes before use.
Liquid fuel stoves (white gas/naphtha) vaporize fuel mechanically via a pump and perform reliably at temperatures well below 0°F. They are heavier and require more maintenance (priming, cleaning) but are the standard recommendation for serious winter camping. White gas burns hot and clean even in extreme cold.
| Stove Type | Performance Below 20°F | Weight | Best For |
|---|---|---|---|
| Canister (isobutane) | Degrades significantly | Light | Mild winter (above 20°F) |
| Liquid fuel (white gas) | Reliable to -40°F | Heavier | Cold winter, multi-day trips |
| Alcohol stove | Unreliable below freezing | Ultralight | Not recommended for winter |
Safety note: Never use any stove inside your tent body. Carbon monoxide (CO) is odorless and colorless, and tents are not ventilated adequately to disperse it. Cooking in a tent vestibule with the inner door open and the outer vestibule door cracked is the maximum acceptable compromise — and only with a stove designed for low-clearance use.
Tip 12: What to Eat and Drink
Cold weather increases your caloric needs significantly. Research from the U.S. Army Research Institute of Environmental Medicine suggests that individuals in cold environments may require 25–50% more calories than in temperate conditions, depending on activity level and temperature (USARIEM, 2026). For a typical adult burning 2,000 calories per day at rest, that means planning for 2,500–3,000 calories on an active winter camping day.
- Food strategy:
- Prioritize fats and complex carbohydrates. Fats provide the most calories per gram (9 kcal/g vs. 4 kcal/g for carbs and protein) and digest slowly, providing sustained heat generation. Nuts, nut butter, full-fat cheese, and salami are classic winter camping staples.
- Eat before you get cold, not after. Your digestive system generates heat as a byproduct of metabolism — use this proactively by eating a snack during every rest stop on the trail.
- Hot food and drinks matter psychologically and physically. Cowboy coffee (grounds boiled directly in a pot, then allowed to settle) is a trail staple that delivers both warmth and caffeine with minimal gear. Hot cocoa and schnapps around the fire at camp serve a similar function — the warmth and fat content both contribute to evening heat retention.
Hydration: Cold air is dry, and you lose moisture with every breath. The sensation of thirst is also blunted in cold weather, meaning you’re likely dehydrating without noticing. Drink water proactively — aim for the same intake you’d target on a warm hiking day, roughly 0.5 liters per hour of activity.
Tips 13-15: Essential Safety Protocols
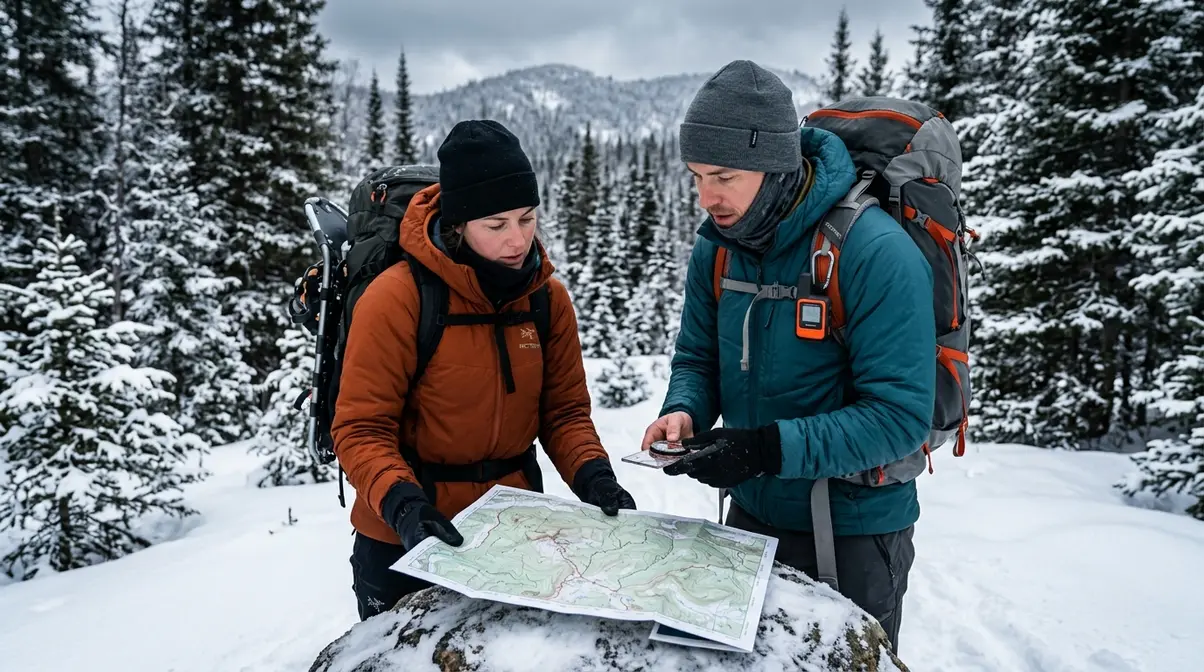
Safety in winter camping is non-negotiable, and this section covers the most critical knowledge a first-time winter camper needs. The risks are real — but they are also predictable and preventable with the right preparation. Every piece of guidance here is backed by clinical or institutional sources, not anecdote.
Tip 13: Safety Gear Checklist
Across outdoor education organizations — including NOLS, the American Alpine Club, and the National Park Service — certain items appear on every winter camping gear list regardless of destination or duration. These are not optional comfort items. They are risk-reduction tools.
- Navigation:
- Topographic map of your area (printed, waterproof)
- Compass (know how to use it with the map)
- GPS device or GPS-enabled watch (backup, not primary)
- Avalanche beacon (if traveling in avalanche terrain)
- Emergency shelter and warmth:
- Mylar emergency survival blankets (minimum 2 per person) — reflect up to 90% of body heat in an emergency bivouac
- Emergency bivy (a waterproof bag for emergency overnight use)
- Fire-starting kit: lighter, waterproof matches, fire starter (three redundant methods)
- First aid:
- Wilderness first aid kit with blister treatment, SAM splint, and chemical heat packs
- Frostbite treatment protocol card (laminated)
- Satellite communicator (SPOT, Garmin inReach) — cell service is unreliable in winter backcountry
- Communication and planning:
- Trip plan filed with a responsible person at home — include your exact route, campsite, and expected return time
- Emergency contact numbers for local search and rescue
Headlamp and batteries: Winter days are short. At northern latitudes, darkness arrives before 5 p.m. Carry a headlamp with fresh lithium batteries (lithium batteries maintain capacity in cold; alkaline batteries lose up to 60% of capacity at 0°F). Always carry a backup set.
Tip 14: Hypothermia and Frostbite
Hypothermia is a condition in which your core body temperature drops below 95°F (35°C). According to the CDC, hypothermia accounts for approximately 1,300 deaths per year in the United States — and it does not require extreme cold to develop (CDC, 2026). The CDC confirms that hypothermia can occur at temperatures above 40°F when a person is wet, exhausted, or improperly dressed.
The early warning signs — known in wilderness medicine as “the umbles” — are:
- Stumbles (loss of coordination)
- Mumbles (slurred speech)
- Grumbles (irritability, confusion)
- Tumbles (falling)
- Hypothermia response protocol (mild to moderate cases):
- Move the person to shelter and out of wind and wet conditions immediately.
- Remove wet clothing and replace with dry insulation.
- Apply external heat sources to the neck, armpits, and groin — not the extremities.
- Provide warm, sweet beverages if the person is conscious and can swallow safely.
- Activate your emergency communication device and request evacuation for moderate or severe cases.
Frostbite is the freezing of skin and underlying tissue, most commonly affecting toes, fingers, nose, and ears. According to NIH/MedlinePlus, frostbite progresses through three stages: frostnip (superficial, reversible), superficial frostbite (blistering), and deep frostbite (tissue damage) (NIH MedlinePlus, 2026). The critical rule: do not rewarm frostbitten tissue if there is any risk of refreezing — refrozen tissue sustains far greater damage than frozen tissue that hasn’t been warmed.
- Frostbite prevention checklist:
- Keep extremities dry and covered at all times
- Wiggle toes and fingers regularly on the trail — if you can’t feel them, stop and rewarm
- Watch your partners’ faces — they often can’t feel their own noses going numb
- Use hand warmers and down booties at camp when activity level drops
Tip 15: Snow Navigation Basics
Snow transforms familiar terrain. Trails disappear under accumulation, landmarks change appearance, and distances become harder to judge. The National Park Service reports that the majority of winter search-and-rescue operations involve hikers and campers who followed a GPS track without verifying it against terrain features — and became disoriented when the track led them to a snow-buried feature (NPS, 2026).
Core navigation practices for snow-covered terrain:
- Pre-trip map study: Before you leave, identify three to five major terrain features along your route — a ridge, a river bend, a lake edge — that will be visible even under snow cover. These become your checkpoints.
- Trail markers: Many winter trails use orange blazes or wooden poles specifically because snow covers ground-level markers. Learn to identify your trail’s marker system before you go.
- GPS as a backup, not a crutch: A GPS track tells you where the trail was recorded, not where the safe travel path currently is. Avalanche runout zones, creek crossings, and corniced ridges may make the recorded route dangerous under current conditions.
- The buddy system: Never navigate in low visibility (snowstorm, whiteout) alone. Maintain visual contact with your partner at all times.
- Turn-back time: Establish a firm turn-back time before you leave camp — the point at which you return regardless of progress. Continuing past this threshold is the most common decision error in winter navigation incidents.
Common Mistakes and When to Reconsider Your Plans
Even experienced 3-season campers make predictable errors on their first winter overnight. Understanding these in advance can prevent a miserable — or dangerous — experience.
Common Pitfalls
Pitfall 1: Underestimating gear weight and bulk. Winter gear is heavier than 3-season gear. A 0°F sleeping bag, a dual-pad system, and extra insulating layers add 8–12 lbs to a typical pack. If you’ve never carried a loaded winter pack, do a short shakedown hike close to a road before committing to a remote overnight.
Pitfall 2: Skipping the tent ventilation step. It feels wrong to open a vent when it’s 10°F outside. Nearly every beginner skips it. By morning, their sleeping bag is damp from condensation, their down insulation has lost 30–40% of its loft, and they’re significantly colder than they expected. Open the vents.
Pitfall 3: Relying on a single heat source. Chemical hand warmers fail in extreme cold. Stove canisters underperform below 20°F. Headlamp batteries die faster than expected. Always carry redundant systems for heat, light, and fire-starting.
Pitfall 4: Starting with a remote, exposed location. Your first winter overnight should be at a car-camping site or a well-traveled backcountry area within 2–3 miles of a road. This gives you an exit option if conditions deteriorate or your gear proves insufficient.
When 3-Season Gear Is Not Enough
If any of the following apply to your planned trip, your standard 3-season kit is insufficient and you should rent or purchase appropriate gear before going:
- Temperatures forecast below 20°F (-6°C) overnight
- Any chance of significant snowfall during your stay
- Wind-exposed ridgeline or open terrain campsite
- Backcountry travel more than 3 miles from a road
When to Consult a Professional Guide
Consider hiring a certified guide or taking a wilderness skills course before your first winter overnight if you plan to travel in avalanche terrain, if you have no prior navigation experience in snow-covered conditions, or if your planned route involves any technical terrain (steep slopes, river crossings, exposed ridges). Organizations like NOLS, the American Mountain Guides Association (AMGA), and local alpine clubs offer beginner winter camping courses specifically designed for 3-season campers making this transition.
Frequently Asked Questions About Winter Camping
What temperature is too cold for tent camping?
There is no universal “too cold” threshold for tent camping — it depends entirely on your gear, experience, and preparation. Beginners with standard 3-season gear should avoid temperatures below 20°F (-6°C). Experienced campers with 0°F-rated sleep systems and 4-season tents regularly camp in temperatures well below 0°F. The real limit is the combination of your gear’s rated capacity and your ability to manage moisture and stay dry (REI, 2026). Start with mild conditions — overnights between 20°F and 35°F — and build experience before pushing to extreme cold.
How do I keep warm in a tent at night in winter?
Staying warm overnight requires a complete sleep system, not just a warm sleeping bag. Use a dual sleeping pad with a combined R-value of at least 5.0, select a sleeping bag rated 10–15°F below your expected overnight low, pre-warm your bag with jumping jacks before getting in, and place a hot water bottle (a Nalgene filled with near-boiling water) at your feet. Eat a high-fat snack before bed — digestion generates body heat. Wear a wool beanie to sleep. Across winter camping communities, the consistent finding is that ground insulation is the most commonly neglected factor in cold nights (Princeton Outdoor Action, 2026).
Is it safe to use a heater inside a tent?
Using most heaters inside a tent is not safe due to carbon monoxide (CO) risk. Catalytic heaters (propane-based) produce CO and require significant ventilation — more than most tents provide safely. If you use any combustion-based heat source in or near your tent, crack all vents and the door, and use a CO detector. Battery-powered electric heating pads and rechargeable heated blankets are the only truly safe tent-warming devices. Never use a camp stove inside a tent body for warmth — the CO accumulation risk is severe (CDC, 2026).
How do I stop my sleeping bag from getting wet in winter?
Sleeping bag moisture comes from two sources: condensation inside the tent and perspiration from your body. Manage condensation by keeping tent vents open 1–2 inches overnight and shaking frost off tent walls before it melts in the morning. Manage perspiration by never getting into your bag in the clothes you hiked in — always change into dry base layers at camp. A Vapor Barrier Liner (VBL) placed inside the sleeping bag prevents body moisture from reaching the bag’s insulation on multi-day trips. Store your bag loosely in a large compression sack when not in use to preserve loft.
What should I eat before bed when winter camping?
Eat a high-fat, moderate-protein snack within 30 minutes of getting into your sleeping bag. Fats provide 9 calories per gram — more than twice the energy density of carbohydrates — and digest slowly, providing sustained metabolic heat generation through the night. Practical options include mixed nuts, nut butter on a tortilla, full-fat cheese with crackers, or dark chocolate. A warm drink like hot cocoa contributes both warmth and calories. Research from the U.S. Army Research Institute of Environmental Medicine confirms that caloric intake directly affects cold-weather thermogenesis — the body’s ability to generate heat (USARIEM, 2026).
Your First Winter Night Starts With a System
For that first-time winter camper who’s excited but apprehensive, here’s the honest summary: the cold is manageable. The Warmth Stack — the layered, stackable system of shelter, clothing, and sleep gear this guide has walked you through — is not complicated once you understand the logic behind each layer. A 4-season tent that blocks wind, a dual-pad system with R-5+ insulation beneath you, a sleeping bag rated 10–15°F below the forecast low, and three clothing layers that keep moisture moving outward will handle the vast majority of beginner winter camping conditions. The CDC’s finding that hypothermia begins above 40°F when moisture is mismanaged is the clearest argument for why the system matters more than any single piece of gear.
Build your stack methodically. When applying these winter camping tips for tent campers, remember to start with the shelter layer, then build your sleep system, then refine your clothing. Each layer reinforces the others — that’s the entire point of The Warmth Stack as a framework.
Your next step: pick a car-camping site with a forecast overnight low between 25°F and 35°F, check the avalanche report, file a trip plan with someone at home, and go. One mild winter overnight teaches you more than reading 10 guides. Bring the hot cocoa. Bring the schnapps. You’re more ready than you think.

David King
Field gear tester at Tent Explorer.