
This blog post may contain affiliate links. As an Amazon Associate I earn from qualifying purchases.
Key Takeaways
- Effective humidity control in a grow tent can be achieved by optimizing airflow, using built-in vents, and strategically placing fans to promote consistent air circulation without needing a dehumidifier.
- Proper watering techniques are important in reducing humidity. Bottom watering and using plants with well-draining pots and soil can help eliminate temporary spikes in humidity.
- Use natural humidity absorbers Put rice, salt, towels, or sponges in your grow tent to absorb excess moisture. These common and readily available household items will help you lower humidity passively.
- Regularly monitoring humidity and temperature with a reliable hygrometer helps identify trends, allowing for timely adjustments to maintain plants in their ideal comfort zone.
- Removing unnecessary leaves promotes air circulation. This distance between plants helps to minimize the chances of mold, mildew, and pest issues associated with excess humidity.
- Seal up those tent leaks! Change your attitude with the seasons for humidity management that lasts and fits a climate of different environments found all over America.
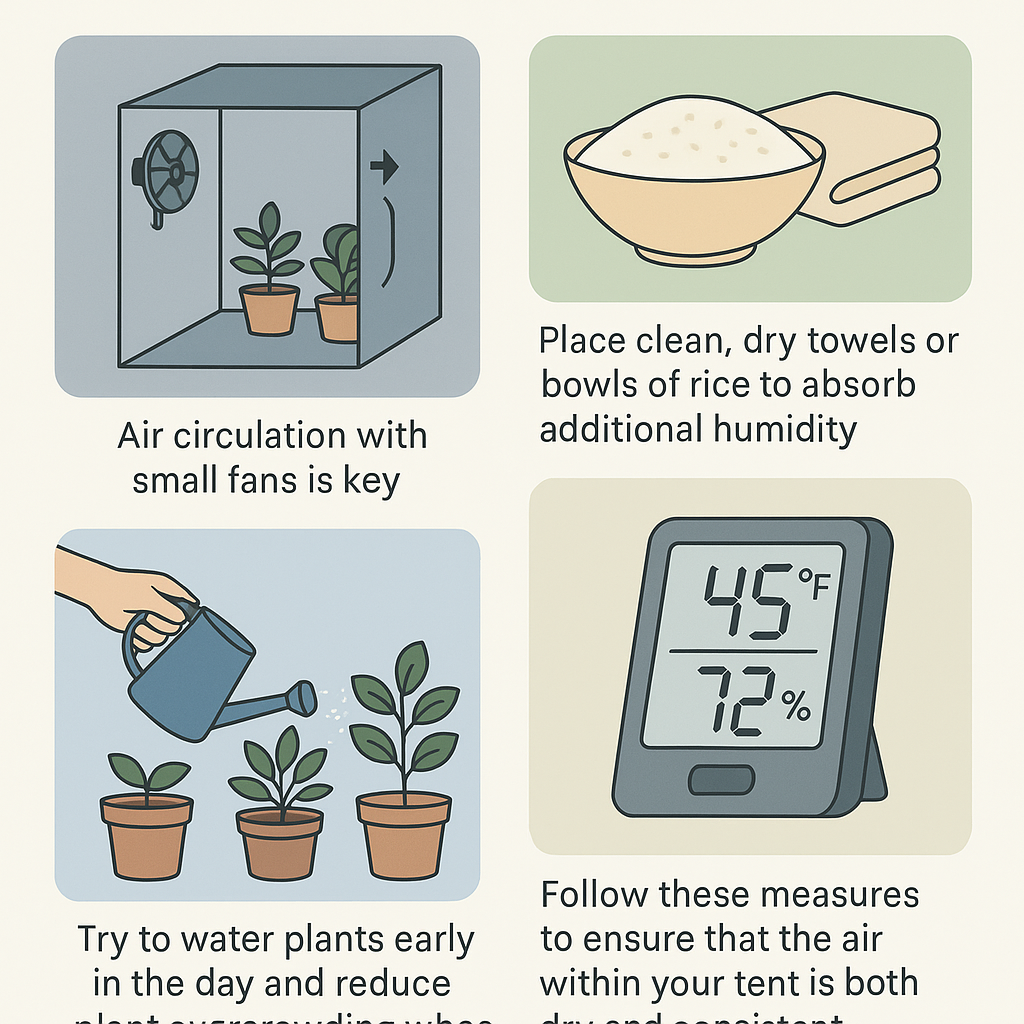
To reduce humidity in a grow tent without a dehumidifier, air circulation with small fans is key.
Other things you can do: Remove a few water trays. Open vents.
Place clean, dry towels or bowls of rice to absorb additional humidity.
Try to water plants early in the day and reduce plant overcrowding when possible.
Follow these measures to ensure that the air within your tent is both dry and consistent.
It greatly simplifies the process of caring for your plants, as you’ll learn below!

Why Tent Humidity Sabotages Plants
Controlling humidity levels in a grow room can be quite the juggling act. From seedlings to mature plants, each species has their optimal humidity range for moisture content in the air. Even slight alterations can upset this equilibrium. Here’s why the proper humidity control matters — and how to achieve it in your indoor gardening. Excess humidity may be working against its development without you realizing it.
Ideal Humidity: Your Plant’s Comfort Zone
Plants are not one size fits all when it comes to humidity. Most species sold for indoor cultivation thrive when the air is consistently 40%-60% RH. Seedlings and younger plants require a bit more—around 70%—while mature plants usually like it around 45–55%.
Flowering plants such as tomatoes and cannabis are particularly susceptible to bud rot and mold when humidity levels remain above 50%. A simple checklist can help: keep young leafy plants above 60%, established ones around 50%, and drop to 40–45% when flowering.
Monitor levels every day with an inexpensive digital hygrometer to identify patterns. Employ simple, quick adjustments, such as circulating air with a fan or reducing watering, to maintain levels in an ideal range.
Also Read: 10 Best 4X4 Grow Tent Complete Kit 2025 Compared
The Sneaky Dangers of Damp Air
Excessive humidity over 70% is like rolling out the welcome mat for mold, mildew, and pests. Mold spreads quickly across your leaves and soil, particularly during the night or when the bottoms of your pots are overly saturated.
When moisture hangs around, it brings on root rot and creates a home for fungus gnats. Too much humidity can make it hard for plants to absorb nutrients, causing even powerful, full-foliaged specimens to suddenly yellow and cease lively growth.
Not only does this stagnant, damp air stress your crops, it reduces your final yield potential. This sets up a recipe for disaster for anyone growing for food production or for profit.
Early Signs of Humidity Trouble
Look for shiny leaves, wilting stems, or patches of white fuzz—these are signs there is too much moisture. Poor growth, leaf curling, or soft areas are all signs of humidity problems.
Having a hygrometer in your tent allows you to notice shifts in humidity early, before issues begin to occur.
Smart Airflow: Your Top Defense
Managing humidity in a grow tent without a dehumidifier comes down to the fundamentals of airflow and ventilation. Mold and mildew are ever-present dangers in these airtight environments, particularly once relative humidity (RH) rises above 60%. Most plants will be happiest at 45% to 55% RH during vegetative stages.
Reducing the humidity down to 40% to 50% during flowering is an effective way to prevent mold from developing. When airflow is smartly controlled, it keeps RH at that sweet spot of 40% to 60%. This stability is impressive in light of changing weather conditions and plant growth stages externally.
1. Master Your Tent’s Built-In Vents
Open and position your tent’s built-in vents to invite fresh air in and keep the moisture-laden air blowing outside. Seal up any other openings or flaps to direct airflow where you need it and prevent it from going the way it naturally would.
Inspect vents regularly for obstructions or rips—dirt and tattered fabric mesh penalize performance. Try out different vent combinations! Experiment with different combinations of lower and upper vents to find which configuration lets moisture escape the fastest for your setup.
2. Strategic Fan Placement Secrets
Fans don’t just push air—they can sculpt it. On one side, position a small oscillating fan. Place one more fan on the opposite side of the room, if possible, to generate a circular airflow that avoids having air trapped in the corners.
Avoid blasting plants with powerful fans or you could cause leaf burn. Direct gusts don’t help, but instead crosswinds help reduce moist areas where mold can begin.
3. Boost Natural Air Exchange
Leave tent flaps open during the day, as much as possible, particularly when ambient air is dry. Install passive intake vents for hands-free fresh air.
Stagger open-flap times to correspond with dry spells on the exterior, not humid ones.
4. Prune Plants for Better Flow
Cut back dense foliage and remove dying leaves to ensure proper ventilation; this allows air movement through the plants, supporting optimal growth.
5. Tent Design & Airflow Insights
Position equipment to avoid obstructing airflow. Reflective vertical walls not only diffuse light beautifully, but they help maintain a constant temperature for your air.
Warm air rises, which is a good thing.
Read more: How to Choose the Perfect Tent for Your Camping Trip
Water Wisely, Cut Down Moisture
Watering without a dehumidifier in a grow tent requires an intentional and practical method of moisture control. Allowing excessive water to accumulate inside the tent creates a humid environment. This can ignite mold, mildew, and prevalent diseases such as powdery mildew and grey mold.
The majority of quality plants will want 40% to 60% relative humidity in the vegetative stage. Yet, during flowering they do better at something a little lower – about 35% to 45%. Overwatering also raises moisture levels, which leads to an increase in pests and disease as well as reducing yields.
Fine-Tune Your Watering Habits
Develop a consistent watering schedule. Begin by probing with a moisture meter and checking the soil before every watering. Don’t go by the guess-and-a-prayer method!
Irrigate lightly, but more frequently, creating consistently moist, but not waterlogged soil. This method prevents large moisture surges. Keep an eye on your plants—yellowing leaves or wilting stems can indicate over or under watering.
Log your practices in an easy notebook or electronic document spreadsheet to identify patterns between weather conditions or stages of plant growth.
- Water early in the day to allow drying time
- Avoid splashing water on leaves
- Check soil depth for dryness, not just the surface
- Respond to plant growth, watering less as plants mature
Why Bottom Watering Works Wonders
Bottom watering — putting pots in trays and allowing them to draw water up from the bottom — works wonders. This helps reduce wet foliage and leaf surface moisture, both of which contribute to increased humidity.
To bottom water, place pots into a shallow tray of water and take them out after 30 minutes or so. Pick up a soil moisture meter. This prevents roots from staying in water too long, leading to root rot.
Banish Standing Water Immediately
Check your tent for puddles or wet spots after every water. Mop up standing water with an old towel or sponge. Inspect drip trays, corners, and the bottoms of pots for leaks.
Use pot risers or slatted racks to improve drainage.
- Remove water from trays and tent floor
- Wipe spills right away
- Use absorbent pads under pots
- Check for leaks after every watering
Pick Draining Pots & Soil
Pots that you buy should have drainage holes in the bottom to allow excess water to drain out. Choose soil mixes that drain well, such as peat with perlite or coco coir.
This prevents roots from sitting in excess moisture and reduces humidity.
- Best pots: fabric grow bags, plastic pots with holes, air-pruning pots
- Good soils: light mixes with perlite, sandy loam, high-coco blends
Pick draining pots & soil. Pick the right potting soil. Water when pots are lighter to the touch.
Temperature’s Link to Tent Humidity
Temperature has a strong effect on how much moisture the air can carry. This is the main reason why grow tent humidity tends to spike as temperatures rise. This means that warm air can carry much more water than cooler air.
Thus, as the temperature in your tent increases, the air rushes to absorb more moisture from the ground, leaves, and even from water trays. This is how temperature and humidity are frequently two sides of the same coin and how controlling one impacts the other.
In San Francisco’s mild climate, where indoor spaces can swing between cool foggy mornings and warm afternoons, keeping your tent at the right temperature is key to stopping humidity from spiking.
| Temperature Range (°F) | Relative Humidity Impact |
|---|---|
| 60–70 | Lower moisture capacity, drier air |
| 70–85 | Ideal balance for most plants |
| 85+ | High moisture capacity, humid air |
How Heat Impacts Air Moisture
How Heat Affects Air Humidity When temperatures increase, the air’s capacity to hold moisture increases. This shifts the environment toward higher humidity, unless you actively cool your space.
Pulling heat out with fans and not running your lights when it’s hottest during the day are other ways to maintain temperature within a range. Heat mats need to be monitored, because excessive heat can increase humidity.
Temperature change is the most important external factor that affects tent humidity.
Cool Your Grow Space Smartly
Fans and portable air conditioning units can pull this hot, humid air out of the grow space, maintaining temperatures within the 70–85 °F sweet spot.
- Place oscillating fans for even airflow
- Vent hot air with ducting
- Open tent flaps in cool weather
- Use frozen water bottles for passive cooling
Reflective films help deflect heat, and lights scheduled for cooler hours of the day put less stress on plants.
Light Choices Affect Tent Heat
Compared to HPS or CFLs, LEDs emit less heat. Here’s a comparison:
| Light Type | Heat Output |
|---|---|
| LED | Very low |
| CFL | Moderate |
| HPS | High |
To reduce heat build-up, mount lights high enough to prevent hot spots, and use timers or controllers to deliver light when temperatures are cooler.
Seal Tent Leaks Effectively
Identify leak points through which warm, moist air can enter. Seal tent leaks thoroughly. Duct tape or rolled weather stripping work well for this.
Create a reminder or checklist for monthly tent checks. After sealing, monitor your humidity levels and hopefully you will notice an improvement.
Natural Ways to Absorb Moisture
For many growers in San Francisco and other coastal climates, dealing with excess humidity in grow tents is a challenge many know all too well. Natural dehumidification is an excellent way to lower moisture without additional tools.
It’s easy to use common household items as desiccants. These materials absorb moisture from the air and prevent an overload of humidity. Popular options are rice, salt, baking soda, silica gel, activated charcoal and even cat litter.
Position these in shallow, open bowls or dishes to disperse around your tent. Monitor how well they’re working by measuring humidity every day with an inexpensive hygrometer. Replace or recharge these absorbent materials once they reach capacity to ensure proper functionality.
DIY Desiccants From Your Kitchen
Partnering rice with salt will make your rice even better at absorbing moisture from the air. Simply fill bowls or mesh bags with one of these to keep your moisture under control.
Next, place them in corners or on shelves within the tent. Silica gel packs, which you might have seen stuffed in new shoes or handbags, are effective in small spaces. To recharge rice or salt, dry them out in the oven.
Experiment with various materials to determine what works best with your tent’s flora and ventilation. Keep in mind that some plants like a bit more humidity, so choose your technique accordingly.
Use Absorbent Materials Wisely
Towels, sponges, and microfiber cloths absorb moisture fast. Place them where you are seeing condensation develop or near your tent’s intake and exhaust locations for ideal results.
Alternatives are paper towels, bath mats, or clean rags. Change or wring out damp materials each day to prevent mold buildup. Keep them near plants or soil that use a lot of humidity to draw moisture away before it can escape.
Smart Plant Spacing Strategies
Plant spacing is crucial for air circulation. Space plants far enough apart to allow air to flow freely. Where there is good airflow, evaporation occurs more quickly and humidity drops.
Consider using simple trellises or stakes to ensure plant material stays upright and spaced. Monitor your native plants for crowding as they mature and be prepared to move plants around.
Defoliating—removing some leaves—can aid in allowing airflow through and moisture to escape. This is most effective with crops that are dense or quick to mature.
Monitor Humidity, Adapt Your Approach
Monitoring humidity in a grow tent is crucial to promoting vigorous plant health and maximizing yield. Plants like it when moisture in the air matches what they need at that stage of growth. Maintain humidity levels around 45%-55% during the vegetative phase and 40%-50% when flowering.
At humidity levels above 60%, mold, mildew, and pests are able to establish. This can be detrimental to plant growth and reduce yields. Having an accurate method of monitoring humidity gives you the information needed. This gives you the power to respond quickly and stop issues from arising in the first place.
A quality hygrometer is the backbone of your setup. Choose one that has a digital readout and good ratings. To achieve the most accurate results, try to mount the sensor at plant height and out of direct sunlight or rain.
To ensure readings are consistent, try to check readings at the same time each day. Wipe down the sensor weekly to ensure dust is not affecting results. Use these tips for better accuracy:
- Place more than one sensor for bigger tents
- Keep sensors out of direct airflow
- Avoid hanging near wet spots
Smartphone apps are available to log readings if you lack digital access. Some of these apps even allow you to manually input readings and track them over time, so you can catch an increase in humidity before it reaches unsafe levels.
Keep a record of daily readings and begin to recognize patterns. When you notice spikes in humidity, investigate the culprit—did you change the watering schedule, or has the weather changed? Determine your baseline and monitor humidity. Use a chart to correlate plant health with drops or increases in humidity.
Routine maintenance is especially important to preventing breakdowns and maintaining a smooth ride. Perform weekly maintenance by inspecting seals, vents, and for any potential leaks. Keep a record of any adjustments you implement.
Communicate your practices with fellow growers and share experiences to educate one another.
Final Words: How to Lower Humidity in Grow Tent?
Grow tents in the U.S. Get muggy fast, and folks can run into mold or limp plants if they ignore it. To lower humidity, circulate air with fans and keep vents open. Try watering your plants in the morning to prevent evaporation. Experiment with clay pebbles, dry towels, or baking soda to absorb increased humidity. Be careful about how warm you let the tent get, because increasing heat will increase humidity. After making some adjustments, use a simple meter to monitor conditions, then adjust your schedule further based on the readings. These measures are effective in nearly every home across America. They’re working in places with radical weather changes too, like the Bay Area or the Midwest. Let us know your best humidity-hacking trick, or your question in the comments below—there’s always more to learn.
Frequently Asked Questions
How can I lower humidity in my grow tent without a dehumidifier?
Increase airflow and proper ventilation, cut back on watering frequency, and eliminate standing water to maintain the ideal humidity range. In addition to using fans and opening vents, consider testing out natural dehumidification methods like baking soda or silica gel to combat high humidity levels in your grow tent.
Why is high humidity bad for grow tent plants?
Excessive moisture buildup can lead to mold and mildew, root rot, and hinder optimal growth. By maintaining the right humidity level, indoor growers can create an ideal environment that ensures their plants are healthy and thriving.
What’s the best way to boost airflow in a grow tent?
To maintain optimal humidity levels in your grow room, start by installing oscillating fans and ensuring your vent ports are open. An exhaust fan at the top will help expel warm, moist air, promoting proper ventilation and reducing excessive moisture buildup.
Can I use household items to absorb moisture in my tent?
Can I use household items as natural dehumidification methods to absorb excessive moisture in my grow room? Put bowls of these in the tent to absorb additional moisture.
How often should I check humidity in my grow tent?
To maintain the ideal humidity range in your grow tent, check humidity levels frequently with a digital hygrometer. This ensures proper humidity control and helps you promptly address fluctuations.
Does plant watering affect humidity levels?
No, not at all. Excessive moisture buildup from too much watering contributes to elevated humidity levels in the air. Indoor growers should water their plants only when the top inch of the soil is dry to maintain the right humidity level.
Will lowering temperature help control humidity in my grow tent?
Yes. Lower temperatures mean lower humidity levels, as cool air cannot contain as much water vapor. To maintain the ideal humidity range, consider using air conditioning, larger fans, or opening the grow room during cooler parts of the day.
