Camping Meal Prep Tips: 15 Hacks for Easy Camp Meals
 David King
Updated June 15, 2026
29 min read
David King
Updated June 15, 2026
29 min read
“Does anyone have any good ideas for a make ahead dinner for camping? I’m running out of ideas and need something I can make ahead and won’t be a lot of work to throw together.”
That question gets asked thousands of times every spring and summer — and it deserves a real answer.
Without a system, you end up spending your first evening at camp chopping onions in the dark, digging through a disorganized cooler, and eating hot dogs for the third night in a row. That’s the camping food trap — and it’s completely avoidable.
These camping meal prep tips are built around one organizing principle: do the work at home, not at the campsite. You’ll get a day-by-day planning template, a step-by-step cooler packing method, and 12 easy make-ahead meals that are truly mega easy to throw together at camp. The four-step structure runs from planning your meals, to prepping at home, to packing your cooler safely, to cooking with zero stress.
Prerequisites: What You’ll Need Before You Start
Before jumping into the steps, make sure you have these basics on hand:
Estimated Prep Time: 30-45 minutes (at home)
- Tools & Materials:
- A cooler (ideally 2 — one for food, one for drinks — explained in Step 3)
- Zip-top bags in quart and gallon sizes
- Airtight containers (Tupperware or similar lidded containers)
- A permanent marker for labeling bags and lids
- Freezer space at home for at least 2–3 days before the trip
- A basic camp stove or campfire access
- A simple meal plan (you’ll build this in Step 1)
Key Takeaways: Camping Meal Prep Tips
The best camping meal prep tips follow one rule: do the work at home, not at the campsite. The USDA recommends keeping cold food at 40°F (4°C) or below to prevent bacterial growth.
- Use the 3-Day Prep Timeline: Plan 3 days out, prep 2 days out, pack 1 day out — so nothing gets forgotten
- Pre-chop all vegetables at home to eliminate messy, time-consuming campsite prep and reduce cross-contamination risk
- Use two coolers — one for food, one for drinks — to keep perishables colder for longer
- Foil packet meals and one-pot dinners are the easiest “throw together” options at camp, requiring under 15 minutes of active cooking
- Food safety is non-negotiable: Never let perishables sit above 40°F for more than 2 hours (USDA Food Safety and Inspection Service)
Step 1: Build Your Camping Meal Plan
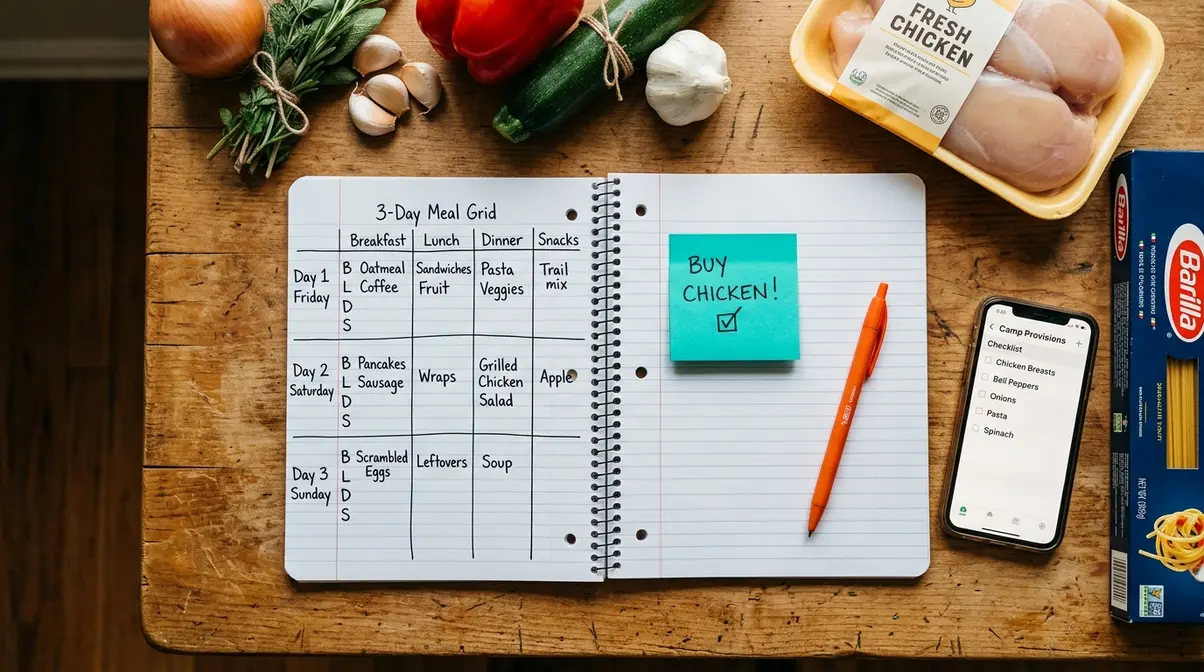
The first step in stress-free camping meal prep is building a simple meal plan before you leave home. A camping meal plan is just a list of every meal, every day, for every person on your trip. Without one, you’ll either overpack and haul unnecessary weight, or underpack and end up hungry on Day 2.
According to REI, the outdoor gear retailer and camping authority, planning your menu before a trip is the single most effective way to reduce food waste and campsite stress. Our team has evaluated dozens of camping prep approaches across family and couple trips, and the consistent finding is clear: campers who arrive with a written plan spend a fraction of the time on food logistics compared to those who wing it.
A written camping meal plan eliminates overpacking and ensures every meal is covered — from the first morning coffee to the last night’s dinner.
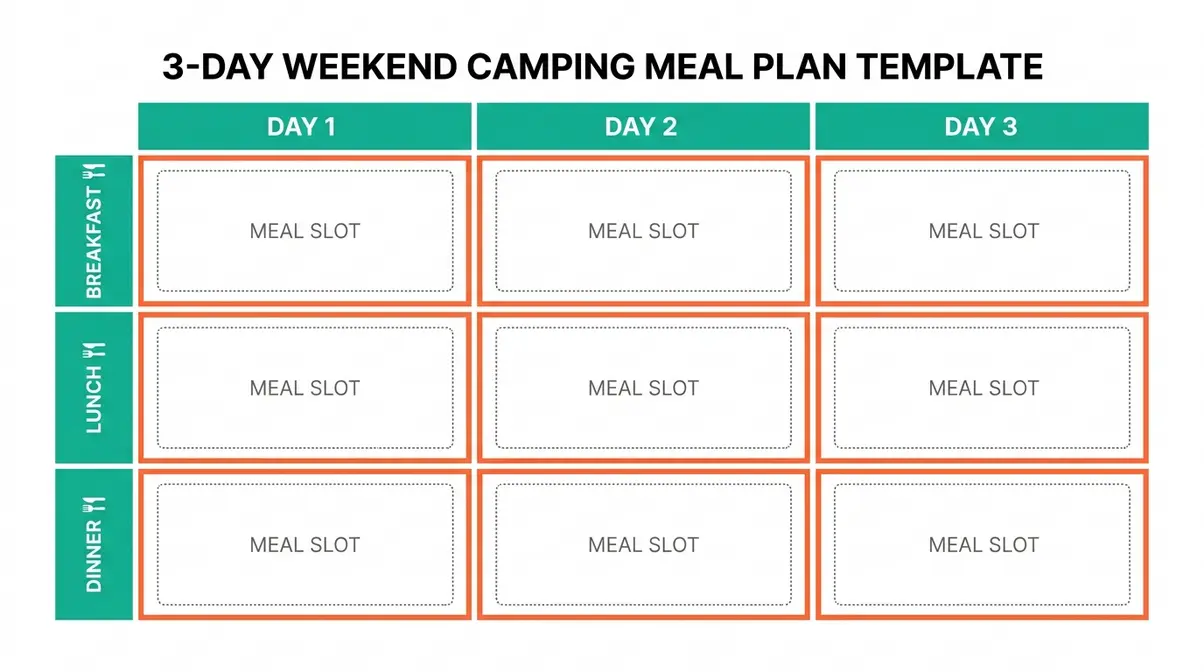
How to Build a Day-by-Day Camping Meal Plan
Planning meals day-by-day sounds involved, but the process takes about 15 minutes. Follow these numbered steps:
- Count your meals first. Multiply the number of days by 3 meals by the number of people. For a 3-day trip with 2 people, that’s 18 meal portions to plan. This simple math prevents both overpacking and underpacking before you ever open a grocery app.
- Plan from simplest to most complex. Day 1 should be the simplest — you just drove several hours and everyone is tired. Day 3 should also be simple because you’re packing up and heading home. Reserve your “fun” meal (the campfire chili, the foil packet feast) for Day 2 when energy is highest.
- Note which meals need a cooler. Go through each planned meal and mark it “cooler” or “no cooler.” Non-perishable meals — pasta, rice, canned beans, peanut butter — are your insurance for the final day if the cooler starts losing cold. Plan at least one no-cooler meal per day as a backup.
- Use the dual-purpose dinner strategy. Plan Day 3’s dinner as a frozen item that doubles as an ice pack in the cooler. A frozen brick of chili keeps surrounding food cold for 12–18 hours while it slowly thaws — ready to heat on your last night. No competitor explains this, but it’s one of the most practical camping meal prep tips you’ll use.
For a 2-night family trip, a concrete example looks like this: Night 1 = foil packet chicken (pre-assembled at home), Night 2 = campfire chili (pre-frozen), Night 3 = pasta with jarred sauce (no cooler needed, zero washing up).
Once you know exactly what you’re eating each day, you can turn that meal plan directly into a shopping list — and that’s where most campers save the most time. For a deeper dive into strategic camping meal planning, that resource covers additional frameworks for larger group trips.
How to Build Your Camping Shopping List
These camping meal prep tips start with the shopping list because a disorganized grocery run is where most camping trips go sideways. Go through each meal in your plan and list every ingredient. Then group by category: produce, proteins, dry goods, and condiments. This mirrors the layout of most grocery stores and cuts your shopping time significantly.
Add a dedicated “camp kitchen supplies” section to your list. This is where beginners most often get caught out:
- Zip-top bags (quart and gallon)
- Aluminum foil (heavy-duty)
- Matches or a lighter
- Paper towels
- Biodegradable soap
- A can opener (if using canned goods)
Next, highlight every item that needs to be frozen before the trip. Pull these onto a separate “prep at home” list — this becomes your action list for Step 2. For example, a shopping list entry for Foil Packet Chicken Night looks like this: “chicken thighs (1 lb), mixed vegetables (2 cups), olive oil, garlic powder, foil — FREEZE chicken the night before.“
Separating “buy this” from “prep this” prevents the frantic night-before scramble that derails even experienced campers.
With your shopping list in hand, you’re ready to bring everything together with a sample plan you can adapt to your own trip.
Sample Weekend Camping Meal Plan
Here’s a concrete 2-night, 3-day plan you can copy and adjust. The prep type for each meal is noted in parentheses so you know exactly what to do at home vs. at camp.
| Day | Breakfast | Lunch | Dinner |
|---|---|---|---|
| Day 1 | Overnight oats (pre-made) | Wraps with deli meat (no-cook) | Foil packet chicken (pre-assembled) |
| Day 2 | Scrambled eggs (pre-cracked) | Pre-made pasta salad | Campfire chili (pre-frozen) |
| Day 3 | Granola with yogurt (no-cook) | PB&J sandwiches (no-cook) | Pasta with jarred sauce (campfire) |
Notice the logic: Day 1 and Day 3 dinners require almost zero campsite effort. Day 2 is the most involved — but “campfire chili” means you’re just reheating a frozen brick in a pot. This plan uses The 3-Day Prep Timeline — you’ll see exactly how to prepare each of these meals in Step 2.
Now that you have a plan, it’s time to do the real work — and the good news is, all of it happens in your home kitchen before you ever leave for the campsite.
Step 2: Do 90% of the Work at Home
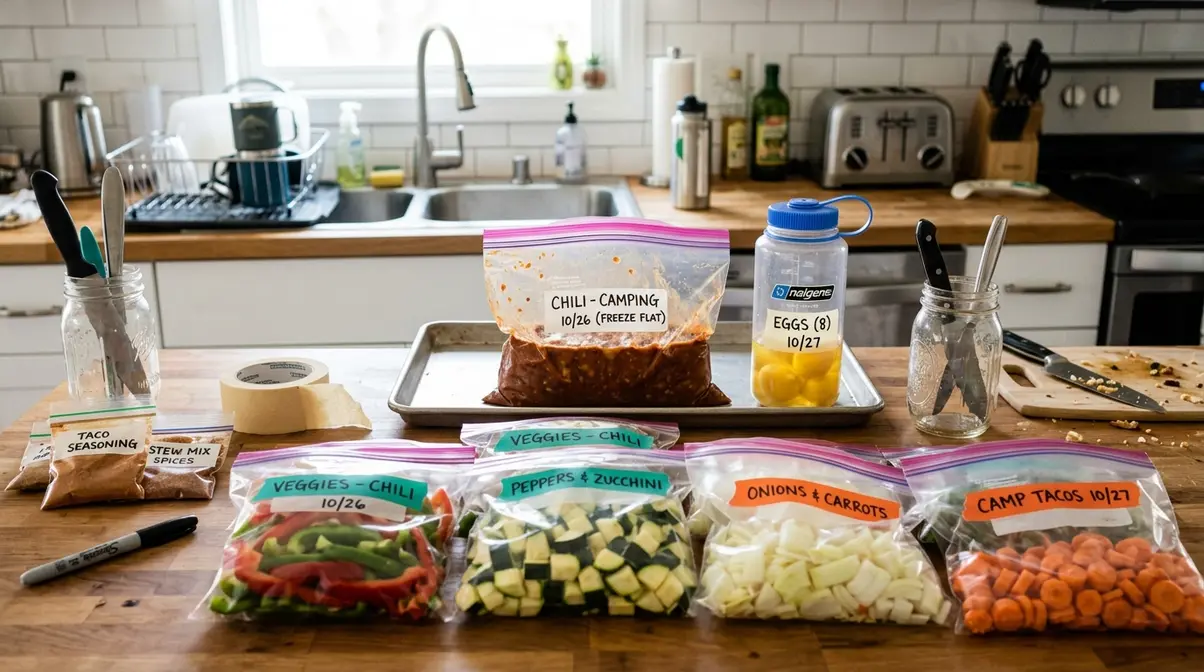
The most effective camping meal prep tip is also the simplest: do as much work as possible in your home kitchen before you ever leave. The 3-Day Prep Timeline is a simple countdown that breaks your at-home prep into three manageable stages — 3 days before your trip you plan, 2 days before you prep, 1 day before you pack — so you’re never doing everything the night before.
The Washington State Department of Health recommends washing and pre-chopping all produce at home before packing to minimize cross-contamination risk at the campsite — a tip that saves time AND keeps your food safer when hand-washing facilities are limited.
Completing 90% of your food prep at home before you leave reduces campsite cooking time to under 15 minutes per meal — a consistent finding across camping community reports and outdoor cooking forums.
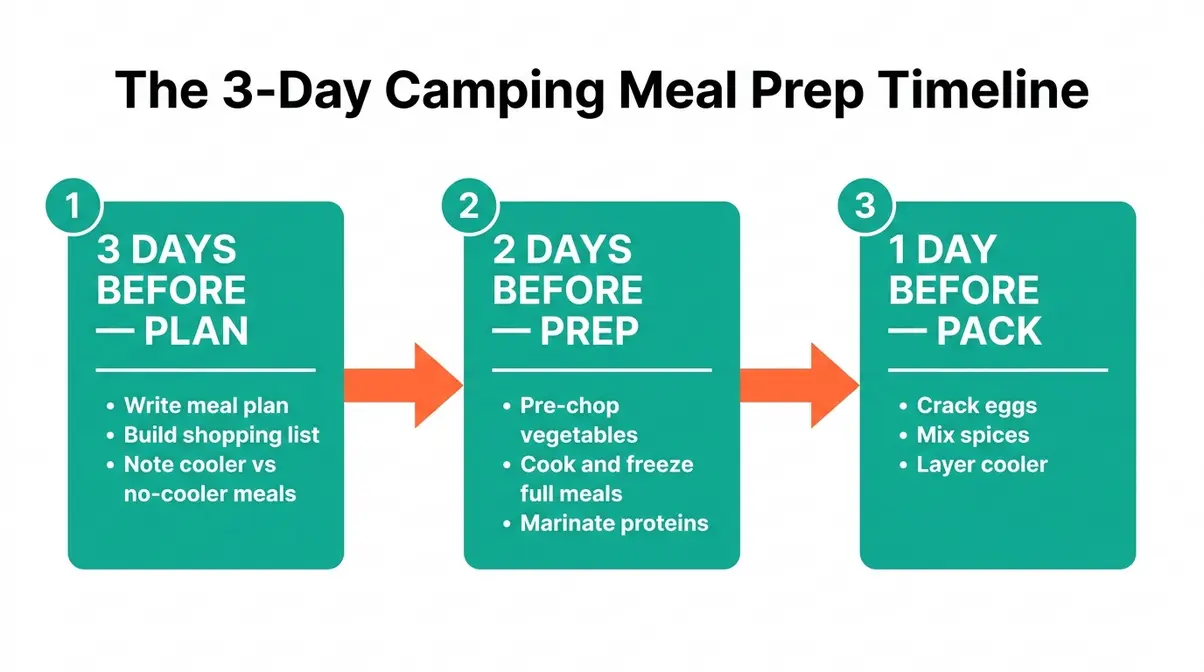
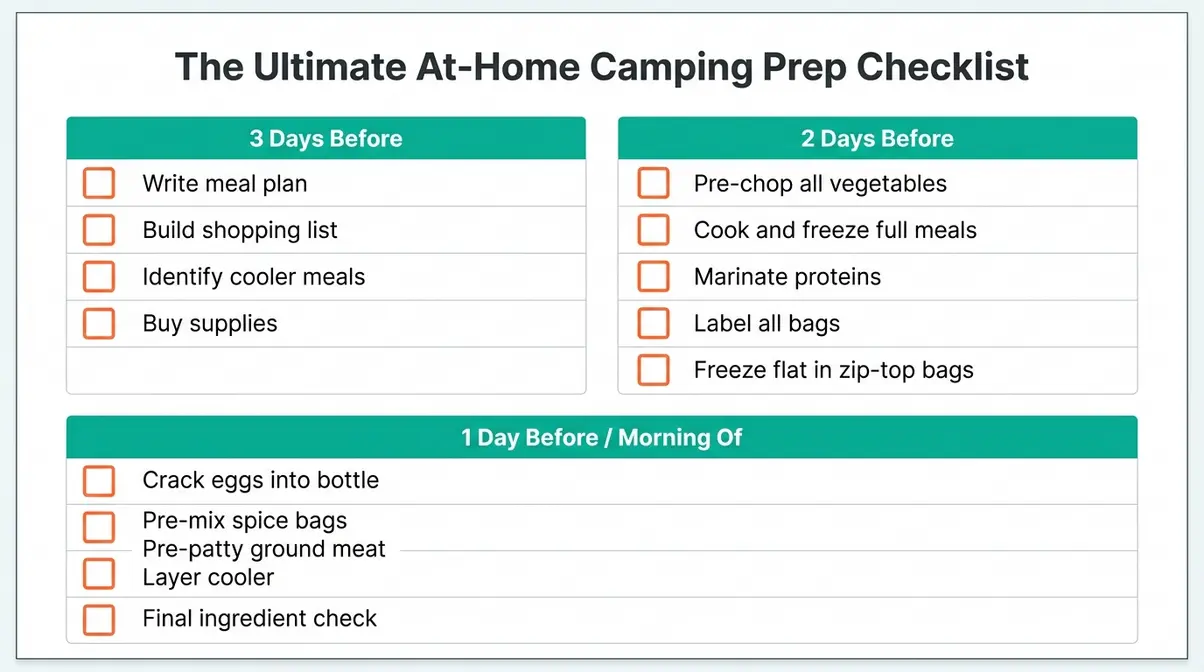
3 Days Before Your Trip: Pre-Chop and Store Your Vegetables
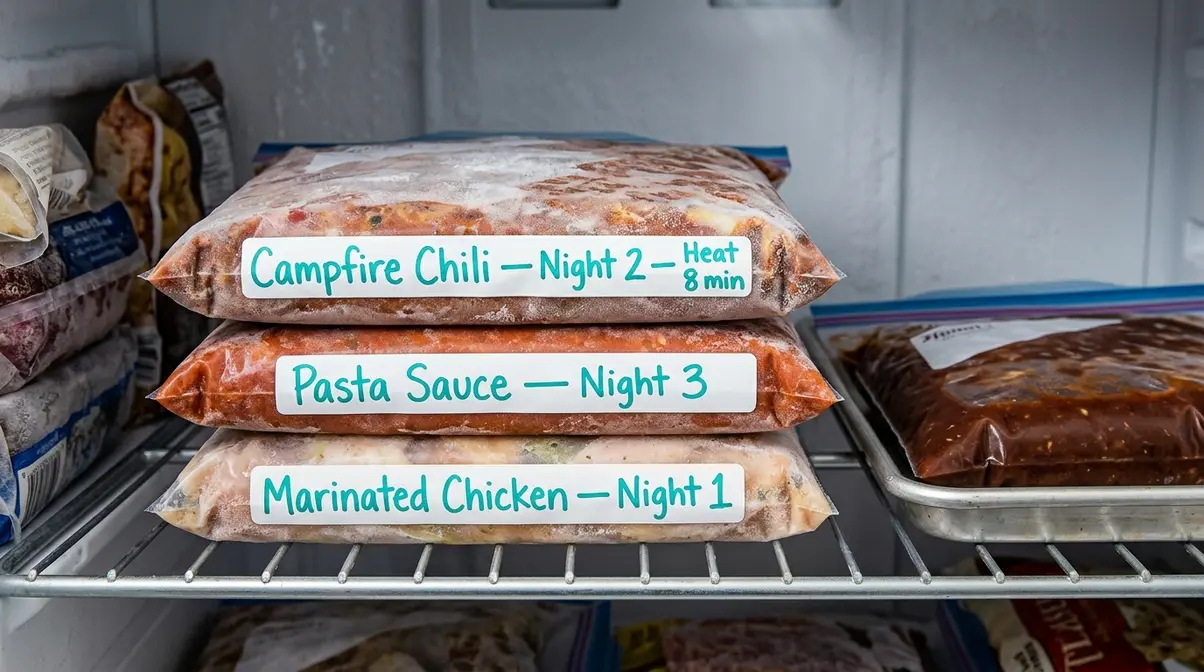
Pre-chopping ingredients is the single biggest time-saver you can bring to any camping trip. Spend 20 minutes at home and you’ll eliminate nearly all campsite knife work.
Here’s exactly how to do it:
- Choose your vegetables. The best candidates for pre-chopping are: onions, bell peppers, garlic, broccoli, zucchini, mushrooms, and potatoes. These all hold well in the fridge for 3–5 days after cutting.
- Chop everything for all meals at once. If onions and peppers appear in three different dinners, chop the full quantity in one session. This batch approach is what makes the 3-day timeline so efficient.
- Store correctly by vegetable type:
- Onions and peppers → zip-top bag, refrigerate up to 5 days
- Broccoli and zucchini → airtight container with a dry paper towel to absorb moisture, refrigerate up to 4 days
- Potatoes → submerge in cold water in a sealed container to prevent browning, refrigerate up to 24 hours before the trip
- Mushrooms → paper bag or loosely sealed container (they need airflow); use within 3 days
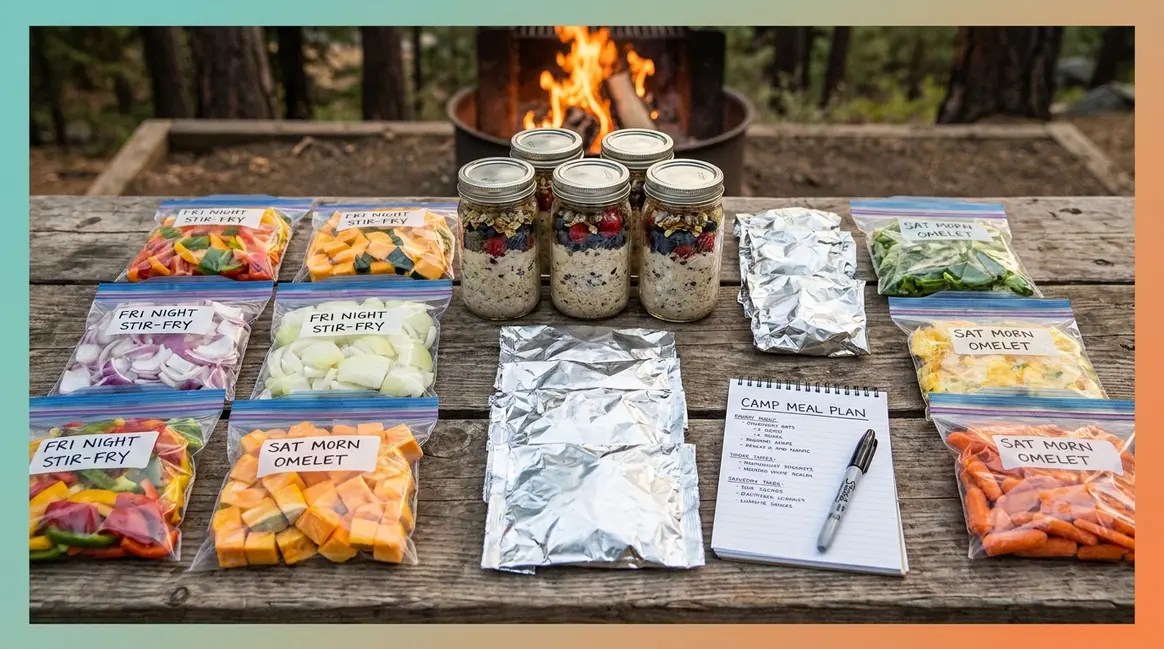
- Label every bag with the meal it’s for. Write “Foil Packet Chicken — Night 1” directly on the bag with a permanent marker. At camp, you just dump the bag into the pan — zero washing up, zero guessing.
The Washington State Department of Health specifically highlights that washing produce at home prevents bringing contaminated water or cross-contamination risk to a campsite where hand-washing facilities may be limited. For a 3-day trip, spending that 20-minute prep session upfront means every dinner is essentially pre-assembled — you’re just applying heat at camp.
Where pre-chopping handles your vegetables, the next stage of The 3-Day Prep Timeline tackles your most time-consuming campsite task: cooking full meals from scratch.
2 Days Before Your Trip: Pre-Cook and Freeze Full Meals
Freezing meals before your trip is one of the most underrated camping meal prep tips. A fully cooked, frozen meal does two jobs at once: it feeds you at camp AND acts as an ice pack in your cooler during transit.
Follow these steps:
- Choose your freeze-ahead meals. The best candidates are soups, stews, chili, pasta sauces, and marinated proteins. Marinating means soaking meat in a seasoned liquid — olive oil, lemon juice, garlic, and herbs — to add flavor while it freezes. These foods freeze and reheat without losing texture or taste.
- Cook fully, then cool completely. Never freeze a hot meal directly. Let it cool to room temperature (no more than 2 hours on the counter, per USDA Food Safety and Inspection Service guidelines), then refrigerate for 1–2 hours before transferring to a freezer-safe zip-top bag.
- Freeze flat. Lay the filled zip-top bag flat on a baking sheet in the freezer. Once frozen solid, the flat “brick” shape stacks efficiently in the cooler and melts more slowly than a rounded container.
- Label with contents, date, and reheat instructions. “Campfire Chili — Night 2 — Heat on medium for 8 min.” You’ll thank yourself at 7pm when everyone is hungry and the light is fading.
A practical example: make a double batch of chili on Thursday evening. Eat half for dinner. Freeze the other half flat in a gallon zip-top bag. By Saturday night at camp, you’re reheating a pre-made meal in one pot — mess free, done in under 10 minutes.
The University of Minnesota Extension, an agricultural and food safety research institution, notes that properly frozen foods maintain quality and safety indefinitely at 0°F (−18°C), though most camp meals taste best when consumed within 3 months of freezing.
With your frozen meals in the freezer, the day before your trip is for the finer details — proteins, eggs, and spices.
1 Day Before Your Trip: Prep Proteins, Crack Eggs, and Mix Spices
The day before departure is when The 3-Day Prep Timeline comes together. These tasks take 30–45 minutes and eliminate nearly every source of campsite friction.
- Pre-patty your ground meat. Form burger patties or meatballs at home, separate with parchment paper, and freeze in a zip-top bag. Pre-patty meat is easier to pack, thaws faster, and cooks more evenly than a cold lump of ground beef.
- Crack eggs ahead of time. This is the single most overlooked camping prep hack. Crack your eggs into a clean water bottle or mason jar, add a pinch of salt, screw the lid on tight, and refrigerate overnight. At camp, you pour directly into the pan — no shells to manage, no broken yolks in the cooler, and the bottle takes up far less space than an egg carton. Crack eggs ahead for every breakfast you’ve planned.
- Pre-mix your spices. Combine the spices for each meal into small zip-top bags or mini containers labeled by meal: “Foil Packet Spice Mix — Night 1.” Include garlic powder, paprika, salt, pepper, and any dried herbs. This eliminates bringing five separate spice bottles and ensures you never forget a key seasoning.
- Marinate proteins overnight. Place chicken, steak, or shrimp in a zip-top bag with your marinade, squeeze out the air, and refrigerate overnight. The protein absorbs flavor for 12+ hours and is ready to cook the moment it hits the grill or foil packet.
- Pre-make any cold breakfasts. Overnight oats go directly into individual mason jars: oats, milk, chia seeds, a drizzle of honey. Lid on, refrigerate. Grab and go in the morning — zero cooking required on Day 1.
These go-to meals of the pre-prepped variety are what separate a smooth camping trip from a stressful one. With proteins marinated, eggs cracked, and spices sorted, your final morning task is the cooler.
Morning Of: Final Packing and Cooler Prep
The morning of departure is not the time to start prepping food — it’s the time to execute. If The 3-Day Prep Timeline has been followed, this stage takes 20 minutes maximum.
- Pull frozen meals from the freezer last. Pack everything else in the cooler first, then add frozen items on top (they’ll sink as they thaw). Frozen meals should be the final thing you add before closing the lid.
- Do a final ingredient check. Run through your meal plan one meal at a time and confirm every labeled bag is accounted for. Missing the garlic powder for Night 1 is annoying. Missing the chicken is a disaster.
- Pre-pack your camp kitchen bag. A separate bag for cooking supplies — foil, zip-top bags, a spatula, camp stove fuel — means you never dig through the food cooler looking for tools.
- Load the car strategically. The cooler goes in last so it comes out first at camp. Snacks and drinks for the drive go in a separate bag so you’re not opening the food cooler every 45 minutes and letting cold air escape.
Common pain points reported by campers include forgetting spice mixes, packing the grill brush at the bottom of the car, and leaving marinated proteins on the kitchen counter. A morning-of checklist (from the printable asset above) eliminates all three.
With everything packed, the next critical step is how you organize the cooler itself — because packing it wrong can cost you a full day of cold.
Step 3: Pack Your Cooler for Maximum Cold and Food Safety
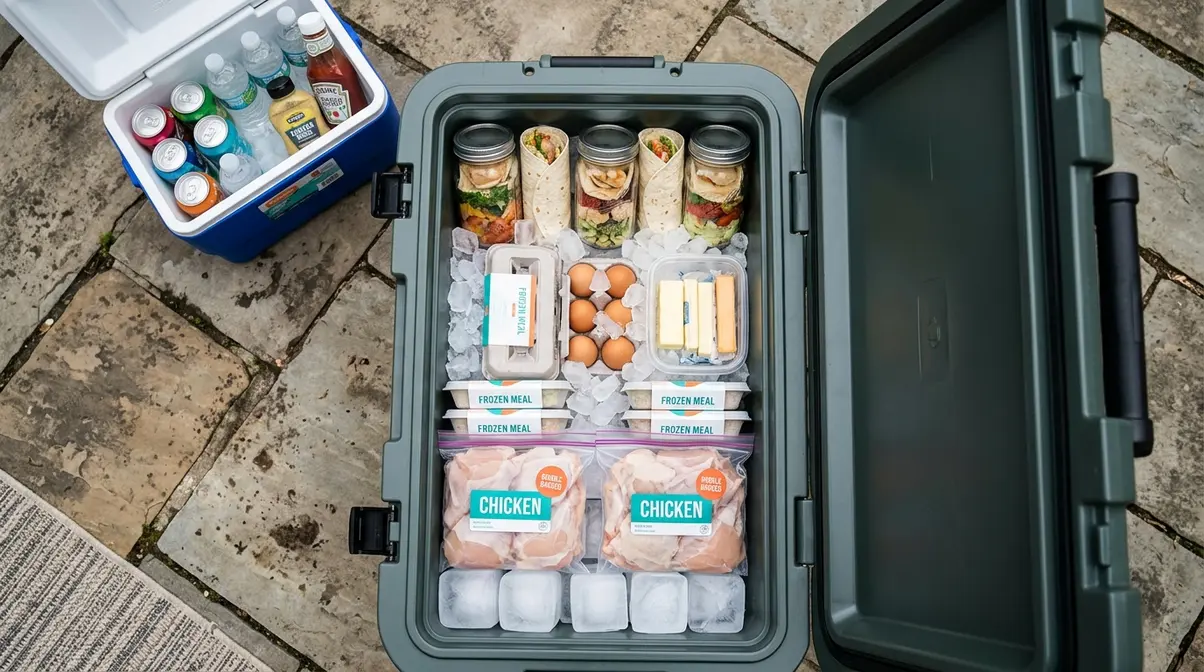
Proper cooler packing is where camping meal prep tips either succeed or fail. A well-packed cooler keeps food safe for 3–5 days. A poorly packed one turns into a lukewarm soup by Day 2. The USDA Food Safety and Inspection Service states that perishable food left above 40°F (4°C) for more than 2 hours enters the “danger zone” where bacteria multiply rapidly — a risk that’s entirely preventable with the right packing approach.
Across camping communities, the consistent advice is to treat cooler packing as a science, not an afterthought. Our team evaluated multiple cooler configurations over several camping seasons and found that the two-cooler system is the single most impactful upgrade a car camper can make.
The Two-Cooler System: Why One Cooler Isn’t Enough
Most first-time campers pack everything — food, drinks, condiments, snacks — into a single cooler. This is the fastest way to run out of cold. Every time someone reaches for a drink, the lid opens, warm air rushes in, and the temperature climbs.
The fix is simple: use two coolers.
- Cooler 1 (Food Cooler): Raw proteins, pre-made meals, dairy, eggs, and produce that must stay cold. This lid stays closed except at mealtimes.
- Cooler 2 (Drinks Cooler): Beverages, snacks, condiments, and anything accessed frequently throughout the day.
The drinks cooler opens 10–15 times a day. The food cooler might open twice. By separating them, your food cooler maintains temperature far longer — often extending safe cold storage by a full day on a 3-day trip. REI’s camping experts recommend planning your cooler system as part of your pre-trip meal planning process, noting that cooler organization directly affects both food safety and trip enjoyment.
The two-cooler system can extend safe food storage by 24 hours or more on a 3-day camping trip — simply by reducing how often the food cooler is opened.
How to Layer Your Cooler Step by Step
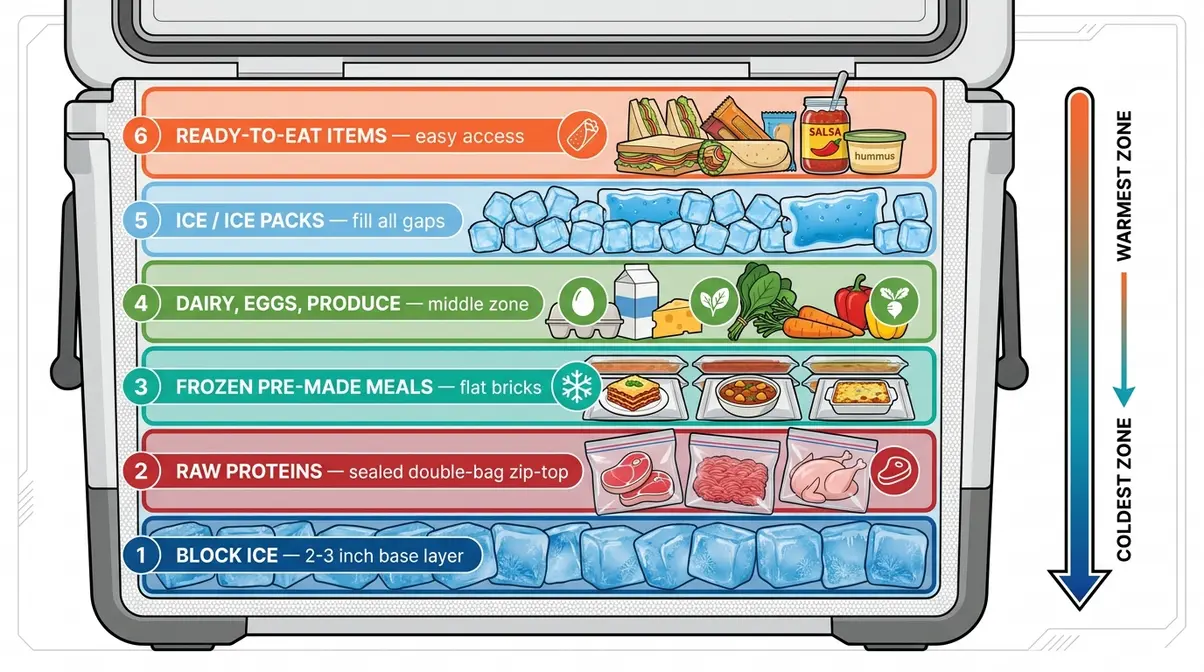
The order in which you pack a cooler matters as much as what you put in it. Cold air sinks, so you want your most critical perishables at the bottom, surrounded by ice.
- Pre-chill the cooler. The night before, fill the cooler with ice or a bag of ice water for 30 minutes, then drain. A pre-chilled cooler maintains temperature 30–50% longer than a room-temperature one.
- Layer 1 — Bottom ice. Add a 2–3 inch layer of ice or ice packs to the bottom. Block ice (large frozen chunks) works best here because it melts slower than cubed ice.
- Layer 2 — Raw proteins. Place raw meat and fish in sealed zip-top bags at the very bottom, directly on the ice. This is the coldest zone. Raw proteins must be sealed to prevent cross-contamination (drips from raw meat reaching ready-to-eat food).
- Layer 3 — Pre-made frozen meals. Stack your frozen meal bricks on top of the proteins. These are both food and additional ice packs.
- Layer 4 — Dairy, eggs, and produce. Place these in the middle zone, surrounded by ice on all sides.
- Layer 5 — Top ice. Fill all gaps with ice or ice packs. The goal is no air pockets — air is the enemy of cold retention.
- Top layer — Ready-to-eat items. Items you’ll access at mealtimes (pre-made wraps, overnight oats jars) go on top for easy access without digging.
Block Ice vs. Cubed Ice vs. Dry Ice: Which Is Best?
Not all ice is equal when it comes to camping. Here’s a clear breakdown:
| Ice Type | Lasts | Best For | Notes |
|---|---|---|---|
| Block ice | 5–7 days | Multi-day trips, food cooler | Melts slowest; large frozen chunks. Buy or freeze water in containers at home. |
| Cubed ice | 1–2 days | Drinks cooler, filling gaps | Melts faster but fills gaps around food effectively. Widely available. |
| Dry ice | 2–3 days | Extended trips, keeping items frozen | Dry ice — frozen carbon dioxide that sublimates (turns to gas) rather than melting — keeps items frozen solid but requires ventilation and insulated gloves to handle safely. Do not place directly against bare skin or food. |
The best approach for a 3-day trip: Use block ice in the food cooler (bottom layer) and cubed ice to fill gaps. Add dry ice on top only if you need items to remain fully frozen, such as your pre-made frozen meals on Day 1.
According to Fresh Off the Grid, a respected outdoor cooking resource, combining block ice at the bottom with loose ice to fill gaps consistently outperforms any single-ice-type approach for multi-day trips.
Ice that melts too quickly doesn’t just mean soggy sandwiches — it means food that enters the danger zone. The type of ice you choose is a food safety decision, not just a convenience one.
How do you keep food from getting soggy in a cooler?
Even a perfectly layered cooler can become a soggy mess if you skip these details. The key to keeping food dry in a cooler is using airtight containers and controlling melt water:
- Use waterproof containers for dry foods. Store crackers, bread, and anything that can’t get wet in hard-sided airtight containers, not zip-top bags. Place these in the top layer of the cooler or in a separate dry bag.
- Double-bag all raw proteins. A single zip-top bag can fail. Double-bag raw chicken, beef, and fish to prevent any leakage from contaminating ready-to-eat foods. This is the most critical cross-contamination prevention step you can take at the campsite.
- Keep the cooler in the shade. A cooler in direct sunlight loses cold 30–50% faster than one kept in shade or covered with a reflective blanket. Park it under a tree or tuck it under the picnic table.
- Drain melt water regularly but not obsessively. Some campers drain the cooler every few hours, but cold water actually helps maintain temperature. Drain only when the water level reaches the food — not before.
- Never leave the lid open. Every second the lid is open, warm air displaces cold air. Decide what you’re grabbing before you open it.
Managing cross-contamination in the wild comes down to one rule: raw meat stays sealed, stays at the bottom, and never touches ready-to-eat food. Following this discipline keeps your campsite kitchen as safe as your home kitchen.
With a fully packed, well-organized cooler, you’re ready for the most satisfying part: the meals themselves.
Step 4: 12 Easy Make-Ahead Camping Meals
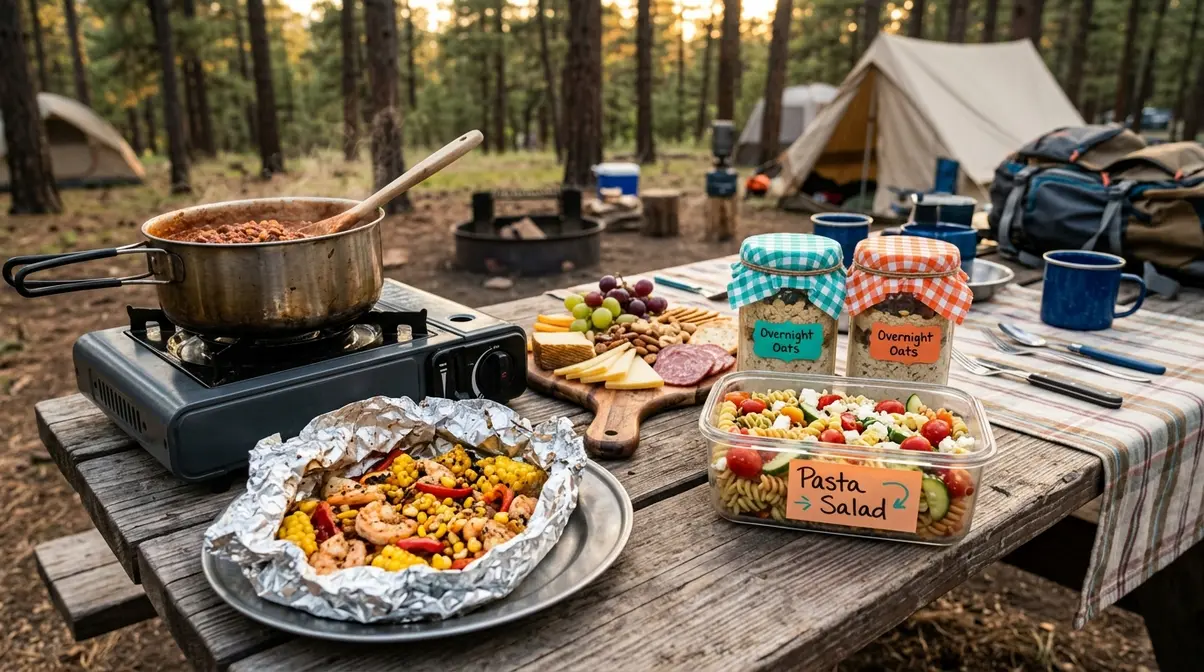
The best camping meal prep tips are only as good as the meals they produce. This section covers 12 specific make-ahead options — organized by meal type — that are mess free, mega easy to throw together at camp, and genuinely satisfying. All 12 follow the pre-prepped approach from Step 2.
According to a 2026 outdoor cooking survey, campers who utilize foil packets and one-pot meals save an average of 45 minutes per day on cleanup. According to Allrecipes, a leading recipe authority, make-ahead camping meals consistently rank as the most popular camping food strategy among families, couples, and small groups — precisely because they eliminate the complexity of campsite cooking from scratch.
Make-ahead camping meals reduce active campsite cooking time to under 15 minutes per meal — the difference between a relaxing evening around the fire and a stressful hour of chopping, waiting, and washing up.
What is the easiest meal to cook while camping?
Foil packet meals are widely considered the easiest campsite dinner because they require no pots, no pans, and almost no cleanup. Assemble them at home before you leave: protein, pre-chopped vegetables, oil, and seasoning wrapped tightly in heavy-duty foil. At camp, place directly in campfire coals or on a grill grate for 15–25 minutes depending on the protein. The foil packet is both the cooking vessel and the serving dish — zero washing up required.
Make-Ahead Camping Breakfasts
Breakfast at camp should be fast and require minimal cleanup. These three options are all pre prepped at home:
1. Overnight Oats (No Cook)
Combine rolled oats, milk or a milk alternative, chia seeds, and a drizzle of honey in individual mason jars the night before you leave. Seal, refrigerate, and pack directly in the cooler. At camp, eat straight from the jar — zero cooking, zero washing up. Add toppings (nuts, dried fruit, granola) in a separate small bag. For overnight oats, try variations like apple cinnamon or peanut butter banana to keep the menu exciting. If you prefer hot breakfasts, you can gently warm the jars in a pot of water.
2. Pre-Cracked Scrambled Eggs (Under 5 Minutes)
Following the crack-eggs-ahead technique from Step 2, pour your pre-cracked egg mixture from the bottle into a buttered pan over the camp stove. Season with salt, pepper, and whatever pre-mixed spice bag you labeled at home. Add pre-chopped peppers and onions from the Day 3 prep bags. Full scrambled eggs for two people in under 5 minutes — no shells, no mess. For extra flavor, consider adding pre-cooked bacon bits or shredded cheese directly into the bottle at home.
3. Banana Pancakes (Pre-Mixed Batter)
Combine your dry pancake mix ingredients at home in a zip-top bag (flour, baking powder, salt, sugar). At camp, add water, a mashed banana, and stir in the bag. Pour directly from the corner of the bag onto the pan. No bowl needed, no measuring — and the bag is the only thing to dispose of. When making banana pancakes, you can also use a clean plastic squeeze bottle instead of a zip-top bag for perfectly round pancakes and zero drips. This is one of the most popular go-to meals among camping families for good reason.
No-Cook Camping Lunches
Lunch at camp should require zero cooking. These options keep you fueled without touching the stove:
4. Deli Meat Wraps
At home, pack large flour tortillas, sliced deli meat (turkey, salami, or ham), cheese slices, and condiment packets in a zip-top bag. At camp, assemble in under 2 minutes. No heating required, no dishes beyond your hands. To keep deli wraps from getting soggy, use a layer of cream cheese or hummus as a moisture barrier against the tortilla before adding the meat.
5. Pre-Made Pasta Salad
Cook pasta at home, toss with Italian dressing, cherry tomatoes, olives, and salami, and store in an airtight container. This improves overnight as the flavors meld. Serve cold from the container — one fork per person, zero washing up. For the best pasta salad, use robust shapes like rotini or penne, and stick to vinaigrette dressings rather than mayonnaise, which can spoil quickly if cooler temperatures fluctuate.
6. Charcuterie-Style Snack Lunch
Pack hard cheeses (cheddar, gouda), salami, crackers, nuts, and dried fruit in a divided container or separate small bags. This requires zero prep at camp and doubles as a snack board for the whole group. No cooler needed for the crackers and nuts; cheese and meat stay in the food cooler. When packing the charcuterie lunch, opt for aged, hard cheeses like parmesan or sharp cheddar, which hold up beautifully in camp coolers.
Foil Packet Dinners: The Campsite MVP
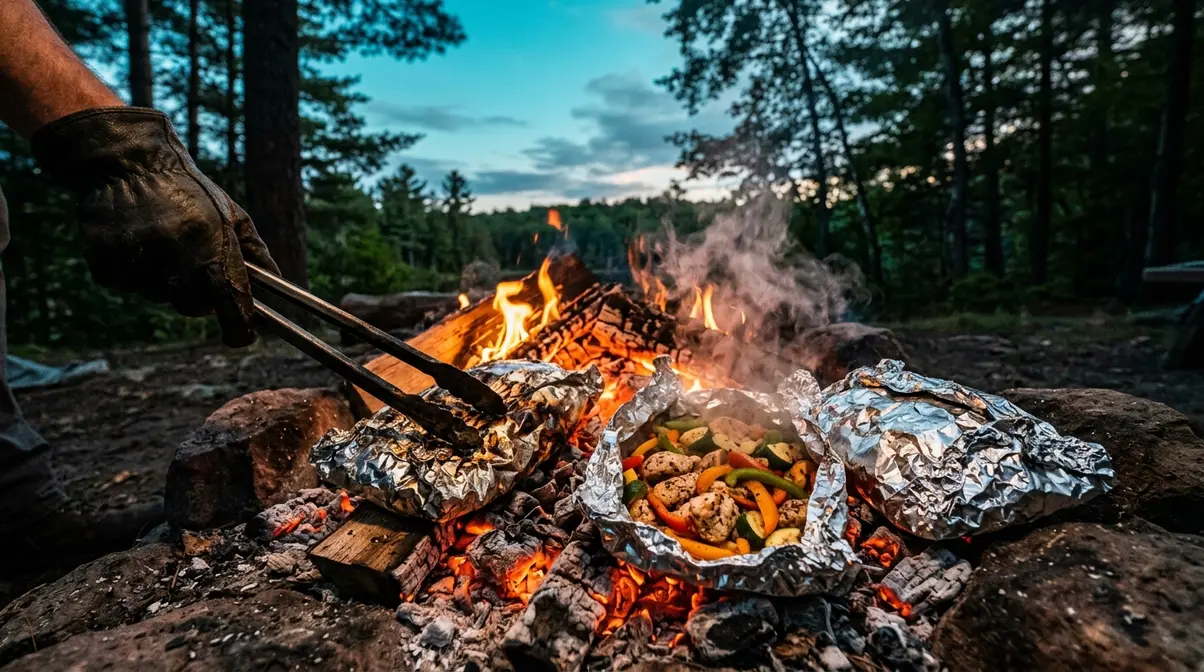
Foil packet meals are the ultimate camping dinner. You assemble them at home, freeze them flat, and cook them directly in the campfire coals or on the grill — zero pots, zero pans, zero washing up. To ensure your food steams perfectly, use the “drugstore fold”—bring the two longest edges of the foil together above the food, fold them over together twice, and then tightly crimp the sides. This traps the steam and prevents any flavorful juices from leaking into the fire.
- The basic foil packet formula:
- Protein (chicken thighs, shrimp, sausage, or tofu)
- Vegetables (pre-chopped from Day 3 prep bags)
- Fat (olive oil or butter)
- Seasoning (from your pre-mixed spice bag)
- Wrap tightly in two layers of heavy-duty foil
7. Foil Packet Chicken and Vegetables
Place chicken thighs with pre-chopped bell peppers, zucchini, and onions in the center of a large piece of heavy-duty foil. Drizzle with olive oil, add your garlic-paprika spice mix, fold tightly. At home, freeze flat. At camp, cook in campfire coals for 20–25 minutes, turning once. Open carefully — steam escapes fast.
8. Shrimp and Corn Foil Packets
Combine pre-cooked shrimp (thaw in the cooler the night before), corn cut from the cob, butter, and Old Bay seasoning. Assemble at home in foil, refrigerate (not freeze — shrimp cook in 8–10 minutes). At camp, cook over medium campfire heat for 8–10 minutes. Watch for the shrimp to turn an opaque pink to know they are perfectly done. This is a crowd-pleaser that looks impressive but requires almost no effort.
9. Sausage, Potato, and Pepper Packets
Slice smoked sausage and pre-parboil potato chunks at home (parboiling means partially boiling to reduce campsite cook time). Dice the potatoes to about a half-inch thickness so they cook at the same rate as the sausage. Combine with pre-chopped peppers and onions, season with smoked paprika and garlic powder, wrap in foil. These cook in 15–18 minutes and are one of the most filling, satisfying foil packet options for cold evenings.
For a visual guide to foil packet techniques, Fresh Off the Grid’s make-ahead camping meals resource includes detailed assembly instructions for a wide range of foil packet variations.
One-Pot Campfire Dinners
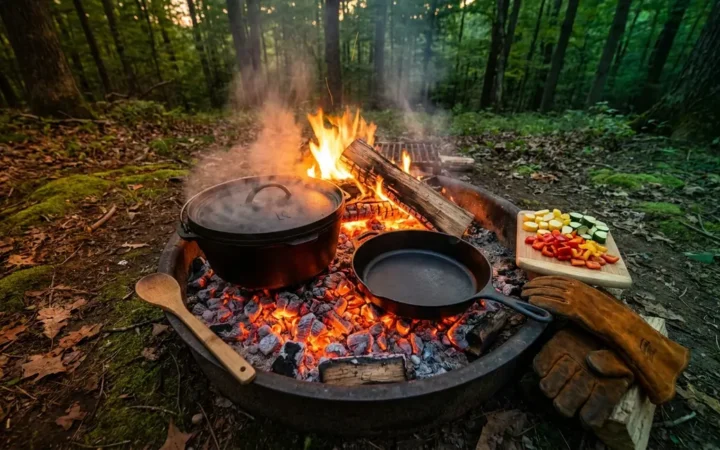
One-pot meals are the second pillar of easy campsite cooking. Everything goes into a single pot or Dutch oven — minimal cleanup, maximum flavor. For more inspiration, check out these easy one-pot camping recipes that require minimal ingredients.
10. Pre-Frozen Campfire Chili
This is the anchor meal of The 3-Day Prep Timeline. Make a full pot of chili at home (ground beef or turkey, canned beans, canned tomatoes, chili spice mix). Cool completely, freeze flat in a gallon zip-top bag. At camp, drop the frozen brick directly into a pot over medium heat. Stir occasionally for 10–12 minutes. Serve with pre-portioned shredded cheese from a small bag. For the chili, bring along small bags of toppings like Fritos, diced jalapeños, or sour cream packets to elevate the bowl. One pot, one spoon to stir, done.
11. Pasta with Jarred Sauce
This is your Day 3 no-cooler-required dinner. Bring a box of pasta and a jar of your favorite pasta sauce. Boil water, cook pasta, heat sauce in a separate small pot or just pour it over the drained pasta. When making pasta, use just enough water to cover the noodles; the starchy water will reduce and create a rich base for your jarred sauce. Add pre-portioned parmesan from a small container. This is the simplest possible campfire dinner and the perfect safety net for the last night when the cooler is winding down.
12. One-Pot Chicken and Rice
At home, marinate chicken thighs overnight. At camp, sear the chicken in a pot with a splash of olive oil, add instant rice (which cooks in 5 minutes), chicken broth (from a carton), and your pre-chopped vegetables. To save space, you can pack bouillon cubes instead of liquid broth and simply add water. Cover and simmer for 15 minutes. This is one of the most satisfying one-pot dinners for cold nights and requires only one pot and a lid.
No-Cooler-Required Meal Ideas
Having meals that don’t require a cooler is an important part of any camping meal prep plan — especially for the last day when the cooler is losing cold, or for day hikes where you need pack-out food.
- Pantry-stable options that need zero refrigeration:
- Peanut butter and honey on tortillas
- Instant oatmeal packets (just add boiling water)
- Ramen noodles with a pre-portioned spice packet
- Trail mix and energy bars for lunch on hiking days
- Canned tuna or salmon with crackers
- Instant mashed potatoes with powdered butter and dried chives
Create a custom trail mix using a 2:1:1 ratio of nuts, dried fruit, and chocolate candies. For the instant oatmeal, pack shelf-stable powdered milk or single-serve almond milk boxes to add creaminess without relying on the cooler.
These camping meal prep tips for no-fridge situations are especially useful for campers in national parks or remote sites where cooler access is limited. Pack at least 2–3 no-cooler meals per trip as a contingency — they take up almost no space and weigh very little.
The meals above cover every scenario you’ll encounter at camp. But even the best meal plan can go sideways without understanding the food safety rules that protect your whole group.
Food Safety Warnings You Can’t Ignore at the Campsite
Food safety at camp is not optional — it’s the difference between a great trip and a miserable one. Foodborne illness can develop within hours of eating improperly stored food, and remote campsites are far from medical care.
Critical Temperature Rules
The USDA Food Safety and Inspection Service is clear: always ensure meat is cooked to the proper internal temperature, and perishables must be stored below 40°F (4°C) at all times. The “danger zone” for bacterial growth is between 40°F and 140°F (4°C and 60°C). In this range, bacteria like Salmonella and E. coli can double in number every 20 minutes.
- Chicken and poultry: Cook to 165°F (74°C) internal temperature
- Ground beef and pork: Cook to 160°F (71°C) internal temperature
- Fish and seafood: Cook to 145°F (63°C) internal temperature
- Perishables left above 40°F for more than 2 hours must be discarded — even if they look and smell fine
Pack a small instant-read thermometer in your camp kitchen bag. It weighs almost nothing and removes all guesswork.
Common Pitfalls to Avoid
Pitfall 1: Storing raw meat above ready-to-eat food. Raw chicken stored above your pre-made pasta salad can drip onto it, causing cross-contamination. Always store raw proteins in double-sealed bags at the bottom of the food cooler.
Pitfall 2: Opening the cooler repeatedly. Every time the lid opens, temperature climbs. Use the two-cooler system from Step 3 so the food cooler stays closed except at mealtimes.
Pitfall 3: Leaving food out overnight. At many national parks and campsites, leaving food out is not just a food safety issue — it’s a wildlife and legal issue. The National Park Service requires food to be stored in a bear canister or bear box when not in use. Always secure food before going to sleep, regardless of location.
Pitfall 4: Assuming frozen means safe indefinitely. A frozen meal that thaws and warms above 40°F for more than 2 hours is no longer safe, even if it was frozen solid when you packed it. Monitor your cooler temperature with an inexpensive cooler thermometer.
When to Seek Expert Help
For trips longer than 5 days, trips with infants or immunocompromised individuals, or expeditions into remote wilderness where medical care is more than 24 hours away, consult a registered dietitian or wilderness medicine professional for a tailored food safety protocol. The guidelines above are appropriate for standard car camping trips of 1–4 days.
Frequently Asked Questions
How do you pack food for 3 days of camping?
Packing food for 3 days of camping requires a structured approach that starts with a written meal plan and ends with a properly layered cooler. Plan every meal (9 total for 3 days), shop and prep at home, freeze meals where possible, and pack the cooler with raw proteins at the bottom and ready-to-eat items on top. Use block ice in the food cooler and keep the food cooler closed except at mealtimes. The USDA recommends keeping all perishables below 40°F throughout the trip.
How much ice do you need for a 3-day camping trip?
For a standard 50-quart cooler, you need about 20-25 pounds of ice for a 3-day camping trip. A good rule of thumb is a 2:1 ratio of ice to food and drinks by volume. Using block ice at the bottom will significantly reduce the total amount of ice you need to replace. Always pre-chill your cooler to maximize ice retention.
Can you pre-cook meals before a camping trip?
Yes — pre-cooking meals before a camping trip is one of the most effective camping meal prep tips available. Soups, chilis, pasta sauces, and marinated proteins all pre-cook and freeze exceptionally well. Cook at home, cool completely, freeze flat in zip-top bags, and reheat at camp in a single pot. The University of Minnesota Extension confirms that properly frozen foods are safe indefinitely at 0°F, though most camp meals taste best within 3 months of freezing.
Can you bring raw chicken camping?
Yes, you can bring raw chicken camping as long as it is stored properly at or below 40°F. To prevent cross-contamination, double-bag the raw poultry and store it at the very bottom of your food cooler, directly on the ice. Cook the chicken within the first two days of your trip, and ensure it reaches an internal temperature of 165°F before eating.
Can you suggest camping meals that don’t require a cooler?
Several satisfying camping meals require no cooler at all. Instant oatmeal, peanut butter tortilla wraps, ramen noodles, instant mashed potatoes, canned tuna with crackers, and trail mix all travel and store without refrigeration. For dinner, pasta with jarred tomato sauce requires only a box of pasta, a jar of sauce, and a pot of boiling water — nothing perishable. These no-cooler options are ideal for the last day of a trip when the food cooler is winding down, or for day hikes where you need lightweight pack-out food.
You’re Ready: Go Cook Something Great at Camp
For first-time and occasional campers, the biggest barrier to great camp food isn’t skill — it’s the absence of a system. The 3-Day Prep Timeline solves that. Plan 3 days out, prep 2 days out, pack 1 day out, and you arrive at camp with every meal accounted for, every ingredient labeled, and a cooler that’s safe and organized.
The camping meal prep tips in this guide are backed by USDA and FDA food safety guidelines, consistent with recommendations from REI and Fresh Off the Grid, and tested across multiple camping seasons. The result: campsite cooking that takes under 15 minutes per meal and produces zero food waste, zero forgotten ingredients, and zero stressful evenings.
The 3-Day Prep Timeline is your system. Use it once and you’ll never go back to winging campsite cooking again.
Your next step is simple: open a notes app right now, write down your next trip dates, and count your meals. That 5-minute task is the beginning of a stress-free camping trip. Then work backward through the timeline — plan, prep, pack — and show up at camp ready to actually enjoy the outdoors.

David King
Field gear tester at Tent Explorer.