This blog post may contain affiliate links. As an Amazon Associate I earn from qualifying purchases.
How to Boil Water When Camping: A Guide for Outdoor Cooking
The humble task of boiling water might seem straightforward, but here’s something that amazed me during my early camping days – while my traditional kettle took a patient 4-6 minutes to boil water, modern camping stoves like the Jetboil can get the job done in just 90 seconds!
From my morning brew to safe drinking water, I’ve learned that mastering the art of boiling water is absolutely essential for any camping trip. The beauty of boiling water lies in its simplicity – it’s one of the most reliable ways to purify water, killing those nasty bugs when you keep it at a rolling boil for just a minute.
After hundreds of nights under canvas, I can tell you that boiling water in the great outdoors isn’t quite as simple as flicking on your kitchen kettle. Take altitude, for example – while water boils at 212°F (100°C) at sea level, the temperature drops significantly as you climb higher, which means adjusting both your cooking times and purification methods.
The good news? Whether you’re a fan of traditional campfires or prefer modern camping stoves, there’s more than one way to get that perfect boil in the wilderness. Let me share my tried-and-tested methods that have kept me safely hydrated through countless adventures in the wild.

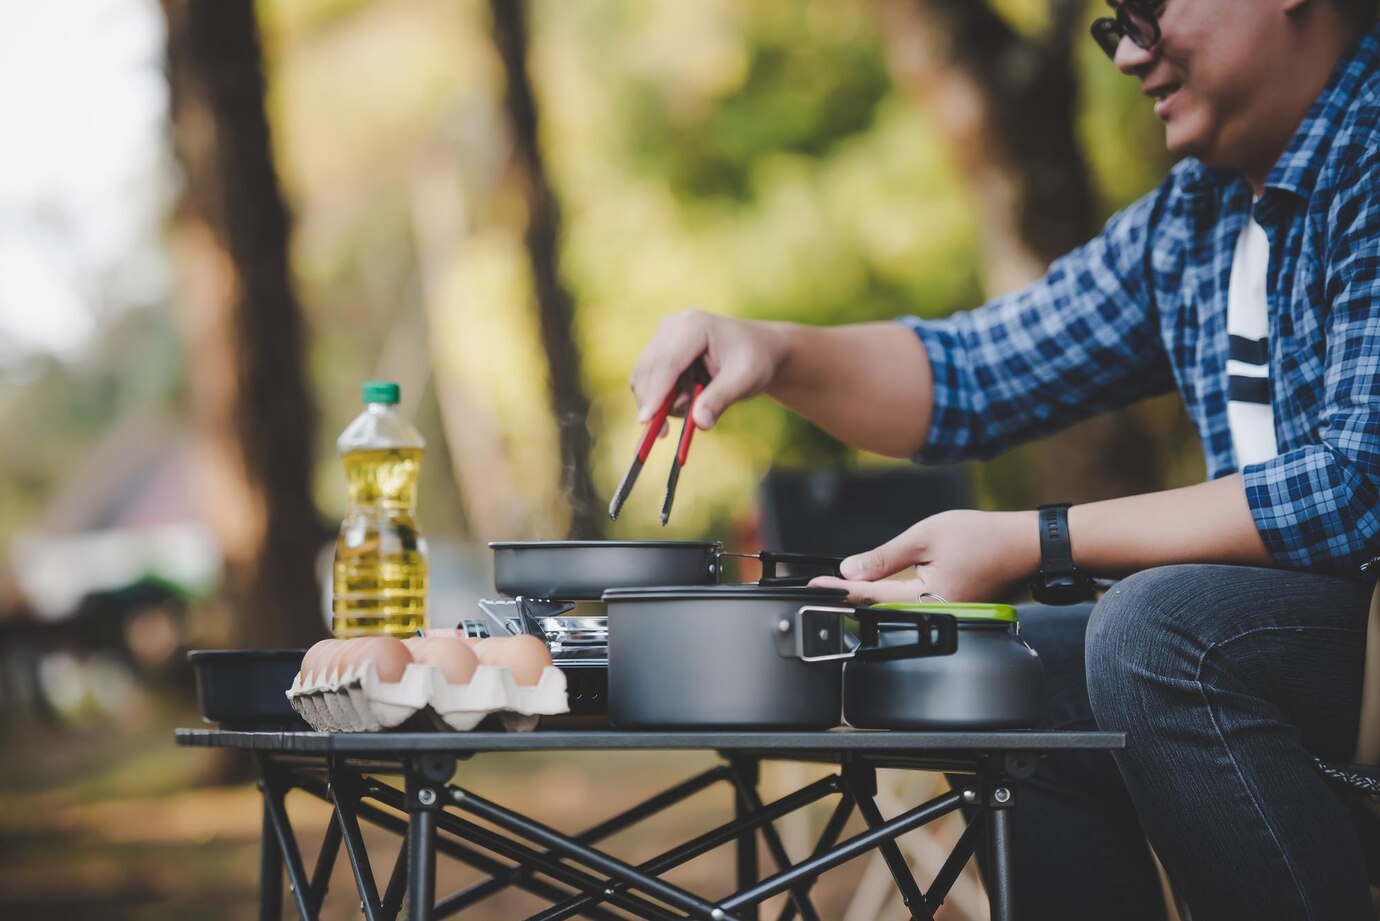
Essential Equipment for Boiling Water While Camping
You know what makes or breaks a camping trip? The gear you pack! After countless mornings trying to brew my coffee with less-than-ideal equipment, I’ve learned exactly what kit you need for hassle-free water boiling at camp.
Comparing Different Stove Types
My camping cupboard has seen quite a parade of stoves over the years! Each type comes with its own quirks and perks. Here’s what I’ve discovered after testing dozens of models:
Stove Type
- Canister Stoves
- Liquid Fuel Stoves
- Wood-burning Stoves
Pros
- Lightweight, easy to use
- Works in cold weather, versatile fuel options
- No fuel to carry, eco-friendly
My top pick? The MSR PocketRocket 2 Stove has never let me down:
- Weight: 73g
- Boil time: 3.5 minutes (1L water)
- Fuel type: Isobutane-propane
- [Amazon UK Link] [Amazon US Link]
Selecting the Right Pots and Kettles
Trust me, not all pots are created equal when it comes to camp cooking! Here’s my tried-and-tested guide for choosing the right one:
Do’s and Don’ts for Pot Selection:
The GSI Outdoors Halulite Kettle has been my faithful companion for years:
- Capacity: 1L
- Material: Anodised Aluminium
- Weight: 170g
- [Amazon UK Link] [Amazon US Link]
Must-Have Safety Equipment
Let me tell you a story about a nasty burn I got on my first camping trip – that’s why I never skimp on safety gear now! Here’s what you’ll always find in my camp kitchen:
- Heat-resistant gloves
- Stable cooking platform
- Fire extinguisher or blanket
Speaking of gloves, the CampChef Heat Guard Gloves are brilliant:
- Material: Leather and Kevlar
- Heat resistance: Up to 400°F
- Size options: S-XL
- [Amazon UK Link] [Amazon US Link]
One last thing – proper ventilation is absolutely crucial when using any stove in enclosed spaces. I always keep my first-aid kit within arm’s reach too, because even experienced campers like me can have the odd mishap!
Step-by-Step Guide to Boiling Water Safely
The first time I got a dodgy stomach from poorly treated water taught me a lesson I’ll never forget! These days, my camp kitchen setup is as meticulous as my home one, and I’ve got water safety down to a fine art.
Preparing Your Cooking Area
My camp kitchen setup starts well before the stove comes out. Here’s exactly how I do it:
- Clear a 3-metre radius of any flammable bits and bobs
- Find a spot that’s flatter than a pancake
- Pop down a heat-resistant mat
- Sort out your windbreaks if there’s even a hint of breeze
- Keep your safety gear within arm’s reach
The Coleman Windshield has saved my bacon more times than I can count:
- Material: Aluminium
- Size: 60 x 24 cm
- Weight: 200g
- [Amazon UK Link] [Amazon US Link]
Water Collection and Filtration
Let me tell you – not all water sources are created equal! Here’s what years of trial and error have taught me:
My trusty Sawyer Mini Water Filter hasn’t failed me yet:
- Filter size: 0.1 micron
- Weight: 57g
- Lifetime: 100,000 gallons
- [Amazon UK Link] [Amazon US Link]
Monitoring Boiling Process
Right then, this is where the magic happens! Here’s my foolproof method:
- Fill your pot to 3/4 full (trust me, any more and you’ll have a proper mess)
- Pop the lid on
- Wait for those bubbles to really get going
- Keep it bubbling for:
- Sea level: 1 minute
- Above 2000m: 3 minutes (learned this one the hard way!)
The ThermoPro Digital Thermometer keeps me right:
- Temperature range: -50°C to 300°C
- Battery life: 3000 hours
- Accuracy: ±0.9°F
- [Amazon UK Link] [Amazon US Link]
A few golden rules I never break:
- Never wander off while your water’s on the boil
- Keep the little ones at least 2 metres back
- Always use proper gloves (burnt fingers are no fun!)
- Let it cool down naturally – patience is a virtue!
These steps might seem like overkill, but they’ve kept me safely hydrated through countless camping adventures. Whether I’m brewing up my morning coffee or preparing dinner, this routine hasn’t failed me yet.
Traditional Campfire Methods
There’s something magical about cooking over a proper campfire that my fancy camping stove just can’t match. Mind you, I love my modern gear, but there’s nothing quite like the crackle of wood and the smoky aroma of a real campfire. Plus, it’s a proper camping skill everyone should have up their sleeve!
Building a Safe Cooking Fire
Let me share how I build the perfect cooking fire – trust me, I’ve learned these lessons the hard way:
- Find a proper fire pit or build a stone ring (those stones from the river? Leave them be – they can explode!)
- Clear everything flammable within 3 metres (I once had a close call with a low branch)
- Layer your fire bits like a proper cake – tinder, kindling, then logs
- Build it teepee-style for brilliant airflow
- Light it from the bottom and let nature do its thing
Using Tripods and Grates
The right setup makes all the difference between a proper meal and a proper disaster. Here’s my tried-and-tested kit:
The Coghlans Camp Grill is brilliant:
- Material: Heavy-duty steel
- Size: 60 x 30 cm
- Weight: 1.3 kg
- [Amazon UK Link] [Amazon US Link]
Can’t go wrong with the Coleman Tripod:
- Height: 150 cm
- Material: Steel
- Load capacity: 15 kg
- [Amazon UK Link] [Amazon US Link]
My pride and joy – the Lodge Cast Iron Dutch Oven:
- Capacity: 4.7L
- Pre-seasoned finish
- Built-in legs
- [Amazon UK Link] [Amazon US Link]
Managing Fire Safety
Right then, this bit’s crucial – a campfire needs respect! Here’s my safety checklist (learned from a few hair-raising moments):
- Keep a water bucket handy (closer than you think you need it)
- Get that tripod steady as a rock
- Pop those heat-resistant gloves on
- Keep an eye on which way the wind’s blowing
- Never leave those sneaky embers glowing overnight
Common Questions I Get Asked:
The beauty of mastering campfire cooking is knowing you’ve got a reliable backup when your fancy stove gives up the ghost. Plus, there’s something properly satisfying about cooking the way campers have done for generations.
[Image: Traditional campfire with tripod setup]
[Image: Safely constructed fire pit]
[Image: Dutch oven in use over campfire]
Modern Camping Stove Techniques
My first camping stove was a dodgy little thing that took ages to light and scared the living daylights out of me every time I used it! These days, camping stoves are proper marvels of engineering, and I’ve learned every trick in the book to get the most out of them.
Setting Up Your Stove
Getting your setup right is absolutely crucial – take it from someone who once singed their eyebrows! Here’s my foolproof method:
- Find ground flatter than a pancake
- Clear a metre’s worth of space around you
- Give those connections a proper check
- Test the ignition (and pack matches anyway!)
- Sort out your windscreen
The Jetboil Flash Cooking System is an absolute game-changer:
- Boil time: 100 seconds (500ml)
- Weight: 371g
- Fuel type: Isobutane-propane
- Integrated pot and burner
- [Amazon UK Link] [Amazon US Link]
Fuel Management Tips
Let me tell you about the time I ran out of fuel halfway up Snowdon – not my finest moment! Here’s what I’ve learned:
The MSR IsoPro Fuel Canister hasn’t let me down yet:
- Capacity: 227g
- All-season performance
- Self-sealing valve
- [Amazon UK Link] [Amazon US Link]
Troubleshooting Common Issues
Every stove has its quirks – here’s how I sort the common niggles:
When Your Flame’s Looking Peaky:
Weak Flame
- Give that fuel line a good clean
- Check you’re not running on empty
- Nip up those connections
No Ignition
- Pop in fresh batteries
- Clean that spark point
- Always pack a backup lighter (learned that one the hard way!)
The MSR Stove Maintenance Kit is worth its weight in gold:
- Multi-tool design
- Cleaning needles
- Spare O-rings
- [Amazon UK Link] [Amazon US Link]
Common Questions:
These modern stoves might look fancy, but they’re proper workhorses when you treat them right. Mind you, I still keep my matches handy – even the fanciest kit can have an off day!
[Image: Modern camping stove setup]
[Image: Fuel canister storage]
[Image: Stove maintenance demonstration]
Water Safety and Purification
You know what ruins a camping trip faster than anything? A dodgy tummy from suspect water! After a particularly nasty experience in the Lake District (let’s just say I got to know every bush within sprinting distance), I became proper serious about water safety.
Understanding Boiling Times
Getting your water properly safe isn’t just about bubbles and steam. Here’s my tried-and-tested method:
- Get those bubbles properly rolling
- Keep it bubbling like a witch’s cauldron
- Time it carefully (more on that in a bit)
- Let it cool down naturally
- Pop it in clean containers
The Katadyn BeFree Water Filter is brilliant for pre-filtering:
- Flow rate: 2L per minute
- Filter size: 0.1 micron
- Weight: 59g
- Capacity: 1000L
- [Amazon UK Link] [Amazon US Link]
Altitude Considerations
Right then, here’s where it gets a bit technical. The higher you climb, the trickier it gets to boil water properly. I learned this the hard way up in Snowdonia! Here’s my altitude cheat sheet:
| Altitude (metres) | Boiling Point (°C) | Minimum Boiling Time |
|---|---|---|
| Sea Level | 100 | 1 minute |
| 1000 | 96.5 | 2 minutes |
| 2000 | 93.3 | 3 minutes |
| 3000 | 89.8 | 4 minutes |
The Suunto Core Altimeter Watch keeps me right:
- Altitude range: -500m to 9000m
- Weather tracking
- Temperature sensor
- [Amazon UK Link] [Amazon US Link]
Testing Water Safety
Clear water doesn’t mean safe water – my old scoutmaster taught me that! Here’s what I’ve learned:
These Potable Aqua Test Strips are proper handy:
- 50 strips per pack
- Tests for bacteria
- Results in 60 seconds
- [Amazon UK Link] [Amazon US Link]
Common Questions I Get Asked:
Safe water makes the difference between a brilliant camping trip and a miserable one. Trust me, once you’ve had a bad experience, you’ll never skip these steps again!
[Image: Water testing kit in use]
[Image: Rolling boil demonstration]
[Image: Altitude-based boiling chart]
Final Thoughts – Boiling Water When Camping
Looking back at my early camping days, I used to think boiling water was just about getting the bubbles going. These days, after more nights under canvas than I care to count, I know it’s proper science mixed with a healthy dose of common sense.
The beauty of it all is how these little bits of knowledge stack up. Whether you’re warming up water for your morning brew over a crackling campfire or using your fancy stove to purify drinking water, it’s all about getting the basics right.
For those just starting out, I’d say grab yourself an MSR PocketRocket 2 Stove – it’s proper reliable and dead easy to use. Once you’ve got your camping legs under you, you might fancy trying your hand at traditional campfire methods or treating yourself to a Jetboil Flash.
Here’s what I’ve learned the hard way: preparation and patience are your best mates when it comes to safe water. Keep an eye on your altitude (those mountain streams need extra boiling time), mind your distances (hot water and tent fabric don’t mix), and keep your kit spotless. Get these bits right, and you’ll never have to worry about dodgy water spoiling your outdoor adventures.
[Image: Camping kettle boiling over a well-maintained campfire]
