 Dave King
Most solo campers agree that picking the perfect campsite makes all the difference on your first tent adventure. Getting it wrong can mean a restless night or a stressful setup. With over 65 percent of young adults worldwide choosing solo outdoor trips each year, building your camp skills not only boosts confidence but also keeps you safe. These steps will show you exactly how to pitch a tent alone, as well as help choose and prepare your space so you can set up a tent with ease, no matter where your journey leads.
Quick Summary
| Key Point | Explanation |
|---|---|
| 1. Choose a suitable ground surface | Find flat, level terrain free from obstacles to ensure a stable tent setup. |
| 2. Organize tent components logically | Systematically arrange tent parts to streamline the setup process for efficiency. |
| 3. Secure the tent with proper stakes | Use stakes at designated angles to maintain stability and prevent movement. |
| 4. Assemble poles correctly | Follow color-coded guides for efficient pole assembly and tent structure integrity. |
| 5. Ensure stability and comfort inside | Adjust guy lines and inner layout for a taut tent and restful sleeping area. |



Last update on 2026-06-08 / Affiliate links / Images from Amazon Product Advertising API
Step 1: Choose and Prepare Your Campsite
Selecting the right campsite is crucial for a safe and enjoyable solo camping experience. Your goal is to find a location that provides comfort, protection, and minimal environmental impact while ensuring your tent setup will be secure and stable.
When searching for an ideal campsite, prioritize finding a flat and level ground surface free from obstacles. Look for durable surfaces like rock, sand, or compacted dirt that can support your tent without causing unnecessary environmental damage. Clear the area of rocks, sticks, pinecones, and branches that could puncture your tent floor or create an uncomfortable sleeping surface. Pay close attention to potential hazards like dead trees or low hanging branches that could pose safety risks.
Orientation matters significantly when choosing your campsite. Position your tent with the door facing away from prevailing winds and consider natural windbreaks like large rocks or dense vegetation. Ensure the ground has good drainage to prevent water pooling underneath your tent during unexpected rainfall. Avoid setting up near animal trails or potential insect breeding grounds to minimize unwanted wildlife encounters.
Pro tip: Always carry a lightweight groundsheet or footprint to protect your tent floor and provide an extra layer of insulation from cold or damp ground conditions.
Here’s a summary of critical factors to evaluate when choosing a campsite:
| Factor | Why It Matters | Potential Risks |
|---|---|---|
| Ground Surface | Ensures comfort and stability | Punctures, uneven sleep surface |
| Environmental Impact | Minimizes damage to nature | Erosion, disturbed wildlife habitat |
| Hazards | Reduces injury and tent damage | Falling branches, live roots |
| Drainage | Prevents water pooling and flooding | Wet gear, uncomfortable sleep |
Step 2: Lay Out and Organize Tent Components
Successfully setting up a tent solo requires strategic preparation and organized component management. Your first objective is to systematically unpack and arrange all tent materials in a logical manner that will streamline the entire setup process.
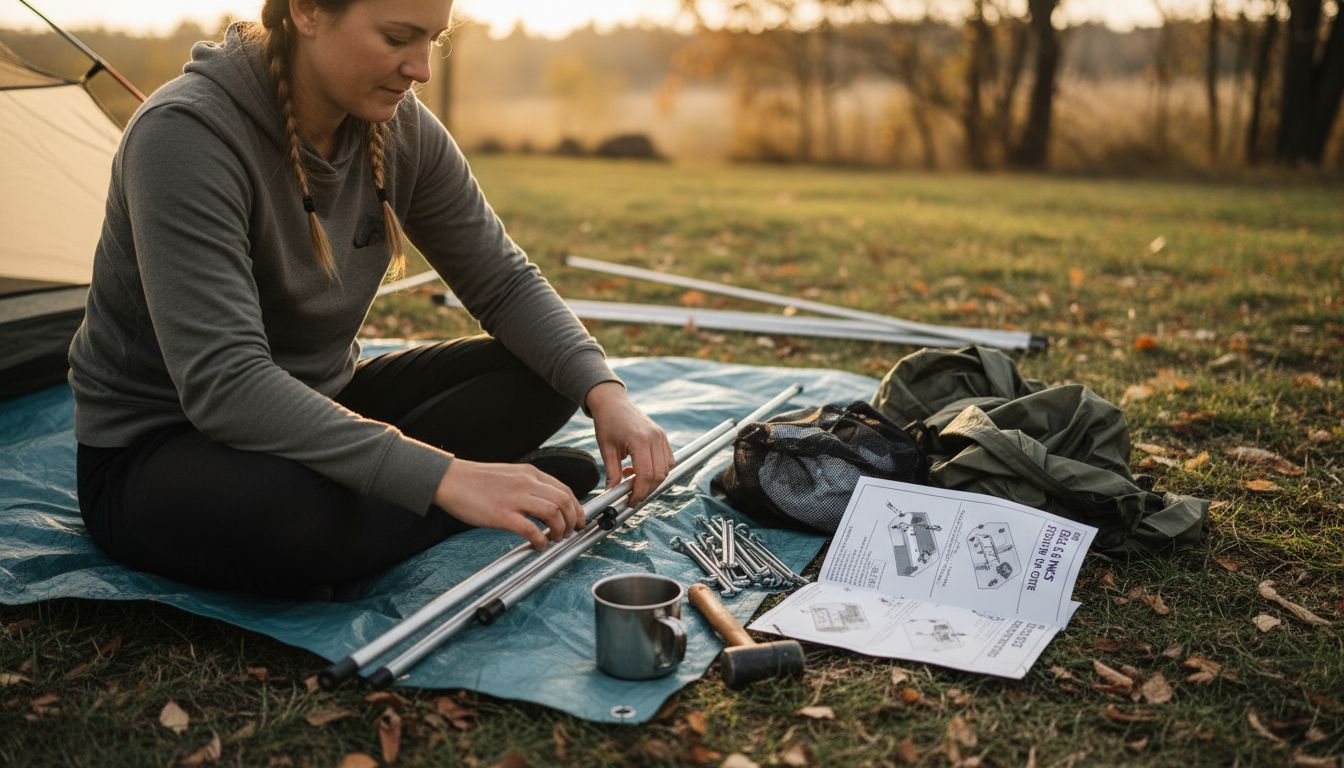
Tents typically consist of fabric sheets connected to supporting poles and hardware that need careful arrangement before assembly. Start by spreading out a clean ground tarp or footprint to protect your tent fabric and create a stable foundation. Carefully unpack all tent components the same way each time putting similar items together creating a consistent system. Separate your tent body, rainfly, poles, stakes, and guylines into distinct groupings. Place poles in one area and ensure they are unfolded and ready for quick connection checking that no sections are damaged or stuck together.
Pay special attention to matching pole sections and identifying their correct attachment points on the tent body. Most modern tents have color coded clips or matching markings to help you align components correctly. Arrange stakes and guylines within easy reach for quick securing once the tent structure is raised. This methodical approach transforms a potentially complex solo setup into a smooth efficient process.
Pro tip: Practice laying out your tent components in the same order every time to create muscle memory and reduce setup time during future camping trips.
Step 3: Secure Corners and Stake Down the Tent
Properly staking your tent is critical for maintaining stability and protecting your shelter from unexpected wind or terrain challenges. Your objective is to create a secure and taut tent setup that will withstand environmental conditions during your camping experience.
Tent pegs are essential for anchoring your shelter and preventing movement, so insert stakes at each corner with precision. Position each stake at a 45-degree angle pointing away from the tent to maximize ground grip and holding power. When driving stakes into the ground, use a medium sized rock as a gentle hammer to avoid bending the stakes, especially in compact or rocky terrain. Press stakes firmly into the soil ensuring they are deeply and securely embedded.
After securing the corner stakes, focus on additional attachment points like vestibule doors and guy lines. These secondary stakes provide extra stability and help maintain proper tent tension. Pull the tent fabric taut as you stake each point to prevent sagging or potential water pooling. Check that the tent body remains symmetrical and evenly stretched across its entire surface. For challenging ground conditions like sandy or loose soil, consider using specialized wide or longer stakes that offer improved grip and resistance.
Pro tip: Bring a lightweight mallet or dedicated stake hammer to make driving tent stakes easier and protect your equipment from damage during setup.
The following table compares common tent stake types suitable for various terrain conditions:
| Stake Type | Best Used On | Key Advantages |
|---|---|---|
| Standard Metal | Firm soil | Lightweight, durable |
| Wide Sand Stakes | Sand/loose soil | Superior grip, stability |
| Screw Stakes | Rocky ground | High anchoring power |
| Plastic Stakes | Soft earth | Rust-resistant, flexible |
Step 4: Assemble Poles and Raise the Tent
Raising your tent solo requires methodical attention to detail and a strategic approach to pole assembly and tent structure. Your goal is to transform individual tent components into a stable and secure shelter that will protect you from the elements.
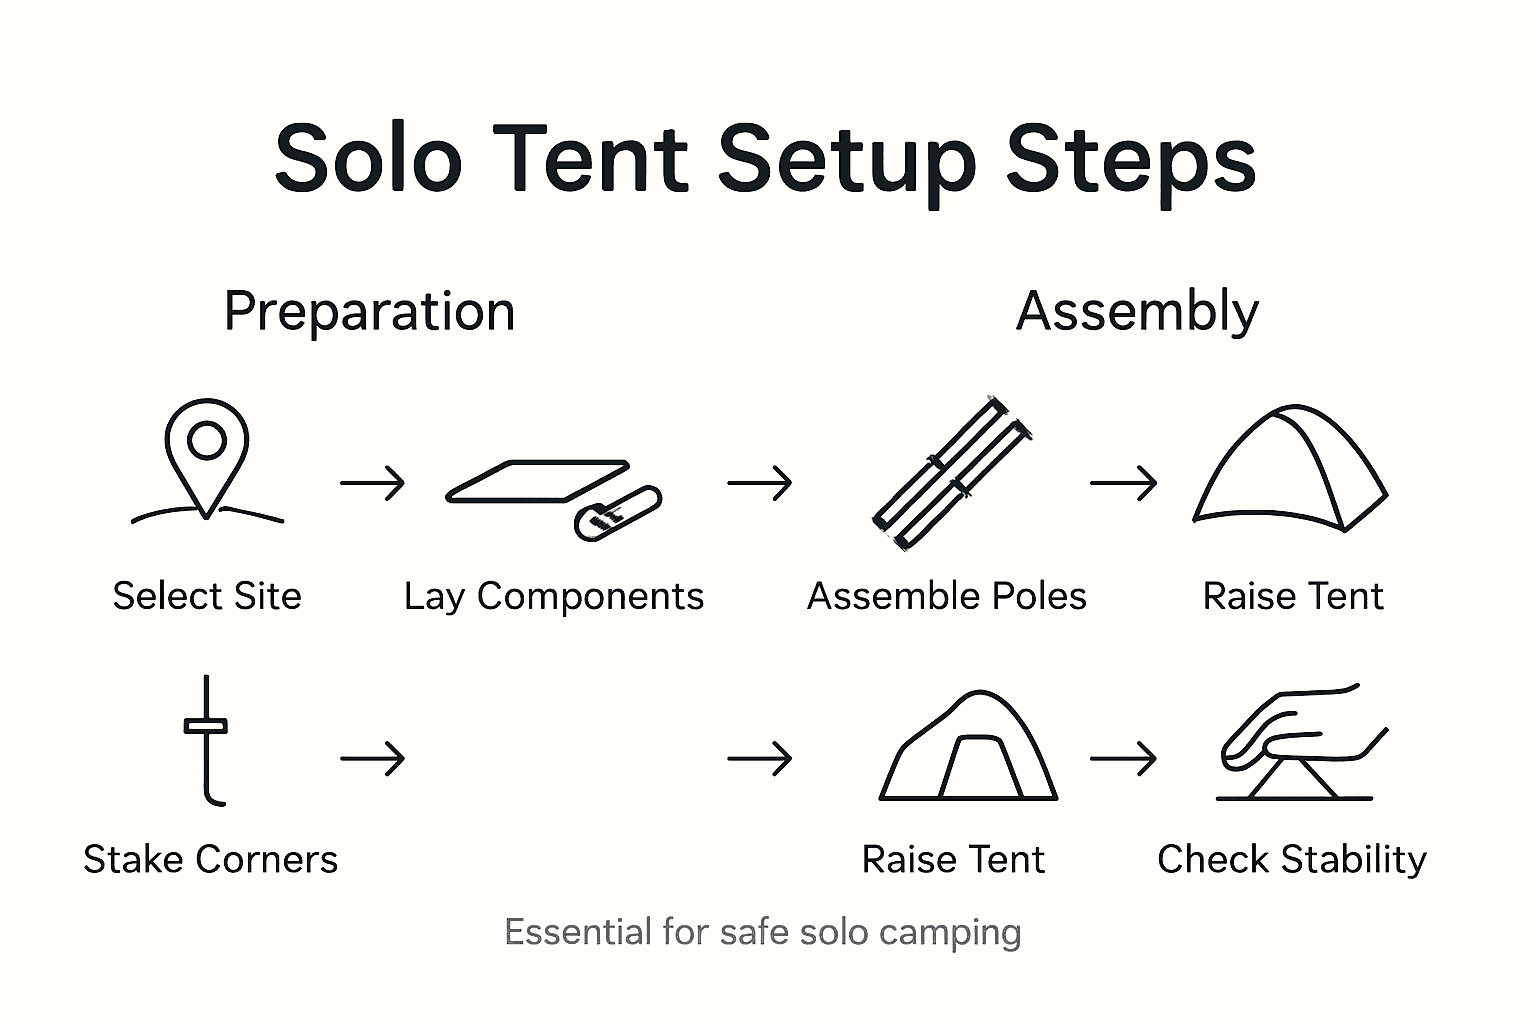
Tent pitching involves assembling poles that connect through various mechanisms like spring loaded segments or shock cord systems, which simplify the setup process. Begin by identifying the correct pole sections and their corresponding attachment points on the tent body. Most modern tents feature color coded clips or sleeve systems that guide proper pole placement. Start by connecting pole segments fully extending them until they click securely into place. Carefully slide poles through fabric sleeves or attach them using integrated clips ensuring even tension across the tent structure.
As you raise the tent frame, work systematically from one corner to another maintaining balanced pressure. Gently bend poles into their designated arches creating the tent’s skeletal framework. Pay attention to maintaining symmetry and preventing uneven stress that could damage poles or fabric. Once poles are fully seated in corner grommets or attachment points, the tent body will begin to take shape. Make small adjustments to ensure the tent fabric is taut and evenly distributed across the frame without wrinkles or excessive slack.
Pro tip: Practice your tent setup at home before your camping trip to familiarize yourself with the unique pole configuration and attachment system of your specific tent model.
Step 5: Check Stability and Adjust for Comfort
With your tent now standing, the final crucial step is ensuring a stable and comfortable shelter that will protect you throughout your outdoor adventure. Your goal is to create a secure living space that can withstand environmental conditions while providing a restful environment.
Position your sleeping area strategically to optimize comfort and minimize exposure to external elements, starting with a careful assessment of your tent’s internal configuration. Examine the tent floor for levelness and remove any protruding rocks or debris that could create uncomfortable sleeping conditions. Carefully place your sleeping pad or mat to ensure maximum cushioning and insulation from cold ground. Check that your sleeping area is positioned away from potential draft points like door openings or ventilation areas while still maintaining adequate airflow.
Walk around your tent interior and test the overall stability by gently pressing on pole connections and checking for any loose fabric or uneven tension. Adjust guy lines and corner stakes as needed to create a taut and symmetric structure. Verify that rainfly attachments are secure and properly aligned to provide maximum weather protection. Take time to adjust interior gear placement to optimize your living space and ensure easy access to essential items during the night.
Pro tip: Keep a small repair kit with extra stakes and pole repair tools inside your tent for quick adjustments or emergency fixes during your camping trip.
Master How to Pitch a Tent Alone with Expert Tips and Gear
Pitching a tent alone can be challenging with all the steps involved such as choosing the right campsite, organizing components, and ensuring stability under varying conditions. If your goal is to set up a solid and comfortable shelter efficiently while avoiding common pitfalls like uneven ground or loose stakes, our detailed guides cover everything you need. From learning how to secure corners with the right stakes to assembling poles with precision, Tent Tips – Tent Explorer offers practical advice that makes solo pitching easier and more confident.
Ready to enhance your outdoor experience with smart strategies and quality gear recommendations? Visit Tent Accessories – Tent Explorer to find the best tools designed for solo campers and explore Outdoor Living – Tent Explorer for ideas to create a cozy campsite. Dive deeper into expert advice and community insights now at Tent Explorer and take your solo camping setup to the next level today.
Frequently Asked Questions
How do I choose a suitable campsite for solo camping?
To choose a suitable campsite, prioritize flat and level ground free from obstacles and hazards like dead trees. Look for a surface that can support your tent without causing damage to the environment; a good guideline is to clear the area of rocks and debris before pitching your tent.
What are the steps for organizing my tent components before setting up?
Organize your tent components by separating them into distinct groups, such as the tent body, rainfly, poles, stakes, and guylines. Lay them out systematically on a clean tarp to create an efficient setup process, ensuring that poles are unfolded and ready for quick assembly.
How do I stake my tent correctly to ensure stability?
Stake your tent correctly by inserting stakes at each corner at a 45-degree angle pointing away from the tent to maximize grip. Ensure each stake is deeply embedded in the ground to maintain tension and prevent movement during windy conditions.
What is the best way to assemble poles and raise a tent by myself?
To assemble poles and raise your tent alone, start by connecting pole sections fully and then slide them through fabric sleeves or attach using clips. Work systematically from corner to corner, maintaining balanced pressure while gently arching the poles to create a stable frame for your tent.
How can I check the stability of my tent after setting it up?
Check the stability of your tent by gently pressing on the pole connections and inspecting the fabric tension. Adjust guy lines and corner stakes as needed to ensure a taut and symmetrical structure to withstand wind and rain efficiently.
What should I do to make my sleeping area comfortable inside the tent?
To make your sleeping area comfortable, position your sleeping pad away from draft points and ensure the tent floor is level by removing any debris. Adjust the interior layout to keep essential items within easy reach, maximizing your comfort and organization for a restful night.
Recommended
- Step By Step Tent Setup: Easy Guide For Quick Camping Success
- Tent Pitching: Why It Matters For Happy Camping
- Pitch Tent On High Side: Expert Tips For Perfect Setup
- Pitch Tent In The Rain

Dave King
I'm Dave King. I publish Tent Explorer, a site built to answer the questions people actually ask before they buy.