
This blog post may contain affiliate links. As an Amazon Associate I earn from qualifying purchases.
📋 Table of Contents
- Core Tent Maintenance Principles
- How to Clean Your Tent Without Ruining It
- What You’ll Need Before You Start
- Step-by-Step Hand-Washing Guide
- Eliminating Mold and Wet Dog Smell
- Restoring Your Tent’s Waterproofing and Seams
- How often should you treat your tent?
- How to Seal Leaking Seams
- Caring for Tent Poles and Zippers
- How to Store Your Tent to Maximize Its Lifespan
- Do tents go bad if not used?
- Loose Storage vs. Stuff Sack
- Protecting Your Tent Floor
- Seasonal Tent Prep Habits
- Caring for Your Camp Shower or Privacy Tent
- Common Mistakes and Professional Repair
- Three Mistakes That Damage Your Tent
- When to Send Your Tent to a Repair Shop
- Frequently Asked Questions
- Is Dawn dish soap safe for tents?
- What is the average lifespan of a tent?
- How to properly care for a tent?
- The Bottom Line on Tent Care
Editor Note: Display a “Last Updated: July 2026” badge directly beneath the H1 or in the article header area.
A well-maintained tent can last 5 to 10 years — but the same tent stored damp after one weekend trip can start growing mold within 24 to 48 hours (Wood to Water). The difference between a decade of reliable shelter and a trash bag of mildewed nylon comes down to a handful of habits most campers skip.
Every time you stuff a wet tent into its sack, you’re accelerating the chemical breakdown of its waterproof coating and giving mold exactly the dark, damp environment it needs to take hold. The damage is quiet, cumulative, and almost entirely preventable.
In this guide, you’ll learn the exact tent maintenance tips — from safe hand-washing to DWR restoration and smart storage — so you can confidently protect your investment for years to come. We’ll cover cleaning, waterproofing, storage, and the most common (and costly) mistakes to avoid.
A well-maintained tent lasts 5–10 years — improper storage or the wrong cleaning product can cut that lifespan in half (Wood to Water). The Tent Lifespan Equation: clean it right, store it dry, and protect it in the field.
- Never use Dawn dish soap on synthetic tents — it strips the DWR waterproof coating
- Always dry completely before storage to prevent mold and hydrolysis of PU coatings
- Treat with DWR spray at least once per season or after heavy use
- Store loosely in a breathable mesh bag — never compressed in a stuff sack long-term
- A tent footprint extends floor life and reduces abrasion damage significantly
Core Tent Maintenance Principles
Effective tent maintenance tips follow a clear, repeatable system — not a collection of occasional fixes. A tent that receives consistent care across three interconnected areas can realistically last a decade; neglect any one pillar and lifespan drops significantly (Baylor University Outdoor Adventure guidelines). The 5-to-10-year lifespan figure that gear manufacturers cite assumes all three pillars are working together.
That organizing principle is what we call The Tent Lifespan Equation: a tent’s longevity is determined by three equal, interdependent pillars — how you clean it, how you store it, and how you protect it in the field. Miss one, and the others can’t compensate.
Here’s how the three pillars interact:
- Cleaning removes the contaminants — dirt, body oils, pine sap — that physically degrade fabric and attract moisture. Using the wrong product here (looking at you, Dawn dish soap) does more damage than the dirt itself. Nikwax Tech Wash, a non-detergent technical cleaner designed for outdoor fabrics, is the standard recommendation for synthetic tents.
- Storage determines what happens to your tent between trips. A tent stored even slightly damp will develop mold and begin hydrolysis — the chemical breakdown of its DWR (Durable Water Repellent), the coating that makes your rainfly bead water — within days.
- Field protection covers the habits that reduce wear during actual use: using a footprint, pitching in shade when possible, and inspecting hardware before and after each trip.
The Boy Scouts of America take this seriously enough to recommend “seasoning” a new canvas tent — wetting it completely and allowing it to dry before first use — as a proactive waterproofing step most campers skip entirely (Boy Scouts of America tent seasoning instructions). That same proactive mindset is what separates gear that lasts from gear that doesn’t.
According to Baylor University’s tent maintenance guidelines, tents must be swept of all debris and completely dried inside and out before storage to maintain equipment integrity — a foundational requirement that underpins every other maintenance habit in this guide.
The first pillar — and the one most campers get wrong — is cleaning. Here’s exactly how to do it safely.
How to Clean Your Tent Without Ruining It
Mold can begin colonizing a damp tent within 24 to 48 hours under warm, humid conditions — and it often starts in the folds and seams where you can’t see it. Cleaning is the first pillar of The Tent Lifespan Equation, and it’s where most campers accidentally cause more damage than the outdoors ever did. The problem isn’t laziness — it’s reaching for the wrong product with the best intentions.

Caption: A quick-reference guide to safe and unsafe cleaning products for synthetic and canvas tent fabrics.
What You’ll Need Before You Start
Before a single drop of water touches your tent, gathering the right supplies — and knowing what to leave on the shelf — is the most important step in how to properly care for a tent.
Estimated Time: 30-45 minutes
- Tools and Materials:
- Large bathtub, clean outdoor tarp, or a plastic storage bin
- Non-detergent technical cleaner (Nikwax Tech Wash or MSR (Mountain Safety Research) Shelter Wash)
- Soft sponge or cloth (no abrasive scrubbers)
- Garden hose with a gentle spray setting
- Clean towels for blotting
- Shade for drying — never direct sunlight
What NOT to use:
- Dawn dish soap — Dawn dish soap, a common household detergent, contains concentrated surfactants that strip the DWR coating and degrade the polyurethane lining underneath.
- Regular laundry detergent
- Bleach or fabric softener
- A washing machine or dryer
MSR’s warning against dish soap is unambiguous: dishwashing liquid, detergent, and bleach can all strip the waterproof coatings on tent fabric. The key distinction is between a detergent (which contains grease-cutting agents that attack chemical coatings) and a non-detergent technical cleaner (which lifts dirt without breaking down protective finishes). That difference is everything.
Canvas tent exception: If you own a wall tent or canvas shelter, mild soap for canvas tents like Woolite may be acceptable — Davis Tent confirms this for their specific canvas materials. Always verify with your manufacturer first.
“NEVER PUT YOUR TENT IN THE WASHING MACHINE OR DRYER!”
The agitation cycle destroys seam tape, and dryer heat melts the coatings that took years of use to wear down. No exceptions.
With the right supplies ready, here’s the exact process for giving your tent a safe, thorough clean.
Step-by-Step Hand-Washing Guide
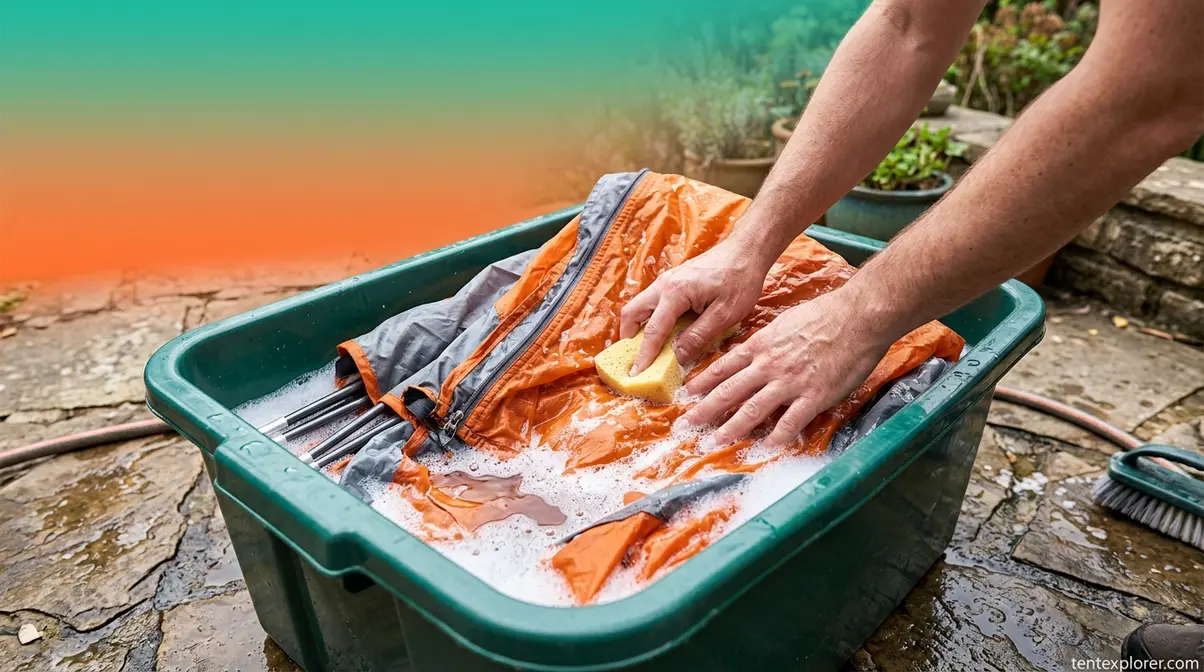
Learning how to properly care for a tent comes down to this six-step process. Routine tent cleaning steps from Popular Mechanics align with manufacturer guidance: shake out debris, spot-clean problem areas, and give special attention to zippers throughout.
Step 1: Set up and pre-clean Shake out all loose dirt, debris, and pine needles from inside and out. Spot-clean sap or bird droppings with a damp cloth before wetting the whole tent — these substances bond more stubbornly once the fabric is saturated.
Step 2: Prepare your cleaning solution Fill a bathtub or large bin with cool or lukewarm water. Add the recommended amount of Nikwax Tech Wash (typically 100ml per wash — follow the label). Avoid hot water, which can loosen seam tape along stress points.
Step 3: Submerge and sponge Place the tent body (poles out) in the water. Use a soft sponge to gently scrub all surfaces, paying extra attention to high-contact areas: the floor, door zippers, and vestibule seams where grime concentrates.
Step 4: Rinse thoroughly Drain and refill with clean water. Rinse until zero soap residue remains — residue attracts dirt and can clog the microscopic pores in technical fabrics, reducing breathability over time.
Step 5: Blot and drip-dry Never wring or twist the fabric; this stresses seam tape and distorts mesh panels. Press gently with a towel to remove excess water, then hang loosely in shade to air dry completely. Direct sunlight accelerates UV degradation — more on that in the Common Mistakes section.
Step 6: Inspect while drying With the tent fully spread out, check seams for peeling tape, zippers for debris, and pole sleeves for fraying. Catching small issues now prevents field failures later.
If your tent has developed mold, mildew, or that telltale “wet dog” smell, the standard wash above won’t fully solve it — here’s the targeted approach.
Eliminating Mold and Wet Dog Smell
Two of the most distressing tent problems — visible mold and a persistent “wet dog” odor — require different treatments. Treating them the same way is a common mistake that leaves one problem unsolved.
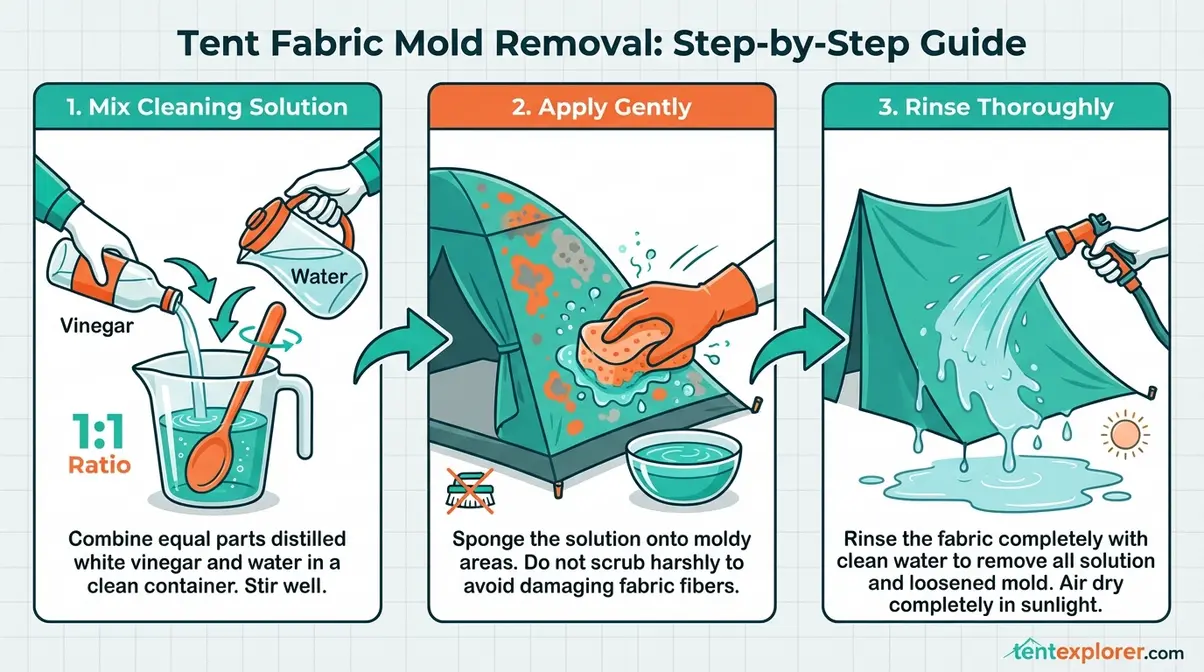
Caption: Vinegar solution applied to tent fabric — the RMEF-recommended method for removing mold without bleaching or weakening nylon fibers.
For visible mold (tent with mold):
Use the vinegar solution for tent mold removal recommended by the Rocky Mountain Elk Foundation: ½ cup of cleaning vinegar per gallon of water. Sponge it onto affected areas, let it sit for five minutes, then rinse thoroughly. Do NOT use bleach — it permanently weakens nylon fibers and voids most manufacturer warranties.
For the “wet dog” smell:
That smell is not mold — it’s a different problem entirely. According to polyurethane coating breakdown research from Gear Aid (a leading outdoor gear repair brand), the “wet dog” smell in older tents is caused by the chemical breakdown of the polyurethane (PU) coating — a process called hydrolysis. Odor eliminators temporarily mask it, but they don’t fix it. The actual solution is to strip and reapply the PU coating, which is an advanced repair covered in the waterproofing section below.
Prevention is simpler than remediation. Since condensation is the leading cause of mold growth inside tents, read our guide on preventing tent condensation to avoid mold before your next trip. After any mold treatment, the tent must dry completely in shade before storage — no exceptions.
Once your tent is clean and dry, it’s time to address the second pillar of The Tent Lifespan Equation: restoring its waterproofing and repairing any damage before your next trip.
Restoring Your Tent’s Waterproofing and Seams
You wake up at 2am to rain drumming on your rainfly — and then feel the first drip. If your tent is leaking, it’s usually one of two problems: the DWR coating has degraded, or the seams have opened up. These are distinct issues with distinct fixes, and waterproofing is the second pillar of The Tent Lifespan Equation — unlike cleaning, it requires proactive scheduling, not just reactive repair.
How often should you treat your tent?
DWR (Durable Water Repellent) is a chemical finish applied to the outer surface of the rainfly that causes water to bead and roll off. It does not make the fabric waterproof on its own — it works in combination with the PU coating underneath. When DWR fails, the outer fabric “wets out” (darkens and becomes saturated with rain), which increases the load on the PU coating and accelerates its breakdown.
- Signs your DWR needs reapplying:
- Water no longer beads on the rainfly surface
- The fly fabric visibly darkens and stays damp during rain
- You notice heavier condensation on the tent interior
How to reapply DWR spray:
Wash the tent first with Nikwax Tech Wash — a clean surface bonds significantly better than a dirty one. Apply Nikwax Tent & Gear Solar Proof or a comparable DWR spray to a damp rainfly, wipe evenly with a cloth, and allow to dry. Some products require low-heat activation (check your label — a brief warm tumble on low heat can help set the treatment, but confirm this is safe for your specific tent fabric before attempting).
How often should you treat? Nikwax recommends reapplying DWR after cleaning, with frequency driven by use — annually for heavy use (roughly five or more nights per month), or every two to three months for active summer campers (Nikwax, 2026). A practical rule: clean and treat at the start of every camping season, and check again mid-season if you’ve had extended rain exposure. You can find our full review of options in our guide to choosing a DWR waterproofing spray.
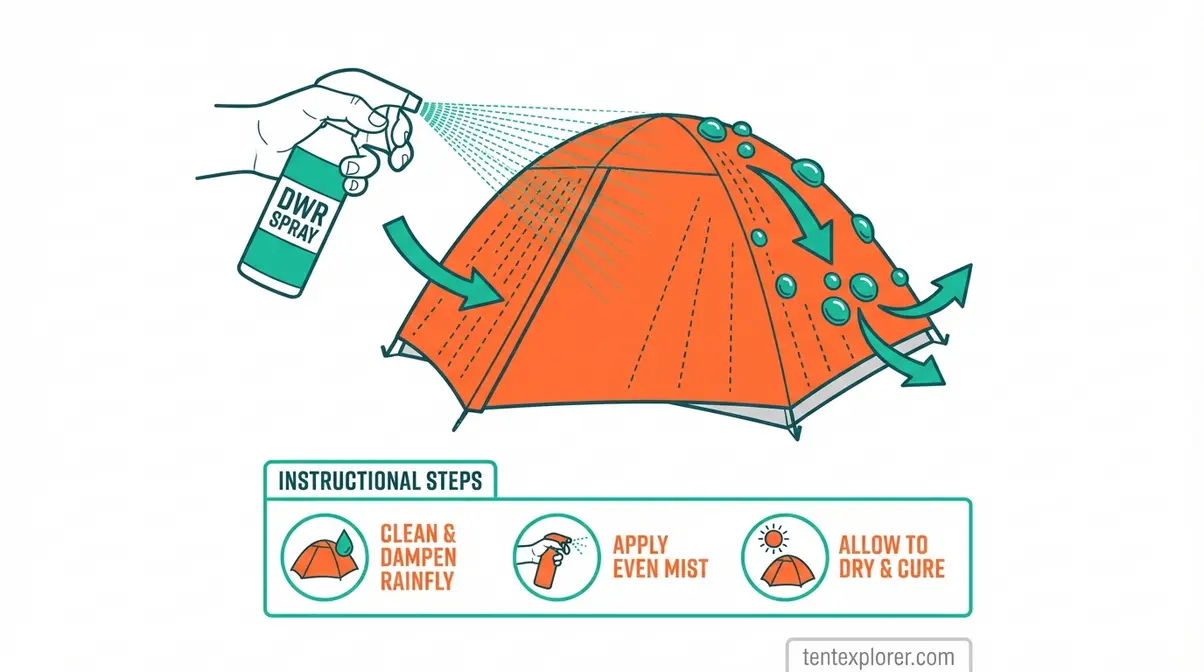
Caption: DWR spray applied to a damp rainfly — the key step is washing the tent first so the treatment bonds to clean fabric.
DWR handles the fabric surface — but if water is entering through the stitching lines, you need seam sealer, not spray.
How to Seal Leaking Seams
Seam tape is the iron-on adhesive strip applied to the inside of factory-sealed tents. Over time, heat, compression, and moisture cause it to peel away from stitching lines, creating pinhole leaks that drip directly onto your sleeping bag. Liquid seam sealer is the field repair for this problem.
- What seam failure looks like:
- Peeling or bubbling tape on the inside of the fly or tent body
- Visible gaps along stitching lines
- Drips that appear specifically at seam locations during rain
To apply seam sealer:
Step 1: Clean the area Ensure the seam area is completely clean and dry before starting.
Step 2: Apply the sealer Apply Gear Aid Seam Sure or McNett Seam Grip along the stitching line using the applicator tip.
Step 3: Spread evenly Spread the liquid evenly with a small brush or fingertip to ensure full coverage.
Step 4: Let it cure Allow the sealed seams to cure for 2-4 hours before exposing the tent to rain.
Critical warning: Seam sealer must be applied to the inside of the tent fly, not the outside. Applying to the wrong side is the single most common seam sealing mistake — the sealer won’t bond properly to the coated outer surface.
For canvas tents, the Boy Scouts of America tent seasoning instructions recommend a “seasoning” process — wetting the tent down and allowing it to dry completely to swell the threads — rather than chemical sealers. For a complete step-by-step process on synthetic tents, see our guide to sealing tent seams.
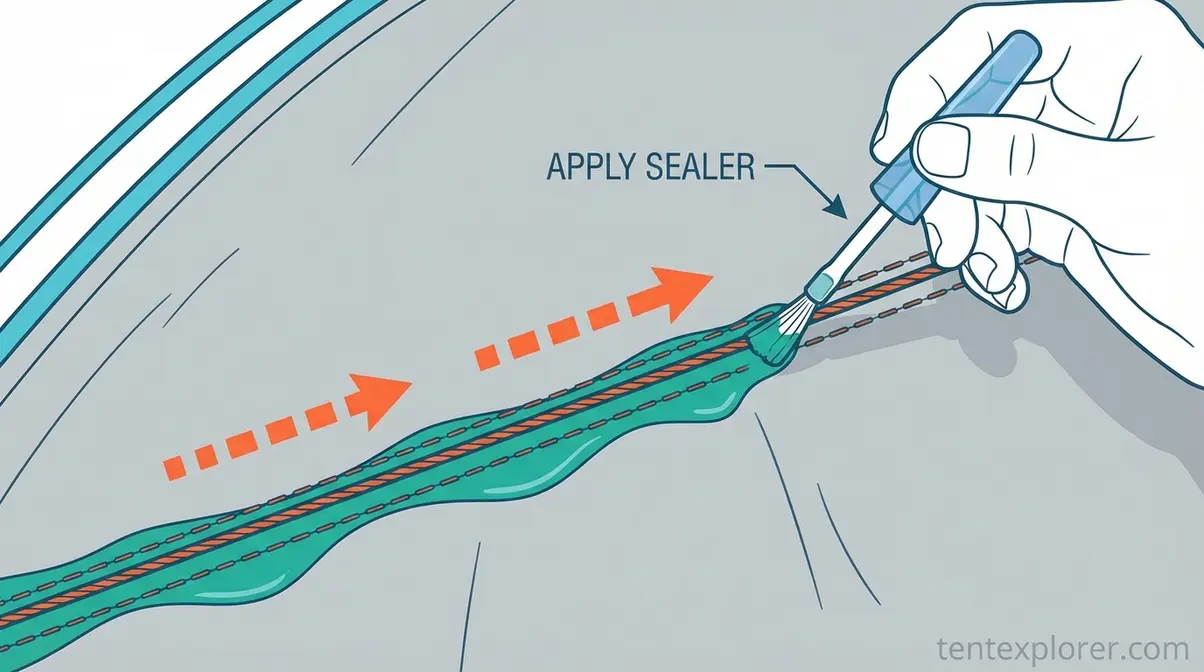
Caption: Seam sealer applied to the interior stitching — note the applicator runs along the full seam length, not just the visible gaps.
With your fly waterproofed and seams sealed, the last repair task in this pillar is the hardware holding everything up: poles and zippers.
Caring for Tent Poles and Zippers
Poles:
After each trip, lay out the shock-corded sections — the elastic-bungee-connected pole segments — and check for cracks, bent ferrule tips, or fraying elastic. A cracked pole section can be temporarily repaired with a pole repair sleeve (a short aluminum tube that slides over the break); carry one in your kit. Replace frayed shock cord every two to three seasons before it snaps mid-setup in the field.
Zippers:
Clean zipper teeth with a soft brush after each trip to remove grit that causes binding. Apply Gear Aid Zip Care or a beeswax-based lubricant — plain candle wax works in a pinch — to keep the slider moving smoothly. A stiff zipper that gets forced open is the leading cause of zipper failure, and zipper replacement is one of the more expensive tent repairs.
What NOT to do: Never use WD-40 on tent zippers. It attracts dirt, degrades the zipper tape over time, and turns a minor friction problem into a major replacement job.
Cleaning and waterproofing are only two legs of the stool. The third — and the one that surprises most campers — is storage. Here’s how to store your tent so it doesn’t “go bad” between trips.
How to Store Your Tent to Maximize Its Lifespan
Yes, tents can and do degrade in storage — but only when stored incorrectly. “With proper care and maintenance, the average lifespan of a well-maintained camping tent is generally between 5 and 10 years” (average tent lifespan, Wood to Water). The gap between a tent that reaches year ten and one that barely survives year three almost always comes down to what happens between trips — not what happens during them.
Do tents go bad if not used?
The rule: Never pack a tent that is even slightly damp. This applies to the fly, tent body, poles, and footprint separately — each component needs to dry independently before you pack it away.
What happens when you skip it: Mold establishes in 24 to 48 hours under warm, humid conditions. More insidiously, moisture trapped against the PU coating triggers hydrolysis — the chemical breakdown of the waterproof lining — which produces that persistent “wet dog” smell and eventually causes the coating to flake off entirely. A well-maintained tent lasts 5-10 years – improper storage is the most common cause of premature degradation (Wood to Water).
Practical tip: If you must pack a wet tent (breaking camp in rain, for example), re-pitch it at home that same day to dry completely before final storage. A few hours of patience saves hundreds of dollars in premature replacement.
Once it’s dry, where and how you store it is the second half of the equation.
Loose Storage vs. Stuff Sack
Stuff sacks are designed for transport, not long-term storage. Constant compression stresses the PU coating along fold lines and prevents any residual moisture from evaporating — the result is that distinctive chemical smell and, eventually, delamination. Compression squeezes moisture into the fabric and stresses the coating in ways that accumulate over months of storage.
The solution: Store your tent loosely in the large breathable mesh bag most tents come with. Keep it in a cool, dry location away from direct sunlight and heat sources. Attic storage in summer is a common mistake — heat and UV light continue degrading fabric even when the tent isn’t being used.
- Storage checklist:
- ✓ Completely dry (fly, body, poles, and footprint)
- ✓ Poles stored separately to avoid pressure points
- ✓ Loosely rolled or folded in a breathable mesh bag
- ✓ Cool, dark location (interior closet, not garage attic)
- ✓ Away from chemicals, solvents, or fuel storage
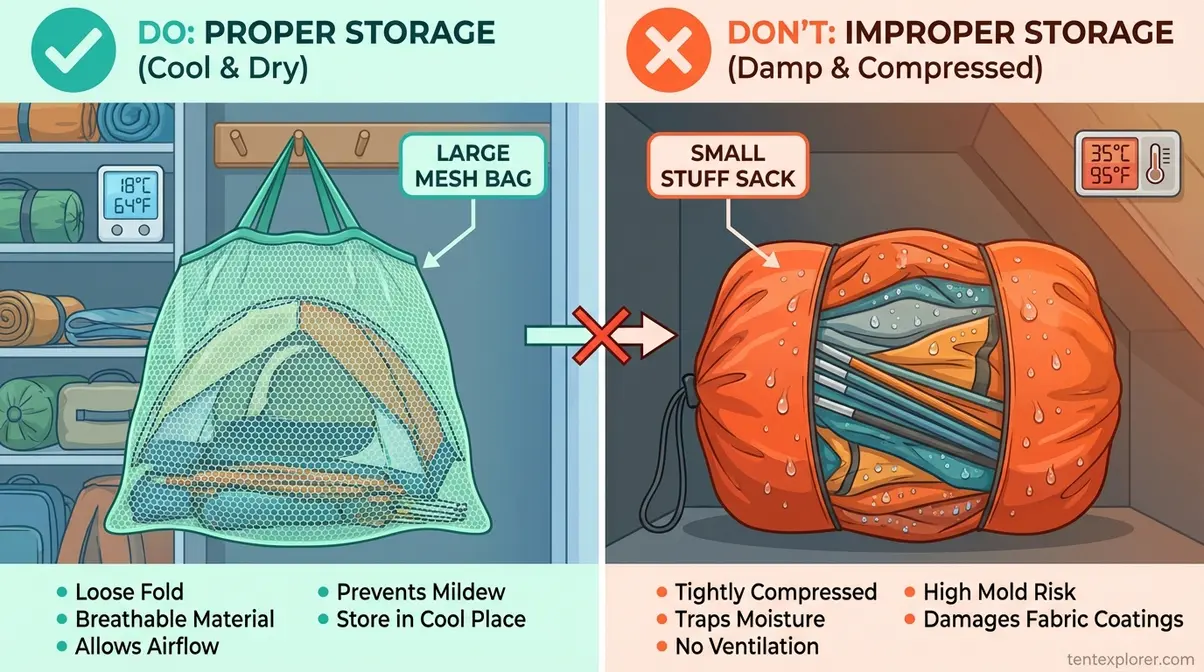
Caption: Breathable mesh storage (left) vs. compressed stuff sack (right) — compression traps moisture and stresses PU coatings along fold lines over months of storage.
Cleaning, waterproofing, and storage cover the three pillars — but protecting your tent starts even before you stake it out.
Protecting Your Tent Floor
The tent floor takes more abuse than any other surface. Every trip, it bears your body weight on rocks, roots, pine cones, and packed earth — and each contact point is a potential pinhole. Abrasion-related pinholes compromise the tent’s waterproof floor coating from the outside in, eventually allowing ground moisture to seep through even when the floor lining is otherwise intact.
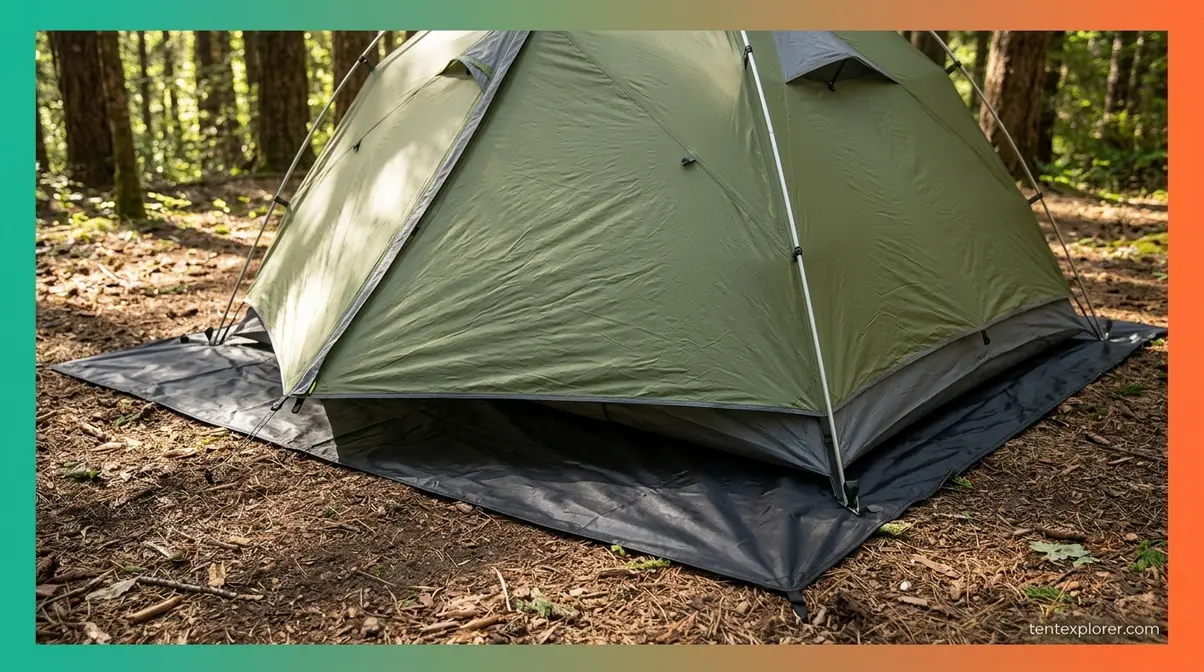
A tent footprint — a ground cloth cut to match your tent’s floor dimensions — is the single highest-impact protective measure for tent floor maintenance. It absorbs the abrasion that would otherwise be absorbed by the floor fabric, and it keeps the coated underside cleaner between washes. For more on sizing and material options, see our full guide on protecting your tent floor with a footprint.
One critical sizing note: the footprint should match or be slightly smaller than the tent floor. A footprint that extends beyond the tent’s perimeter channels rain water underneath the floor rather than away from it — the opposite of what you want.
- Additional floor protection habits:
- Remove shoes before entering the tent — grit on shoe soles is highly abrasive against coated floor fabric
- Avoid placing sharp objects (tent stakes, trekking poles, cooking utensils) directly on the floor
- Inspect the floor for pinholes each season by holding it up to light — small holes are far easier to patch than large ones
Seasonal Tent Prep Habits
Building a brief pre-season and post-season routine catches the small problems that become expensive field failures. Our evaluation of common tent failure points found that most in-field problems — a zipper that won’t close, a pole that snaps, a seam that drips — show early warning signs that a five-minute backyard inspection would have caught.
- Pre-season checklist (spring, before your first trip):
- Pitch the tent in your backyard and leave it up for an hour
- Check all seam tape for peeling or bubbling
- Test every zipper — apply lubricant if any resistance
- Inspect shock-corded pole sections for cracks or fraying elastic
- Apply DWR spray to the rainfly as part of summer camping season prep
- Confirm the footprint is intact and not thinning at pressure points
- Post-season routine (fall, after your last trip):
- Full hand-wash using the six-step process above
- Dry completely — fly and body separately
- Store loosely in breathable mesh bag in a cool, dark location
This twice-yearly rhythm takes under an hour total and keeps The Tent Lifespan Equation running smoothly year after year.
Caring for Your Camp Shower or Privacy Tent
Pop-up privacy tents and camp shower enclosures need the same care discipline as sleeping tents — but most campers never apply the same protocols. In practice, camp shower tents accumulate soap residue, trapped humidity, and mold faster than sleeping tents because they’re exposed to moisture every single use.
When maintaining a portable camp shower tent, apply these habits:
- Dry before storage — the same Dry-First Rule applies. After each use, open all vents and panels and allow to air out completely before collapsing.
- Wipe down the interior after each use with a damp cloth to remove soap residue. Residue left on fabric attracts mildew and accelerates fabric degradation.
- Check zipper and frame joints for corrosion — soap residue accelerates metal corrosion on aluminum and steel frame joints. A quick rinse and dry after each use prevents this.
- Inspect the base for accumulated moisture — privacy tent floors sit directly on wet ground and are prone to mold growth in the base seams.
The same vinegar solution used for sleeping tent mold (½ cup per gallon of water) works effectively on camp shower tent fabric as well.
Common Mistakes and Professional Repair
Knowing what not to do is as important as knowing the right steps. Across the camping community, the consistent feedback from experienced campers and gear repair professionals is that most tent damage is self-inflicted — and almost always avoidable.
Three Mistakes That Damage Your Tent
- Machine washing. The washing machine’s agitation cycle destroys seam tape and strips waterproof coatings in a single wash. As the blockquote warning above states — no exceptions. Hand washing takes 20 minutes; seam tape replacement costs significantly more.
- Packing wet. Mold establishes in 24 to 48 hours and triggers PU coating hydrolysis over weeks of damp storage. One wet pack-away can create a “wet dog” smell that requires full coating removal to fix — a repair that costs more time and money than the five minutes of drying would have.
- Prolonged direct sunlight. UV radiation is a silent, cumulative killer for tent fabrics. Research from SlingFin’s UV degradation study found that nylon and polyester tent fabrics exposed to prolonged sunlight start to look, feel, and tear like tissue paper — with significant tensile strength loss occurring within weeks of sustained exposure (SlingFin, 2026). This applies to storage as well as field use: leaving a tent pitched in full sun all day, every day, dramatically shortens its life. Use a tarp for shade, or choose shaded campsites when possible.
If your tent has damage beyond these DIY fixes, professional repair is often more cost-effective than replacement.
When to Send Your Tent to a Repair Shop
Some damage exceeds what a tube of seam sealer or a DWR spray can fix. These scenarios warrant professional attention:
- Delaminated PU coating (large areas of flaking lining) — requires full recoating, which is beyond a DIY application
- Broken or bent pole ferrule — structural repair requiring matched replacement parts
- Failed YKK zipper replacement — zipper replacement requires specialized tools and skills
- Gore-Tex fabric delamination — must be handled by an authorized repair facility
Where to go: Rainy Pass Repair (Seattle) is a widely referenced authorized repair shop for complex tent repairs, including Gore-Tex work. REI Co-op also offers professional repair services for common issues. A $50–150 professional repair on a $300 tent is almost always more economical than a $300 replacement — and keeps quality gear out of the landfill.
Knowing your limits is part of being a skilled camper, not a failure of it.
Frequently Asked Questions
Is Dawn dish soap safe for tents?
Dawn dish soap is not safe for most synthetic tents — it strips the DWR (Durable Water Repellent) coating and can damage waterproof fabric linings. Dish soap contains concentrated surfactants designed to cut grease, which also break down the chemical treatments that keep your tent waterproof. Instead, use a purpose-made non-detergent cleaner like Nikwax Tech Wash, which cleans effectively without compromising waterproof performance. When in doubt, spot-test on a small, hidden area before treating the whole tent.
What is the average lifespan of a tent?
A well-maintained tent typically lasts between 5 and 10 years (Wood to Water), depending on usage frequency, material quality, and storage conditions. The single biggest factor in longevity is whether the tent is consistently stored dry. Never storing a wet tent, avoiding prolonged UV exposure, and reapplying DWR annually can add years to any tent’s functional life.
How to properly care for a tent?
Proper tent care follows four core steps: dry the tent completely before storage, hand wash with a non-detergent cleaner, store loosely in a breathable mesh bag, and use a tent footprint to protect the floor from abrasion. Avoid machine washing, harsh soaps, and storing in compressed stuff sacks long-term — all three accelerate fabric and coating degradation. Inspect seams and zippers before and after each trip to catch small problems early. Reapply DWR waterproofing spray at least once per season, or whenever water stops beading on the rainfly. These habits, applied consistently, are the difference between a tent that lasts 3 years and one that lasts 10.
The Bottom Line on Tent Care
For campers who want to protect their tent investment, the right tent maintenance tips reduce to three non-negotiable habits: clean with the right products (never Dawn dish soap), store completely dry in a breathable bag, and restore waterproofing before each season. A well-maintained tent lasts 5–10 years — the same gear stored wet once can begin mold growth in 24 to 48 hours (Wood to Water). The Tent Lifespan Equation works only when all three pillars are in place simultaneously.
The Tent Lifespan Equation isn’t complicated — it just requires consistency. Most campers who end up with a ruined tent made one avoidable mistake: they skipped the drying step, reached for the dish soap, or stuffed a wet fly into its sack “just this once.” Gear that costs hundreds of dollars deserves a 30-minute post-trip routine.
Start with the hand-washing steps in this guide after your next trip — it takes under 30 minutes and is the single highest-impact maintenance habit you can build. When you’re ready to go deeper, our complete guides to sealing tent seams and choosing the right DWR spray will walk you through restoring full waterproof performance.
