Outdoor Cooking Guide for Campers: Step-by-Step Tips
 David King
Updated July 1, 2026
22 min read
David King
Updated July 1, 2026
22 min read
“There’s just something about cooking over an open flame that makes every meal taste better.”
That feeling is real — and it’s exactly why so many people fall in love with camp cooking. But if you’ve ever stared at a pile of camping gear wondering where to even start, you know the excitement can quickly turn into overwhelm.
Poor planning makes it worse. Forgotten utensils, undercooked chicken, a fire that won’t stay lit — these are the moments that turn a relaxed campsite dinner into a stressful ordeal. For beginners, campsite cooking can feel like uncharted waters.
This outdoor cooking guide for campers walks you through everything — from choosing your first stove to cleaning up properly — using a simple three-stage system called The Prep-Cook-Clean System. You’ll find gear recommendations, step-by-step techniques, beginner-friendly recipes, and food safety rules, all in one place.
This outdoor cooking guide for campers covers every stage of the process — from packing the right gear to cleaning up responsibly — using The Prep-Cook-Clean System.
- Gear matters: A two-burner propane stove and cast-iron skillet cover 90% of camp cooking needs for most beginners
- Fire control is the skill: Learn two heat zones — direct and indirect — and most meals become manageable
- Prep at home: Pre-chopped ingredients and pre-measured spices cut campsite cooking time in half
- Food safety is non-negotiable: Keep perishables at 40°F or below to prevent bacterial growth (USDA)
- Leave No Trace: Wash dishes 200 feet from water sources and pack out all food waste
Recommended Products
| # | Image | Product | Best For | Buy |
|---|---|---|---|---|
| 1 |  |
20000 BTU 2-Burner Propane Stove | Family car camping meals | Buy on Amazon |
| 2 | 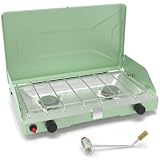 |
2-Burner Windscreen Camping Stove | Windy outdoor cooking | Buy on Amazon |
| 3 | 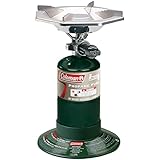 |
Coleman BottleTop Propane Stove | Solo or backpacking trips | Buy on Amazon |
| 4 |  |
Coghlan’s Cast Iron Pie Iron | Campfire sandwich making | Buy on Amazon |
Essential Camp Cooking Gear & Kitchen Setup
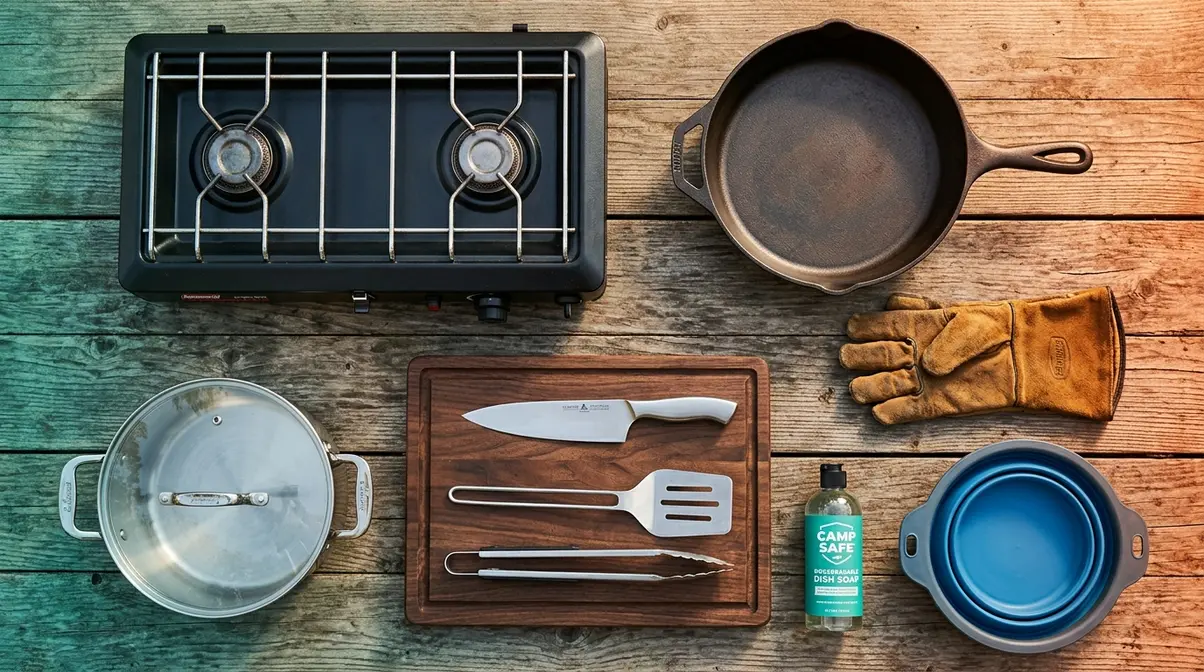
A two-burner propane stove and a cast-iron skillet handle 90% of camp cooking needs for most beginner campers. Getting your essential camping cooking gear sorted before you leave home is the foundation of stress-free outdoor cooking — and it’s the first stage of The Prep-Cook-Clean System. Having the right tools already packed means you arrive at camp ready to cook, not scrambling to improvise.
Beginner campers consistently report that gear overwhelm — buying too much, packing too little, or bringing items they don’t know how to use — is the single biggest obstacle on their first trip. The fix is a prioritized list that separates “must-have” from “nice-to-have.” We evaluated gear recommendations across dozens of outdoor cooking communities to build a beginner-first kit that actually fits in your car.
Choosing the Right Camp Stove
Your stove is the most important piece of gear you’ll buy. The right choice depends on your trip style, group size, and whether you’ll have access to fuel resupply points — not on brand loyalty.
There are three main stove types worth knowing:
| Stove Type | Best For | Pros | Cons |
|---|---|---|---|
| Propane 2-burner | Car camping families | High heat output, two simultaneous burners, stable base | Heavier, requires propane canisters |
| Single-burner propane | Solo or backpacking trips | Lightweight, compact, affordable | One burner limits multitasking |
| Wood-burning | Remote camping without fuel logistics | No canisters needed, use natural fuel | Requires dry wood, slower heat, fire-ban restrictions |
BTU stands for British Thermal Unit — it measures how much heat a stove produces. A 20,000 BTU two-burner stove boils water in under 5 minutes and handles most campsite cooking tasks, from a rolling boil for pasta to a low simmer for sauces (Wirecutter’s camping stove testing). A 7,650 BTU single-burner is slower but weighs significantly less — a real advantage when every ounce counts.
For car camping with a group, a foldable 20,000 BTU two-burner stove gives you the power to cook multiple dishes at once. For solo trips, the Coleman BottleTop Propane Stove is a compact single-burner option that screws directly onto a standard propane canister — no hose, no fuss. If you’re looking for wind protection, the 2-Burner Windscreen Camping Stove adds built-in panels that keep your flame steady on exposed sites.
One scenario competitors never address: what if campfires are banned at your destination? Fire bans are increasingly common across the western U.S. during dry seasons. An outdoor wood burning stove for cooking works well in remote areas where you can gather fuel, but a propane stove is your most reliable backup anywhere. Always check your specific campsite’s fire restrictions at recreation.gov before you pack.
For a full review of tested accessories, see our guide to essential camp cooking accessories.
Now that you know which stove fits your trip style, let’s look at the cookware that turns that heat into an actual meal.
Cookware: Cast Iron, Pots, & Pie Irons
Cast iron is the beginner’s best friend at the campsite. A cast-iron skillet is a heavy-duty pan that holds heat evenly over any flame — campfire, propane stove, or charcoal grill. It’s nearly indestructible, goes from fire to table without warping, and gets better with age. Look for a “pre-seasoned” skillet, meaning it’s been coated with oil and baked at the factory to create a natural non-stick layer. You can cook eggs, bacon, pancakes, and stir-fries in the same pan with minimal cleanup.
A Dutch oven is a lidded cast-iron pot that can bake, stew, and simmer over a campfire. Place hot coals on the lid and underneath the pot, and you can bake cornbread, slow-simmer chili, or steam vegetables. USU Extension research on Dutch oven cooking notes that placing 8–10 coals underneath and 14–16 coals on the lid creates approximately 325–350°F inside — reliable enough for most baking recipes. It’s heavier than a standard pot, but the versatility makes it worth carrying on car camping trips.
For lighter alternatives, a stainless steel pot set with a lid doubles as a pot and a pan. These nest together and weigh a fraction of cast iron — ideal for backpacking or minimalist setups.
Don’t overlook the Coghlan’s Cast Iron Pie Iron, a simple campfire tool for toasted sandwiches and pocket pies. Clamp two slices of bread with your filling inside, hold it over the coals, and flip once. It’s a crowd-pleaser for kids and adults alike, and it requires zero cooking skill to use well.
Must-Have vs. Nice-to-Have Cookware:
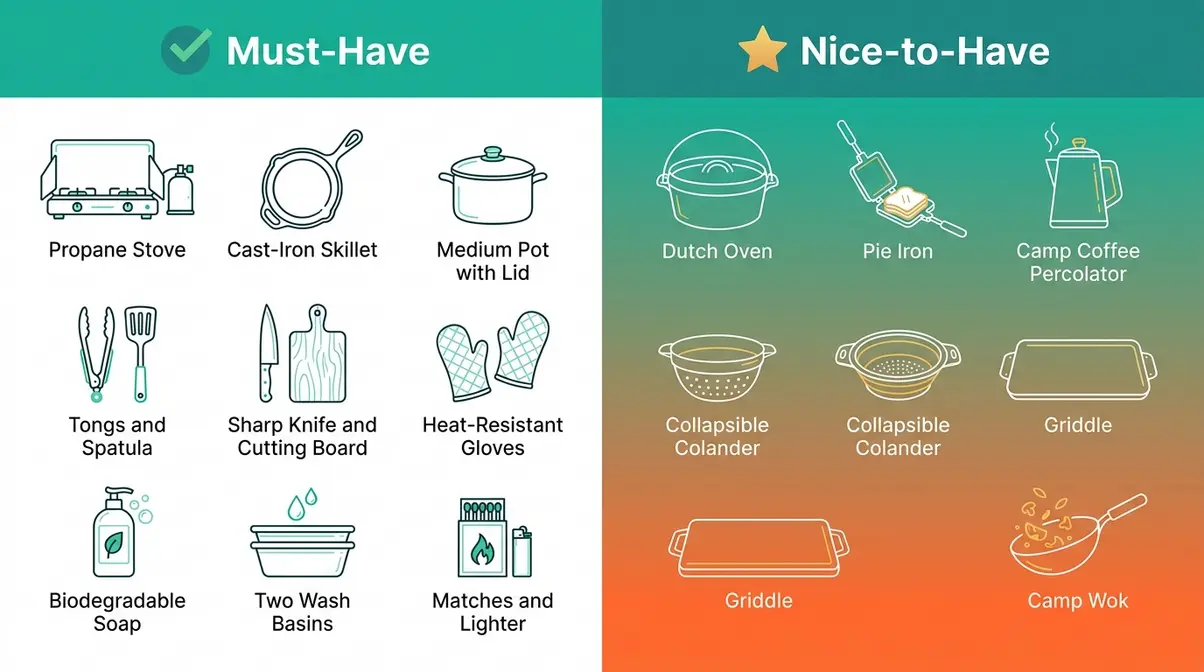
- ✅ Must-Have: Cast-iron skillet, medium pot with lid, long-handled tongs, heat-resistant gloves
- ✅ Must-Have: Cutting board, sharp knife, can opener, spatula
- ⭐ Nice-to-Have: Dutch oven, cast iron pie iron, collapsible colander, camp coffee percolator
- ⭐ Nice-to-Have: Griddle, camp wok, specialty baking pans
For more ideas on what to bring, our camping kitchen gear guide breaks down every item by priority level.
Camp Kitchen Setup Checklist
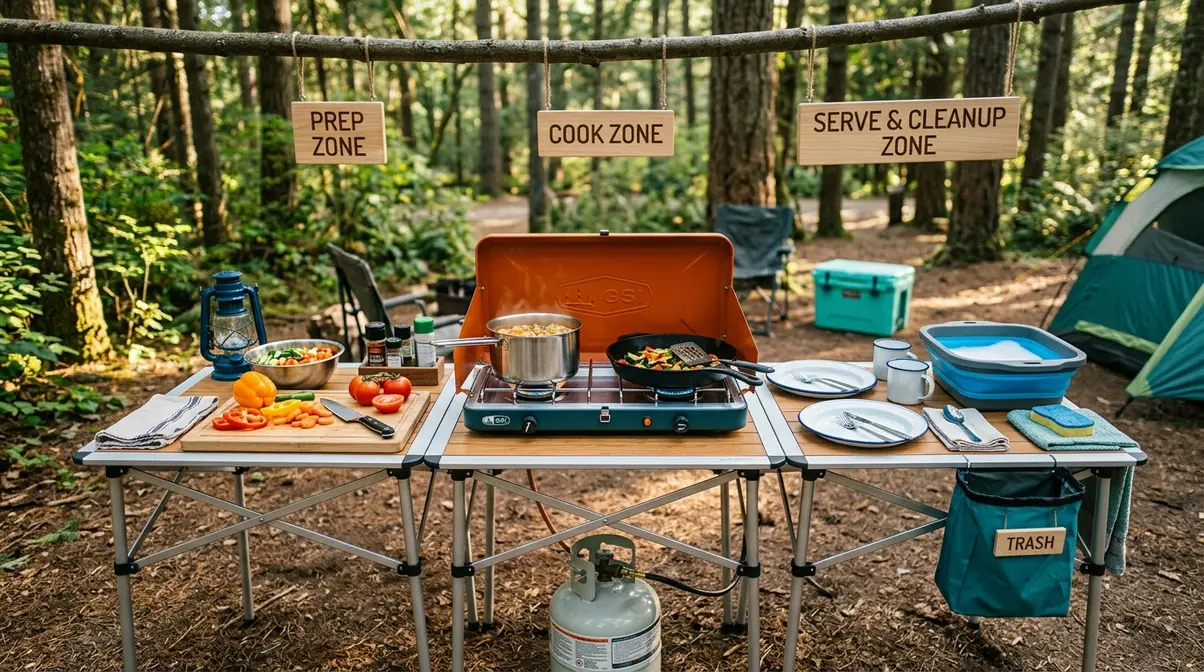
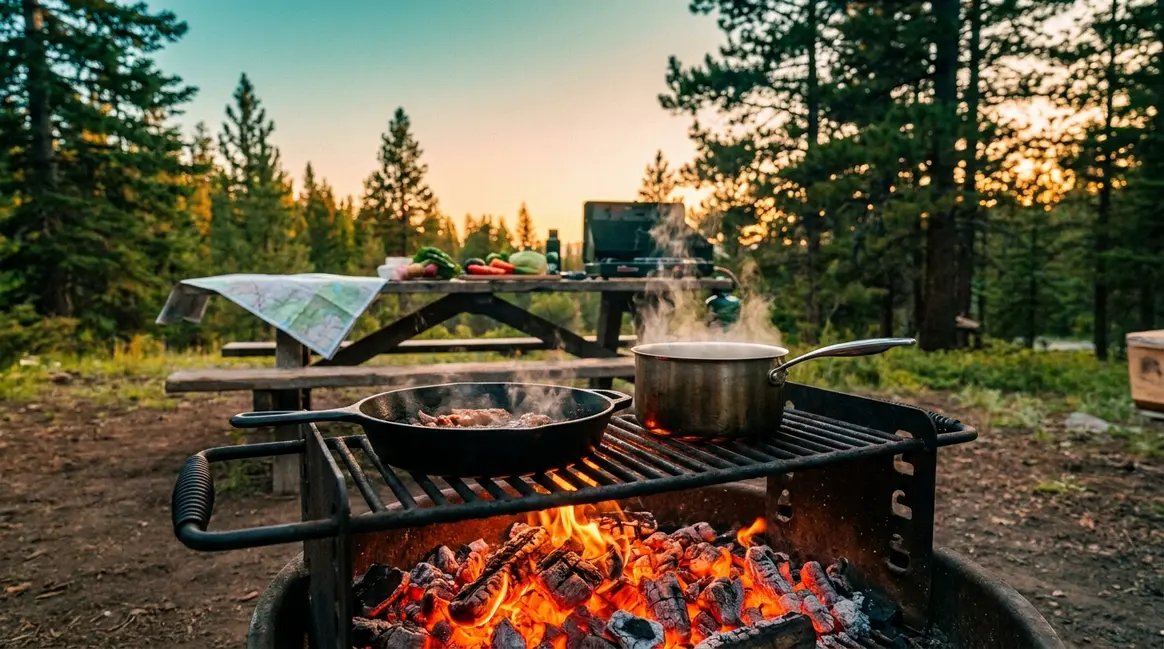
A complete camping kitchen doesn’t need to be complicated. Outdoor cooking communities consistently report that the most stress-free setups follow a simple spatial rule: one zone for prep, one zone for cooking, one zone for cleanup. Here’s how to build it in under 10 minutes.
Step-by-step camp kitchen setup:
- Choose your surface. Set up a folding camp table or use a flat picnic table. Never prep food directly on the ground — this invites contamination and insects.
- Designate three zones. Left side = prep (cutting board, knife, ingredients). Middle = cooking (stove, pots, utensils). Right side = serve/cleanup (plates, wash basin, trash bag).
- Set up your stove. Place it on a stable, level surface at least 3 feet from your tent or any flammable material. Connect the propane canister and test the igniter before you need it.
- Hang or store food safely. Keep all food in sealed containers or a cooler. Never leave food unattended on the table — wildlife is faster than you think.
- Pre-stage your tools. Lay out tongs, spatula, pot holders, and your cutting knife before you start cooking. Searching for tools mid-cook is how meals get burned.
- Set up your wash station. Fill one basin with soapy water, one with rinse water. Position it downwind and at least 10 feet from your cooking zone.
Campfire Cooking Essentials — Quick-Reference Checklist:
| Category | Item | Priority |
|---|---|---|
| Heat | Propane stove + fuel canister | Must-Have |
| Heat | Matches + lighter (both) | Must-Have |
| Cookware | Cast-iron skillet | Must-Have |
| Cookware | Medium pot with lid | Must-Have |
| Utensils | Tongs, spatula, long spoon | Must-Have |
| Safety | Heat-resistant gloves | Must-Have |
| Prep | Cutting board + sharp knife | Must-Have |
| Cleanup | Biodegradable soap, two basins | Must-Have |
| Cookware | Dutch oven | Nice-to-Have |
| Extras | Pie iron, percolator, griddle | Nice-to-Have |
Once your gear is packed and your kitchen is ready, the real adventure begins — learning how to cook over fire and flame.
Campfire Cooking Techniques for Beginners
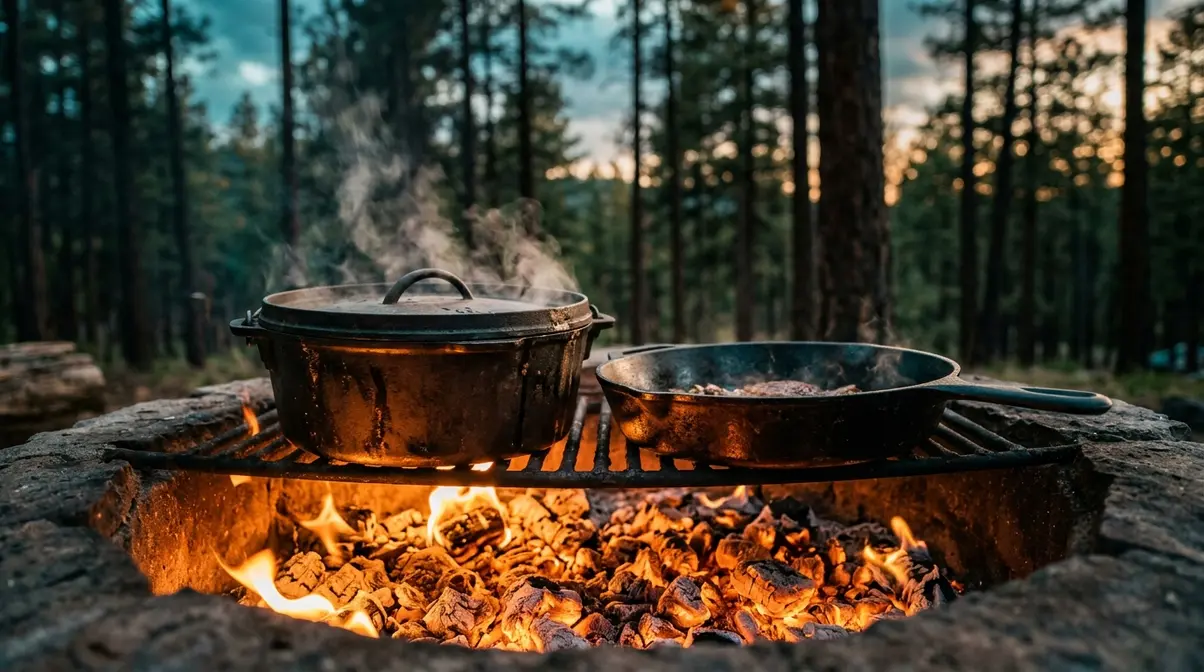
Campfire cooking is one of the most satisfying skills you can build as an outdoor enthusiast. The key is fire management, not recipe complexity — once you understand how to control heat over an open flame, nearly any meal becomes achievable. This is the COOK stage of The Prep-Cook-Clean System, where preparation meets execution.
Beginner campers consistently find that their biggest frustration isn’t the food itself — it’s an uncontrollable fire producing either a charred crust or a raw center. The good news: two simple concepts (fire structure and heat zones) solve most of these problems immediately.
How to Build and Manage a Cooking Fire
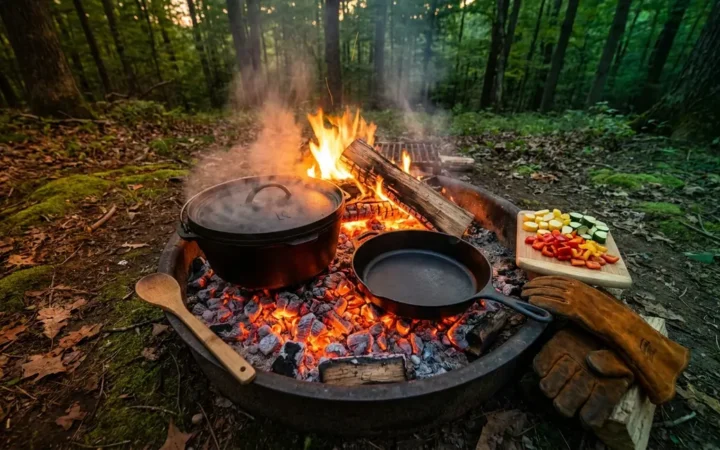
A cooking fire is different from a warmth fire. A warmth fire burns tall and bright. A cooking fire burns low, hot, and steady — with a deep bed of coals rather than tall flames. According to the National Park Service campfire guidelines, a well-established coal bed produces more consistent, controllable heat than an active flame and significantly reduces the risk of fire spread.
How to build a cooking fire — step by step:
- Check fire regulations first. Confirm fires are permitted at your campsite. Many sites require you to use established fire rings only.
- Gather three fuel types. Tinder (dry leaves, paper, fine twigs), kindling (pencil-sized sticks), and fuel wood (wrist-thick logs).
- Build a tinder nest. Place a loose handful of tinder in the center of your fire ring.
- Add a kindling teepee. Lean 8–10 kindling sticks over the tinder in a cone shape, leaving an opening on the windward side.
- Light from the windward opening. The breeze feeds oxygen into the base, where the fire needs it most.
- Add fuel wood gradually. Once kindling catches, add two or three fuel logs in a loose teepee or log-cabin stack. Don’t smother the fire — air circulation is essential.
- Wait for coals. The best campfire cooking starts 30–45 minutes after ignition, once logs have burned down to glowing orange coals with a white ash coating.
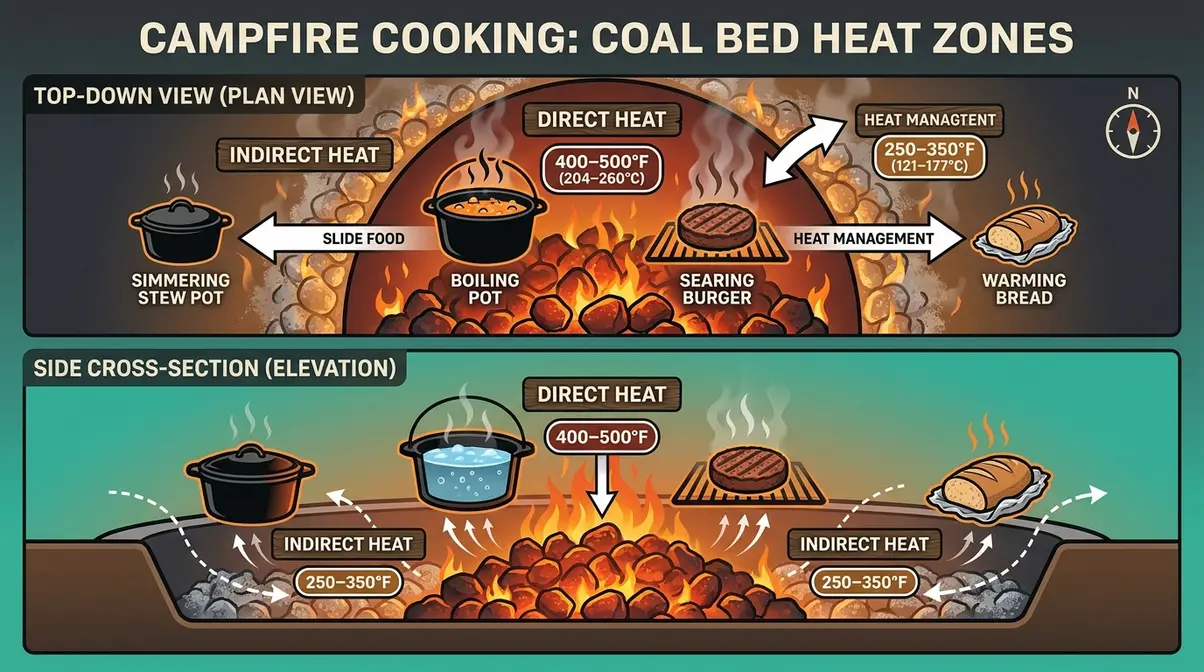
Mastering Heat Zones for Even Cooking
Direct heat sits directly over glowing coals — the hottest zone, ideal for searing, boiling water, and cooking items that need high, fast heat. Indirect heat sits at the perimeter of the coal bed, where temperatures run lower and steadier — perfect for slow-simmering stews, keeping food warm, or finishing items that need gentle cooking without burning.
Here’s how to use both zones in practice:
- Direct zone: Sear a burger or chicken breast for 3–4 minutes per side, then move it to the indirect zone to cook through without charring.
- Indirect zone: Keep your pot of oatmeal or chili at a low simmer while you prep the rest of the meal.
- Two-pot strategy: Boil water for coffee or pasta on direct heat; hold your sauce or stew on indirect heat simultaneously.
Outdoor cooking communities report that the two-zone method reduces burned meals by giving you an “escape route” — if something starts cooking too fast, you slide it to the perimeter. It takes one trip to master.
Grilling, Boiling, Frying, & Baking
Each cooking method requires a slightly different setup. Here’s a quick guide to each:
Grilling: Use a campfire grill grate placed over coals. Brush with oil to prevent sticking. Grill vegetables, fish, and meat directly. Turn food only once per side for better sear marks and less sticking.
Boiling: Place your pot directly over the direct heat zone. Use a lid to speed up boiling time — this matters at altitude, where water boils at lower temperatures. Pasta, rice, instant oatmeal, and hot drinks all rely on this method.
Frying: Heat your cast-iron skillet over direct coals until a drop of water sizzles and evaporates immediately. Add oil, then food. Keep a lid nearby in case of flare-ups. Eggs, pancakes, and stir-fry vegetables all work well this way.
Baking: Use a Dutch oven with a lid. Place 8 coals underneath and 14–16 coals on the lid. Rotate the Dutch oven a quarter-turn every 10 minutes to prevent hot spots. Biscuits, cornbread, and cobblers typically take 20–30 minutes at this setup.
Pro Tips and Camping Hacks
These Chef-Approved tricks come from experienced outdoor cooks and camping communities who’ve refined them over hundreds of trips:
- Pre-measure your spices at home. Combine salt, pepper, garlic powder, and your preferred seasonings into small zip-lock bags or reusable containers. Label each one. This saves time, reduces waste, and keeps your pack light.
- Use a cast-iron lid as a second pan. The lid of a Dutch oven can function as a shallow frying pan over coals. Two cooking surfaces, one piece of gear.
- Freeze proteins before you leave. A frozen chicken breast or ground beef acts as an extra ice block in your cooler and thaws safely over the first 24 hours. This extends safe storage without extra ice.
- Bring a spray bottle of water. Use it to douse small flare-ups without drowning your coals or ruining your food.
- Aluminum foil is your best friend. Wrap seasoned potatoes, vegetables, or fish in foil packets and place them directly in coals. Zero cleanup, full flavor. A medium potato cooks through in about 45–60 minutes.
- Pre-cook where you can. Partially cook rice or pasta at home, refrigerate it, and finish it at camp in half the time.
For more meal planning inspiration, our camping meal planning guide covers a full week of campsite menus with prep strategies.
Easy Camping Meal Ideas for Every Meal of the Day
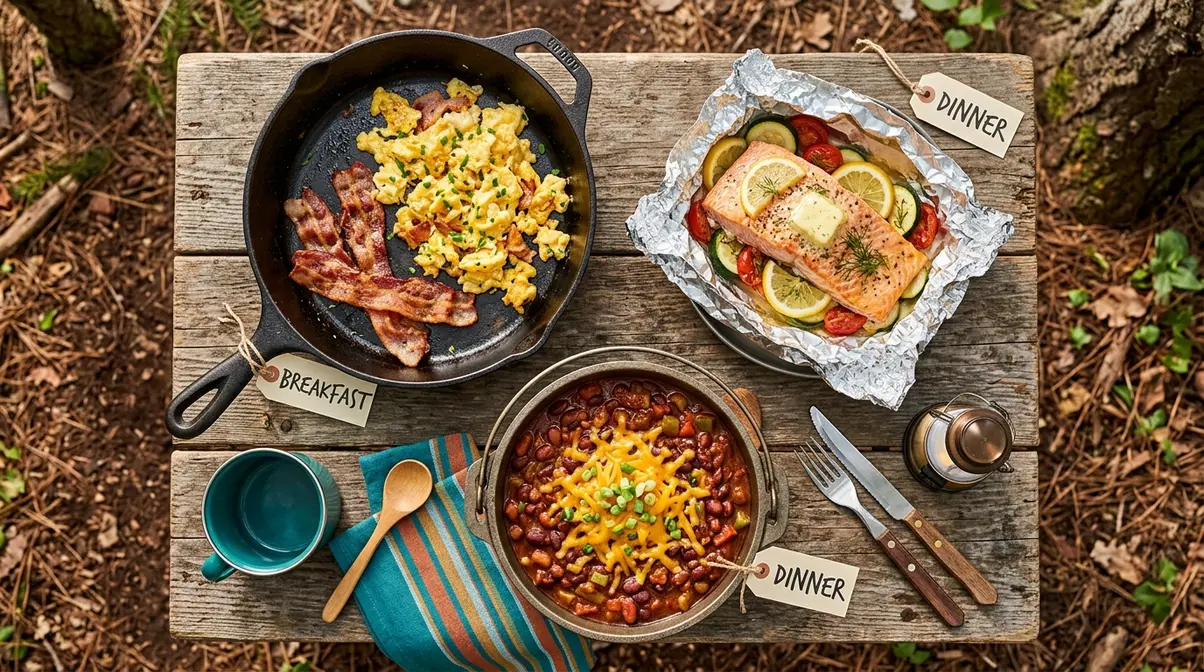
Camp cooking doesn’t need to be gourmet to be satisfying. Simple, repeatable meals made from shelf-stable and easy-prep ingredients are the foundation of stress-free campsite cooking. The goal isn’t to replicate your home kitchen — it’s to eat well with minimal equipment and maximum enjoyment.
Outdoor cooking communities consistently recommend building your camp menu around three rules: one-pot where possible, ingredients that serve double duty across meals, and at least one “comfort” meal per day to keep morale high.
Simple Campfire Breakfasts
Breakfast is the easiest campsite meal to nail. Here are four beginner-friendly options:
1. Scrambled Eggs and Bacon in a Cast-Iron Skillet
Cook bacon strips first over direct heat, then use the rendered fat to scramble eggs. Takes 10 minutes. Requires one pan, one spatula. Serve with pre-sliced bread toasted on the grill grate.
2. Campfire Oatmeal
Bring water to a boil over direct heat. Add instant oats, stir, reduce to indirect heat for 2 minutes. Top with dried fruit, nuts, and a spoonful of peanut butter for protein. Pre-portion oats at home in zip-lock bags for zero-mess mornings.
3. Foil Packet Breakfast Burritos
At home: scramble eggs, cook sausage, and combine with shredded cheese and diced peppers in individual foil packets. Refrigerate. At camp: place foil packets directly on coals for 8–10 minutes, flip once. Open carefully — steam is hot.
4. Campfire Pancakes
Use a dry pancake mix (just add water). Pre-measure the mix into a zip-lock bag at home. At camp, add water to the bag, seal it, and snip a corner to pipe batter directly onto your oiled cast-iron skillet over medium heat.
One-Pot Camping Dinners for Easy Cleanup
One-pot meals are the backbone of smart campsite cooking. They minimize dishes, reduce cooking complexity, and leave you more time to enjoy the evening. Here are three reliable options:
1. Campfire Chili
Brown ground beef in your Dutch oven over direct heat. Add canned beans, canned diced tomatoes, chili powder, cumin, and garlic powder. Stir to combine. Move to indirect heat and simmer for 20–30 minutes. Serves 4. Reheat the next morning for a quick protein-packed breakfast.
2. One-Pot Pasta
Add pasta, canned crushed tomatoes, garlic, olive oil, salt, and enough water to cover by 1 inch to your medium pot. Bring to a boil over direct heat. Stir frequently. Cook until pasta is tender and sauce has thickened, about 12–15 minutes. No draining required.
3. Foil Packet Salmon with Vegetables
At home: place a salmon fillet on a large square of foil. Add sliced zucchini, cherry tomatoes, olive oil, lemon slices, and dill. Seal tightly. At camp: place packet on coals for 12–15 minutes. Open carefully. No pots, no pans, no cleanup.
For more one-pot ideas, our easy camp dinner recipes section covers 15 beginner-friendly options with full ingredient lists.
A Simple 3-Day Camping Meal Plan
Use this plan as your starting template. All items marked (prep at home) can be partially or fully prepared before you leave — this is the heart of the PREP stage.
| Day | Breakfast | Lunch | Dinner |
|---|---|---|---|
| Day 1 | Scrambled eggs + bacon | PB&J sandwiches + trail mix | Campfire chili (one-pot) |
| Day 2 | Campfire oatmeal (prep at home: pre-portioned) | Foil packet veggies + canned tuna | One-pot pasta with tomato sauce |
| Day 3 | Pancakes (prep at home: dry mix portioned) | Wraps with deli meat + cheese | Foil packet salmon + vegetables |
- At-home prep list for this 3-day plan:
- Pre-measure oatmeal + toppings into 3 labeled zip-lock bags
- Pre-portion pancake dry mix into a zip-lock bag
- Freeze ground beef (Day 1 chili) and salmon fillet (Day 3)
- Pre-chop vegetables for chili and foil packets; store in sealed containers
- Pre-measure spice blends (chili powder + cumin + garlic; dill + salt + pepper)
- Pack dry pasta, canned tomatoes, canned beans, and canned tuna — these need no refrigeration
Campsite Food Safety, Storage & Pre-Trip Planning
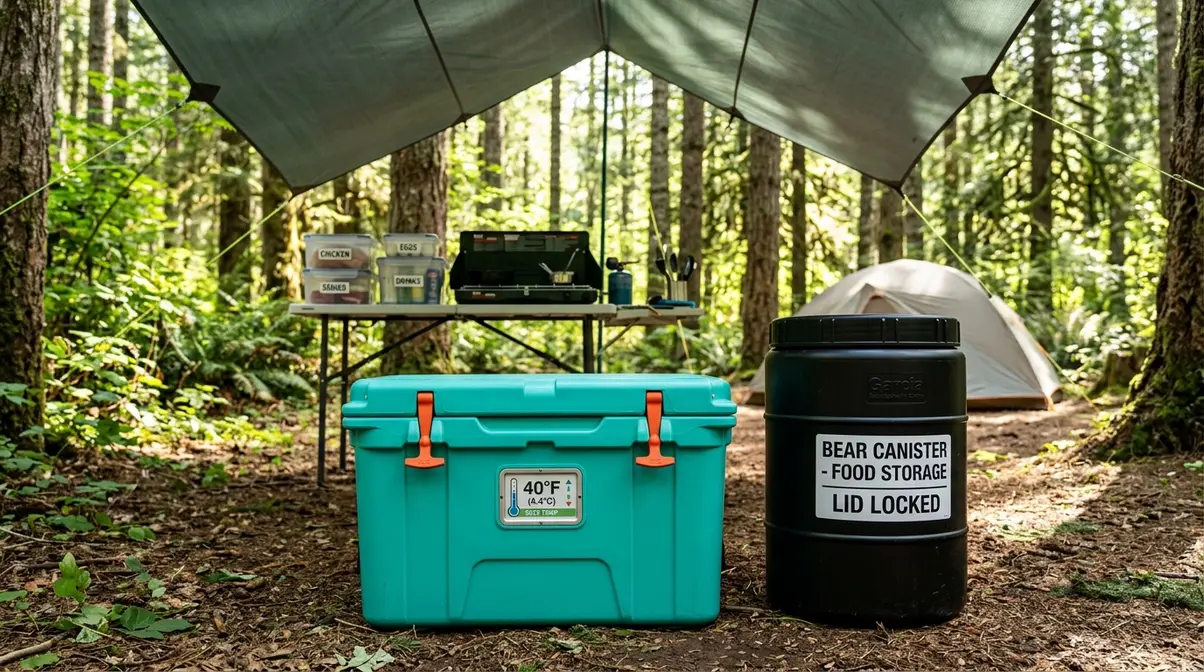
Food safety at the campsite isn’t optional — it’s the difference between a great trip and a miserable one. Improper food storage causes both foodborne illness and dangerous wildlife encounters, two outcomes that are entirely preventable with a few consistent habits. This section covers the safety and planning components of The Prep-Cook-Clean System.
According to the USDA, perishable foods must be kept at 40°F (4°C) or below to prevent bacterial growth. At temperatures above 40°F, harmful bacteria can double in count every 20 minutes — a serious risk in a warm cooler on a summer day (USDA Food Safety and Inspection Service, 2026).
How do you cook on a campfire safely?
An uncontrolled campfire is the leading cause of preventable wildfires at developed campgrounds. The NPS campfire safety guidelines outline clear rules every camper must follow.
Before and During Cooking:
- Check fire regulations before you go. Visit recreation.gov or your campsite’s official page. Many areas implement seasonal fire bans — always verify the day before you leave, not weeks in advance.
- Use designated fire rings only. Never build a ground fire outside an established ring. The ring contains embers and prevents ground fires from spreading.
- Keep fires small. A cooking fire needs to be no larger than your grill grate. Larger fires are harder to control and take longer to extinguish.
After Cooking:
- Never leave a fire unattended. Even a “dying” fire can reignite in wind. Assign someone to watch it whenever food is on the heat.
- Extinguish completely before sleeping. Drown the fire with water — enough that you can hold your hand near the coals without feeling heat. Stir the ash with a stick to expose hidden embers. Repeat until cold. The NPS rule: “If it’s too hot to touch, it’s too hot to leave.”
- Pack out all food waste. Ash mixed with food scraps attracts wildlife. Dispose of food waste in a sealed bag, not in the fire ring.
How to store food safely when camping?
Proper food storage protects both your health and local wildlife. There are two main systems to know:
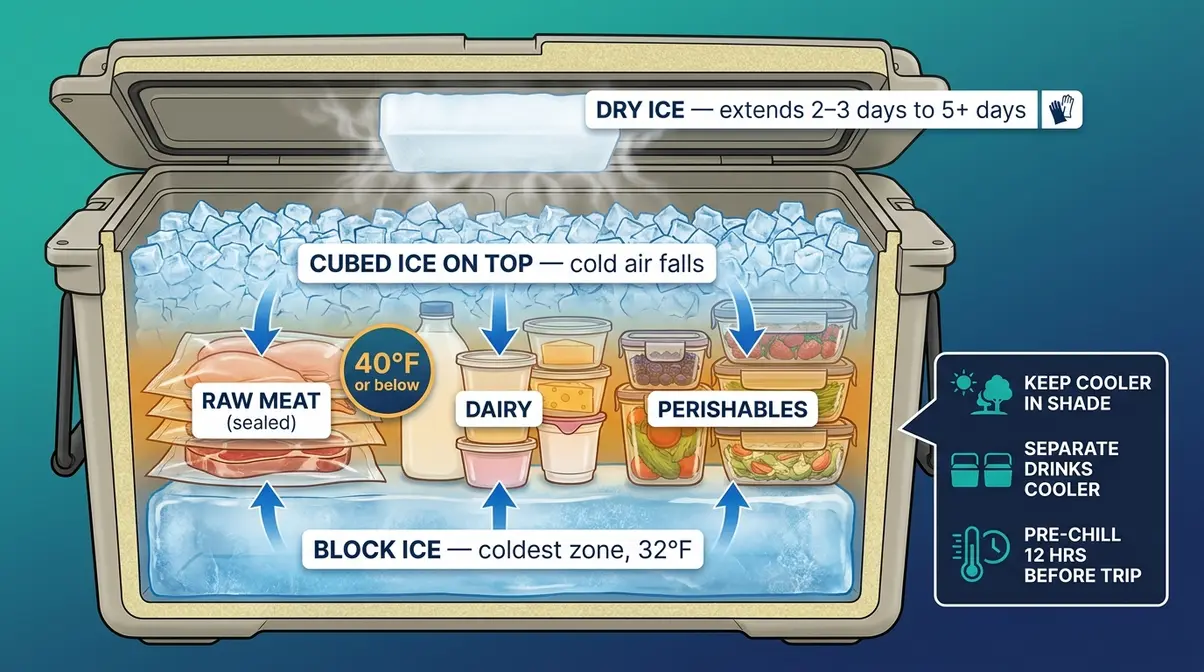
- Cooler management:
- Keep your cooler out of direct sunlight — under a tarp or in the shade of your vehicle.
- Pre-chill the cooler the night before your trip by filling it with ice for 12 hours, then draining and repacking.
- Layer ice at the bottom, then perishables, then more ice on top. Cold air falls — keep the coldest items at the bottom.
- A good cooler with adequate ice maintains safe temperatures (40°F or below) for 2–3 days. Add a block of dry ice on top of regular ice to extend this significantly.
- Keep a separate cooler for drinks. A frequently opened drink cooler warms up fast and should never store raw meat or dairy.
Bear-safe food storage:
In bear country, a bear canister (a hard-sided, bear-resistant container approved by the U.S. Forest Service) or a bear bag (food hung at least 10 feet off the ground and 4 feet from any branch) is required at many backcountry sites. Check your specific area’s regulations — the U.S. Forest Service publishes bear storage requirements by region. Even in campgrounds without mandatory requirements, storing food in your car overnight is strongly recommended. Bears associate human food with campsites, and one encounter can habituate an animal to human presence permanently.
For a deeper dive into campsite safety practices, our campsite safety guide covers both wildlife encounters and weather preparedness.
How do you wash dishes at a campsite?
Leave No Trace (LNT) is an outdoor ethics framework that guides campers to minimize their impact on natural environments. For camp cooking, LNT principles directly govern how you wash dishes and dispose of food waste — and ignoring them damages the ecosystems you came to enjoy.
The Leave No Trace Center for Outdoor Ethics recommends washing all dishes, pots, and utensils at least 200 feet (about 70 adult paces) from any water source, campsite, or trail. This prevents food particles and soap from entering streams or lakes.
Step-by-step LNT dish-washing process:
- Prep and Wash:
- Scrape all food scraps into a sealed trash bag. Every particle counts.
- Use biodegradable soap only. Conventional dish soap harms aquatic ecosystems even in small amounts. Biodegradable options like Dr. Bronner’s break down safely.
- Wash in the first basin with hot soapy water. Scrub thoroughly.
- Rinse in the second basin with clean water.
- Disposal:
- Strain the wash water through a fine mesh strainer to catch food particles.
- Scatter the strained water widely over a large area of ground at least 200 feet from any water source. Never dump it in one spot.
- Pack out all food waste and strainings in a sealed bag. Do not bury food waste — animals dig it up.
This is the CLEAN stage of The Prep-Cook-Clean System, and it’s just as important as the Prep and Cook stages. A campsite left cleaner than you found it is the mark of a confident, experienced outdoor cook.
Common Camp Cooking Mistakes to Avoid
Even well-prepared campers make predictable errors on their first few trips. Recognizing these patterns in advance means you can skip the frustration entirely.
Packing Too Much (Or the Wrong Things)
The single most common beginner mistake is overpacking gear and underpacking the right consumables. Outdoor cooking communities report that most first-timers bring duplicate utensils, oversized pots they never use, and forget essentials like a can opener or biodegradable soap.
- How to avoid it:
- Use the Must-Have checklist from this guide and pack nothing outside it on your first trip.
- Lay all gear on your floor before packing. If you can’t name the last time you used it at home, leave it behind.
- Double-check your consumables: propane fuel, matches, soap, trash bags, and spices are the most frequently forgotten items.
When to seek alternatives: If your gear list is growing beyond one large bag, consider renting a camp kitchen kit from your nearest outdoor retailer (REI and many state park concessions offer rentals). Starting with a rental kit on trip one lets you identify exactly what you actually use before you invest.
Underestimating Safety and Fire Control
The two risks that turn a fun trip into a dangerous one are foodborne illness and uncontrolled fire — and both are almost entirely avoidable.
- Common food safety mistakes:
- Leaving the cooler in direct sunlight (temperatures inside can exceed 70°F within an hour on a warm day).
- Cross-contaminating raw meat with vegetables by using the same cutting board without washing.
- Assuming food is safe because it “looks fine” — bacterial growth is invisible.
- Common fire control mistakes:
- Starting to cook over active flames instead of waiting for a coal bed.
- Using too much lighter fluid and creating unpredictable flare-ups.
- Forgetting to check fire bans and arriving to find campfires are prohibited.
How to avoid it: Bring a separate cutting board for raw meat, a food thermometer (chicken should reach 165°F internally; ground beef 160°F, per USDA guidelines), and always have a backup propane stove for fire-ban scenarios. Check local fire conditions at airnow.gov and your campsite’s official page the evening before departure.
Frequently Asked Questions About Camp Cooking
What gear do I absolutely need?
The essential camp cooking gear list starts with five items: a propane stove, a cast-iron skillet, a medium pot with a lid, a sharp knife with a cutting board, and heat-resistant gloves. These five tools cover the vast majority of campsite meals for most beginner campers. A can opener, long-handled tongs, and biodegradable soap round out the must-have kit. Everything else — Dutch ovens, griddles, pie irons — is genuinely useful but optional on your first trip.
What are the easiest camping meals?
Foil packet meals, one-pot pasta, and campfire scrambled eggs are the three easiest camp cooking options for beginners. Foil packets require no dishes — just wrap seasoned ingredients in aluminum foil and place on coals. One-pot pasta cooks everything in a single pot with no draining. Scrambled eggs take under 10 minutes in a cast-iron skillet. All three work on a propane stove or a campfire coal bed, making them reliable regardless of fire conditions.
Can you use regular pans on camp stoves?
Yes, you can use regular kitchen pans on a camp stove, but cast iron or stainless steel is highly recommended. Standard non-stick pans can easily warp or degrade over the high, uneven heat of a camp stove. Cast iron retains heat better and withstands the rugged outdoor environment.
How much propane do I need for a trip?
For a standard two-day weekend trip, one 16-ounce propane canister is usually sufficient for cooking breakfast and dinner. If you plan to boil water frequently for coffee or use a two-burner stove on high heat, pack a second canister as a backup. It is always better to have extra fuel than to run out mid-meal.
What is the best way to keep food cold?
The most effective method is pre-chilling your cooler with sacrificial ice the night before your trip. When packing, place a solid block of ice at the bottom, layer your perishable foods in sealed containers, and top with cubed ice. Keep the cooler in the shade and open it as infrequently as possible to maintain safe temperatures.
Your Next Step: Start Cooking with Confidence
Camp cooking gets easier every single trip. The first time you build a coal bed and cook a meal over an open flame, something shifts — the anxiety fades and the adventure takes over. That’s exactly what The Prep-Cook-Clean System is designed to deliver: a repeatable, stress-free process that makes every camping meal feel intentional rather than improvised.
The Prep-Cook-Clean System works because it mirrors how experienced outdoor cooks actually think. You prepare at home to reduce campsite chaos. You cook with the right gear and techniques to get consistent results. You clean up responsibly to protect the places you love and leave them ready for the next visitor.
Start small. Pack the five essential items from this outdoor cooking guide for campers, choose one meal from the 3-day plan, and try it on your next trip. You don’t need to master everything at once — one confident meal is all it takes to build the momentum that carries you through every camping adventure after it. For deeper coverage of any topic in this guide, explore the linked cluster articles throughout — each one goes further on gear, recipes, safety, and planning.

David King
Field gear tester at Tent Explorer.