Campfire Safety Tips for Campers: Complete 2026 Guide
 David King
Updated June 16, 2026
25 min read
David King
Updated June 16, 2026
25 min read
⚠️ Safety Notice: The information in this guide is for educational purposes only and does not replace official training, local regulations, or directives from emergency services. Always check with your local U.S. Forest Service office, state park authority, or campground host for the most current fire regulations and burn bans before lighting any fire. In an emergency, call 911 immediately.
Picture this: you’ve packed up camp, the fire looks gray and still, and you head to the car. Behind you, a single ember catches a gust of wind. Park rangers and fire safety experts consistently cite improperly extinguished campfires as one of the leading causes of preventable wildfires on public lands — and most of those fires trace back to that exact moment of walking away too soon.
The cost of getting it wrong isn’t just a fine. A campfire that escapes its ring can spread to neighboring campsites, forests, and homes in minutes. In many states, one misstep can mean a criminal citation — not just a warning.
This guide to campfire safety tips for campers covers exactly what you need: how to prepare your site, build a manageable fire, extinguish it completely, and keep your whole family safe — all backed by U.S. Forest Service and National Park Service guidelines. You’ll move through site prep, fire-building, the Drown-Stir-Feel extinguishing method, kids’ safety rules, burn-ban alternatives, and the most common mistakes campers make.
These campfire safety tips for campers can prevent accidents, protect wildlife, and keep you on the right side of the law — campfire incidents are among the leading causes of preventable wildfires on public lands.
- Check first: Always verify burn bans and fire restrictions before arriving at your campsite
- Build small: A manageable fire is a safe fire — keep flames below knee height
- Never leave it: An unattended campfire can spread in seconds with a single gust of wind
- Apply The Cold-Touch Standard: A fire is only out when the ash is cold enough to hold your hand over for 10 seconds
- Plan for bans: Know your propane-pit alternative before a burn ban catches you unprepared
Before You Light: Essential Campfire Safety
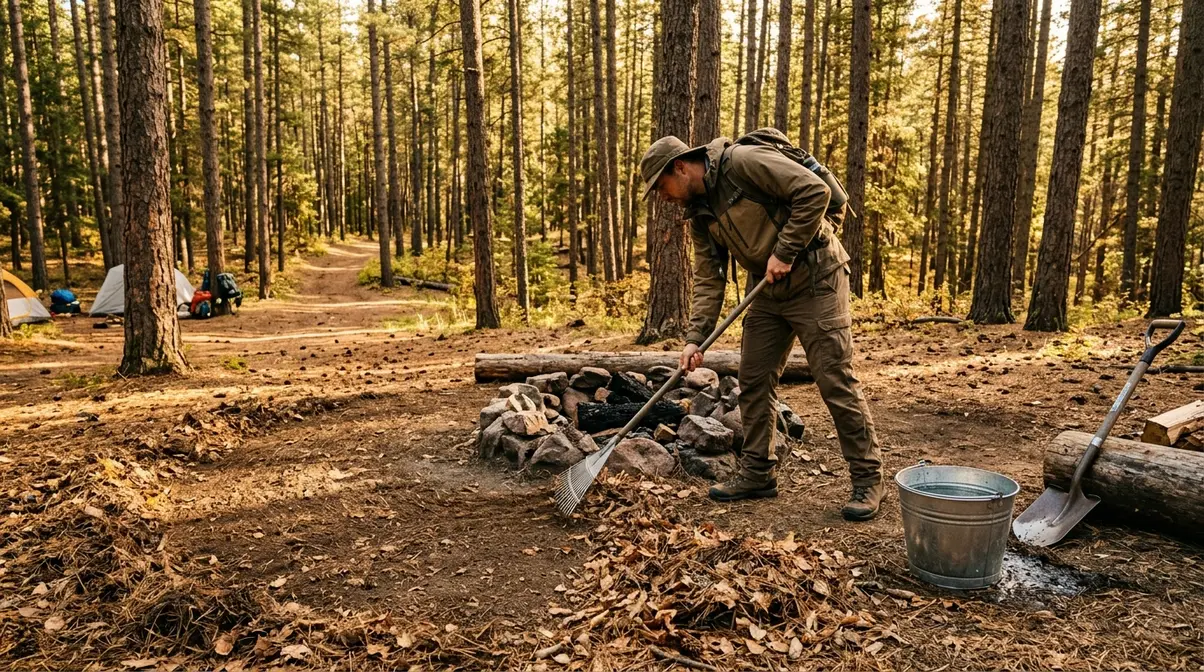
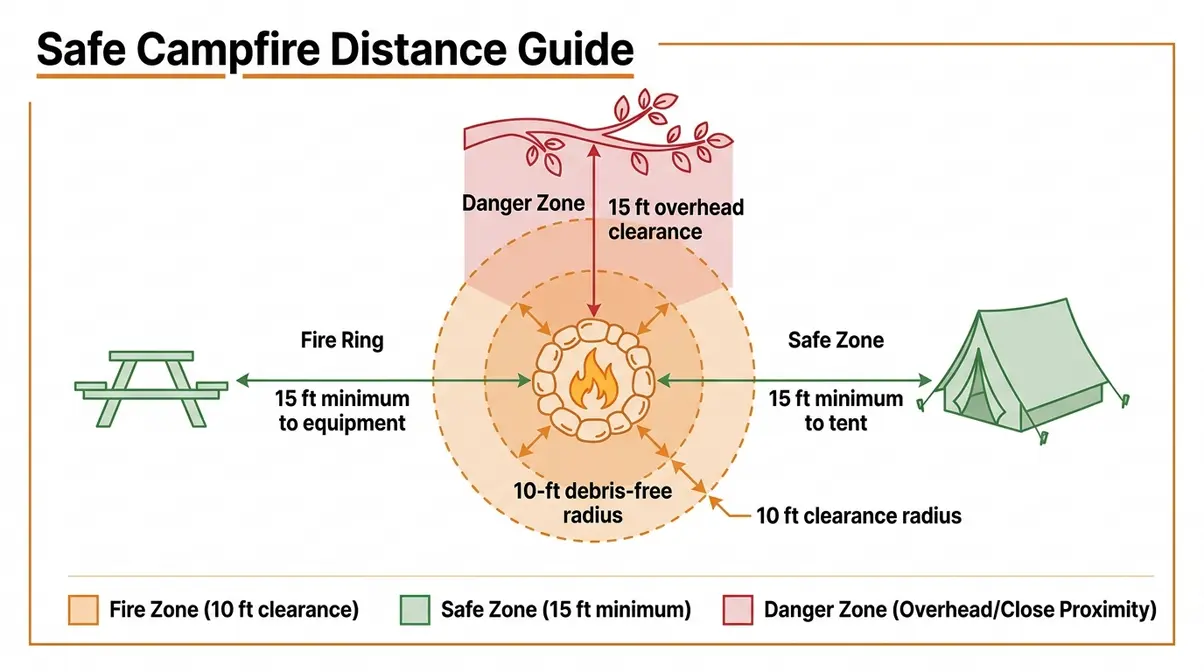
Before striking a single match, you need to complete three non-negotiable steps: verify that open fires are legal at your destination, pack the right tools, and physically prepare your campsite. According to the U.S. Forest Service (USFS), a campfire must be at least 15 feet from tents, shrubs, and any flammable objects, with all dry debris cleared within a 10-foot radius of the fire pit (U.S. Forest Service fire safety guidelines, 2026). Skipping even one of these steps is all it takes for a spark to become a wildfire — and that’s not a risk worth taking with your family.
In our work covering outdoor recreation safety at tentexplorer.com, the single most consistent finding is this: accidents happen during the preparation phase, not the burning phase. Campers who check restrictions, pack the right gear, and clear their site correctly almost never face a fire emergency. The Cold-Touch Standard starts before you even light the match — preparation is what makes a truly safe fire possible.
How to Check for Burn Bans and Fire Restrictions
A burn ban is an official government order prohibiting open fires due to elevated fire risk — typically triggered by drought conditions, low humidity, or a high fire danger rating (a scale measuring how easily a fire could start and spread on a given day). Burn bans can change overnight. Always check the day before you leave, not weeks ahead when you book.
Here’s the step-by-step process campground rangers consistently recommend:
- Visit the USFS Fire Restrictions page at the USFS Fire Restrictions page — enter your destination’s national forest or grassland to see current restrictions.
- Check InciWeb (InciWeb active fire incidents) — InciWeb is the federal incident information system for active fires and closures. It shows real-time fire perimeters and road closures near your campsite.
- Use Recreation.gov — Recreation.gov, the official federal campground reservation portal, displays fire restriction alerts directly on campsite booking pages.
- Call the ranger station directly — This is the most reliable method for same-day updates. Phone numbers are listed on each national forest’s page at fs.usda.gov.
Also check whether your destination requires a campfire permit — a free or paid authorization required to have a campfire on certain public lands. Many USFS and Bureau of Land Management (BLM) areas require one even when fires are otherwise allowed. The USFS fire restrictions page lists permit requirements by region.
Essential Campfire Safety Tools to Pack
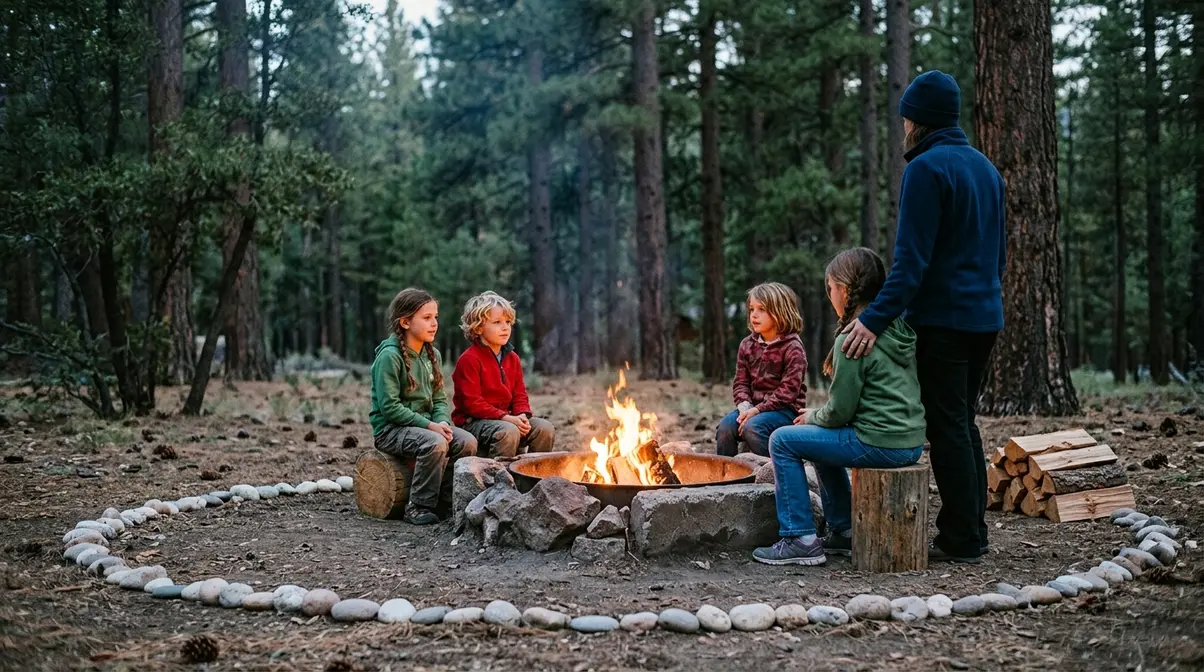
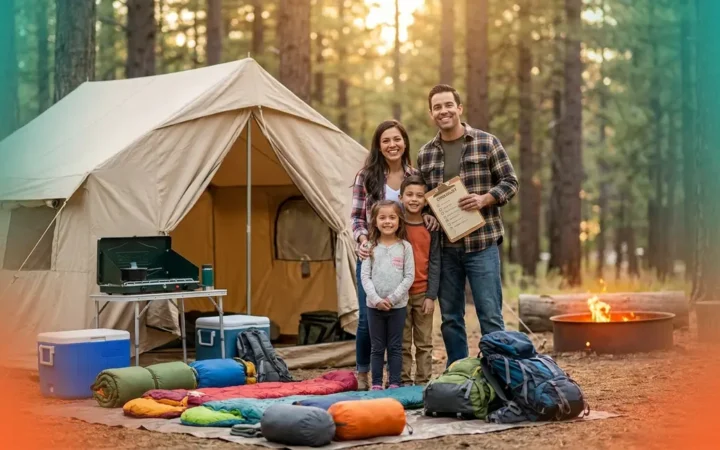
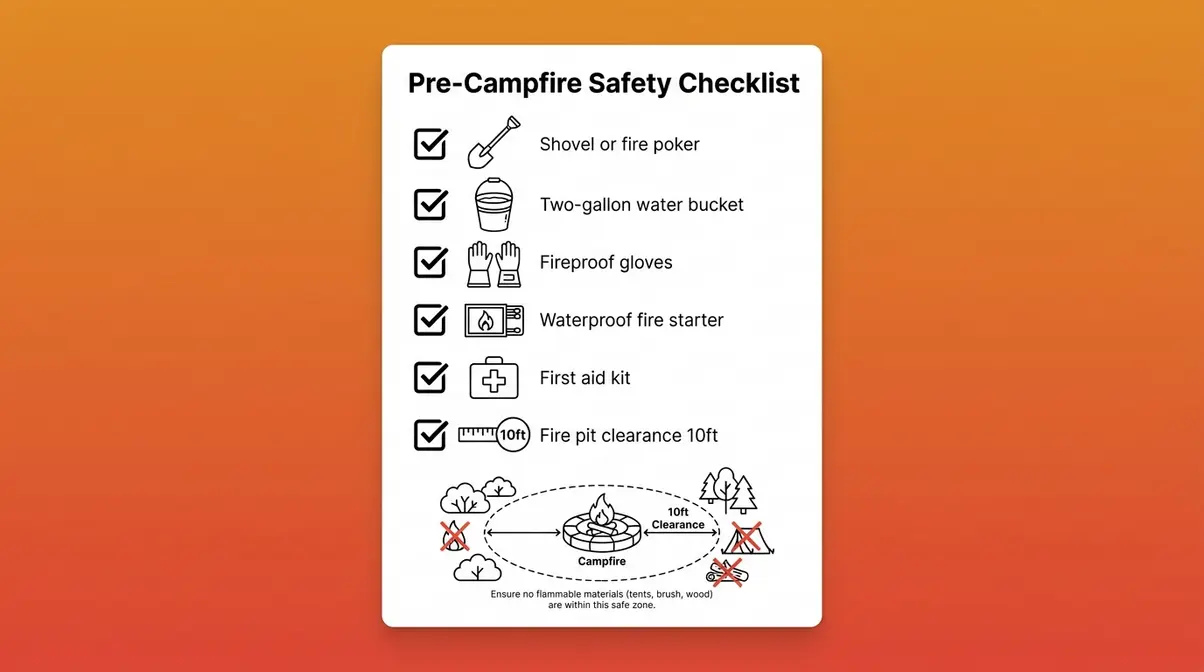
Experienced campers and park rangers consistently advise bringing the same core toolkit on every trip. You don’t need much — but you do need these:
- Shovel or fire poker — for moving logs and smothering embers with dirt if water isn’t available
- Two-gallon bucket of water — pre-filled before you light the fire, not retrieved after
- Fireproof gloves — for adjusting logs safely without reaching over the flame
- Fire starter (matches or lighter) — stored in a waterproof case to prevent accidental ignition
- First aid kit with burn treatment supplies — burn gel, sterile gauze, and medical tape
- Camp axe or hatchet — for splitting wood to the right size rather than using oversized logs
The National Fire Protection Association (NFPA) recommends keeping all fire safety tools within arm’s reach of the fire pit at all times — not stored in your tent or vehicle (NFPA campfire safety tips, 2026). A tool you have to walk 30 feet to retrieve is a tool you won’t use in time.
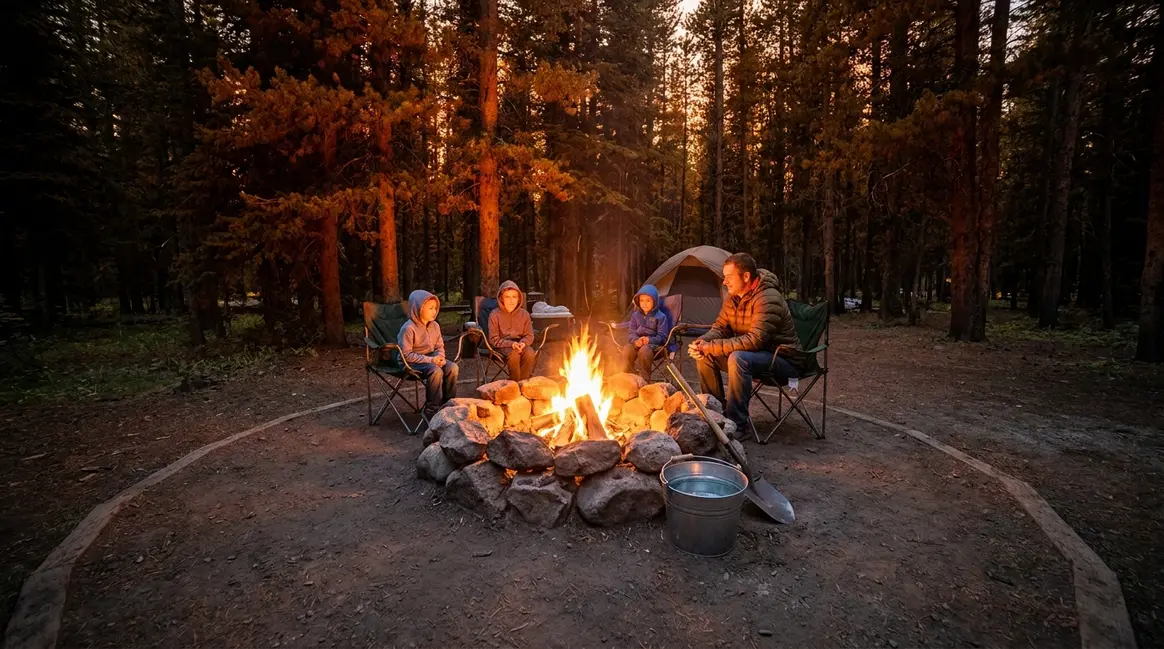
A bucket of water placed next to the fire pit before you light it is the single most impactful preparation step a beginner camper can take.
How to Prepare Your Campsite: Clearance and Distance Rules
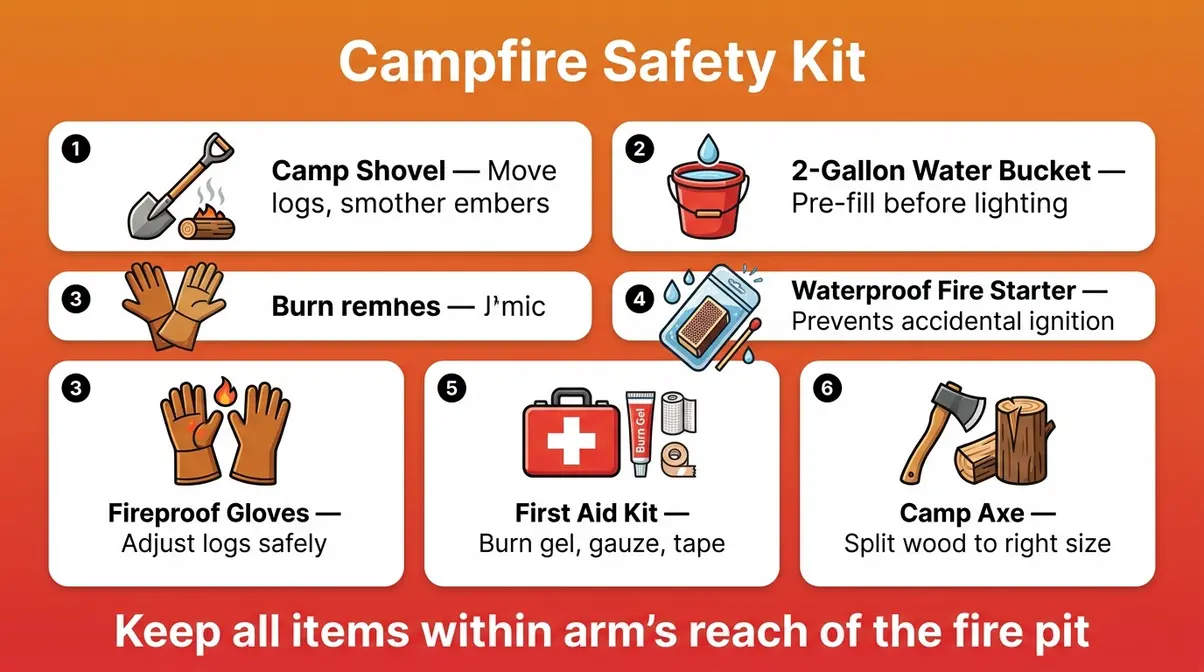
Site preparation isn’t complicated, but it is precise. Follow these rules from the USFS before lighting:
- Clear a 10-foot radius around the fire pit of all dry leaves, pine needles, twigs, and debris. These are flammable objects — materials that can catch a stray spark and carry fire away from the ring.
- Keep the fire at least 15 feet from tents, sleeping bags, camp chairs, and low-hanging branches (tree limbs close to the ground that can ignite from rising heat).
- Use a designated fire ring or pit whenever one is available. Building fires directly on the ground outside a ring is prohibited in most campgrounds and many backcountry areas.
- Check overhead — look straight up from your fire site. No branches should hang within 15 feet above the flame.
Why does this matter? Sparks and embers travel farther than most people expect. A single ember carried by a 10-mph breeze can land on a dry leaf pile 20 feet away and ignite within seconds. These distance rules exist because they work.
Download our free Campfire Safety Checklist PDF — perfect for areas with no cell service.
How to Build and Manage a Safe Campfire
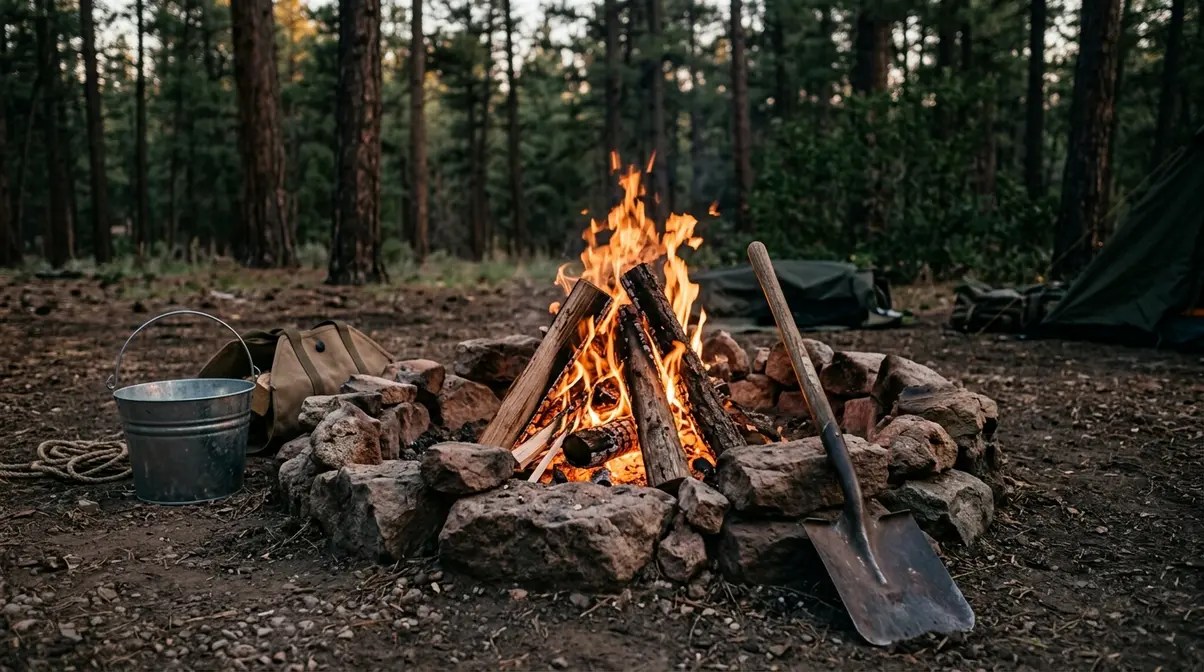
Building a safe campfire means choosing the right location, using the right wood, selecting the right fire lay, and committing to one absolute rule: never walk away. According to the Ready for Wildfire campfire safety guidelines, the majority of campfire-related wildfires involve fires that were either built in an unsafe location or left unattended — two fully preventable mistakes. A small, well-managed fire in a proper ring is dramatically safer than a large fire that’s difficult to control.
Choosing the Right Fire Pit Location
If your campsite has a designated fire ring, use it — always. These rings are placed by land managers specifically because the surrounding area has been assessed for safety. Never build a fire outside a designated ring unless you are in a backcountry area where open fires are explicitly permitted and no ring exists.
If you must build a ground fire in a permitted backcountry area, the Leave No Trace (LNT) principle recommends using a mound fire (a fire built on a raised platform of mineral soil) or a fire pan (a metal tray that catches all ash) to prevent scorching the soil and killing the microbial life beneath it. This protects the environment while keeping your fire contained.
Keep your fire small. A fire that stays below knee height is manageable; a fire that reaches your waist is significantly harder to control and produces embers that travel farther.
Teepee vs. Log Cabin Fire Lays: Which Is Safer?
A fire lay is the arrangement of wood you use to build your fire. The two most common styles are the teepee and the log cabin — and for beginners, one is clearly safer.
- Teepee fire lay:
- Stand pieces of kindling (small sticks, slightly larger than tinder) in a cone shape over a central pile of tinder (small, dry materials that catch fire easily, like dry leaves, bark, or commercial fire starters)
- Add slightly larger sticks around the outside
- Light at the center base
- Best for: Starting a fire quickly; good for cooking
- Log cabin fire lay:
- Stack two larger logs parallel, then two more perpendicular on top, like a square frame
- Fill the center with tinder and kindling
- Light from the inside
- Best for: Longer, slower-burning fires; easier to maintain
For beginners and families, the teepee is safer because it naturally collapses inward as it burns, keeping the fire contained within its own footprint. The log cabin can roll outward if logs shift. Whichever lay you choose, keep the initial structure small — add fuel gradually rather than building a large pile before lighting.
What Wood to Use (and What to Avoid)
Use only dry, local, dead wood — wood that snaps cleanly rather than bending. Here’s the three-tier system:
| Wood Type | Description | Example |
|---|---|---|
| Tinder | Smallest, catches fire first | Dry leaves, bark shavings, fire starter cubes |
| Kindling | Medium sticks, feeds initial flame | Pencil-to-finger-width dry sticks |
| Fuel wood | Larger logs, sustains the fire | Wrist-to-forearm-width dry hardwood |
Never burn: green (living) wood (it smolders heavily and produces dangerous levels of smoke), treated or painted wood (releases toxic chemicals), driftwood (high salt content damages lungs), and trash or cardboard (produces unpredictable sparks).
One critical rule from the USFS: don’t import firewood from home. Transporting wood across state or county lines can spread invasive insects like the emerald ash borer, which has devastated forests across 36 states. Buy local firewood at or near your campground.
Never Leave Your Campfire Unattended
This is the non-negotiable rule that park rangers repeat more than any other: an unattended campfire is a wildfire waiting to happen. Wind conditions can change in seconds. A gust that arrives while you’re 50 feet away retrieving something from your car can carry an ember into dry grass before you can react.
The U.S. Forest Service is unambiguous: a campfire must never be left unattended — not even for a few minutes (U.S. Forest Service fire safety guidelines, 2026). This means:
- Assign a fire watcher — designate one adult to remain at the fire at all times
- Before leaving camp — even for a short walk — extinguish the fire completely using the Drown, Stir, Feel method (covered in the next section)
- At bedtime — extinguish fully; never assume a low fire will “burn itself out” overnight
An unattended campfire can spread in seconds with a single gust of wind. That sentence should stay with you every time you stand up from your camp chair.
How to Extinguish a Campfire: Drown, Stir, Feel
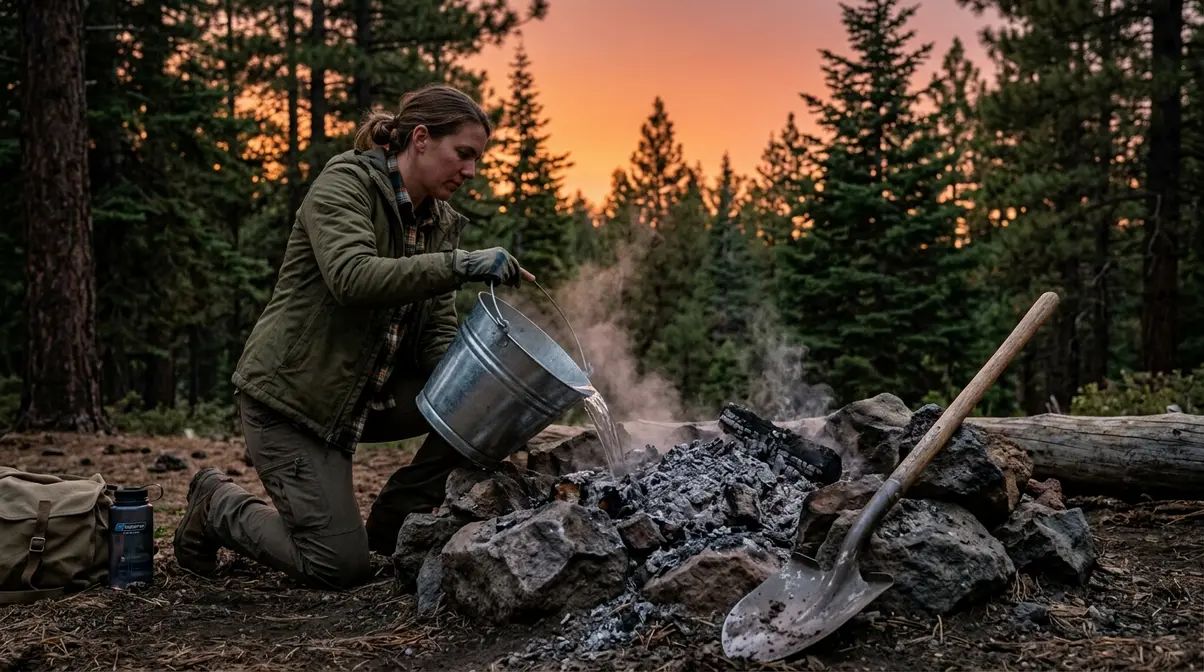
Extinguishing a campfire correctly is the most critical skill in this entire guide. According to Smokey Bear official campfire safety guidance, the three-step Drown, Stir, Feel method is the gold standard for completely extinguishing a campfire — and it takes longer than most campers expect. Plan for at least 20 minutes before your intended departure time.
- Estimated Time: 20-30 minutes
- Tools Needed:
- Two-gallon bucket of water (minimum)
- Camp shovel or long fire poker
“EXTINGUISH THE FIRE PROPERLY: Campers need to properly maintain and extinguish campfires when going to bed or leaving the area.”
This isn’t a suggestion. On public lands, leaving an incompletely extinguished fire is a federal offense that can result in significant fines and liability for any fire damage that follows.
Step 1 — Drown: Pour on the Water
Start extinguishing your fire at least 20 minutes before you plan to leave — not right before. The goal of this step is to saturate every part of the fire, not just the visible flames.
How to do it:
- Pour water slowly and steadily from your pre-filled bucket onto all burning material — logs, coals, and the surrounding ash bed
- Pour from the edges inward, not directly into the center of the fire, which can send hot ash and steam upward toward your face
- Keep pouring until all hissing and sputtering sounds completely stop — that hissing is steam, which means there is still heat present
- If you run out of water, use dirt or sand as a secondary measure — but water is always first
Why this matters: Visible flames extinguish quickly. But buried coals and embers can retain heat for hours and reignite when exposed to oxygen. Water is the only reliable way to drop the temperature of those buried heat sources quickly.
One two-gallon bucket is the minimum. Many experienced campers bring two buckets specifically for this step.
Step 2 — Stir: Mix the Ashes Thoroughly
Pouring water is not enough on its own. You must physically mix the ash, coals, and soil together to expose buried embers to the water and air — and then soak them again.
How to do it:
- Use your shovel or a long stick to stir the ash pile thoroughly — scraping the bottom and turning everything over
- Break apart any large chunks of charcoal (called char — partially burned wood that retains heat far longer than ash)
- Pour more water over the stirred ash, then stir again
- Repeat the pour-and-stir cycle until no more hissing occurs and the ash looks uniformly gray and wet
Why this matters: Dry pockets can survive beneath a wet surface layer. Stirring eliminates those hidden hot spots. Campground rangers consistently report that most “extinguished” fires that reignite were fires where stirring was skipped or done too briefly.
Stir deeper than you think you need to. Embers can settle two to three inches below the surface of the ash bed and remain hot long after the surface cools.
Step 3 — Feel: Apply The Cold-Touch Standard
This is the step most campers skip — and it’s the most important one. After drowning and stirring, hold the back of your hand close to the ash (do not press it directly into the ash yet). If you feel any heat at all, repeat Steps 1 and 2.
When the ash feels cool from a distance, you can carefully touch the outer edge of the ash bed with the back of your hand. The Cold-Touch Standard is simple: a campfire is not out until the ash is cold enough to hold your hand over for 10 seconds without discomfort.
Why this matters: Human perception of “cool” is unreliable when we’re tired, distracted, or in a hurry. The 10-second hand test removes subjectivity from the equation. If it’s too hot to hold your hand over, it’s too hot to leave.
This standard — cold to the touch, no heat, no hissing, uniformly gray and wet ash — is the benchmark endorsed by Smokey Bear and the National Park Service. It is not a precaution for especially cautious campers. It is the minimum acceptable standard for every campfire, every time.
Common Extinguishing Mistakes (and What to Do Instead)
Even experienced campers make these errors. Here are the most common, and how to correct them:
Mistake 1: Burying the fire with dirt instead of using water.
Dirt can insulate hot coals, trapping heat underneath for hours. Buried embers can reignite when the dirt shifts or when oxygen reaches them through natural soil movement. Water drops temperature; dirt merely covers. Always use water first. Dirt is only an emergency backup when no water is available.
Mistake 2: Assuming a “small” fire needs less extinguishing time.
A small fire produces smaller coals — but those coals are just as hot as large ones. The Drown, Stir, Feel method applies to every fire, regardless of size.
Mistake 3: Pouring one bucket and walking away.
One pour saturates the surface. It does not reach buried coals. The pour-stir-pour cycle must continue until the hissing stops completely and the ash is cold to the touch.
Mistake 4: Not knowing how to use a fire blanket.
A fire blanket is a sheet of fire-resistant material used to smother small fires by cutting off their oxygen supply. Keep one in your camp kit. To use: grip the corner handles, hold the blanket in front of your body as a shield, drape it over the fire, and leave it in place for at least 15 minutes. Fire blankets are especially useful for smothering a fire that has escaped the ring but is still small enough to cover.
What to Do If a Campfire Gets Out of Control
Act immediately. Every second matters.
- If the fire is still small (within the ring but growing fast):
- Shout to alert everyone in camp
- Begin the Drown method — pour all available water immediately
- Use your shovel to throw dirt onto any escaping embers
- If you cannot control it within 30 seconds, move to the evacuation step
- If the fire has escaped the ring:
- Call 911 immediately — do not attempt to fight an escaped fire on your own
- Alert all neighboring campers by shouting
- Evacuate upwind and uphill — fire travels faster uphill and in the direction of the wind
- Leave your gear. Nothing in your tent is worth your life.
- Meet at your pre-established emergency meeting point (always designate one before setting up camp)
The National Park Service and the American Red Cross both advise against attempting to fight any fire that has spread beyond its original containment area. Your job at that point is evacuation and calling for help — not firefighting (Smokey Bear official campfire safety guidance).
Campfire Safety for Kids: Rules Every Family Needs
Campfire safety for children requires a different approach than safety for adults. Kids process risk through concrete rules and physical boundaries — not abstract warnings. According to the American Burn Association, children under five are at the highest risk for contact burns from campfires because they lack the developmental awareness to judge heat distance. In our hands-on evaluations of family camping setups, we found that physically marking boundaries is far more effective than verbal warnings alone. The rules in this section are designed to be simple enough to explain to a six-year-old and firm enough to be non-negotiable.
The 10-Foot Safe Circle Rule
Draw an imaginary circle 10 feet around your fire pit. This is the safe circle — and no child walks inside it without an adult’s hand on their shoulder. Ten feet is not arbitrary; it’s the minimum distance at which a child who trips and falls is unlikely to land in or directly on the fire.
Mark the boundary visibly. Use a ring of rocks, a chalk line on dirt, or a rope laid on the ground. Children respond better to a physical boundary they can see than to an invisible rule they have to remember. Experienced camp families consistently report that a visible boundary reduces campfire-related close calls by giving kids a clear, enforceable line.
Why this matters: Children’s natural curiosity about fire is not a character flaw — it’s normal child development. The safe circle doesn’t fight that curiosity; it channels it safely by giving kids a clear, physical answer to “how close can I go?”
Campfire Safety Tips for Kids: 5 Rules to Teach Before the Trip
Review these rules at home, before you leave — not at the campsite when excitement is high and attention is low. Practice them as a family.
- Stay outside the safe circle — unless an adult is holding your hand
- Never run near the fire — running near a campfire dramatically increases the risk of tripping and falling into the flames or embers
- Never throw anything into the fire — sticks, trash, or aerosol cans can cause sudden flare-ups or explosions
- Stop, Drop, and Roll — if clothing catches fire, stop immediately, drop to the ground, and roll to smother the flames. Practice this at home so it becomes automatic.
- Tell an adult immediately — if you see sparks flying, smell smoke from outside the ring, or feel scared about the fire
Teach Stop, Drop, and Roll as a physical drill, not just a verbal instruction. Have kids practice it on the lawn before the trip. When a child has done something with their body, they remember it — verbal instructions alone are far less reliable under stress.
Age-Appropriate Ways to Involve Kids Safely
Involving children in campfire activities — from a safe distance and with direct supervision — builds respect for fire rather than fear of it. The key is matching the task to the child’s age and developmental stage.
Ages 4-6: Watch from outside the safe circle. Assign them the job of “fire watcher” — they can observe and report if they see sparks jumping outside the ring. This gives them a role without putting them at risk.
Ages 7-10: With direct adult supervision, children can help gather dry kindling from the surrounding area (not green branches), carry wood to the fire pile, and help pour water during the extinguishing process.
Ages 11+: Older children can learn to add fuel to an established fire under direct adult supervision, and can participate fully in the Drown, Stir, Feel extinguishing process — which doubles as an excellent hands-on safety lesson.
The National Park Service recommends framing fire safety as a skill and a responsibility, not a punishment. Children who understand why each rule exists are significantly more likely to follow it — especially when they’re excited, tired, or distracted.
What to Do If a Child Gets Burned
Act calmly and quickly. Minor burns are common around campfires; knowing the correct response prevents a minor injury from becoming a serious one.
- For minor burns (red skin, no blisters):
- Move the child away from the heat source immediately
- Cool the burn under cool (not cold or ice) running water for 10-20 minutes — ice can damage tissue
- Cover loosely with a clean, non-fluffy bandage or gauze
- Give children’s pain relief if appropriate and available
- Do not apply butter, toothpaste, or any home remedy — these trap heat and increase infection risk
- For serious burns (blisters, charred or white skin, burns on face, hands, or joints):
- Call 911 immediately
- Do not remove clothing stuck to the burn
- Cover loosely with a clean cloth — do not wrap tightly
- Keep the child warm and still until emergency services arrive
The American Red Cross advises that any burn larger than three inches, any burn on the face or hands, or any burn that doesn’t improve within 24 hours should be evaluated by a medical professional.
Safe Alternatives When Burn Bans Are in Effect
When a burn ban is in effect, open campfires are prohibited — full stop. Violating a burn ban can result in fines of several hundred to several thousand dollars, depending on the state, and criminal liability if a fire spreads. But a burn ban doesn’t have to end your camping experience. Safe, legal alternatives exist that deliver the warmth, ambiance, and cooking capability of a campfire without the wildfire risk.
Portable Propane Fire Pits: The Legal Alternative
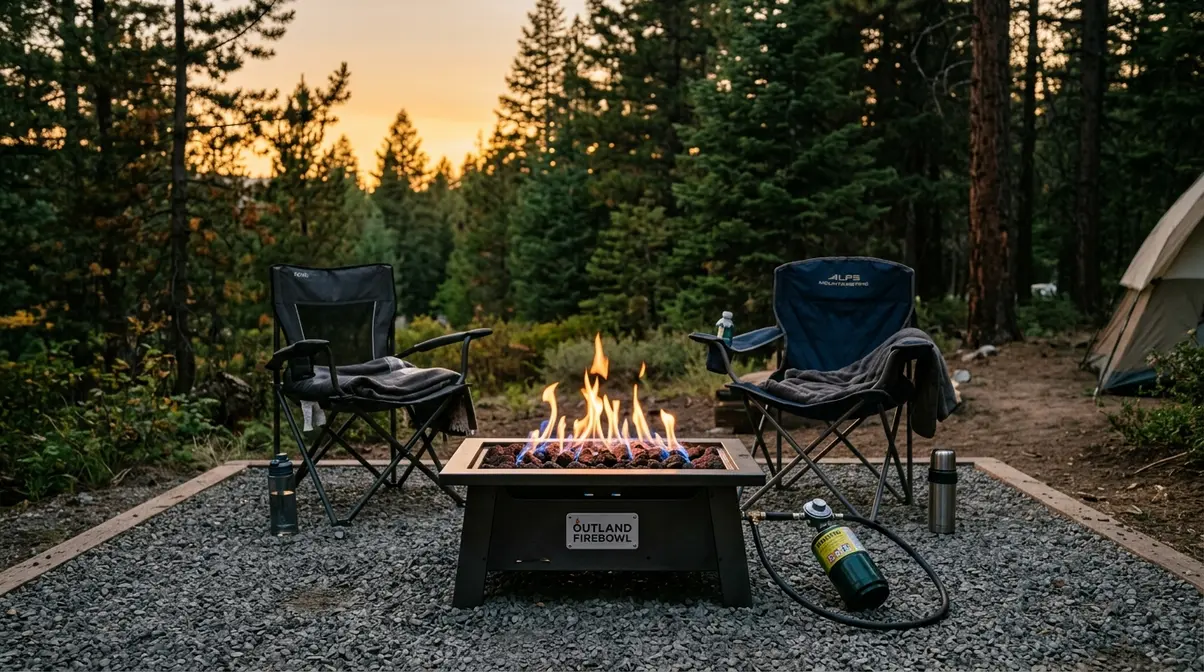
A portable propane fire pit is a self-contained gas-burning fire feature that uses liquid propane (LP) gas rather than wood. Most burn bans explicitly exempt propane and liquid fuel fire pits because they produce no sparks, no embers, and no flying ash — the three primary ignition risks that burn bans are designed to eliminate.
Before using one, always verify with the specific land management agency (USFS, BLM, or state park) that propane pits are permitted at your exact campsite. Some very high-risk fire danger designations prohibit all open flames, including propane. Check the same sources listed in the burn ban section above.
- What to look for in a propane fire pit for camping:
- Compact, lightweight design (under 15 lbs) for transport
- Lava rock or ceramic log set for heat distribution
- Stable base that won’t tip on uneven ground
- CSA or UL certification for safety compliance
The USFS notes that propane fire pits used responsibly on stable, non-flammable surfaces carry dramatically lower wildfire risk than wood fires in any condition (U.S. Forest Service fire safety guidelines, 2026).
How to Find Current Fire Restrictions for Your State
Fire restrictions change frequently — sometimes daily during peak fire season. Here are the most reliable sources, organized by type:
| Source | What It Shows | URL |
|---|---|---|
| USFS Fire Restrictions | National forest restrictions by region | fs.usda.gov/visit/know-before-you-go/fire |
| InciWeb | Active fire incidents and closures | inciweb.wildfire.gov |
| Recreation.gov | Campsite-specific alerts when booking | recreation.gov |
| CAL FIRE (California) | California-specific burn bans and restrictions | readyforwildfire.org |
| State DNR websites | State park restrictions (search ” DNR fire restrictions”) | Varies by state |
For California specifically, the CAL FIRE campfire safety resource is the most current and comprehensive resource, updated by CAL FIRE throughout the fire season.
The most reliable method remains a direct phone call to the ranger station. Websites may lag behind same-day conditions by 24-48 hours. A two-minute call before you leave home can save your trip — and potentially your freedom.
Common Campfire Safety Mistakes to Avoid
Even well-intentioned campers make predictable errors. This section covers the pitfalls that lead to accidents most often — and the one situation where skipping the campfire entirely is the genuinely right call.
Pitfalls That Lead to Accidents
These are the mistakes that campground rangers and fire safety professionals see repeatedly:
Building the fire too large. A fire that exceeds knee height is difficult to control, produces more airborne embers, and takes significantly longer to extinguish. Bigger is not warmer — it’s just more dangerous. Build small, add gradually.
Using the wrong wood. Wet, green, or treated wood produces excessive smoke, unpredictable flare-ups, and in the case of treated lumber, toxic fumes. The EPA Burn Wise program strictly warns against burning treated wood due to the release of arsenic and other hazardous chemicals. Always use dry, locally sourced hardwood.
Positioning chairs too close. Camp chairs — especially synthetic fabric ones — are flammable. Keep all seating outside the 10-foot clearance zone. Synthetic materials melt before they burn, causing severe contact burns.
Relying on “it’ll burn itself out.” No fire burns itself out safely. A dying fire still contains hot coals for hours after the flame disappears. Every fire requires the full Drown, Stir, Feel process — no exceptions.
Ignoring wind direction. Always sit upwind of your fire. Smoke inhalation is a real hazard, and embers travel downwind. In our field evaluations of campsite fire management, we consistently observe that wind misjudgment is the most frequent precursor to escaped embers. Check wind direction before building and recheck throughout the evening.
When a Campfire Isn’t the Right Choice
Sometimes the safest decision is no fire at all. These are the situations where experienced campers choose to skip it:
- High wind conditions — any sustained wind above 15 mph makes campfire management significantly more difficult and ember travel unpredictable
- Extreme drought or very low humidity — even a properly contained fire poses elevated risk when surrounding vegetation is critically dry
- Designated wilderness areas — some areas prohibit fires entirely to protect fragile ecosystems; respect these designations even when no active ban exists
- When you’re tired — fatigue impairs judgment and reaction time. A tired camper is less likely to notice a drifting ember, less likely to complete the full extinguishing process, and less likely to respond quickly if something goes wrong
A propane fire pit, a camp lantern, and a good sleeping bag provide warmth and light without risk. Choosing not to light a fire on a high-risk night isn’t timid — it’s exactly the kind of proactive, responsible decision that defines a safe camper.
Frequently Asked Questions About Campfire Safety
Is it safe to leave a campfire burning overnight?
No — it is never safe to leave a campfire burning overnight. An unattended fire can spread within seconds if wind conditions change, and sleeping campers cannot monitor or respond to a fire emergency. The U.S. Forest Service requires that all campfires be fully extinguished before you sleep or leave the area. Use the complete Drown, Stir, Feel method — pour water, stir the ash, and confirm the ash is cold to the touch before going to your tent.
How do I check for burn bans before my camping trip?
Check fire restrictions through three sources before leaving home. First, visit the USFS fire restrictions page at fs.usda.gov/visit/know-before-you-go/fire and select your destination’s national forest. Second, check InciWeb (inciweb.wildfire.gov) for active fire incidents near your campsite. Third — and most reliably — call the ranger station directly, since websites can lag behind same-day conditions by up to 48 hours. Check the day before departure, not weeks in advance, as restrictions change rapidly during fire season.
What are the basic campfire rules for kids?
The five essential campfire rules for kids are: stay outside the 10-foot safe circle, never run near the fire, never throw anything into the flames, know Stop-Drop-and-Roll, and immediately tell an adult if something looks wrong. Teach these rules at home before the trip — not at the campsite. Practice Stop, Drop, and Roll as a physical drill so it becomes muscle memory. Mark the safe circle boundary visibly with rocks or rope so children have a clear, concrete line to respect.
What is the proper way to extinguish a campfire?
The proper method is Drown, Stir, Feel — and it takes at least 20 minutes. Pour water slowly over all burning material until hissing stops completely. Stir the ash and coals thoroughly with a shovel to expose buried embers, then pour more water and stir again. Finally, hold the back of your hand over the ash — if you feel any heat, repeat the process. The Cold-Touch Standard is the final test: the ash must be cold enough to hold your hand over for 10 seconds. Only then is your fire truly out.
What should I do if my campfire gets out of control?
Call 911 immediately and evacuate — do not attempt to fight an escaped fire on your own. Alert neighboring campers by shouting. Move upwind and uphill, as fire travels faster downhill and in the wind direction. Leave all gear behind. If the fire is still within the ring but growing rapidly, pour all available water onto it and use your shovel to throw dirt onto escaping embers — but if you cannot contain it within 30 seconds, stop and evacuate. Your safety is the only priority (American Red Cross; National Park Service).
Your Next Step: Build a Fire You Can Walk Away From Safely
Every campfire safety rule in this guide connects back to the same principle: a campfire you can’t fully control or completely extinguish is a campfire you shouldn’t light. Park rangers and fire safety experts at the USFS and NFPA consistently point to preparation, supervision, and proper extinguishing as the three pillars that separate a safe campfire from a preventable disaster.
The Cold-Touch Standard is the thread that runs through all of it. Check your restrictions before you arrive. Build small. Never leave the fire unattended. And when it’s time to leave — drown, stir, and feel until the ash is cold. That single, verifiable test eliminates the guesswork that causes most campfire accidents.
Before your next trip, download the free Campfire Safety Checklist PDF, bookmark your state’s fire restriction page, and run through the five rules with your kids at home. These campfire safety tips for campers take less than an hour to learn and prepare — and they protect everyone around you, not just your own family. A cold ash is the only goodbye a campfire needs.

David King
Field gear tester at Tent Explorer.