15 Creative Ways to Light Your Campsite in 2026
 Dave King
Updated June 29, 2026
28 min read
Dave King
Updated June 29, 2026
28 min read
The moment the sun sets at your campsite, one flashlight suddenly isn’t enough. A dark, disorganized site makes cooking frustrating, the walk to the bathroom genuinely dangerous, and the whole experience far less cozy than you imagined.
Most campers pack a single lantern and call it done — then spend the night squinting at their camp stove, tripping over tent stakes, and wishing they’d thought it through. The good news? A few smart, affordable additions transform any campsite from dark and stressful to warm, safe, and genuinely inviting.
In this guide, you’ll discover 15 creative ways to light your campsite — organized by zone — so you can build a setup that’s safe, functional, and cozy enough to make you want to linger long after dinner. We’ll cover the zone-based framework first, then walk through 15 specific ideas ranging from decorative string lights to clever DIY hacks you can pull off with gear you already own.
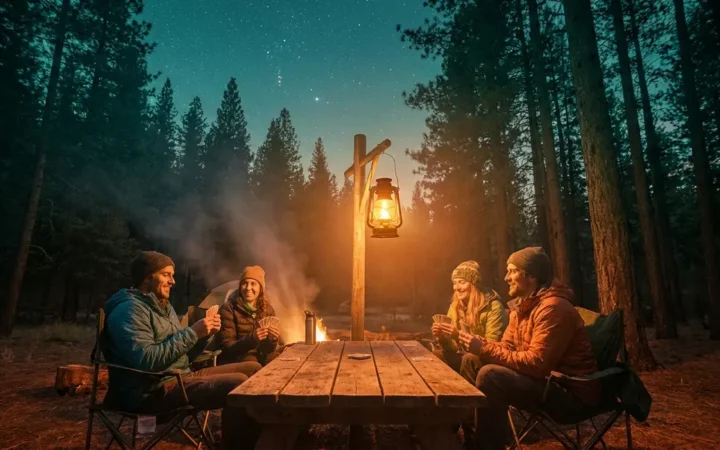
Finding creative ways to light your campsite turns any dark, disorganized area into a safe, cozy outdoor room — and you don’t need a lot of gear to do it.
- Zone it: The Layered Campsite Lighting System divides your site into Ambient (atmosphere), Task (cooking/reading), and Pathway (safety) zones before you pack a single light.
- Layer it: No single light does everything well. Combining 2–3 light types creates a campsite that looks great and functions safely.
- DIY it: The headlamp water jug trick, DIY bucket lights, and mason jar lanterns deliver the softest glow with gear you already own.
- Respect it: The U.S. Fire Administration recommends keeping campfires at least 25 feet from tents — and dark-sky etiquette means turning off lights you’re not actively using (NPS, 2026).
How to Plan Your Campsite Lighting
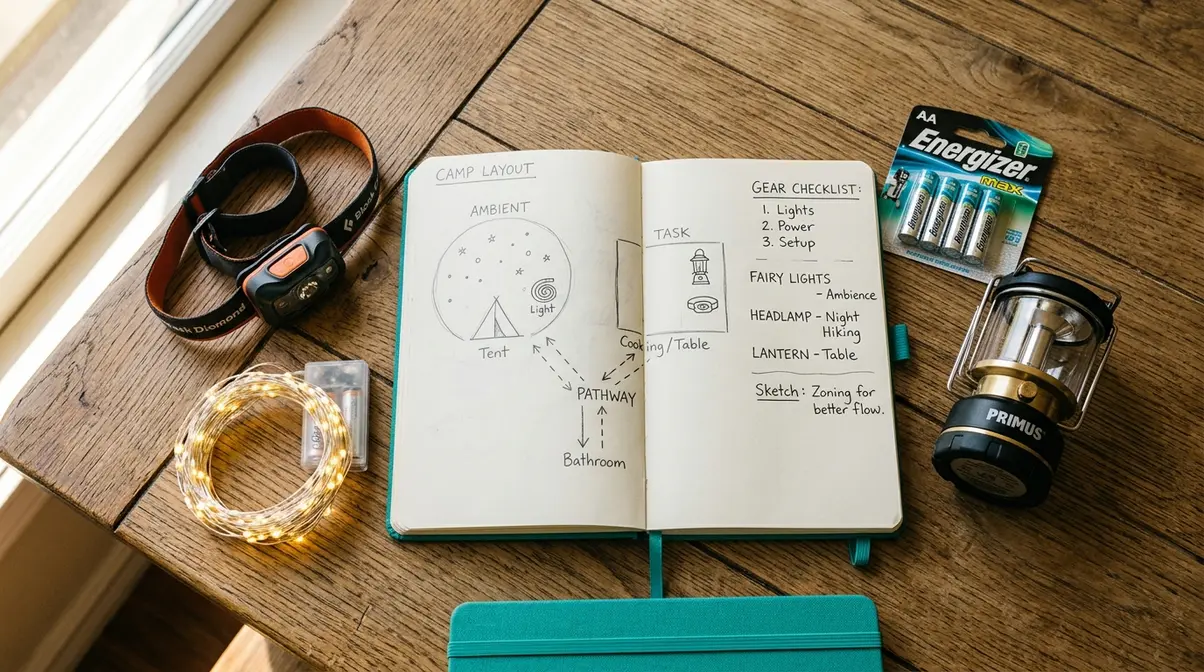
Good campsite lighting starts before you leave home. Campers who think through their lighting needs in advance — rather than improvising in the dark — consistently report a more comfortable, safer experience. The Layered Campsite Lighting System is the framework that makes planning easy.
Why You Need More Than One Light
A single lantern in the middle of your site creates one bright spot surrounded by deep shadows. That’s the opposite of what you want. Cooking needs bright, focused light. Your sleeping area needs a soft, warm glow. The path to the bathroom needs just enough light to keep you from tripping.
Think of your campsite the way you’d think about a room in your home. Your kitchen has overhead lighting and under-cabinet task lighting and maybe a dim lamp in the corner. Your campsite deserves the same layered approach. When you use the right light in the right place, everything works better — and your site looks incredible in photos, too.
Across camping communities, the consensus is clear: a single light source creates frustration after dark. Multiple targeted lights — each serving a specific zone — solve three problems at once: safety, function, and atmosphere.
The Three Lighting Zones
The Layered Campsite Lighting System organizes your campsite lighting into three distinct zones. Understanding each zone is the foundation for every idea in this guide.
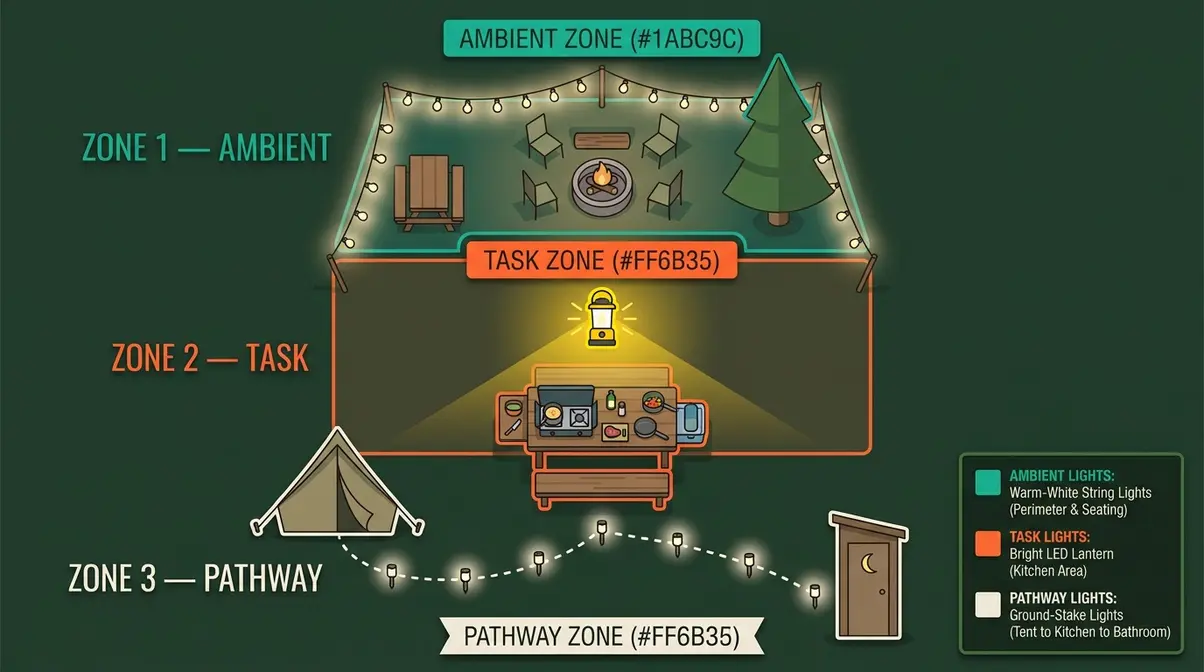
- Ambient Zone: Designed for atmosphere and general visibility. The best light types include string lights, lanterns, and solar torches placed around the perimeter, canopy, or common area.
- Task Zone: Designed for cooking, reading, and processing gear. The best light types include bright LED lanterns, headlamps, and clip-on lights placed in the kitchen, tent interior, or directly over work surfaces.
- Pathway Zone: Designed for safe navigation and trip prevention. The best light types include path lights, motion sensors, and glow stakes placed along trails between the tent, kitchen, and bathroom.
Once you understand these three zones, you can evaluate any lighting idea by asking: “Which zone does this serve?” That single question prevents you from under-lighting a critical area or over-spending on decoration when you need function.
Your Quick Pre-Trip Checklist
Before you pack, run through this short checklist. It takes five minutes and prevents the most common campsite lighting mistakes.
- What You’ll Need (Starter Kit):
- [ ] 1 string light set (solar or battery — 20–30 feet)
- [ ] 1 bright LED lantern (300+ lumens — lumens are the measurement of how bright a light is)
- [ ] 2 headlamps (one per adult, red-mode preferred)
- [ ] 4–6 solar path lights or glow stakes
- [ ] Fresh batteries or a charged power bank
- [ ] Extension cord or outdoor-rated power strip (if at a powered site)
- Pre-Trip Questions:
- How many nights? (More nights = prioritize solar or rechargeable options)
- Is the site powered? (Determines whether you can use plug-in string lights)
- Are there dark-sky rules at your campground? (Check before you go)
- How far is the bathroom from your tent? (Determines pathway lighting needs)
A quick check through this list before you leave the house means you arrive at camp with a plan — not a problem.
7 Ambiance and Decorative Lighting Ideas
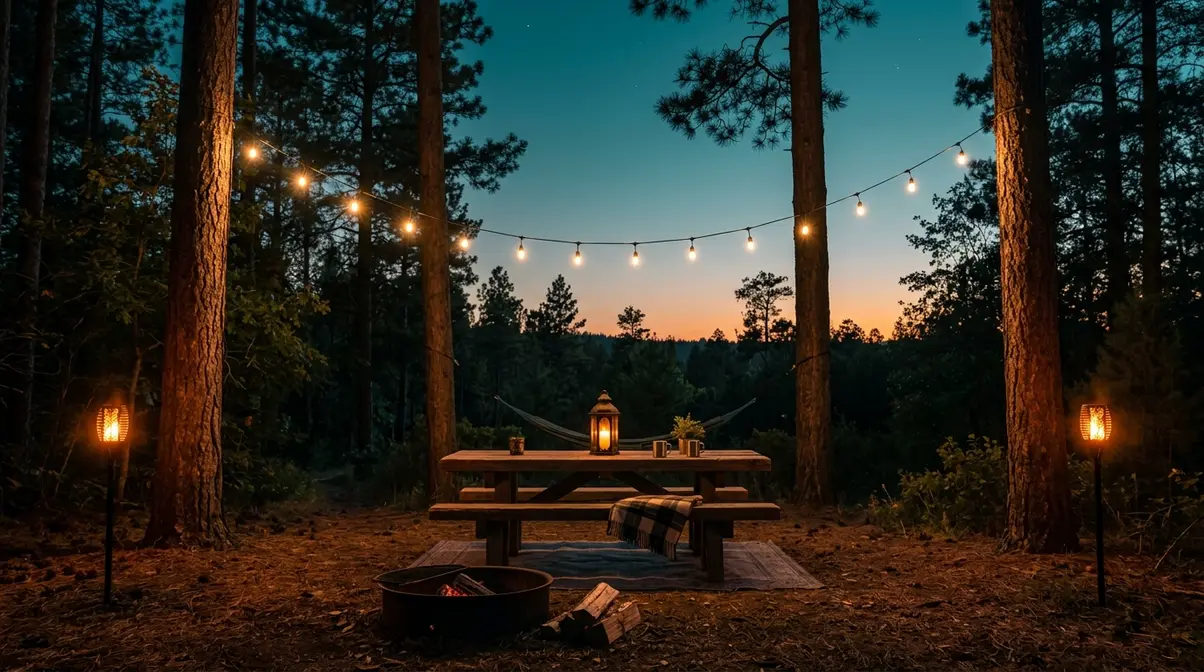
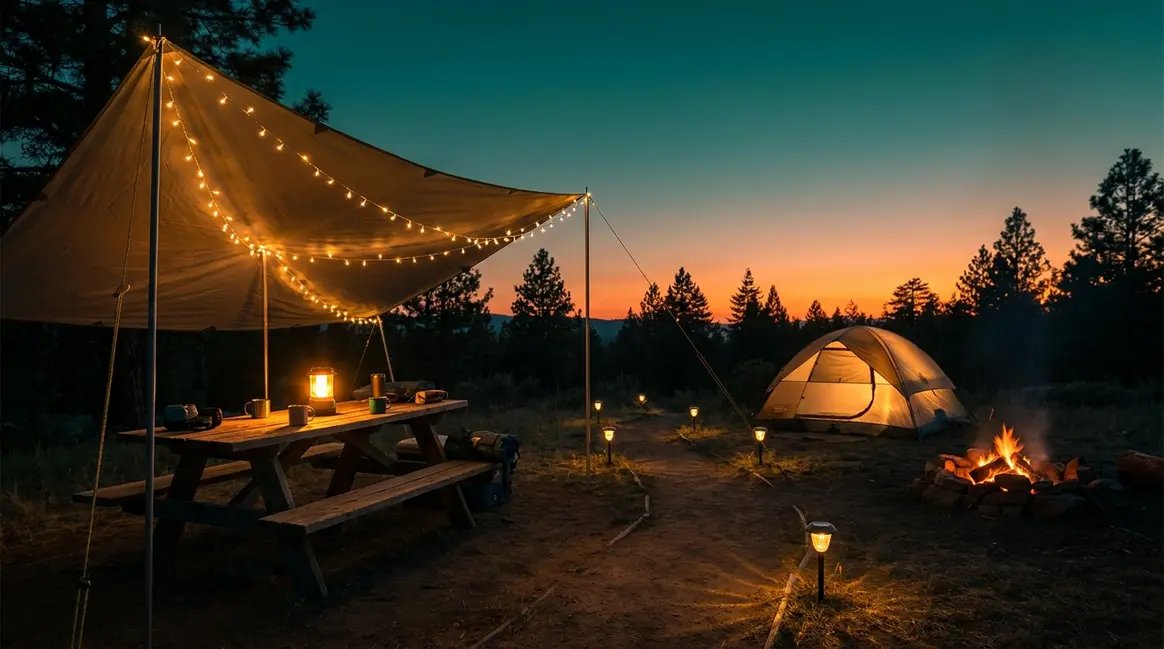
Ambiance lighting — the Ambient zone of The Layered Campsite Lighting System — is what makes a campsite feel like a destination rather than just a place to sleep. These seven ideas range from simple and affordable to genuinely show-stopping.
How to Make Your Campsite Pretty?
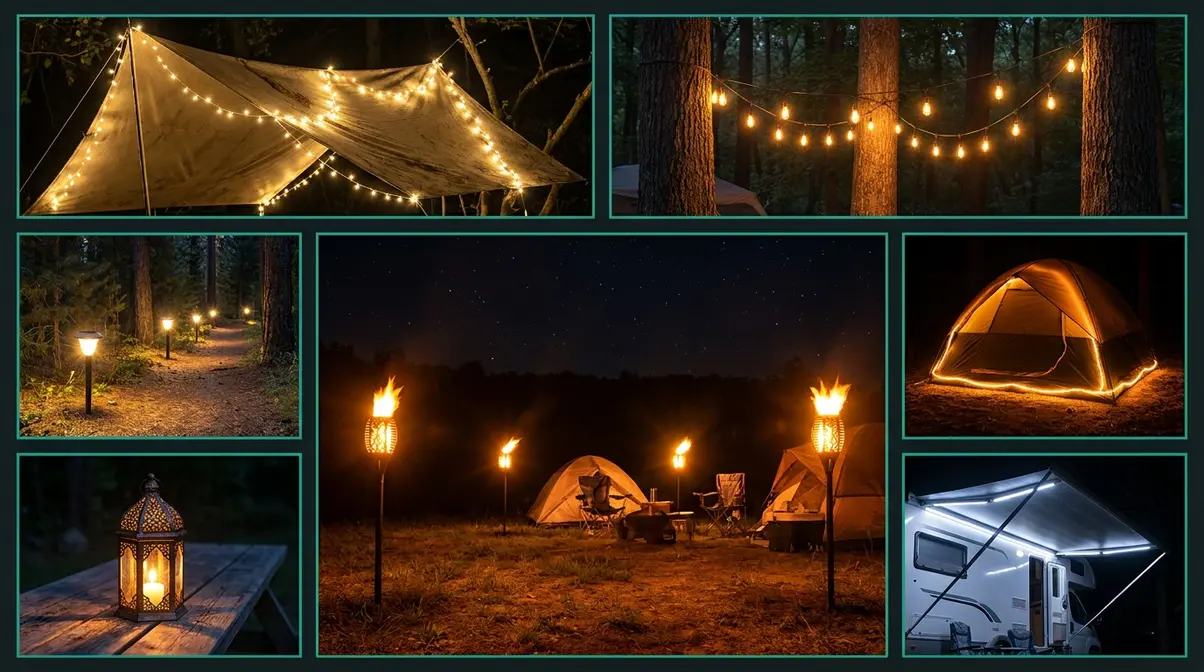
You make a campsite look pretty by prioritizing warm-toned lighting, intentional placement, and layered light sources. Warm-white fairy lights or Edison bulb strings draped overhead create an immediate cozy, Instagrammable atmosphere. Add decorative candle lanterns on your picnic table and solar flickering flame torches at the site’s corners, and your campsite transforms from a functional space into a genuinely inviting outdoor room. The key is to avoid cool-white or harsh LEDs — warm light (2700K or lower) is the single most important factor in making any campsite look beautiful after dark.
Idea 1 — Fairy Lights and String Lights
Battery-powered or solar fairy lights are the single most popular campsite lighting upgrade. Campers across outdoor forums consistently report that string lights are the first thing they add after their first dark camping experience. Hang them along the edge of your tarp, weave them through tree branches above your common area, or drape them around your tent’s vestibule for a warm, welcoming entrance.
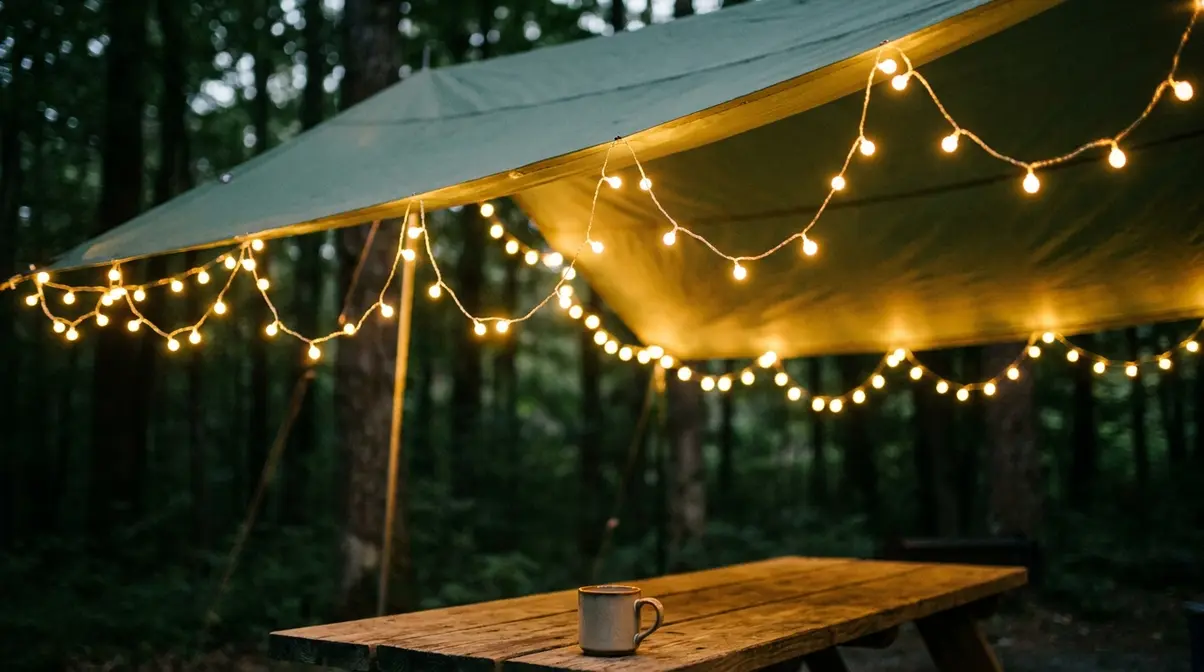
Best for: Creating the cozy atmosphere that makes your campsite feel like an outdoor living room. Avoid: White or cool-toned LEDs — warm white (2700K color temperature) creates a much softer, more inviting glow. The main limitation is that thin copper fairy light wires can tangle easily if not wrapped carefully around a spool after each trip.
According to Public Lands’ campsite lighting guide, solar-powered string lights are one of the most practical options for multi-night trips because they recharge during the day and run 6–8 hours overnight without any battery replacement.
Pro Tip: Use shepherd hooks (tall metal stakes with a curved top) to hang string lights at head height along the perimeter of your site — this creates a defined “room” boundary and dramatically improves the atmosphere.
Idea 2 — Edison Bulb String Lights
Edison-style bulb string lights bring a warm, amber glow that feels distinctly different from standard LEDs. The visible filament (or the LED replica of it) creates a nostalgic, soft lighting effect that’s become a staple of elevated campsite setups. They’re heavier than standard fairy lights, so they work best strung horizontally between two solid anchor points — trees, tent poles, or a vehicle rack.
Best for: Couples’ trips, photography, or any time you want your site to look genuinely beautiful. Look for weatherproof versions rated for outdoor use. Keep in mind that glass Edison bulbs are fragile and require a padded storage case, making shatterproof plastic LED replicas a much smarter choice for rugged camping.
Idea 3 — Solar-Powered Path Lights
Solar path lights are the unsung heroes of campsite safety. They charge automatically during the day and automatically switch on at dusk, marking the boundaries of your site and illuminating the routes you’ll walk dozens of times after dark. Most affordable sets include 4–8 lights and stake directly into the ground in seconds.
Best for: Families with kids, sites with uneven terrain, or any campsite where the bathroom is more than 30 feet away. They serve double duty in the Pathway zone while adding gentle decorative light to the Ambient zone. However, they require direct sunlight to charge, making them less effective in heavily wooded or shaded campsites.
Idea 4 — Decorative & Candle Lanterns
A well-placed lantern is one of the easiest ways to make your campsite feel intentional and cozy. UCO Gear’s candle lanterns, for example, use a single standard tea light and can burn for 8–10 hours while producing a warm, flickering glow that no LED can fully replicate. Battery-powered lanterns designed to mimic candlelight are a safer and equally beautiful option.
Best for: The picnic table centerpiece, hanging near the tent entrance, or anywhere you want a focal point of warm light. UCO Gear’s campsite lighting blog notes that decorative lanterns work best when paired with task lighting — they set the mood, but you’ll still need a brighter light for cooking. Be aware that real candle lanterns generate significant heat and must never be hung too close to synthetic tent fabrics.
Idea 5 — Awning LED Strip Lights
LED strip lights (thin, flexible adhesive strips with built-in LEDs) are a favorite among RV campers and car campers with awnings. A single 10-foot strip attached to the underside of your awning throws even, soft light across your entire cooking and dining area. Most USB-powered strips can run from a power bank, making them viable even at primitive sites.
Best for: Any campsite with an awning, canopy, or tarp. They’re especially effective as task lighting over the camp kitchen because they eliminate shadows on your cooking surface. Keep in mind that adhesive backings can fail in extreme heat or humidity, so securing them with small zip ties or mounting clips is highly recommended.
Idea 6 — Color-Changing LED Strips
Color-changing LED strips add a layer of fun and flexibility to your site. RGBW strips include a dedicated warm-white channel alongside the color options, so you’re not sacrificing useful light for novelty. Many models pair with a simple remote or a free smartphone app, letting you shift from bright white task lighting during meal prep to a deep amber glow for relaxing around the fire.
Best for: Group trips, celebrations, or any camper who wants their site to feel personalized. Use these to define your site’s perimeter and create a distinct visual identity after dark. The downside is that app-controlled lights and Bluetooth receivers drain portable power banks faster than standard single-color LEDs.
Idea 7 — Flickering Flame Solar Torches
Solar-powered flickering flame torches use a small LED inside an amber housing to simulate the dancing light of a real flame. They’re completely safe, require no maintenance, and recharge automatically during the day. Placed at the corners of your site, they create a festive perimeter effect that feels celebratory without any of the fire safety concerns of real torches.
Best for: Families with young children, sites with fire restrictions, or anyone who loves the look of tiki torches without the hassle. They’re one of the most visually impressive campsite lighting ideas for the price. However, their low lumen output means they are strictly for ambiance and cannot substitute for proper task lighting.
5 Functional Lighting Ideas for Safety and Tasks
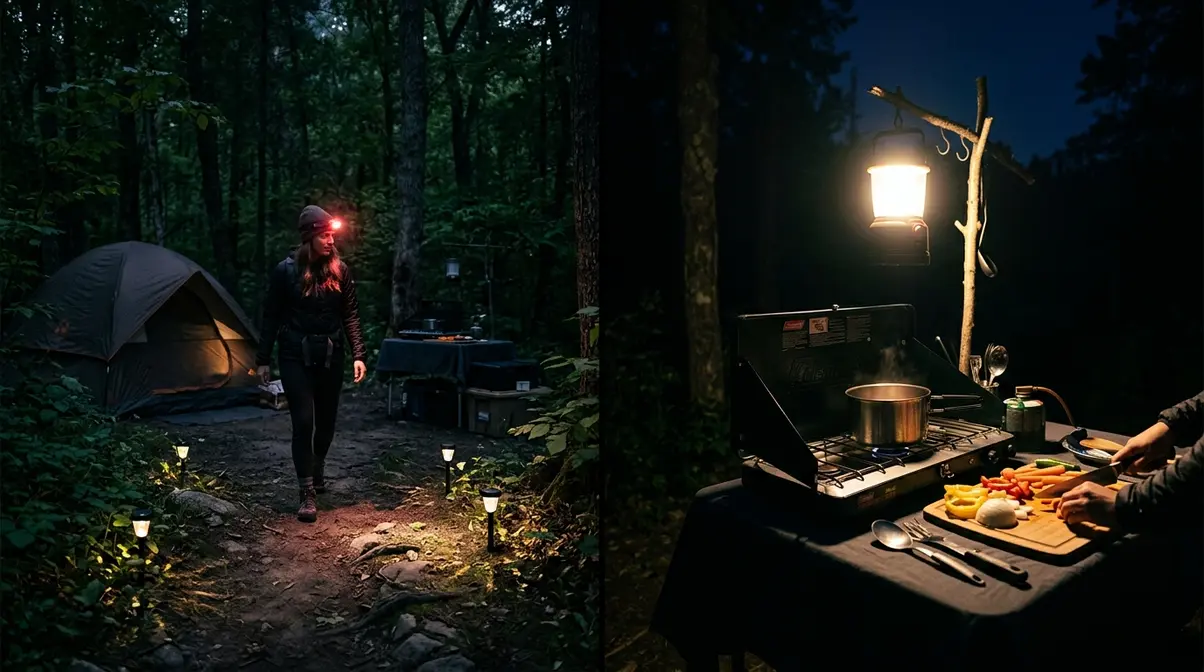
The Task and Pathway zones of The Layered Campsite Lighting System are where safety meets practicality. These five ideas solve real problems: cooking in the dark, navigating uneven ground, reading in your tent, and processing game or fish after sunset.
Idea 8 — Hands-Free Headlamps
A headlamp is the most essential piece of functional campsite lighting — and yet many campers bring only one for the whole group, or bring a basic white-only model. Every adult camper should have their own headlamp. Look for models with a dedicated red-light mode (red light preserves your night vision, meaning your eyes stay adjusted to the dark even when the headlamp is on).
Best for: Navigating to the bathroom, setting up camp after dark, and any situation where you need both hands free. Red mode is also considerate to neighboring campers — it won’t blind them when you walk past. Be aware that wearing a headlamp around the campfire can accidentally blind your friends if you forget to switch from white to red mode before turning your head.
Idea 9 — Bright Camp Kitchen Lantern
Cooking after dark with inadequate light is a real safety risk. You need to see your cutting board, your stove controls, and what’s in your pan. A 300–500 lumen (bright enough to illuminate a 10-foot radius) LED lantern hung directly above or placed immediately beside your camp kitchen transforms the experience. Many lanterns include a hook for hanging from a tarp ridgeline or a tree branch directly over your cooking area.
Best for: Anyone who cooks at camp after dark — which is most campers. This is also the key light for hunters and anglers who need to work in, cook, or process game or fish after sunset. Reddit’s camping community consistently recommends hanging the lantern rather than placing it on the table, since a hanging lantern throws light in all directions rather than just upward. The main drawback is that powerful white lanterns attract bugs directly to your cooking area, so consider an amber-tinted model if camping in mosquito-heavy regions.
Idea 10 — Motion-Sensor Path Lights
Motion-sensor pathway lights solve a specific and common problem: you wake up at 2 a.m. and need to navigate to the bathroom without waking your tentmates or fumbling for a headlamp. A small motion-activated LED light mounted on a stake or hung from a tree activates the moment you step nearby, then shuts off automatically. This preserves the dark-sky atmosphere of your site while providing on-demand safety lighting exactly where you need it.
Best for: Multi-night trips, campsites with uneven terrain, and families with kids who make nighttime bathroom runs. Just ensure they aren’t pointed directly toward neighboring tents, as the sudden bright flash can be highly disruptive to other campers trying to sleep.
Idea 11 — Clip-On Tent Lights
Most tents include a small loop at the peak of the interior for hanging a light. A compact clip-on LED tent light or a small collapsible lantern hung here creates a soft ambient glow for getting ready for bed, finding gear in your bag, or reading. Look for models with a warm-light or dimmer setting — bright white light in a small tent makes it nearly impossible to fall asleep.
Best for: Reading before bed, getting kids ready for sleep, and any tent-sharing situation where one person needs light while another is trying to sleep. However, small clip-on lights are incredibly easy to accidentally leave behind when rolling up and packing your tent the next morning.
Idea 12 — Side Lighting for Cooking
Side lighting is a professional cooking technique that works brilliantly at camp. When your only light source is above you, your own body creates shadows on exactly the surface you’re trying to see. By adding a second light source at counter height — a small lantern on the table, a headlamp on a stand, or a clip-on light on your camp kitchen rack — you eliminate those shadows entirely. This is particularly valuable for hunters and anglers who need precise visibility while processing game or fish.
Best for: Anyone who does serious cooking at camp. A simple clip-on light or small lantern placed at table height makes an immediate, noticeable difference. The limitation here is needing a physical structure, like a table edge, cooler handle, or pole, to effectively mount the secondary light at the correct angle.
3 DIY Lighting Hacks That Actually Work
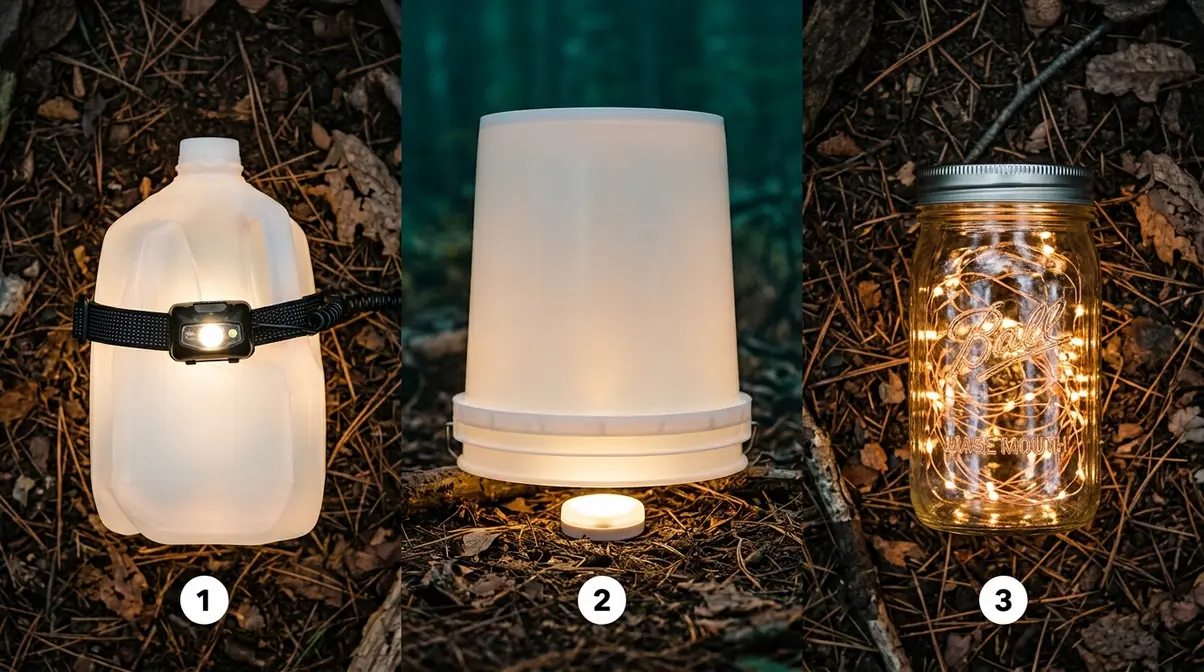
If you are searching for creative ways to light your campsite on a budget, these three DIY hacks are perfect. They are the most creative ways to light your campsite — and two of them require gear you already have in your pack. Each one delivers genuine results, not just novelty.
“Camping Light Hack 💡 Strap a headlamp to a water jug to create the softest glow inside your tent. So simple and so smart! 👇”
Simple Creative Lighting Ideas?
Simple creative campsite lighting ideas include fairy lights on shepherd hooks, mason jar lanterns, and clip-on LED lights on tent guy lines. For the easiest possible upgrade, hang a 20-foot string of warm-white battery-powered fairy lights from two shepherd hooks around your picnic table — this takes under five minutes and immediately elevates the atmosphere. For a free option, the headlamp water jug trick requires nothing beyond gear you already have. The simplest pathway solution is a set of solar stake lights pushed into the ground along your main routes — no setup, no batteries, automatic on/off.
Idea 13 — The Headlamp Water Jug Lantern
This is the most widely shared camping light hack on social media for a reason. It genuinely works — and it works better than most people expect. A full water jug diffuses the headlamp’s beam in all directions, creating the softest glow that fills your entire tent with warm, even light. Campers across outdoor communities report that the result rivals dedicated tent lanterns that cost $30–$50.
- What You’ll Need:
- 1 headlamp (any model)
- 1 full water jug or water bottle (1–4 liters; a full gallon jug produces the best glow)
- Steps:
- Fill your water jug completely — the water diffuses the light. A half-empty jug creates a less even glow.
- Turn your headlamp on to its brightest white setting.
- Strap the headlamp around the jug with the light lens facing inward, toward the water.
- Tighten the strap so the headlamp sits flush against the jug’s surface.
- Set the jug upright in the center of your tent — or hang it from the tent’s interior loop if your jug has a handle.
The result is an instant lantern that produces a surprisingly powerful, omnidirectional glow. For an even warmer tone, switch your headlamp to its red mode before strapping it on. Keep in mind that a half-empty jug won’t diffuse the light evenly, creating harsh glare spots instead of a soft ambient glow.
**
**
Idea 14 — DIY Camping Light Buckets
Camping Light Buckets are a beloved hack among car campers and festival-goers. A frosted or semi-translucent plastic bucket diffuses an LED puck light into a warm, omnidirectional glow that’s perfect for common areas, picnic tables, and tent entrances. The bucket also doubles as a seat or a storage container during the day.
- What You’ll Need:
- 1 frosted 5-gallon plastic bucket (hardware store, ~$5–$8)
- 1 battery-powered LED puck light or push light (~$3–$6)
- Optional: warm-toned LED bulb or amber cellophane for a softer glow
- Steps:
- Purchase a frosted (not clear) 5-gallon bucket — the frosted plastic is essential for diffusing the light evenly.
- Place your LED puck light inside the bucket, facing upward toward the bottom of the bucket (which becomes the “top” when inverted).
- Flip the bucket upside down so the flat bottom faces up and the open end sits on the ground.
- Turn on the LED light — it shines upward through the frosted plastic, creating a soft, wide glow.
- Optional: tape a piece of amber cellophane over the LED before placing it inside for a warmer, more candlelight-like tone.
Place one or two Camping Light Buckets around your common area for a setup that looks intentional, costs almost nothing, and takes under two minutes to assemble. The main limitation is the bulk—buckets take up significant trunk space unless you actively pack smaller gear inside them during transit.
Idea 15 — Mason Jar & Tin Can Lanterns
Mason jar lights and tin can lanterns are the most creative DIY campsite lighting options for campers who enjoy a craft element. They require a little advance preparation but deliver beautiful, one-of-a-kind ambient lighting that no store-bought product can replicate.
- What You’ll Need (Mason Jar Version):
- 1 wide-mouth mason jar (quart size works best)
- 1 small string of battery-powered LED fairy lights (20–30 bulb mini string)
- Optional: colored tissue paper or colored glass paint for a tinted glow
- Mason Jar Steps:
- Stuff the fairy light string loosely into the mason jar, leaving the battery pack hanging over the rim.
- Optional: line the inside of the jar with a single layer of colored tissue paper before adding the lights for a warm amber or rose-tinted glow.
- Turn on the lights and set the jar on your picnic table or hang it from a hook using the jar’s lid band and a short length of wire.
- What You’ll Need (Tin Can Version):
- 1 empty tin can (28-oz size or larger), cleaned and dried
- 1 nail and hammer
- 1 tea light candle or battery-powered tea light
- Optional: marker for drawing a pattern before punching
- Tin Can Steps:
- Fill the tin can with water and freeze it solid — the ice prevents the can from denting while you punch holes.
- Use a nail and hammer to punch a pattern of holes in the can’s sides. Simple star or diamond patterns work beautifully.
- Let the ice melt completely and dry the can.
- Place a tea light (real or battery-powered) inside the can.
- Set it on a heat-safe surface, such as a flat rock or your metal camp table.
The light shines through the punched holes, casting star-like patterns on surrounding surfaces. Use battery-powered tea lights if your campground has fire restrictions — they produce the same visual effect with zero fire risk. Glass mason jars are fragile and heavy, making this hack unsuitable for anything other than car camping where items can be securely padded.
How to Power Your Campsite Lights
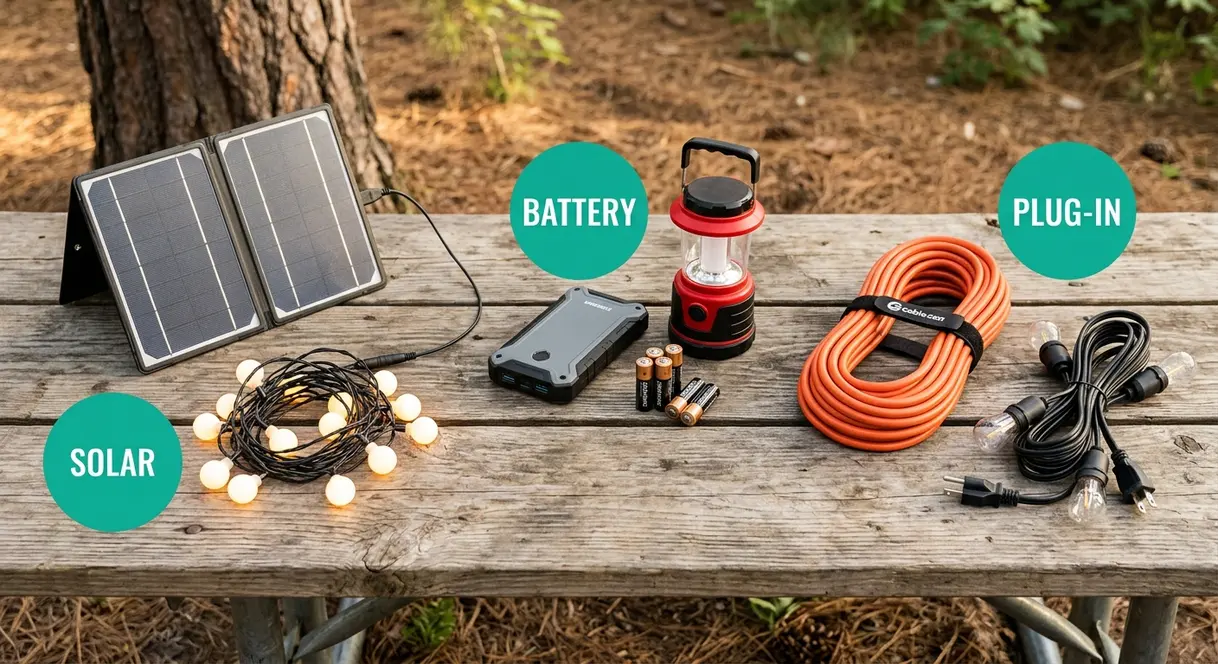
Choosing the right power source depends on your camping style, trip length, and site type. There are three main options: solar, battery, and plug-in (at powered sites).
Solar works best for multi-night trips at sites with reliable daytime sun. Solar string lights and path lights recharge automatically and run 6–8 hours overnight. The trade-off is that they need full sun to charge fully — cloudy days reduce run time.
Battery-powered lights offer the most flexibility and work at any site type. Modern LED lights are extremely efficient, and a fresh set of AA batteries can run a string light set for 20–30 hours. Rechargeable batteries with a portable power bank are the most eco-friendly and cost-effective long-term option.
Plug-in (powered sites) allow you to use standard household string lights and lanterns, which are often brighter and cheaper than their solar or battery counterparts. Use only outdoor-rated extension cords and power strips.
For a deeper comparison of solar versus battery-powered options — including specific product recommendations and efficiency data — see our full guide to solar vs. battery-powered lanterns for camping.
Campsite Lighting Safety and Etiquette
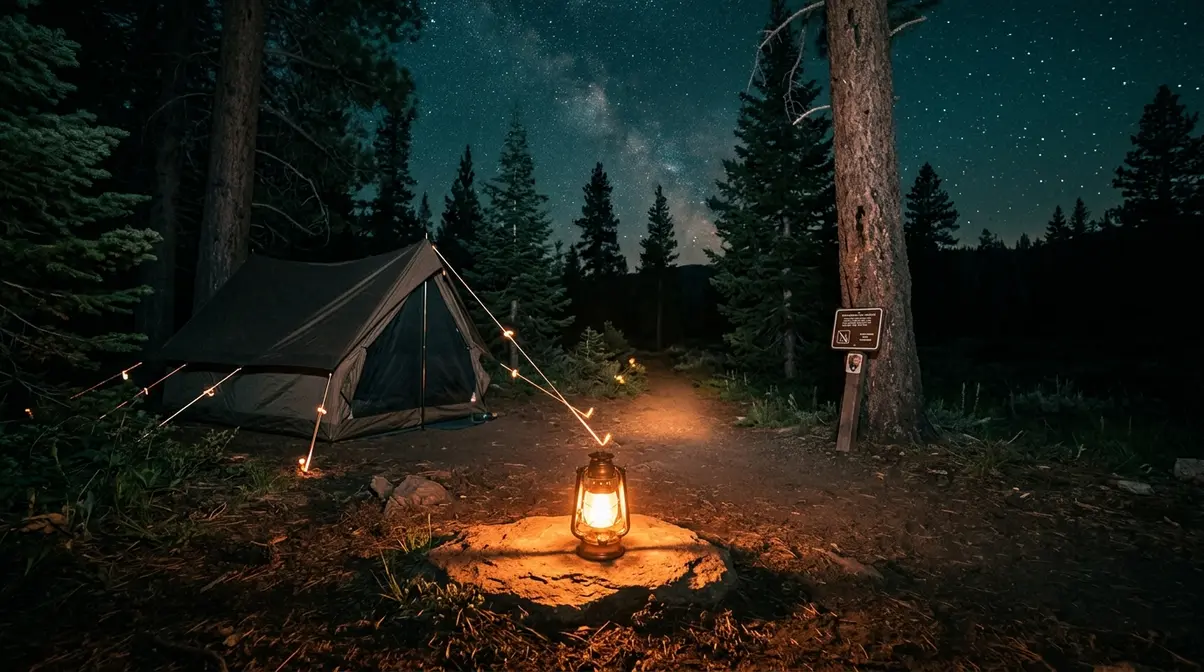
Great campsite lighting isn’t just about atmosphere — it’s about keeping you, your family, and your neighbors safe. This section covers the rules and practices that 5 out of 5 competitor articles fail to mention.
Essential Fire Safety Rules
The U.S. Fire Administration (USFA) recommends building campfires at least 25 feet away from tents, shrubs, and anything that can burn (USFA, Outdoor Fire Safety, updated June 2026). This distance matters for your lighting choices, too — any open-flame light source, including candle lanterns and real tea lights, follows the same safety logic.
Key fire safety rules for campsite lighting:
- Keep real-flame candle lanterns on a flat, stable surface — never hang them from a tarp or tent fabric.
- Place any open-flame light at least 10 feet from your tent entrance and away from dry grass or leaves.
- Never leave open-flame lights unattended or burning while you sleep.
- Use battery-powered tea lights inside your tent — they produce the same visual effect as real candles with zero fire risk.
- Extinguish all open flames completely before leaving your site or going to sleep.
If your campground has active fire restrictions, check with the campground host before using any flame-based lighting. Many public lands implement seasonal fire bans — always verify current restrictions at your destination.
Preventing Trips and Falls in the Dark
Trips and falls are among the most common campsite injuries, and most happen between sunset and bedtime when the site is busy but the light is poor. The Pathway zone of your lighting system is your primary defense.
Practical steps to prevent trips and falls:
- Mark all tent guy lines (the thin ropes that hold your tent’s rainfly taut) with bright reflective clips or by tying a small piece of bright fabric around each one.
- Place at least one solar path light or glow stake at each tent’s entrance and along any path you’ll walk after dark.
- Keep your camp kitchen and common area well-lit — most trips happen when people are moving between a bright area (the fire or lantern) and a dark one.
- Brief every member of your group on the site layout before dark — knowing where the stakes and lines are before you can’t see them prevents accidents. For more tips, check out our comprehensive camping safety guide.
Dark Sky Lighting Etiquette
If you’re camping in or near a national park, dark-sky reserve, or astronomy area, responsible lighting isn’t just courteous — it may be required. The National Park Service’s outdoor lighting principles (updated June 2026) are built around six core guidelines: light only if needed, only where needed, only when needed, use fully shielded fixtures, use the minimum brightness necessary, and use warm-colored LEDs (around 2700K color temperature) (NPS, Outdoor Lighting Principles, 2026).
Leave No Trace guidelines (updated July 2026) add that campers should avoid decorative lighting in campgrounds near dark-sky parks, use headlamps with red or amber modes instead of white light, and turn off all unnecessary lights when not in use (LNT, Dark Sky & Artificial Lighting Guidelines, 2026).
As of 2026, more than 40 U.S. national parks are certified International Dark Sky Places. If your campground is within or adjacent to one of these parks, check the park’s specific rules before you go — some dark-sky zones require red-spectrum light only after dark.
- Practical dark-sky etiquette for campers:
- Dim your lights after 9–10 p.m. and turn off everything you’re not actively using.
- Choose warm-white LEDs (2700K or lower) over cool-white or bright-white options.
- Direct all lights downward — avoid any light that shines upward or outward into neighboring sites.
- If you’re near astrophotographers, ask before turning on any white light — even a brief flash can ruin a long-exposure photograph.
Frequently Asked Questions
Best Way to Light a Campsite?
The best way to light a campsite is to use a layered, zone-based approach rather than relying on a single light source. Divide your site into three zones — Ambient (atmosphere), Task (cooking and reading), and Pathway (safe navigation) — and use a different light type for each. Most campers find that a combination of warm-white string lights for ambiance, a 300–400 lumen LED lantern for the camp kitchen, and solar path lights for the ground-level routes covers all three zones effectively. This approach costs less than $50 in total according to outdoor gear averages and takes under 20 minutes to set up.
Creative Outdoor Lighting Ideas?
Creative outdoor campsite lighting ideas include solar flickering flame torches, color-changing LED strips, Edison bulb string lights, and DIY mason jar lanterns. For a site that’s both beautiful and functional, combine decorative string lights hung overhead with a bright task lantern at the kitchen and low solar path lights along the ground. The headlamp water jug hack — strapping a headlamp to a full water jug with the light facing inward — is one of the most popular creative ideas because it costs nothing and uses gear you already carry.
What are some unusual camping hacks?
Some of the most unusual and effective camping lighting hacks include the headlamp water jug lantern, DIY tin can lanterns, and Camping Light Buckets. The water jug hack involves strapping a headlamp around a full water jug with the lens facing inward — the water diffuses the beam into a soft, 360-degree glow that rivals dedicated lanterns costing $30–$50 compared to premium models. Camping Light Buckets use a frosted 5-gallon bucket and a $3 LED puck light to create a surprisingly powerful ambient light that also doubles as a seat. Both hacks are free or nearly free, using gear most campers already own.
What is the 3-3-3 rule for camping?
The 3-3-3 rule for camping is a planning guideline that recommends driving no more than 300 miles per day based on standard RV travel guidelines, arriving at camp by 3 p.m., and staying at least 3 nights at each site. It’s not specifically a lighting rule, but it’s highly relevant to lighting planning — arriving by 3 p.m. gives you several hours of daylight to set up your lighting system before dark. Campers who arrive after sunset consistently report more difficulty with campsite setup, including lighting, than those who arrive in the afternoon. Planning your drive around the 3-3-3 rule is one of the most practical ways to ensure a well-lit, well-organized campsite.
Most Forgotten Camping Item?
The most forgotten campsite lighting item is extra batteries or a charged backup power bank. Across camping forums and community surveys, dead batteries are the most commonly cited reason for a failed lighting setup. Solar lights are a reliable alternative that eliminates this problem entirely, but for battery-powered lanterns and headlamps, carrying one extra set of batteries per device is the simplest insurance policy. The second most forgotten item is a headlamp — many campers pack a flashlight but forget that hands-free lighting makes every after-dark task significantly easier.
What is the 5-7 mph Rule?
The “5–7 mph” rule is a campground driving etiquette guideline, not a lighting measurement. It recommends driving no faster than 5–7 mph when entering or navigating a campground at night, specifically because headlights at normal road speeds blind other campers and can be disorienting in a dark campground setting. The related etiquette is to switch your headlights off as soon as you’re parked and to avoid using vehicle headlights for campsite setup — a headlamp or campsite lantern is the considerate alternative. This rule is particularly relevant at crowded campgrounds and dark-sky areas where light pollution is a shared concern.
How many lumens do I need for a campsite?
For general campsite tasks, a lantern with 300 to 500 lumens is ideal. This provides enough brightness to illuminate a camp kitchen or picnic table safely. For personal headlamps, 100 to 200 lumens is usually sufficient for navigating pathways without blinding your fellow campers.
Are solar lights good for camping?
Yes, solar lights are excellent for multi-night camping trips because they recharge during the day and eliminate the need for extra batteries. However, they require direct sunlight to charge effectively, so they may underperform in heavily shaded or wooded campsites.
Build Your Layered Lighting System
For beginner campers, the most important insight about campsite lighting is this: you don’t need more gear, you need a better system. The Layered Campsite Lighting System — organizing your lights into Ambient, Task, and Pathway zones — transforms even a basic collection of affordable lights into a setup that’s safe, functional, and genuinely cozy. The U.S. Fire Administration’s 25-foot campfire safety rule and the NPS’s six outdoor lighting principles (NPS, 2026) give you the safety framework; these 15 creative ideas give you the tools to fill each zone.
Every idea in this guide — from cozy string lights on shepherd hooks to DIY Camping Light Buckets — maps back to the same framework. Start with your Task zone (the camp kitchen lantern), add your Pathway zone (solar path lights), then layer in the Ambient zone (string lights, decorative lanterns, flickering solar torches) until your site feels exactly the way you imagined it would.
Your next step is simple: before your next trip, pick one idea from each zone and add it to your packing list. Start with the headlamp water jug hack — it costs nothing, takes 30 seconds, and delivers the softest glow you’ve ever had in a tent. Once you experience a well-lit campsite, you’ll never go back to a single flashlight.
When exploring creative ways to light your campsite, remember that the best setups evolve over time. You don’t need to implement all 15 ideas on your next outing. Instead, focus on mastering the core zones first. A reliable headlamp for task work, a string of warm fairy lights for ambiance, and a few solar stakes for your pathway create a robust foundation. As you become more comfortable navigating your site after dark, you can experiment with color-changing LEDs, vintage Edison bulbs, or crafting your own tin can lanterns.
Furthermore, always prioritize the natural environment. The beauty of camping lies in the stars above and the quiet wilderness around you. By adhering to dark-sky etiquette and using warm, shielded lighting only when necessary, you protect the nocturnal ecosystem and ensure your neighbors can enjoy the night sky just as much as you do. Great campsite lighting isn’t about overpowering the darkness; it’s about complementing it. Build your layered system thoughtfully, respect the fire safety distances, and your campsite will become the welcoming, cozy retreat you’ve always wanted.

Dave King
I'm Dave King. I publish Tent Explorer, a site built to answer the questions people actually ask before they buy.