
This blog post may contain affiliate links. As an Amazon Associate I earn from qualifying purchases.
Imagine you’re out in the wild, surrounded by nature, and enjoying a peaceful camping trip. Suddenly, you notice a tear in your tent window, letting in cold air and bugs.
It’s a frustrating situation, right? But don’t worry, repairing a tent window is easier than you might think. In this guide, you’ll learn step-by-step how to fix that window and get back to enjoying your adventure. Whether you’re a seasoned camper or a beginner, these simple techniques will empower you to handle any tent mishap with confidence.
Keep reading to discover how you can save money, extend the life of your tent, and ensure your next camping trip is hassle-free.
Assessing Damage
Fixing a torn tent window starts with checking the extent of the tear. Clean the area around the damage for a clear view. Secure the edges with tape, ensuring no dirt is trapped underneath. Apply a patch over the tear, pressing firmly to seal it.
Repairing a tent window might seem daunting, but assessing the damage is the first step to restoring your outdoor haven. Understanding the problem helps you decide on the right solution, saving you time and frustration. Let’s break down how to accurately assess the damage to your tent window, ensuring you’re well-prepared for your next camping adventure.
Also Read: How to Repair Torn Tent: Quick and Easy Solutions
Types Of Window Damage
Different types of damage require different repair methods. You might encounter tears from sharp objects or holes from accidental burns. Recognizing the specific damage is crucial for choosing the right repair kit or technique. Consider the material of your tent window. Is it clear vinyl or a mesh? Each type has unique vulnerabilities. A clear vinyl window might crack under extreme cold, while mesh windows are more susceptible to snagging.
Checking For Tears And Holes
Run your fingers gently along the window surface. This tactile inspection helps detect small tears that are easy to overlook. Look closely for any tiny holes that might let in unwanted moisture or insects. Pay attention to the edges of the window. Damage often starts at the seams where the material is under the most stress. A small tear can easily expand with wind or rain, so it’s best to catch them early.
Inspecting Zippers And Mesh
Zippers are integral to your tent’s functionality. Check if they zip smoothly without snagging. A faulty zipper can compromise the entire tent’s integrity. Examine the mesh for any rips or holes. Mesh damage might not seem significant, but it can allow bugs to invade your space. Consider how this might affect your sleep and comfort. When was the last time you closely inspected your tent window? Regular checks can prevent minor damage from escalating into something more serious. This proactive approach not only extends the life of your tent but enhances your camping experience, ensuring that your outdoor escapes remain pleasant and stress-free.
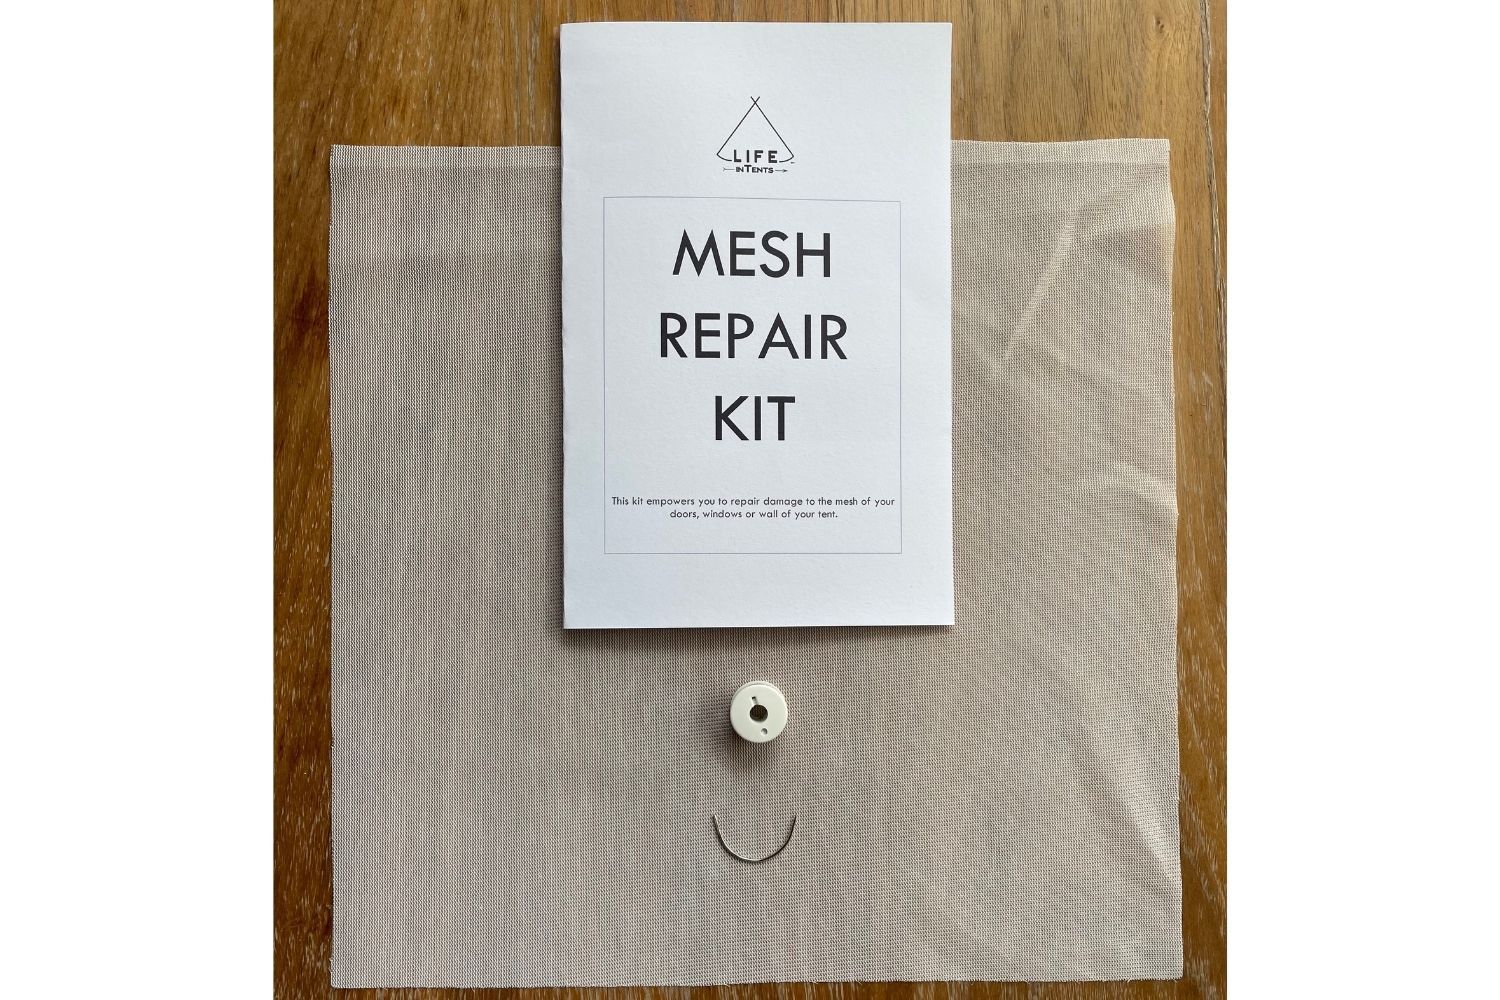
Credit: www.lifeintents.com
Gathering Materials
Gathering materials is key to repairing a tent window effectively. Start with clear tape for small tears. For larger damage, use a patch kit, scissors, and adhesive. Keep all tools within reach for a smooth repair process.
Gathering Materials is a crucial step in the process of repairing your tent window. Without the right tools and materials, your repair efforts could be futile, leading to a less-than-perfect fix and more hassle on your next outdoor adventure. Imagine being in the wilderness, the wind howling outside, and your tent window letting in the cold because you missed one small item in your repair kit. That’s why we’re going to make sure you’ve got everything you need before you get started. Let’s break it down into essential tools, recommended repair kits, and choosing the right adhesive.
Essential Tools
To kick off your tent window repair, you’ll need a few basic tools. These tools are not just handy but essential in ensuring a smooth repair process. Scissors are indispensable for cutting patches or trimming excess material. A small sewing kit can be invaluable, especially if you need to stitch a tear before applying adhesive. Don’t forget a clean cloth for wiping down surfaces; a clean surface ensures better adhesion.
Recommended Repair Kits
Selecting the right repair kit can save you time and effort. Many seasoned campers swear by kits that include patches, adhesive, and applicators. Look for kits that offer transparent patches for discreet repairs. Some kits even come with a variety of patch sizes, so you’re ready for small punctures or larger tears. Consider a kit with a weather-resistant adhesive; this ensures your repair holds up against rain and wind.
Choosing The Right Adhesive
The adhesive you choose can make or break your repair. It’s not just about sticking things together; it’s about durability and reliability. Silicone-based adhesives are popular because they remain flexible and waterproof once dry. If you’re dealing with vinyl windows, a vinyl-specific adhesive is ideal. Always check the adhesive’s drying time and temperature range to ensure it fits your camping conditions. Have you ever found yourself in the middle of a repair wondering why things aren’t sticking? Choosing the right adhesive could be the answer to that mystery. With these insights, you’re ready to gather materials confidently and tackle that tent window repair like a pro.
Patch Small Tears
Repairing tent window tears can be straightforward. Gather a repair kit with adhesive patches. Clean the tear area thoroughly before applying the patch. Ensure the patch covers the tear completely for a secure fix.
Camping under the stars can be a magical experience, but a small tear in your tent window can quickly dampen the mood. You don’t want that pesky tear to let in bugs or rain during your trip. Luckily, patching small tears in your tent window is a straightforward task that can be handled with some simple tools and a bit of patience. Understanding how to effectively patch these tears can save your camping trip and extend the life of your tent.
Cleaning The Area
Before you begin patching, make sure the area around the tear is clean and dry. Dirt and debris can prevent the patch from sticking properly, leading to further damage. Use a mild soap and water to gently clean the area, and then allow it to dry completely. A quick wipe with an alcohol pad can also help ensure the surface is ready for patching. This step is crucial because it ensures the adhesive will bond effectively. Have you ever tried sticking tape to a dusty surface? It just doesn’t work!
Applying Patches
Once the area is clean, it’s time to apply the patch. Fabric patches or repair kits specifically designed for tents work best. Cut the patch so it’s slightly larger than the tear, giving it an extra half-inch on each side. This extra space helps the patch adhere better and provides more coverage. Apply the patch firmly over the tear, pressing down on the edges to secure it. Use your fingers to smooth out any bubbles or wrinkles. A perfectly smooth patch means a stronger hold and a better seal. Have you ever thought about how a simple patch can save you from an unexpected storm?
Securing With Tape
To ensure the patch stays put, secure it with tape. Clear repair tape or duct tape can work wonders here. Apply the tape over the edges of the patch, creating a double layer of protection. Make sure the tape extends beyond the edges of the patch for extra security. This step reinforces the patch, preventing it from peeling off. Isn’t it amazing how a little bit of tape can provide peace of mind on a windy night in the wilderness? By following these simple steps, you’re not just fixing a tent; you’re also ensuring that nothing stands between you and your next adventure. So, why let a small tear hold you back? Get patching, and get back to nature!
Fixing Large Holes
Repairing a tent window with large holes involves patching techniques. Start by cleaning the area around the hole. Apply a repair patch or tape designed for tent fabric. Ensure the patch is securely attached to prevent further damage.
Fixing large holes in a tent window can seem daunting, but with the right approach, it’s quite manageable. Picture this: you’re camping under a starry sky, and suddenly a gust of wind makes the tent flap wildly, leaving a gaping hole in the window. Panic might set in, but fear not. With a few simple steps, you can restore your tent to its former glory.
Cutting Repair Fabric
Begin by assessing the size of the hole. Measure it accurately, and add an extra inch to each side. This ensures the patch will cover the hole completely and adhere well. Choose a durable repair fabric that closely matches your tent material. Cut the fabric into a rectangular or oval shape to avoid sharp corners. Sharp corners can catch on things and make the patch less secure.
Sewing Techniques
Once you have your fabric, it’s time to sew. Use a strong, weather-resistant thread to ensure longevity. A backstitch works wonders for securing the patch firmly in place. If you’re not familiar with sewing, practice on a scrap piece first. It’s a skill worth learning and can come in handy in many situations. Who knew repairing a tent could be your first step towards mastering a new hobby?
Reinforcing With Sealant
After sewing, reinforce the patch with a sealant. Choose one that’s compatible with your tent fabric. This adds an extra layer of protection against the elements. Apply the sealant along the edges of the patch. This not only secures it further but also makes it waterproof. Have you considered how much a rainy night could test your repair skills? Repairing a tent window might seem like a hassle, but it can be a surprisingly satisfying project. With a little patience and the right materials, your tent will be adventure-ready in no time. What other unexpected skills have you learned while camping?
Repairing Zippers
Fixing a tent window zipper is simple and saves your camping gear. First, clean any dirt or debris. Then, gently realign the zipper teeth using pliers if needed. Finally, test the zipper to ensure smooth operation.
Repairing a tent window zipper might seem daunting, but it’s a skill worth mastering. Imagine you’re camping in the wild, surrounded by nature, and suddenly, your tent zipper gives up. Panic sets in, right? But, with a few handy tips, you can fix this common problem without missing a beat. Let’s dive into how you can tackle zipper issues efficiently.
Replacing Zipper Pulls
Zipper pulls often break or go missing. It’s frustrating but can be easily fixed. Carry a few spare zipper pulls in your camping kit. These small tools are life-savers. Simply attach a new pull onto the slider. If you don’t have one, a paperclip or key ring can work in a pinch. Ever improvised with a paperclip? It’s oddly satisfying when it works perfectly.
Realigning Zipper Tracks
A misaligned zipper track can halt your camping plans. But don’t worry, it’s fixable. Gently realign the tracks by moving the slider back and forth. Make sure the teeth are in place. If the slider is bent, a pair of pliers can help reshape it. It’s like untangling a necklace, patience is key. Ever tried fixing a bent slider with pliers? It’s surprisingly effective and rewarding.
Lubricating Zipper Teeth
Stuck zippers are a common nuisance. Dust and dirt build up over time, causing this issue. Use a zipper lubricant to smooth the teeth. A dab of candle wax or petroleum jelly can also do the trick. Apply it sparingly and test the zipper. Does the thought of using candle wax surprise you? Simple household items often solve unexpected problems. In the wild, your tent is your sanctuary. Ensuring its functionality by maintaining the zippers can save you from potential hassles. What’s your go-to trick for a stubborn zipper? Share your experiences in the comments below, and let’s learn from each other’s camping adventures!
Restoring Mesh
Repairing a tent window can be a satisfying DIY project. The mesh often suffers from wear and tear. It’s crucial to restore the mesh to keep insects out and maintain ventilation. Properly repairing mesh ensures your tent remains functional and comfortable.
Patching Mesh Tears
Start by assessing the damage on the mesh. Clean the area around the tear with a damp cloth. Use adhesive mesh patches for small holes. These patches are easy to apply and durable. For larger tears, sew the edges together before applying a patch. Ensure the patch covers the tear completely for a seamless repair.
Securing With Seam Grip
Seam Grip is excellent for reinforcing mesh repairs. Apply Seam Grip along the edges of the patch. This ensures a strong bond with the mesh. Let it dry for several hours before handling. Seam Grip also adds waterproofing, enhancing the durability of the repair.
Preventing Future Damage
Proper storage helps prevent mesh damage. Store the tent in a dry, cool place. Avoid contact with sharp objects to protect the mesh. Regularly inspect the tent for signs of wear. Early repairs prevent bigger issues later. Consider using a tent footprint to protect the mesh from ground debris.
Final Checks
Completing tent window repairs involves crucial final checks. Ensure your tent is ready for future adventures. These checks can prevent unexpected issues during camping trips. Proper testing and storage keep your tent in top condition.
Testing Repairs
Inspect the repaired areas carefully. Look for any missed damages. Test the window by opening and closing it. Ensure smooth operation without hitches. Check for any loose stitching. Ensure the repair is strong and secure.
Ensuring Waterproofing
Waterproofing is vital for tent longevity. Test the window seal by spraying water. Observe if any leaks appear. Use waterproof spray if needed. Ensure all seams are properly sealed. This prevents water damage during rain.
Storing Properly
Proper storage extends tent life. Clean the tent before storing. Remove dirt and debris. Let it dry completely to prevent mold. Fold neatly without creasing the window. Store in a cool, dry place. Protect from direct sunlight and pests.
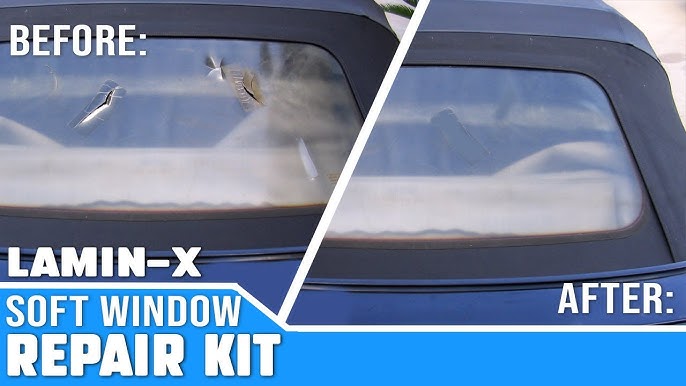
Credit: www.youtube.com

Credit: craftandroam.wordpress.com
Frequently Asked Questions
How Do I Fix A Torn Tent Window?
To fix a torn tent window, start by cleaning the area around the tear. Use a repair tape or patch kit designed for tents. Apply the patch carefully, ensuring no air bubbles. Press firmly and let it set. This process restores the window’s functionality and durability.
Can I Use Duct Tape For Tent Repairs?
While duct tape can be a temporary fix, it’s not ideal for long-term tent repairs. It may not withstand weather conditions and can leave residue. It’s better to use specialized repair tape or patch kits designed for tents. These solutions offer durability and better adhesion for tent materials.
What Tools Are Needed For Tent Window Repair?
You’ll need a repair kit, which includes adhesive tape or patches. A pair of scissors can help in cutting patches to size. Cleaning materials like soap and water are essential for preparing the surface. These tools ensure an effective and lasting repair for your tent window.
How Long Does Tent Window Repair Take?
Tent window repair is typically quick and can be completed in about 30 minutes. Cleaning the area and applying a patch are straightforward steps. Allow some time for the adhesive to set, usually a few hours. This ensures the repair is secure and weather-resistant.
Conclusion
Repairing a tent window is easier than you think. Follow the steps carefully. Gather the right materials first. Clean the damaged area well. Apply the patch with steady hands. Let it dry fully before use. Check your work for any loose edges.
Your tent is ready for the next adventure. A well-repaired window keeps out the elements. Enjoy your camping trips with peace of mind. Remember to inspect your tent regularly. Early repairs save time and trouble later. Stay safe and happy camping!
