15 Outdoor Cooking Tips for Campers: Beginner’s Guide 2026
 David King
Updated June 30, 2026
19 min read
David King
Updated June 30, 2026
19 min read
Your first camp cooking experience probably looked something like this: burnt hot dogs on the outside, cold in the middle, a forgotten spatula somewhere in the car, and a pile of dishes waiting for you at 10 PM. For most beginners, that first night around the camp stove is a humbling one — and it doesn’t have to be.
Without a plan, camp cooking drains the energy and joy right out of a trip. Wasted food, a stressed-out family, and a first night that starts on the wrong foot can color the whole experience. But here’s the thing — none of that is your fault. Nobody teaches you how to cook outdoors.
In this guide, you’ll discover 15 outdoor cooking tips for campers that cover everything from at-home prep to food safety — so you can focus on enjoying the outdoors instead of fighting your camp stove. We’ll walk through four areas: preparing at home, choosing the right gear, mastering key cooking methods, and keeping your food safe.
- What You’ll Need Before You Start:
- (Estimated Time: 30-45 minutes of at-home prep)
- A cooler with ice or frozen gel packs
- A camp stove or access to a campfire ring
- Heavy-duty aluminum foil
- A meat thermometer
- Zip-lock bags and airtight containers for prepped ingredients
- Basic utensils: tongs, spatula, and a sharp knife
Mastering outdoor cooking tips for campers comes down to three pillars — Smart Prep, Right Gear, and Safe Execution — what we call The Camp Kitchen Trifecta.
- Prep at home first: Pre-chop, marinate, and freeze ingredients before you leave — this alone saves 30+ minutes at the campsite
- Gear essentials: A camp stove and a cast iron skillet cover 90% of camp cooking needs
- Cook over coals, not flames: Even heat prevents burnt outsides and raw middles
- Food safety is non-negotiable: Keep cold food below 40°F (USDA guideline) and always use a meat thermometer
- The Camp Kitchen Trifecta turns camp cooking from stressful guesswork into a repeatable system
10 Camp Meal Hacks for Smarter Prep
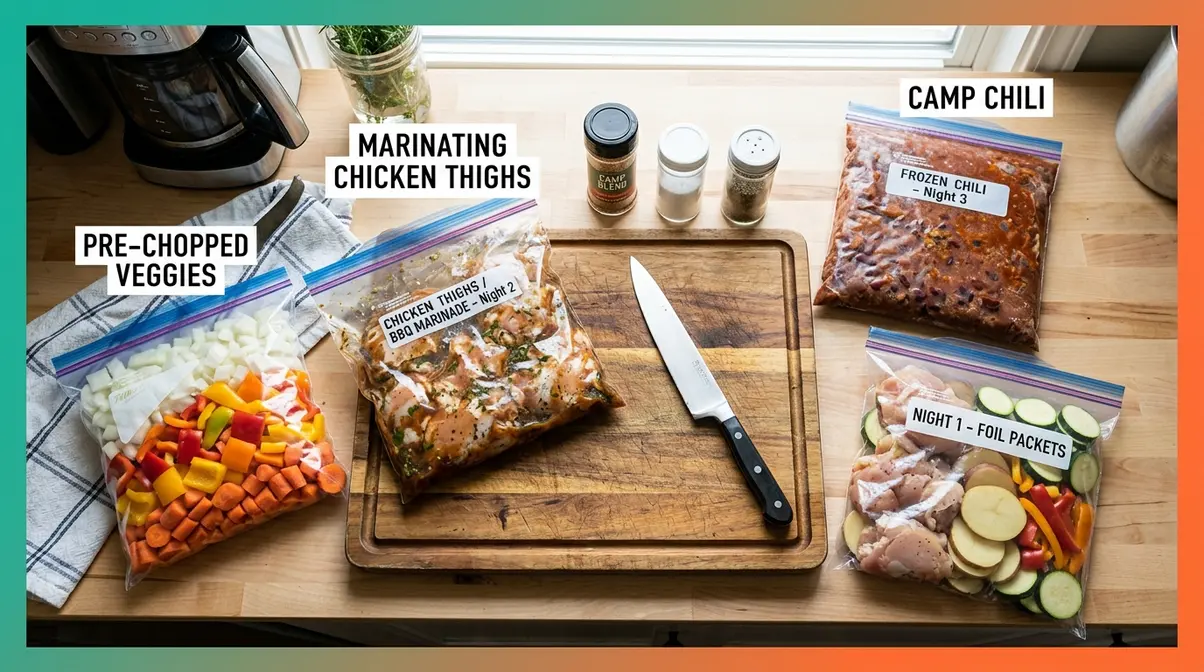
The single biggest time-saver in outdoor cooking for campers happens before you ever leave home. Prepping ingredients in advance — chopping vegetables, marinating proteins, and freezing full meals — eliminates most of the campsite work, turning what could be a stressful cooking session into a simple reheat-and-assemble process. For a deeper dive into making your ingredients last, check out our comprehensive camping meal prep guide.
“I usually prep my food before I leave.” — a strategy shared consistently across camping communities, and the foundation of The Camp Kitchen Trifecta’s first pillar: Smart Prep.
Think of your kitchen at home as your real camp kitchen. The campsite is just where you finish the job. Penn State Extension advises freezing meat and poultry before packing your cooler — frozen proteins stay cold longer and help keep surrounding foods cold as they thaw.
Why At-Home Prep Is Crucial
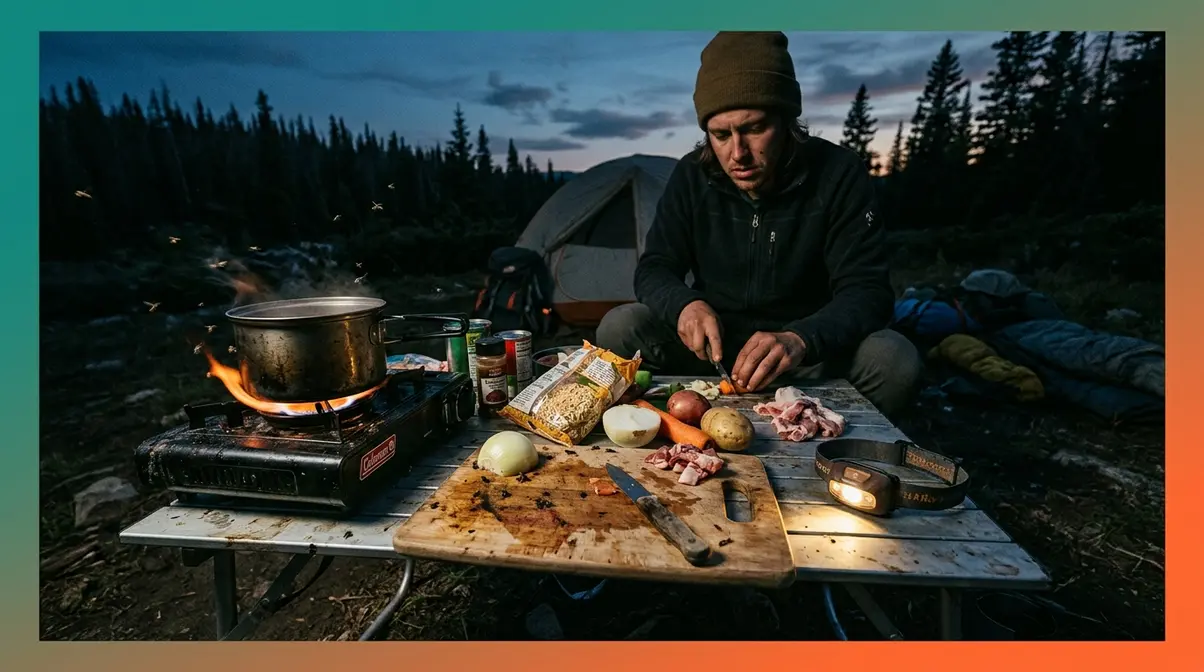
Make-ahead camping meals work because campsite conditions fight you at every step. There’s limited counter space, no running water nearby, insects circling your cutting board, unpredictable wind, and poor lighting after dark. Doing your prep at home eliminates all of those variables before they become problems.
Most camp cooking “fails” happen for a simple reason: people arrive hungry and rushed. When you’re tired from the drive and the kids are asking what’s for dinner, the last thing you want to do is dice an onion. Removing that time pressure with advance prep is what separates a smooth first trip from a chaotic one. Here are 10 specific things you can do at home before your next trip.
10 At-Home Prep Hacks
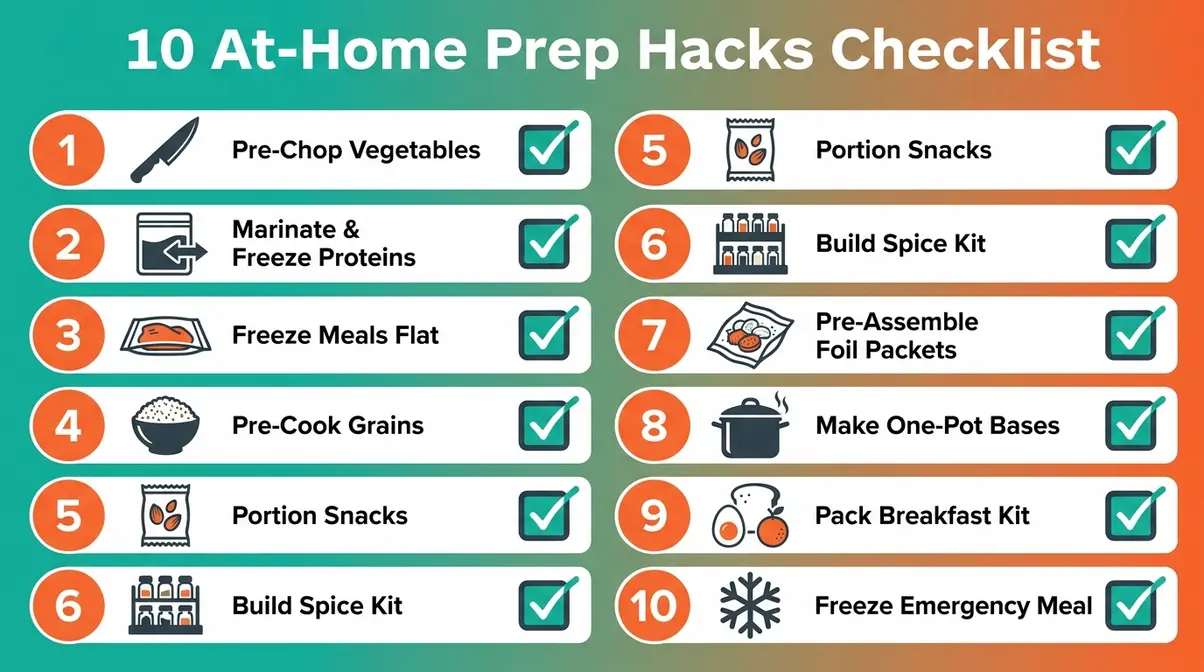
- Pre-chop all vegetables. Dice onions, peppers, and carrots at home and store them in labeled zip-lock bags. Why it works: No cutting board or knife needed at the campsite. How: Fill one bag per meal, label it with the meal name and the day you plan to cook it.
- Marinate proteins overnight. Chicken thighs and steak absorb flavor best with 12–24 hours in a marinade. Why it works: You get restaurant-quality flavor with zero campsite effort. How: Seal the protein in a zip-lock bag with your marinade, then pack it frozen — it doubles as a cooler ice pack.
- Freeze meals flat. Chili, soups, and stews freeze flat in zip-lock bags, stack easily in a cooler, and reheat in about 10 minutes over a camp stove. Why it works: Frozen proteins stay cold longer and help keep surrounding items cold as they thaw — a technique backed by Penn State Extension’s camping food safety guidelines.
- Pre-cook grains and pasta. Cook rice, quinoa, or pasta at home and store it in airtight containers. Why it works: Boiling water at altitude or over an uneven flame takes time. At camp, you just warm the grain and combine it with your protein and sauce.
- Portion snacks into individual bags. Pre-portion trail mix, nuts, and crackers before you leave. Why it works: Eliminates rummaging through a shared bag for food between meals or mid-hike, which also reduces spills and attracts fewer insects.
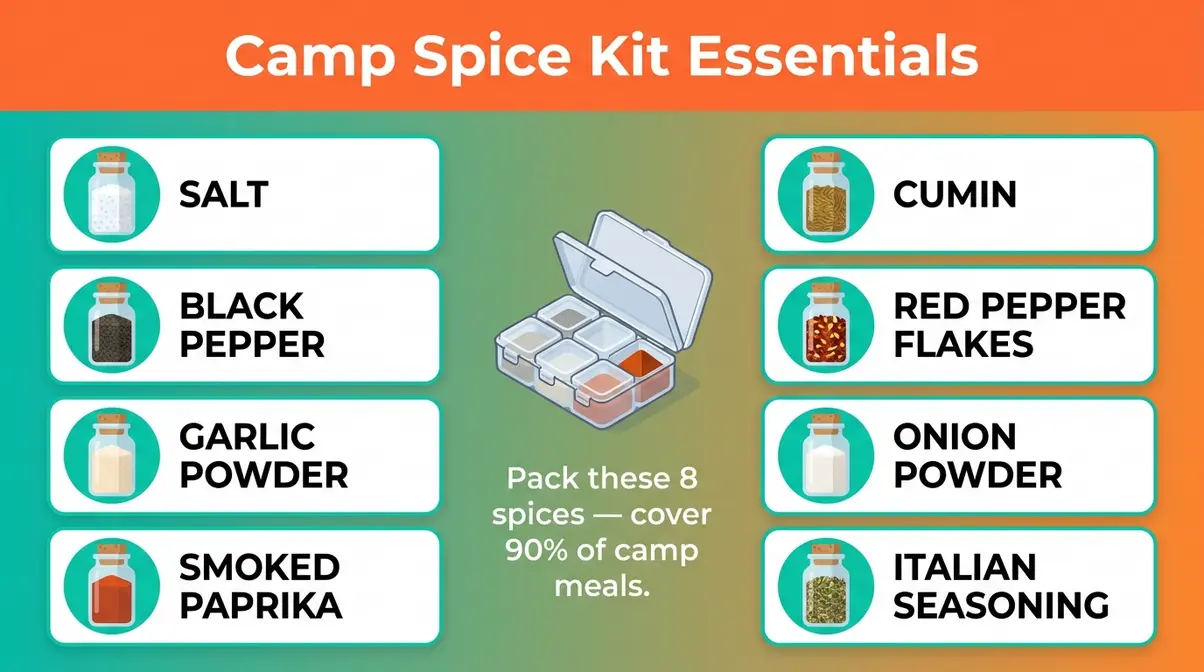
- Build a spice kit in advance. Fill a small pill organizer or a set of mini containers with your go-to spices: salt, pepper, garlic powder, paprika, and cumin. Why it works: Saves packing space and prevents you from hauling full-size bottles across three days of camping.
- Pre-assemble foil packet ingredients. Combine raw protein, chopped vegetables, and seasoning in a zip-lock bag at home. Why it works: At camp, you simply pour the contents onto foil and fold it up — the hard work is already done. How: Label each bag with the cooking time so nobody has to guess.
- Make one-pot dinner bases at home. Brown ground beef or sausage in your kitchen, then freeze it. At camp, add pasta, beans, or rice for a fast one-pot dinner in under 15 minutes. Why it works: One-pot dinners are the go-to camping meal for beginners because they require minimal gear and produce minimal cleanup.
- Pack a breakfast kit. Crack eggs into a sealed, leak-proof container, pre-mix pancake batter, and pre-slice bacon into a zip-lock bag. Why it works: Mornings are often the most chaotic part of a camping trip. Having breakfast ready to go means coffee first, cooking second.
- Freeze a full “emergency meal.” Pack one complete frozen meal (a bag of chili, a stew, or a pasta sauce) that requires nothing but reheating. Why it works: On rainy days, late arrivals, or nights when everything goes sideways, this is your safety net — and it costs you five minutes of planning at home.
What Meals Freeze Well for Camping?
Soups, chili, stews, and pre-cooked ground meat freeze exceptionally well for camping and reheat in under 10 minutes on a camp stove. Freeze them flat in zip-lock bags so they stack easily in your cooler and double as ice packs while still frozen. Marinated chicken thighs and seasoned ground beef also freeze well and are easy to cook through once thawed. Avoid freezing meals with high dairy content (cream-based sauces separate when thawed) or raw potatoes (they become mushy).
Spice Kits and Snack Planning
A thoughtful spice kit transforms simple ingredients into satisfying meals. Beyond the basics (salt, pepper, garlic powder), consider smoked paprika for eggs and potatoes, cumin for bean-based dishes, and a pinch of red pepper flakes for pasta. Pack everything in a small zippered pouch so it travels as one unit.
For breakfast, think in terms of “kits” rather than individual ingredients. A pancake kit (pre-mixed dry ingredients + a small bottle of oil), an egg kit (cracked eggs in a container + pre-diced peppers and onions), and a coffee kit (ground coffee, filters, a small pour-over cone) all pack flat and require almost no campsite prep. Snacks should follow the same logic — pre-portioned, sealed, and labeled.
Essential Camp Kitchen Gear Setup
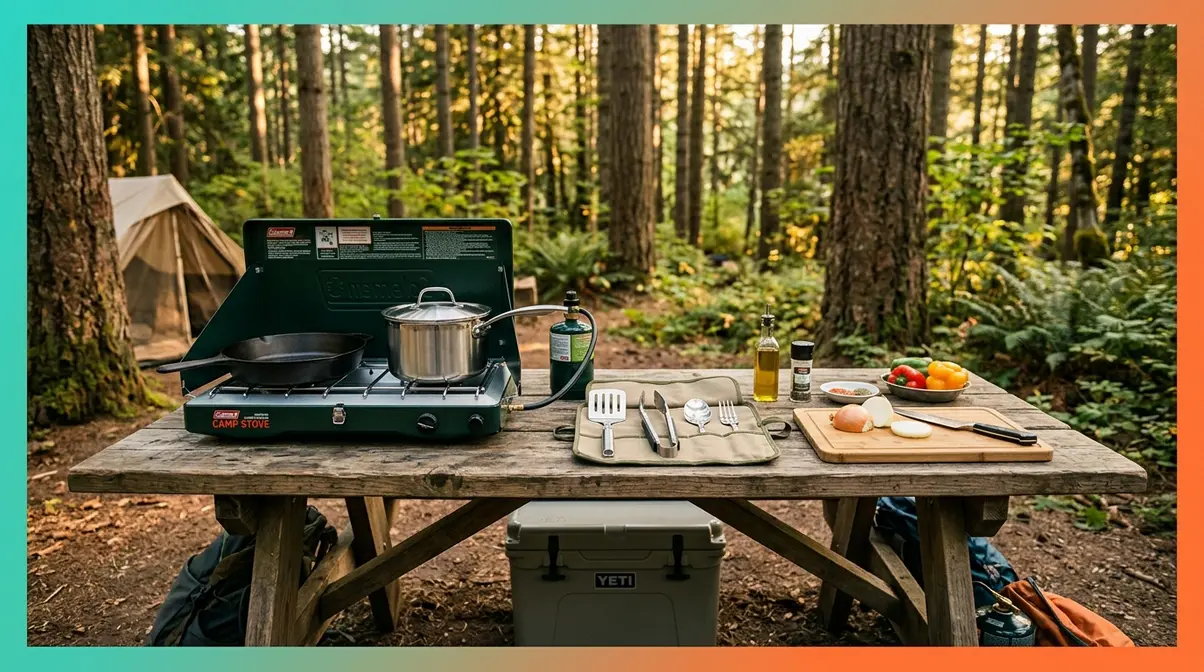
When looking for outdoor cooking tips for campers, having the right gear makes camp cooking feel effortless. Wrong gear — or too much gear — makes it feel like moving a kitchen into the woods. Our team evaluated dozens of beginner camp kitchen setups and found that most first-timers either over-pack (bringing a full knife block and a wok) or under-pack (forgetting a pot lid). Before you pack, review an essential tent camping gear checklist to ensure you have the basics. The second pillar of The Camp Kitchen Trifecta is choosing the Right Gear: essential, not excessive.
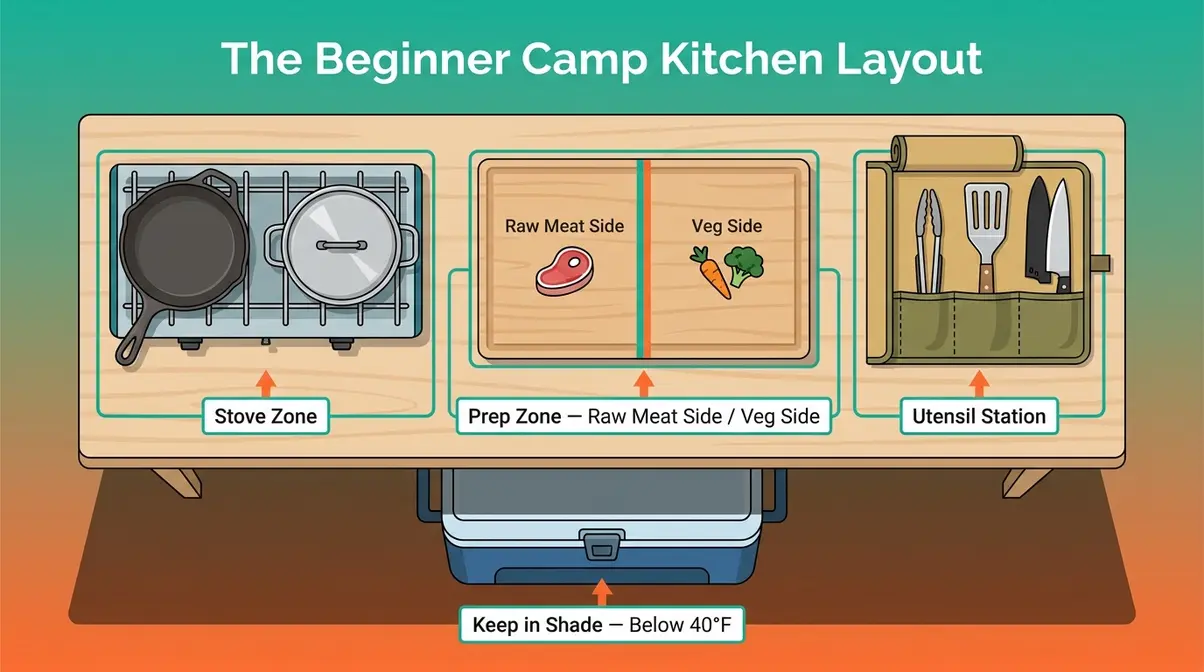
Stove, Cookware, and Utensils
For car camping — camping where you drive directly to your campsite and park nearby — you have the luxury of bringing slightly heavier gear than a backpacker would. That said, three pieces of equipment cover the vast majority of what you’ll cook outdoors.
1. A two-burner camp stove. This is your most important piece of equipment. A two-burner propane stove gives you consistent, adjustable heat — something an open campfire cannot reliably provide. Should you bring a folding grill or a camp stove? For beginners, the National Park Service recommends using a camp stove when possible, especially in areas where campfire bans may be in effect.
2. A cast iron skillet (a heavy, heat-retaining pan that works great over uneven campfire heat). Cast iron heats evenly, handles high temperatures without warping, and lasts decades with basic care. It’s the single most versatile piece of cookware you can bring. One 10-inch skillet handles eggs, pancakes, sautéed vegetables, and seared proteins.
3. A lightweight pot with a lid. A 2-quart pot covers boiling water for coffee and pasta, reheating soups, and cooking one-pot dinners. The lid is critical — it traps heat and dramatically reduces cooking time on a low-BTU camp stove.
For utensils, pack tongs, a silicone spatula, a wooden spoon, a sharp knife in a protective sleeve, and a small cutting board. That’s genuinely all you need.
How to Set Up Your Camp Kitchen
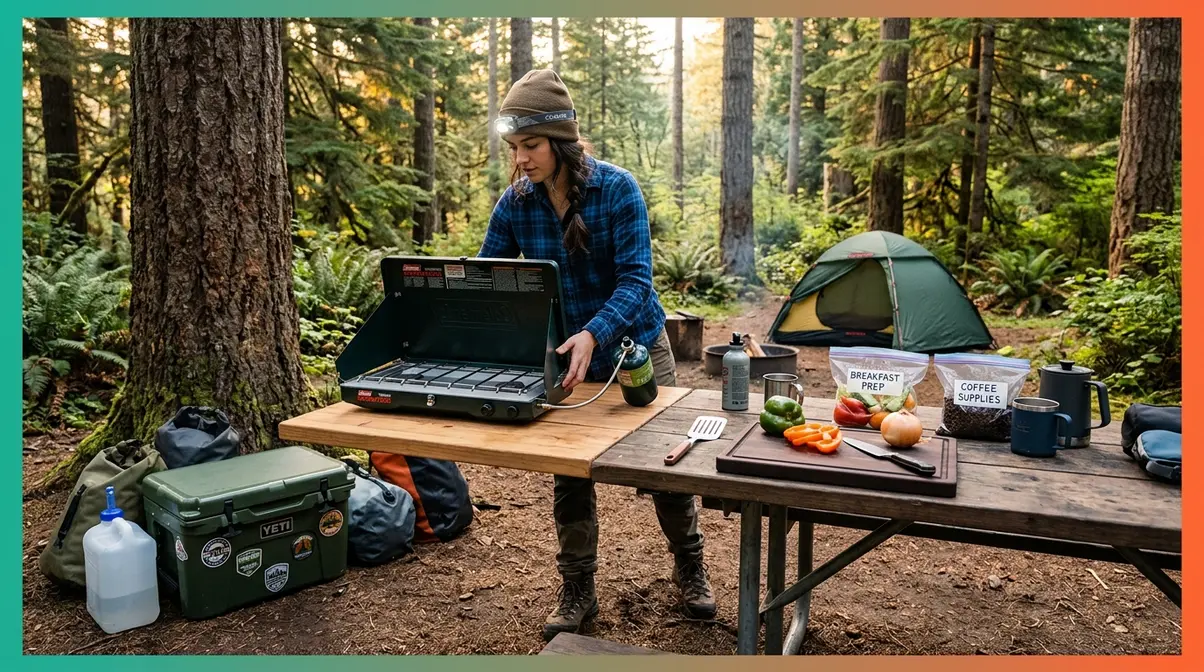
A well-organized camp kitchen is safer and faster to cook in. Follow these steps when you arrive at your site:
- Choose a flat, stable surface — your camp table or a large, flat rock — at least 10 feet from your tent to keep food smells away from your sleeping area.
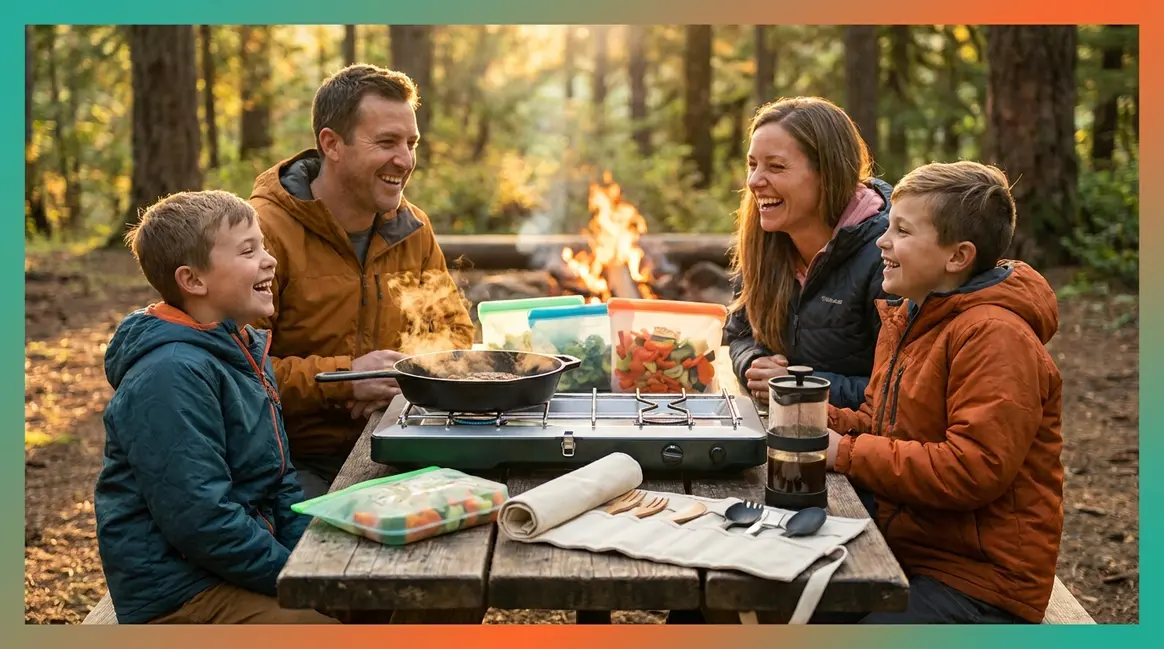
- Set your stove on one end of the table and leave the other half as a prep zone.
- Place your utensil roll or bag within arm’s reach of the stove — never on the ground where it can collect dirt.
- Designate a “raw meat zone” on one side of your cutting board. Use one side for raw proteins only, flip it for vegetables. This is the single easiest way to prevent cross-contamination outdoors.
- Keep your cooler in the shade and away from direct sun. Open it as infrequently as possible to maintain the internal temperature below 40°F.
- Set up a wash station — a collapsible basin with biodegradable soap and a small jug of water — for handwashing before and after handling food.
Nice-to-Have Kitchen Extras
Once you’ve mastered the basics, a few must-have camping accessories make camp cooking genuinely enjoyable. A portable Blackstone 22″ griddle (a flat-top propane griddle designed for outdoor use) is a popular upgrade for families and group campers — it cooks pancakes, stir-fry, smash burgers, and eggs all at once on a large, flat surface. It’s heavier than a camp stove and requires a bit more cleanup, but the cooking versatility is hard to match.
Other useful additions: a French press for coffee, a collapsible colander for draining pasta, and a lightweight Dutch oven (a deep, lidded cast iron pot) for baking cornbread or cooking hearty stews over coals.
Master These Camp Cooking Methods
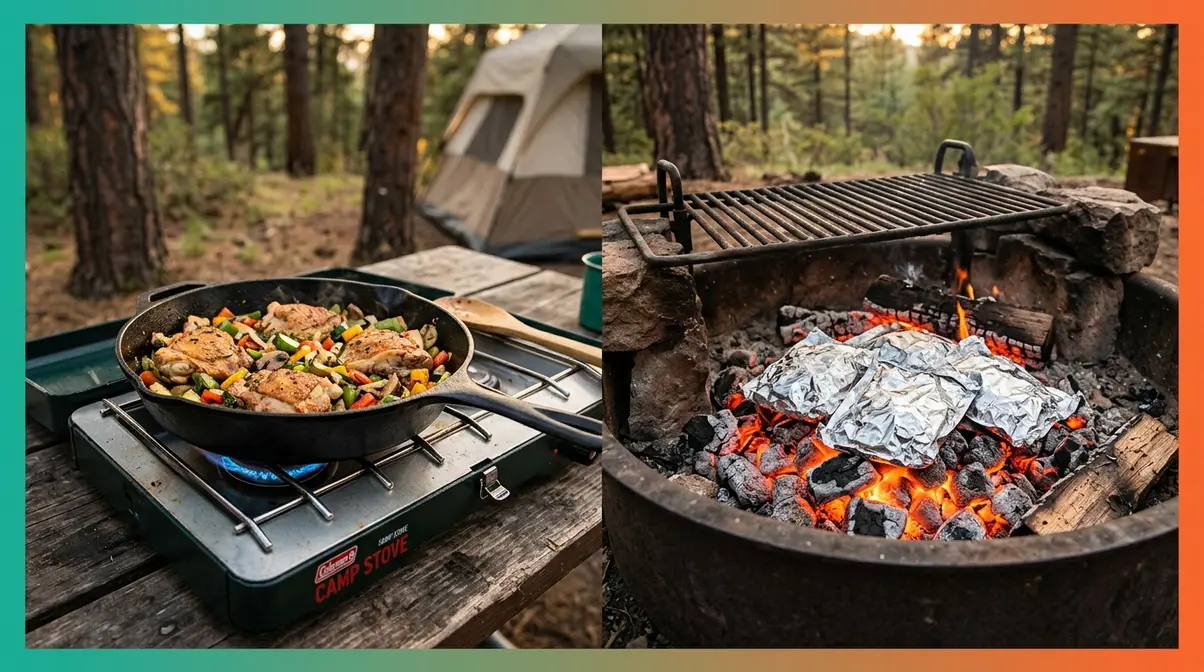
Knowing what to cook is only half the equation. Knowing how to cook it over an open fire or a camp stove is what separates a good camp meal from a great one. Across camping communities, the consistent feedback from beginners is the same: the cooking method matters as much as the recipe. The third pillar of The Camp Kitchen Trifecta — Safe Execution — starts with technique.
How to Make Foil Packet Meals
Foil packet meals are a campfire cooking technique where ingredients are wrapped in heavy-duty aluminum foil and cooked directly on coals or a grill grate. They’re the most forgiving method for beginners because the foil traps steam and heat, cooking ingredients from all sides simultaneously. According to University of Nebraska–Lincoln Extension, foil packet cooking is one of the safest and most reliable outdoor cooking methods for even heat distribution.
Follow these steps for a foolproof foil packet:
- Tear two sheets of heavy-duty foil, each about 18 inches long. Using two layers prevents punctures and steam leaks.
- Layer your ingredients in the center — start with a protein (chicken thighs, shrimp, or ground beef patties work well), then add pre-chopped vegetables from your prep bags, then season.
- Add a small pat of butter or a drizzle of olive oil to create steam inside the packet. This prevents sticking and adds flavor.
- Fold the foil tightly: bring the two long edges together and fold them down in 1-inch increments. Fold the short ends under to seal completely. No steam should escape.
- Place on a bed of hot coals (not open flames — more on this below) or on a grill grate over medium heat.
- Cook for 15–20 minutes, flipping once at the halfway point. Cooking time varies by protein: chicken thighs take about 20 minutes, shrimp takes 8–10 minutes, vegetables alone take 12–15 minutes.
- Open carefully — fold back one corner away from your face to release the steam before fully opening.
Avoiding Burnt Food on a Campfire
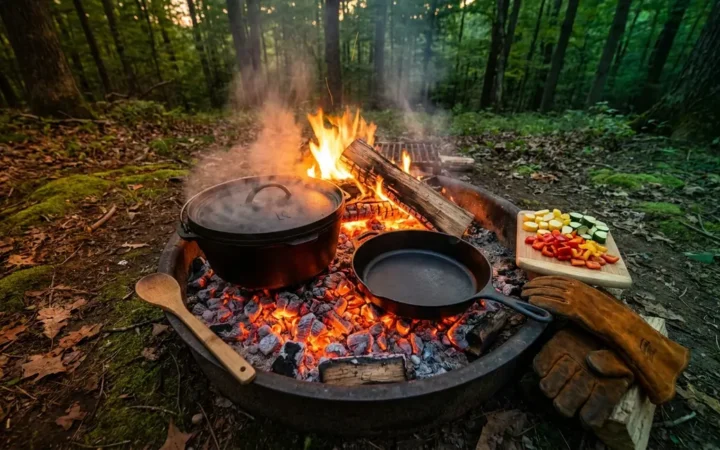
Cook over coals, not open flames. Open flames are unpredictable and far too hot for most foods. Wait for your fire to burn down to a bed of glowing orange embers — about 45–60 minutes after lighting — before placing any food over it.
Use a folding grill grate to keep your pan or foil packets at a consistent height above the heat. For cast iron cooking, shuffle some coals to distribute heat evenly beneath the pan, and test the temperature with your palm (4–5 seconds at 6 inches = medium heat).
Stove Techniques and Cleanup
A two-burner camp stove gives you something a campfire can’t: precise, adjustable heat. Use the high-BTU burner for boiling water (pasta, coffee, rehydrating freeze-dried meals) and the low-BTU burner for simmering sauces or warming pre-cooked meals gently. For one-pot dinners, bring everything to a boil on high, then reduce to low and cover — the trapped steam does most of the cooking. You can find excellent one-pot campfire recipes online to simplify your evenings.
Post-meal cleanup is easier than most beginners expect. Scrape food scraps into a sealed bag (never leave food waste near your site — it attracts wildlife). Wash dishes with biodegradable soap at least 200 feet from any water source, in line with Leave No Trace principles. A collapsible basin with warm water handles most cleanup in under 10 minutes. Cast iron should never be soaked — wipe it clean with a paper towel while still warm, and apply a thin coat of oil to prevent rust.
Camp Food Safety and Storage Rules
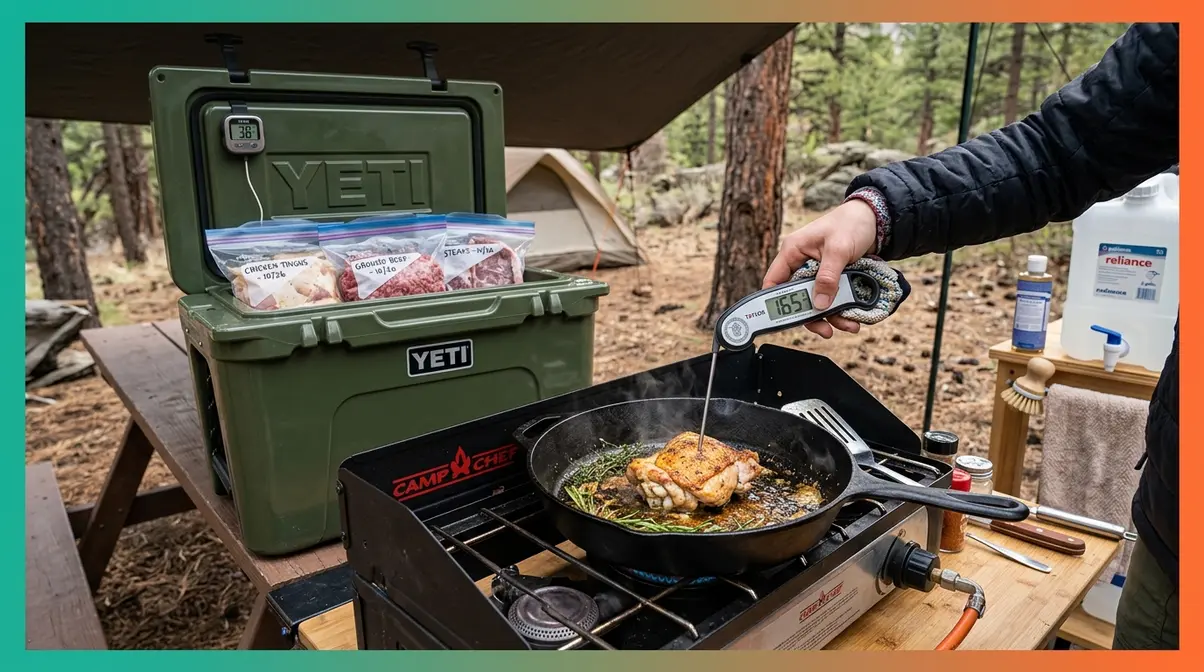
Food Safety Note: Always follow USDA guidelines for safe food handling outdoors. When in doubt, throw it out.
Food safety is not optional when you’re cooking in the field. There’s no refrigerator to catch a mistake, no urgent care clinic around the corner, and no way to quickly replace spoiled food at a remote campsite. Safe Execution — the third pillar of The Camp Kitchen Trifecta — means treating outdoor food handling with the same seriousness you would in your home kitchen. According to the USDA’s FoodSafety.gov, foodborne illness risks increase significantly in outdoor settings where temperature control is harder to maintain. For broader outdoor security, review general tent camping safety tips.
Cooler Management: The 40°F Rule
Keep cold food below 40°F at all times. The USDA defines the “danger zone” as temperatures between 40°F and 140°F — the range where bacteria multiply rapidly (USDA FoodSafety.gov, 2026). At a campsite, this means managing your cooler actively, not passively.
Follow these cooler rules:
- Pre-chill your cooler for at least 2 hours before packing by filling it with ice and closing the lid.
- Pack in layers: ice on the bottom, frozen meals and raw proteins in the middle, drinks and snacks on top.
- Keep raw meats in sealed, leak-proof containers or double-bagged zip-locks at the bottom of the cooler so juices cannot drip onto other foods.
- Open the cooler as infrequently as possible. Every time you open it, warm air enters and ice melts faster.
- Use a cooler thermometer (an inexpensive probe thermometer works) to verify the internal temperature stays below 40°F.
- Replenish ice daily on multi-day trips. Block ice lasts longer than cubed ice — use block ice as the base layer.
Preventing Cross-Contamination
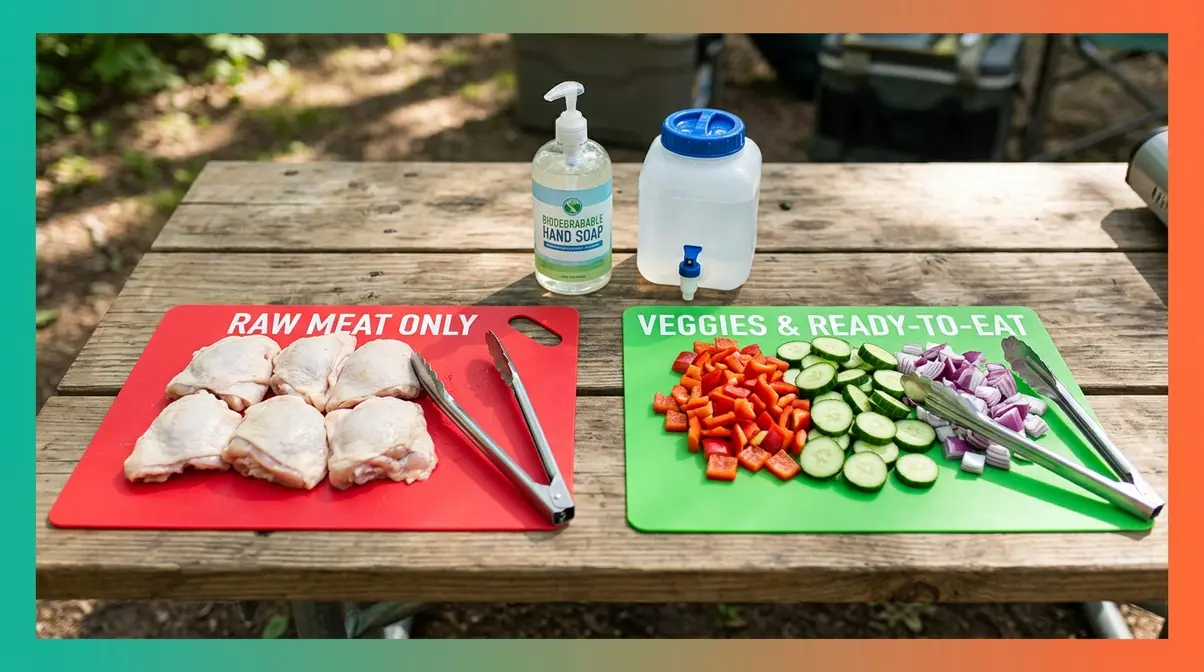
Cross-contamination — when bacteria from raw meat transfer to ready-to-eat foods through shared surfaces, utensils, or hands — is one of the leading causes of foodborne illness during outdoor cooking. The CDC recommends keeping raw meats completely separate from other foods during both storage and preparation (CDC, 2026).
At the campsite, apply these rules consistently:
- Use separate cutting boards for raw proteins and everything else. Color-coded boards (red for meat, green for vegetables) are a simple system that prevents mix-ups.
- Wash hands with soap and water before and after handling raw meat. If running water isn’t available, use hand sanitizer as a backup — but soap and water is always preferred.
- Never reuse marinades that raw meat has soaked in as a sauce or basting liquid unless you bring them to a full boil first.
- Pack raw proteins in double-sealed bags at the bottom of your cooler, below all ready-to-eat foods.
Safe Campsite Cooking Temps
The only reliable way to know if your food is fully cooked outdoors is a meat thermometer. Color and texture are unreliable guides — especially for chicken, which can appear white on the outside while remaining dangerously undercooked inside.
The USDA’s safe minimum internal temperatures are (FoodSafety.gov, 2026):
| Food | Safe Internal Temperature |
|---|---|
| Poultry (chicken, turkey) | 165°F |
| Ground beef, pork, lamb | 160°F |
| Whole cuts of beef, pork, lamb | 145°F (+ 3-min rest) |
| Fish and shellfish | 145°F |
| Eggs | Cook until yolk and white are firm |
When in doubt, use a meat thermometer — no guesswork when cooking for your family outdoors. Insert the probe into the thickest part of the meat, away from bone, and wait for a stable reading.
Leave No Trace: Fire Safety
Responsible campfire management is part of safe camp cooking. According to LNT.org, fires should only be built in designated fire rings or fire pans, using only dead and downed wood collected from the ground — never cut from standing trees (Leave No Trace Center for Outdoor Ethics, 2026).
For food waste and wildlife safety, the NPS recommends storing all food, trash, and scented items in bear-resistant containers or hung from a bear bag when in bear country. Never leave food scraps near your tent or cooking area overnight. Burn off food residue from your grill grate after cooking, but pack all remaining waste out with you. These practices protect both wildlife and future campers who use the same site.
Common Camp Cooking Mistakes to Avoid
Even with good preparation, beginners run into predictable problems. Our team reviewed feedback from camping communities and identified the five mistakes that derail camp cooking most often — along with straightforward fixes for each.
5 Mistakes Beginner Camp Cooks Make
- Cooking over open flames instead of coals. Fix: Build your fire 45–60 minutes early and wait for the flame to die down to a coal bed before cooking.
- Forgetting a can opener or key utensil. Fix: Keep a printed camp kitchen checklist in your gear bag. Check it before every trip, not the morning you leave.
- Opening the cooler constantly. Fix: Pack a separate “snack cooler” or dry bag for frequently accessed items so your main food cooler stays closed and cold.
- Trying to cook complex recipes on the first night. Fix: Plan your most ambitious meal for Day 2, when you’re settled and familiar with your setup. Night one should be your simplest, most foolproof meal — foil packets or a pre-made one-pot dinner.
- Under-seasoning everything. Fix: Cold outdoor air dulls your sense of taste slightly. Season more generously than you would at home, and always taste before serving.
When a Camp Stove Is the Better Choice
A campfire is romantic, but a camp stove is often the smarter tool — especially for beginners. Many national parks and public lands issue campfire bans during dry seasons, and some designated campsites prohibit ground fires entirely. The NPS notes that camp stoves produce significantly less environmental impact than campfires and are permitted in far more locations.
Beyond regulations, a camp stove gives you reliable, adjustable heat from the first minute. There’s no waiting 45 minutes for coals, no wind disruption, and no risk of an accidental fire. For a first camping trip, starting with a two-burner propane stove and treating the campfire as a bonus — for ambiance and s’mores — removes a significant layer of complexity from your cooking experience.
Frequently Asked Questions
How do I keep food cold while camping without a refrigerator?
Keep your cooler below 40°F by pre-chilling it before packing, using block ice as a base layer, and opening it as infrequently as possible. The USDA defines anything above 40°F as the “danger zone” where bacteria multiply rapidly (FoodSafety.gov, 2026). Pack raw proteins at the bottom in sealed bags, use a cheap probe thermometer to monitor the internal temperature, and replenish ice daily on multi-day trips.
What’s the safest way to handle raw chicken at a campsite?
Keep raw chicken in a sealed, double-bagged container at the bottom of your cooler, away from all ready-to-eat foods. Use a dedicated cutting surface for raw poultry to prevent dangerous cross-contamination. Wash your hands with soap and water immediately after handling it. Cook chicken to an internal temperature of 165°F, verified with a meat thermometer, which is the only reliable test for doneness outdoors. The CDC emphasizes that cross-contamination from raw poultry is one of the most common causes of campsite foodborne illness (CDC, 2026).
Do I need a camp stove if I have access to a campfire?
Yes — bring a camp stove as your primary cooking tool, even if you plan to use a campfire. Campfire bans are common across national parks and public lands during dry seasons, and you may arrive at your site to find fires are prohibited that day. A two-burner propane stove gives you consistent, adjustable heat that a campfire cannot reliably provide, especially for beginners. Use the campfire for ambiance, toasting marshmallows, and warmth, but use the stove for your actual meals.
Mastering Your Camp Kitchen Setup
For first-time campers, outdoor cooking feels intimidating because it looks like one big unknown. But once you break it down into the three pillars of The Camp Kitchen Trifecta — Smart Prep at home, the Right Gear at your site, and Safe Execution while cooking — it becomes a system you can repeat and improve on every trip. Prepping ingredients at home can save 30 or more minutes of active cooking time at the campsite, and the right three pieces of gear cover 90% of what you’ll ever need to cook outdoors.
The Camp Kitchen Trifecta isn’t just a framework for this article — it’s a mental model you can take to every campsite. Each pillar builds on the last: the prep you do at home makes your gear more effective, and good gear makes safe execution easier. When all three work together, camp cooking stops feeling like a chore and starts feeling like part of the adventure.
If you are searching for the best outdoor cooking tips for campers, remember that it all comes down to preparation. Start with one change before your next trip: spend 30 minutes in your kitchen the evening before you leave. Pre-chop your vegetables, freeze your proteins flat, and assemble your spice kit. That single habit — the foundation of Smart Prep — will make your first night at the campsite easier than you think. The fire, the food, and the whole experience will follow from there.

David King
Field gear tester at Tent Explorer.