Family Camping Guide for Beginners: The No-Tears Blueprint
 David King
Updated June 30, 2026
30 min read
David King
Updated June 30, 2026
30 min read
You’ve been scrolling camping posts for weeks, your cart is full of gear you’re not sure you need, and you still don’t know if your kids are going to love it or melt down before dinner. Every experienced camping family makes it look effortless — and nobody tells you what they wish they’d known before that first trip.
Without a clear plan, first-time family camping trips often end in soggy sleeping bags, hungry kids, and a very long drive home. Most online guides skip the hard parts entirely — the rainy-day meltdowns, the 10 p.m. “I’m cold” wake-ups, the scramble to find the can opener you forgot to pack.
This family camping guide for beginners gives you something different: The No-Tears Blueprint — a 5-step system (Choose → Pack → Cook → Play → Adapt) built specifically for overwhelmed first-time parent campers. By the end, you’ll have a complete, step-by-step plan covering campsite selection, essential gear, easy meals, screen-free activities, and sanity-saving hacks from families who’ve already made every mistake so you don’t have to.
“What I wish I’d known BEFORE going camping with kids for the first time 👇 Save this before your next trip — this will save your sanity 🏕️🙌”
This guide covers six core areas: planning your first trip, gear essentials, camp food, keeping kids entertained, pro tips, and safety — everything you need to leave the driveway with confidence.
Key Takeaways: Your No-Tears Blueprint
A successful first family camping trip starts with choosing a beginner-friendly campsite within 1–2 hours of home — not the most scenic spot you can find.
- Start small: Choose a campsite with flush toilets and running water for your first trip
- Practice first: Set up your tent at home before the trip — it changes everything
- Pack by category: Shelter → Sleep → Kitchen → Safety → Clothing (in that order)
- The No-Tears Blueprint: 5 steps — Choose, Pack, Cook, Play, Adapt — cover every family camping scenario
- Safety non-negotiables: A first aid kit, headlamps for every family member, and a snack bin are not optional
Table of Contents
- Your First Family Camping Trip: Start Small, Win Big
- The Complete Family Camping Gear Checklist
- Simple Camp Food and Cooking Strategies for Families
- Keeping Kids Entertained Without Screens
- Pro Tips and Hacks for a Stress-Free Family Trip
- Camping Safety Essentials Every Family Needs to Know
- Frequently Asked Questions
- Your First Trip Starts Now
Your First Family Camping Trip: Start Small, Win Big {#planning}
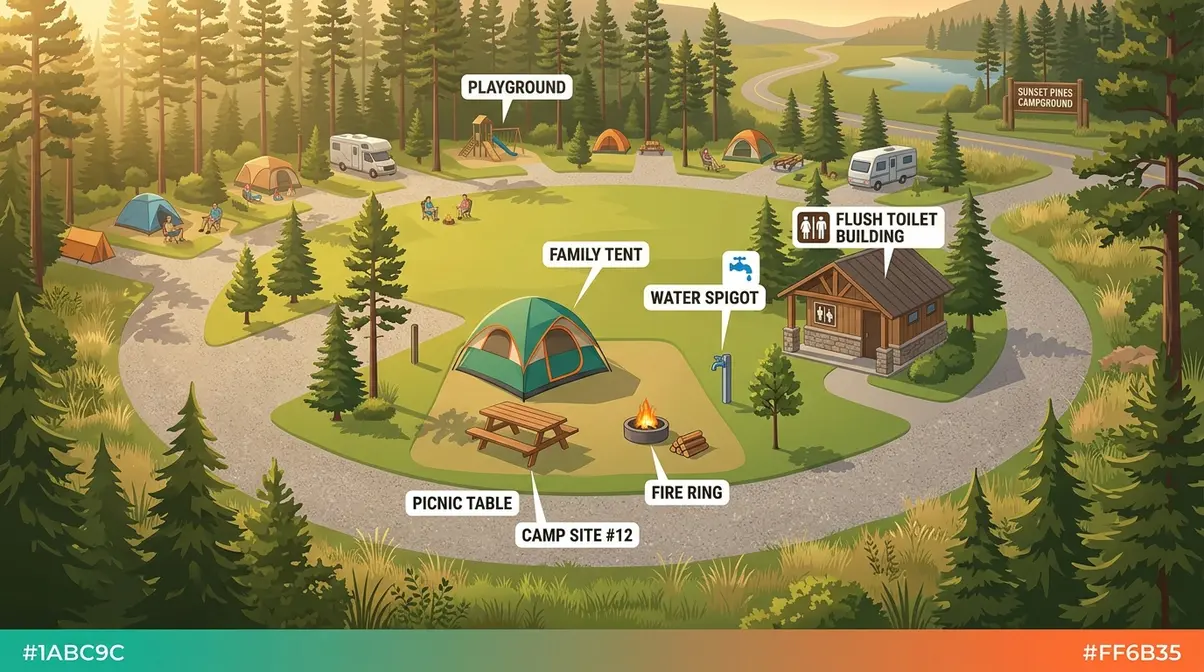
Step 1 of The No-Tears Blueprint is Choose — and choosing the right campsite is the single most consequential decision you’ll make for your first trip. A beginner-friendly campground with the right amenities, close to home, sets up every other part of the trip for success. Get this wrong and even perfect gear won’t save you.
Why does the campsite choice matter more than any other decision? Because first-time family camping trips don’t fail from bad sleeping bags or forgotten spatulas. They fail from overwhelm — too remote, too unfamiliar, too far from an easy exit. The right campsite gives you a safety net, and that psychological cushion is what lets you relax enough to actually enjoy the experience.
With the right site locked in, everything else — setup, meals, activities — becomes manageable. Here’s how to choose it, practice for it, and get your kids excited before you even leave home.
How to Choose Your First Family-Friendly Campsite
Family camping planning starts with one rule: resist the temptation to make your first trip a bucket-list adventure. The goal isn’t the most beautiful campground in the state — it’s a successful night under the stars that makes your kids beg to go back.
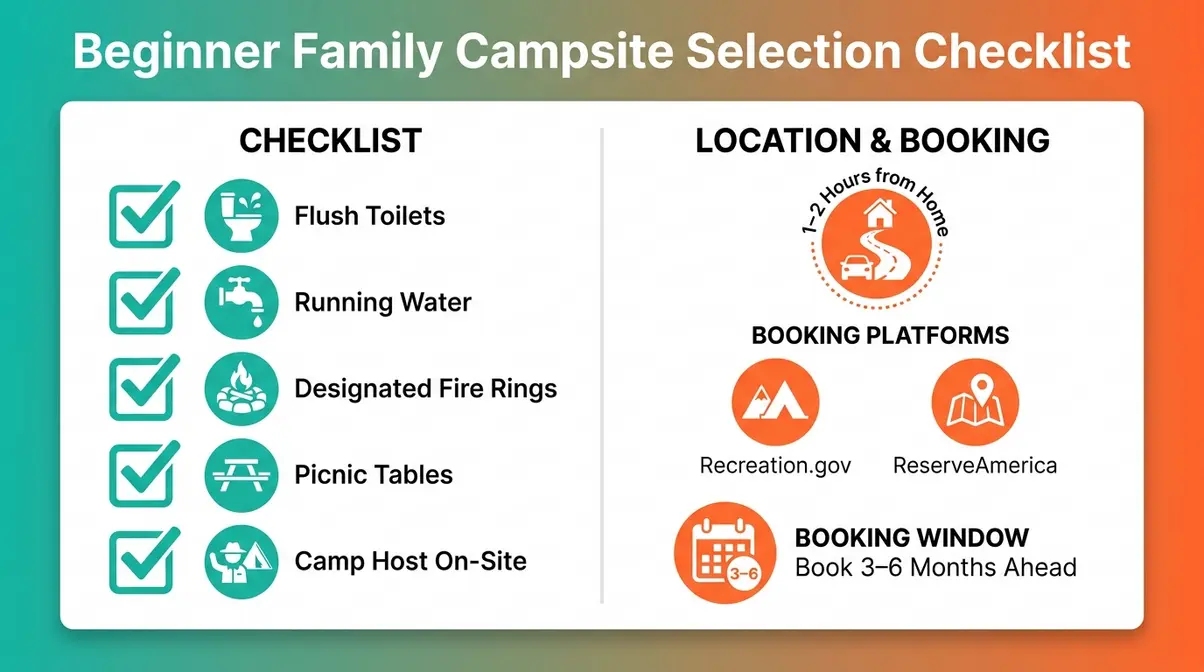
The Proximity Rule is non-negotiable for first-timers. Choose a campsite within 1–2 hours of home. Here’s why: if a child spikes a fever, the weather turns severe, or you realize you forgot the sleeping pads, you can be home in two hours without it becoming a disaster story. That psychological safety net is the difference between a family that camps again and one that never tries a second time. As National Park Service recommendations for camping with kids confirm, starting with developed campgrounds that offer modern amenities significantly improves first-trip outcomes for families.
For beginners, look for campgrounds with these amenities:
- Flush toilets (vs. pit toilets) — a genuine sanity-saver with young children
- Running water at or near the campsite
- Designated fire rings with established fire pits
- Picnic tables at each site
- Camp host or ranger on-site for emergencies and questions
State park campgrounds and KOA campgrounds are excellent starting points. They’re designed for families, offer clean facilities, and usually have camp stores nearby if you forget something critical.
Book early. Popular campgrounds fill up fast — especially for summer weekends. Book 3–6 months in advance for peak season (May through September). Use Recreation.gov for federal and state park sites or ReserveAmerica for state park systems. Set a calendar reminder the day reservations open — popular sites disappear within hours.
If you’re choosing between a remote wilderness site and a state park campground 90 minutes away, choose the state park for your first trip — every time.
For a complete pre-trip planning list, see our beginner camping checklist.
Once you’ve picked your campsite and hit “book,” don’t wait until the night before the trip to open the tent box — that’s a mistake that’s ended more than a few camping trips before they started.
The Backyard Practice Run: Why It Changes Everything
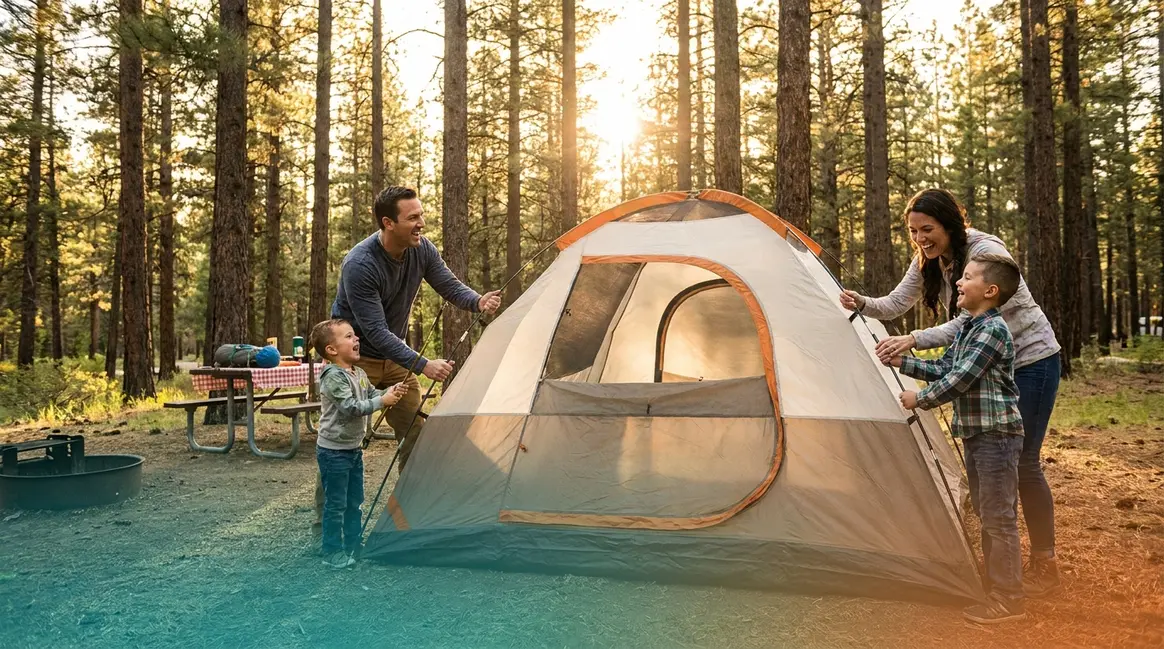
This is the single most impactful action you can take as part of your beginner camping preparation — and most first-timers skip it entirely. Pitch your tent at home at least 3–5 days before the trip. Not the night before. Not in the dark campground parking lot. At home, in daylight, with no pressure.
Here’s your step-by-step practice run:
- Lay out all components on the ground — poles, stakes, rain fly, footprint (a ground cloth that protects the tent floor). Count everything against the instruction sheet.
- Identify every pole section and connect them before you start threading. Color-coded poles make this easier — most family tents have them.
- Follow the instructions start to finish, even if you think you know what you’re doing. First-time assembly always reveals a step you assumed you understood.
- Stake the tent down as you would at a campsite — practice the tension on the rain fly so it doesn’t pool water.
- Let the kids help — assign each child a job: one holds poles, one organizes stakes, one lays out sleeping bags inside.
- Time yourself. Knowing setup takes 22 minutes (not 45) changes how you plan your campsite arrival time.
- Break it down and repack it — this is where most people discover a missing stuff sack or broken zipper. Better at home than at the campground.
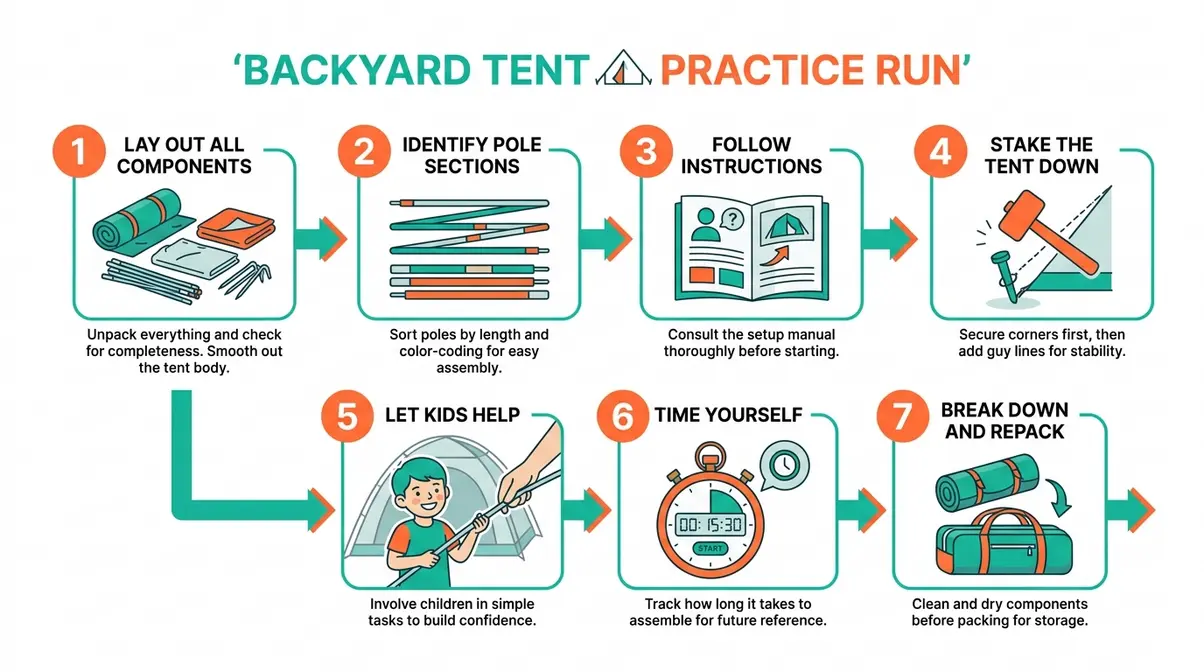
Three things happen during a practice run that can’t happen any other way: you discover missing parts before you’re 90 minutes from home, your kids build genuine excitement and feel ownership of the trip, and you eliminate the “I can’t figure this out in the dark” stress entirely.
Set up your tent on a Saturday morning. Order pizza. Sleep in it that night. You’ll be surprised how many questions get answered — and how much excitement gets built.
For more setup strategies, see our tent camping tips for beginners.
With your tent skills dialed in, the last piece of pre-trip preparation is getting your kids involved — because a child who helped plan the trip is a child who’s excited to be there.
Involving Kids in the Planning Process
Parenting research and the experience of families who camp regularly point to the same insight: children who participate in planning a trip are dramatically less likely to complain once they’re there. Ownership reduces resistance. Here’s how to build that ownership before you leave the driveway.
The Packing Involvement Trick: Give each child a small backpack and tell them they can pack 3–5 items of their choice — a stuffed animal, a favorite book, a card game. This gives them a sense of control and means their comfort items are guaranteed to make the trip. A child who has their own camping bag is a child invested in the adventure. Give each child a small printable checklist of their personal items. When they check things off themselves, they feel responsible — and far less likely to announce they’re bored before you’ve finished setting up.
The Weather Check Ritual: Three days before the trip, check the forecast together. Show your kids what the weather icons mean (sun, clouds, rain, thunderstorm). Make a game of packing “just in case” items — a rain jacket, extra socks, a small tarp. This turns pre-trip anxiety into preparation, and it models good outdoor thinking that will serve them for years.
The Junior Ranger Preview: Before the trip, tell your kids about the Junior Ranger program — a free National Park Service (NPS) initiative that turns park visits into structured learning adventures for kids aged 5–12. Kids earn a badge by completing a booklet of activities tied to the specific park. Giving them this mission before the trip means they arrive with a goal, not just a vague sense of “we’re camping.”
Also worth a brief mention: campground etiquette. Cover quiet hours (typically 10 p.m.–6 a.m.), fire ring rules (more on those in the Safety section), and shared facilities. Two minutes of this conversation before the trip prevents the most common campsite friction.
This family camping guide for beginners is built around one core idea: reduce unknowns before you arrive, and the trip takes care of itself.
With your campsite booked, your tent practiced, and your kids briefed on the Junior Ranger mission ahead, it’s time for Step 2 of The No-Tears Blueprint: assembling the right gear without wasting money or forgetting the one item that ruins the whole trip.
The Complete Family Camping Gear Checklist {#gear}
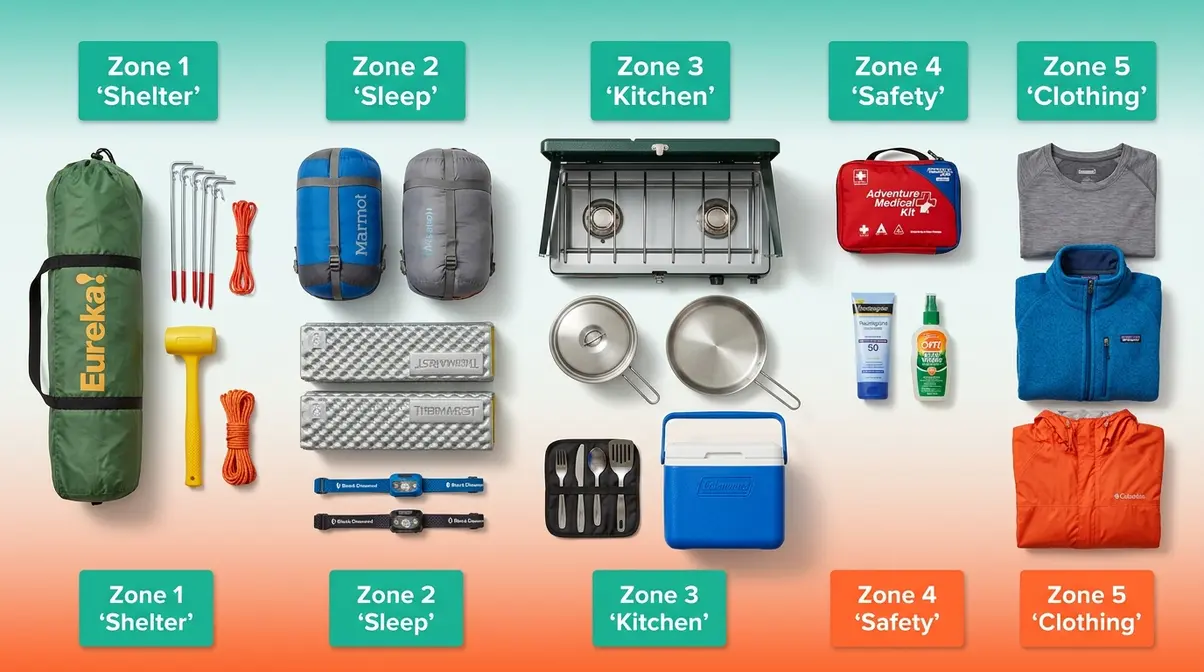
A complete camping essentials checklist for families is organized by category — Shelter, Sleep, Kitchen, Safety, and Clothing — because category-based packing is the only reliable way to prevent forgotten items. The most common beginner mistake isn’t bringing the wrong gear. It’s overpacking clothes and underpacking safety. This section gives you the categorized list and the reasoning behind each item, so you understand what you’re bringing and why.
Step 2 of The No-Tears Blueprint is Pack — and packing smart means knowing the difference between “must-haves” and “nice-to-haves” before you start loading the car.
Shelter and Sleep: The Non-Negotiables
What to pack for family camping starts with the gear that determines whether everyone sleeps — and sleeping determines whether everyone has fun. Get shelter and sleep wrong, and no amount of great food or fun activities will save the trip.
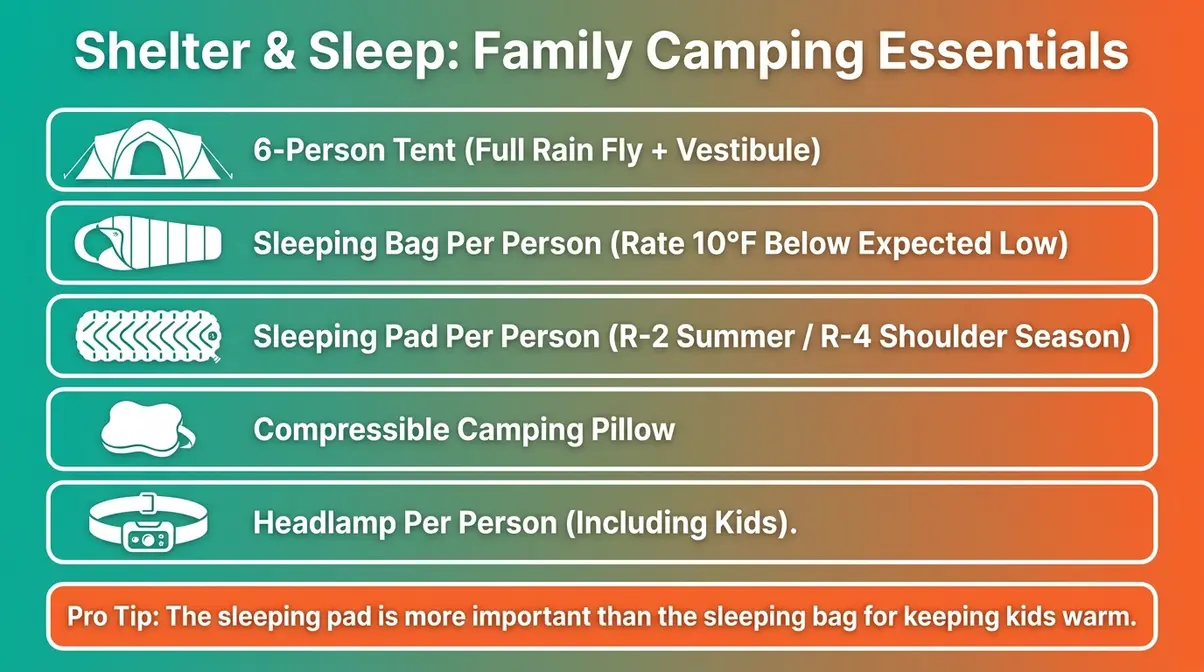
Tents: Buy one size up from what you think you need. A family of four needs a 6-person tent (not a 4-person) — the size ratings assume gear-free adults sleeping shoulder to shoulder. Extra space means room for gear, a sleeping toddler who migrates sideways, and the ability to sit up and get dressed without waking everyone. Look for a tent with a full-coverage rain fly (one that reaches the ground), a vestibule (a covered porch area for muddy boots), and color-coded poles for fast setup.
Sleeping Bags: Match the bag’s temperature rating to the coldest expected night temperature — then go 10°F lower for kids. Children sleep cold, especially in the early morning hours. A bag rated to 32°F works well for three-season camping in most of the U.S.
The sleeping pad insight that most beginners miss: A sleeping pad (a foam or inflatable mat that insulates you from the ground) is the single most important warmth item for camping with kids — the cold ground pulls heat from a child’s body faster than cold air does. A sleeping bag rated to 20°F won’t keep a child warm on bare ground. Look for a sleeping pad with an R-value (a measure of insulation — the higher the number, the warmer) of at least R-2 for summer camping and R-4 for three-season use.
Shelter and Sleep Checklist:
- 6-person (or larger) family tent with full rain fly and vestibule
- Sleeping bag per person (rated 10°F below expected low temperature)
- Sleeping pad per person (R-2 minimum for summer; R-4 for shoulder seasons)
- Pillow (a compressible camping pillow saves significant bag space)
- Headlamp per person — including kids (hands-free, harder to drop than flashlights, and kids genuinely love having their own)
Pro Tip: Headlamps beat flashlights for families, no exceptions. They’re hands-free, which matters when you’re walking to the bathroom at 2 a.m. with a half-asleep five-year-old. Buy ones with a red-light mode — it preserves night vision and won’t wake up the whole campsite.
Camp Kitchen Essentials for Beginners
You don’t need a camp kitchen that rivals your home setup. You need a system that produces hot food reliably with minimal cleanup. For beginners, that means a two-burner camp stove (a portable propane stove with two independently controlled burners), one good pot, one pan, and a cooler large enough to keep food safe.
Camp Kitchen Checklist:
- Two-burner propane camp stove + extra propane canisters (bring more than you think you need)
- One 4–6 qt pot (for boiling pasta, making oatmeal, heating soup)
- One 10-inch cast-iron or non-stick skillet
- Camp plates, bowls, and cups — one set per person (melamine or enamel holds up best)
- Utensil set: spatula, serving spoon, tongs, can opener (the most forgotten item in camping)
- Cutting board and camp knife
- Biodegradable camp soap + small basin for washing up
- Family-sized hard-sided cooler (minimum 50 qt for a family of four for a weekend)
- Reusable zip bags and aluminum foil (for pre-prepped meals and foil packets)
Pro Tip: The cooler is a food safety item, not just a convenience. The Centers for Disease Control and Prevention (CDC) recommends keeping perishable food at or below 40°F to prevent bacterial growth. Pack your cooler with ice blocks (not cubed ice — blocks last significantly longer), store raw meat at the bottom in sealed bags, and minimize how often you open the lid. A second smaller cooler for drinks saves the food cooler from constant opening.
Internal Link: For a full breakdown, see our essential tent camping gear checklist.
Safety, Health, and Clothing Layers
This category is where most beginners underpack — and where a forgotten item creates the most stress. Safety gear and the right clothing system aren’t optional. They’re the difference between a minor inconvenience and a trip-ending problem.
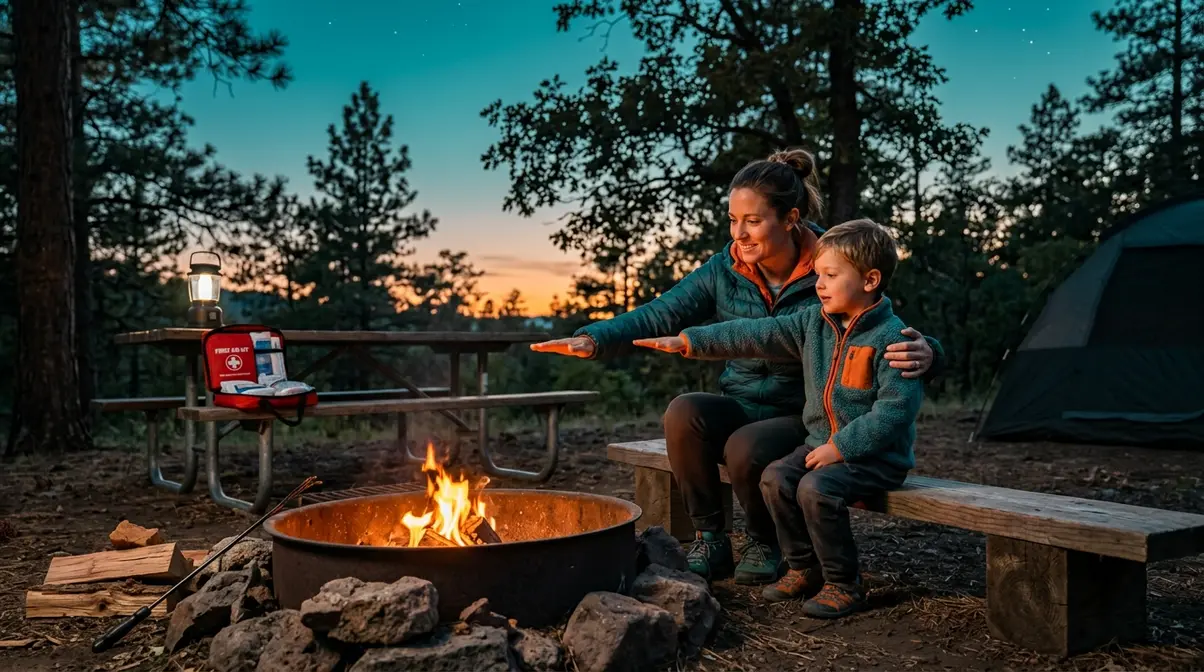
First Aid Kit: Buy a pre-assembled family camping first aid kit rather than building one from scratch. Ensure it includes: adhesive bandages in multiple sizes, antiseptic wipes, antibiotic ointment, blister treatment, pain reliever (children’s and adult), tweezers (for splinters and ticks), an emergency whistle, and a basic first aid reference card. The American Academy of Pediatrics (AAP), the leading professional organization for pediatric health, recommends families carry a comprehensive first aid kit and know how to use it before heading into outdoor settings.
Insect Repellent: The AAP recommends DEET-based repellents containing 10–30% DEET for children 2 months and older. Apply to clothing and exposed skin, avoiding the eyes, mouth, and hands (children touch their faces constantly). Permethrin-treated clothing provides additional protection for tick-heavy environments.
Sunscreen: SPF 30 or higher, broad-spectrum, applied 15–30 minutes before sun exposure and reapplied every two hours during outdoor activities.
Clothing Layers — The System:
Experienced camping families consistently recommend the three-layer system for kids:
- Base layer (moisture-wicking synthetic or merino wool — NOT cotton, which stays wet and causes chills)
- Mid layer (fleece jacket or down vest for insulation)
- Outer layer (waterproof/windproof shell jacket)
Pack two complete sets of layers per child, plus one extra set of socks and underwear per day. Kids will get wet. Plan for it.
Safety and Clothing Checklist:
- Pre-assembled family first aid kit
- Insect repellent (10–30% DEET per AAP guidelines for children 2+ months)
- Sunscreen (SPF 30+, broad-spectrum)
- Three-layer clothing system per person (base + mid + outer)
- Rain gear per person (waterproof jacket with hood)
- Sturdy closed-toe shoes or hiking sandals per child
- Extra socks and underwear (1 set per day per child)
With your gear organized by category and packed into bins (more on that in the Pro Tips section), you’re ready for Step 3 of The No-Tears Blueprint: feeding your family without losing your mind over a camp stove.
Simple Camp Food and Cooking Strategies for Families {#food}
Step 3 of The No-Tears Blueprint is Cook — and camp cooking with kids is simpler than it looks when you do the hard work at home before you leave. The secret isn’t elaborate campfire recipes. It’s ruthless pre-trip meal planning so that every meal at the campsite requires assembly, not cooking from scratch.
Families who camp regularly report that meal stress is the number one source of campsite frustration on first trips — usually because parents are trying to cook unfamiliar food on unfamiliar equipment while managing hungry, overstimulated kids. The solution is to keep meals simple, familiar, and as pre-prepped as possible.
Pre-Trip Meal Prep: Do the Hard Work at Home
The most effective camp cooking strategy is to treat your kitchen at home as the real camp kitchen. Before you leave, do as much prep as you can — chop vegetables, marinate proteins, pre-measure dry ingredients, and portion snacks into individual bags.
Meal prep actions to complete before the trip:
- Plan every meal — breakfast, lunch, dinner, and snacks — for every day of the trip. Write it on paper and tape it inside a kitchen cabinet.
- Pre-chop all vegetables and store in labeled zip bags in the cooler.
- Pre-marinate proteins (chicken, sausage, ground beef) the night before, stored in sealed bags at the bottom of the cooler.
- Pre-measure dry ingredients for pancake mix, oatmeal, and hot chocolate into labeled zip bags.
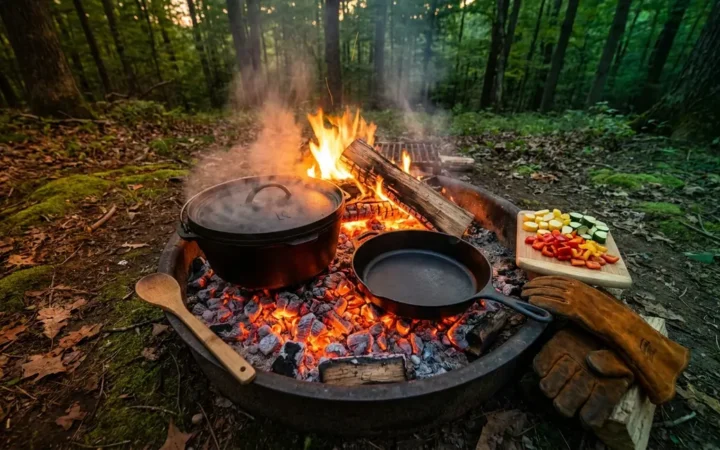
- Assemble foil packet meals at home — add protein, vegetables, and seasoning to heavy-duty foil, fold, and refrigerate. At the campsite, these go directly on the grill grate or in the coals.
- Pack a “Day 1 emergency kit” — easy snacks and a no-cook meal (sandwiches, wraps, trail mix) for the first evening when setup takes longer than expected.
5 Easy Meal Ideas the Whole Family Will Actually Eat
The best camp meals are familiar, require minimal cleanup, and can be made with one pot or one pan. Parent communities consistently recommend sticking to meals your kids already eat at home — camping is not the time to introduce new foods to a picky eater.
5 beginner-friendly family camp meals:
- Foil Packet Chicken and Vegetables — marinated chicken thighs + sliced bell peppers + olive oil + seasoning, wrapped in heavy-duty foil. Cook directly on grill grate over campfire for 25–30 minutes. Zero cleanup.
- Campfire Chili — brown ground beef at home, freeze in a zip bag. At camp, heat in the pot with canned kidney beans, canned tomatoes, and pre-measured chili seasoning. Ready in 15 minutes.
- Pancakes and Scrambled Eggs — the classic first-morning breakfast. Pre-mix dry pancake ingredients at home. Add water and eggs at camp. One pan, one spatula, five minutes.
- Hot Dogs and Baked Beans — zero prep, universally loved, and gives kids the campfire-roasting experience they’ll talk about for weeks.
- Pasta with Jarred Sauce — boil pasta in your camp pot, heat sauce in the pan. Bring pre-grated parmesan in a small container. Familiar, filling, and the kids will eat it.
Pro Tip: Pack one “comfort food” item specific to each child — their favorite crackers, a specific cereal, a chocolate bar. When everything else is unfamiliar, a known favorite provides enormous comfort.
The Snack Bin System That Saves Your Sanity
This is one of the most underrated systems in family camping — and no top competitor covers it. The Snack Bin is a dedicated, kid-accessible container (a small plastic bin or reusable tote) that lives in the center of the campsite and contains only snacks that don’t require refrigeration.
Why it works: Kids graze constantly, especially outdoors. Every time a child asks for food and you have to open the cooler, dig through ice, and search for something, you lose two minutes and gain one frustrated parent. The Snack Bin eliminates this entirely.
What goes in the Snack Bin:
- Individual trail mix packets
- Granola bars and energy bars
- Crackers and peanut butter packets
- Dried fruit
- Fruit pouches (the foil kind that don’t need refrigeration)
- A few pieces of candy — yes, really. Camping is a treat.
The rule: Kids can access the Snack Bin independently without asking. It empowers them, reduces constant food requests, and gives you uninterrupted time to set up camp or start the fire.
Keep the Snack Bin elevated (on the picnic table, not the ground) and away from the campfire. More on proper food storage in the Safety section.
Keeping Kids Entertained Without Screens {#entertainment}
Step 4 of The No-Tears Blueprint is Play — and the good news is that nature is genuinely better entertainment than any screen, once kids get past the initial “there’s nothing to do” adjustment period (typically 20–30 minutes). The key is having a handful of activities ready before boredom sets in.
Parent communities consistently note that the first 30 minutes after arrival are the highest-risk window for meltdowns — kids are overstimulated, hungry, and there’s nothing familiar to anchor to. The activities in this section are specifically chosen to bridge that gap and carry the whole trip.
Daytime Nature Activities: 6 Ideas That Need Zero Prep
The best outdoor activities for kids require no equipment, no planning, and no screens — just a little parental enthusiasm to get them started. Families who camp regularly report that children who seem “addicted to screens” at home often surprise their parents by spending hours outside once they’re given permission to explore freely.
6 zero-prep nature activities:
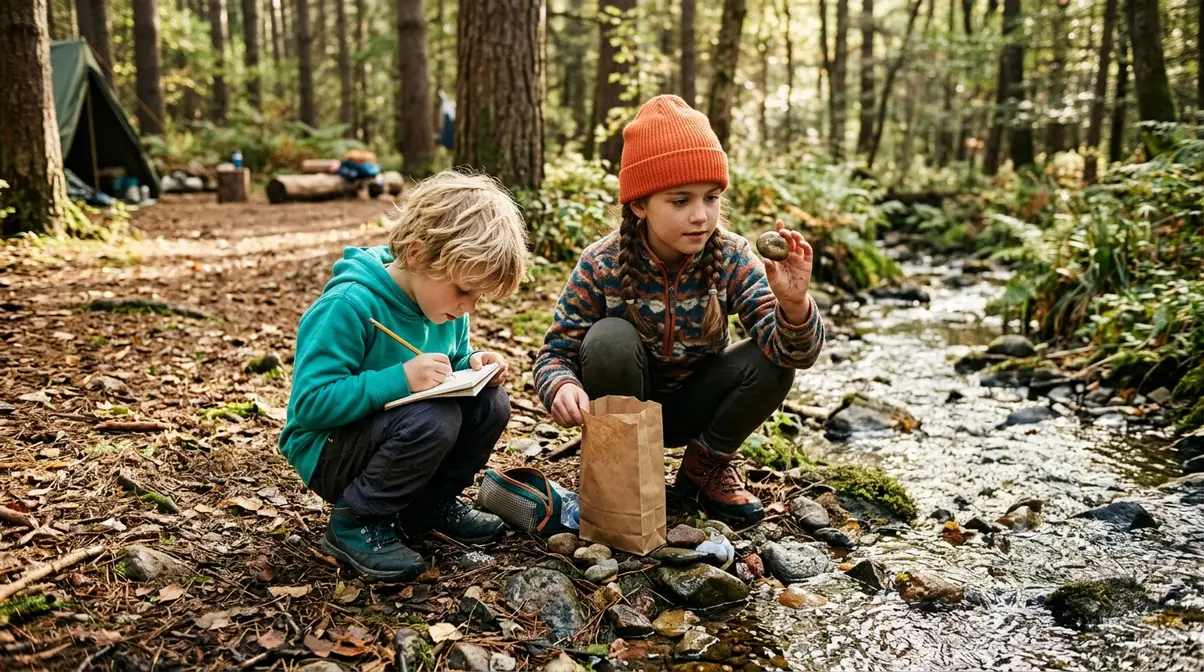
- Rock and Leaf Collection — Give each child a small paper bag and challenge them to find 10 interesting rocks and 5 different leaves. Works for ages 3–10.
- Nature Journaling — A small notebook and a pencil. Kids draw what they see: trees, birds, insects, cloud shapes. No artistic skill required — observation is the point.
- Stick Building — Collect sticks and build something: a fort, a miniature campsite, a bridge across a stream. Open-ended construction play works for all ages.
- Cloud Watching — Lie on a sleeping pad in the sun and find shapes in the clouds. Sounds simple. Kids love it.
- Bird Watching — Download a free bird identification app (like Merlin by Cornell Lab) before the trip. Kids can identify birds by sound or photo — turns a walk into a game.
- Puddle Jumping and Stream Exploration — Pack waterproof boots or old sneakers specifically for getting wet. Removing the “don’t get dirty” rule for one day is transformative.
Rainy Day and Campfire Night Activities
This is the content gap that no top competitor covers — and the scenario that causes the most first-trip anxiety. What do you do when it rains? Here’s the honest answer: a little rain doesn’t end a camping trip. The right gear and a contingency plan make it an adventure.
Rainy Day Kit (pack this regardless of the forecast):
- A small tarp (a waterproof sheet that can be rigged as a canopy) strung between trees or poles over the picnic table creates a dry outdoor area. You can eat, play games, and do crafts under it even in steady rain.
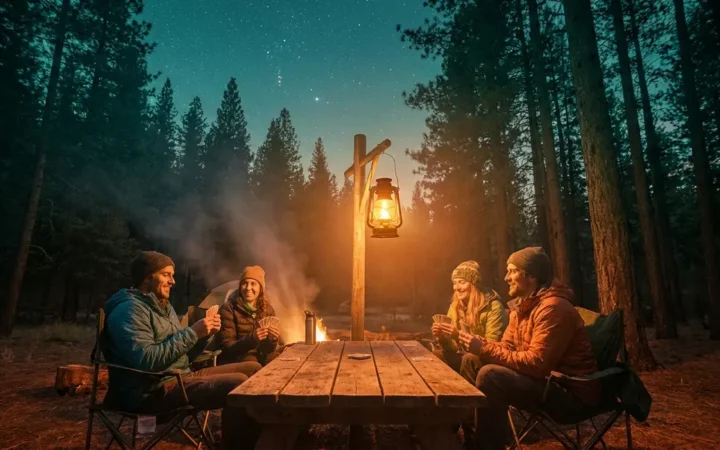
- Card games (a waterproof deck if possible)
- A small travel board game
- Coloring books and crayons in a zip bag
- A read-aloud book — one chapter per meal is a camping tradition many families start on their first trip and never stop
If the weather is severe (thunderstorms, lightning), stay in the tent or your vehicle. The National Park Service advises seeking shelter in a hard-sided building or vehicle during lightning events and avoiding open areas, tall trees, and bodies of water.
Campfire Night Activities:
- S’mores — the classic. Let kids assemble their own.
- Campfire storytelling — each person adds one sentence to a running story. Gets chaotic and hilarious fast.
- Star identification — download a free stargazing app (Sky Map or Star Walk) before the trip. Point it at the sky. Kids are genuinely amazed.
- Shadow puppets — a headlamp against the tent wall. Works every time with kids under 8.
- Campfire songs — you don’t need to know many. “She’ll Be Coming ‘Round the Mountain” and “Home on the Range” are enough.
The Junior Ranger Program and Nature Scavenger Hunt
The Junior Ranger program (the free NPS initiative that turns park visits into structured learning adventures for kids aged 5–12) is one of the best-kept secrets in family camping — and it solves a specific problem: what do kids do while parents set up camp?
How it works: At the park visitor center, pick up a free Junior Ranger activity booklet. Kids complete age-appropriate activities — wildlife observation, nature journaling, learning about local history — and return the booklet to a ranger to earn an official Junior Ranger badge and certificate. It typically takes 1–3 hours and costs nothing. Many national and state parks participate.
Before the trip: Preview the program on the National Park Service website and tell your kids what badge they’re working toward. Arriving with a mission changes everything.
The Nature Scavenger Hunt is a perfect complement to the Junior Ranger program — and you can run it simultaneously. Create a simple list of things to find or observe at the campsite:
- Sample scavenger hunt items:
- Something smooth and something rough
- A bird or bird feather
- Three different kinds of trees
- Animal tracks or evidence of an animal
- Something that smells interesting
- The oldest-looking tree you can find
- A cloud that looks like something
Give each child a clipboard (or a book to write on) and a pencil. The hunt takes 30–60 minutes and costs nothing — and it directly addresses the “I’m bored” window right after arrival when parents need setup time most.
Pro Tips and Hacks for a Stress-Free Family Trip {#protips}
Step 5 of The No-Tears Blueprint is Adapt — and the families who camp most successfully aren’t the ones with the best gear. They’re the ones who’ve built flexible systems that handle the unexpected without crisis. These hacks come from parent communities who have done exactly what you’re about to do, and learned what actually matters.
Mastering Layers: How to Keep Kids Warm All Night
Cold kids at night is the number one reason first camping trips don’t become second camping trips. The solution isn’t a more expensive sleeping bag — it’s understanding how heat loss works and layering accordingly.
The core principle: Kids lose body heat through the ground faster than through the air. A sleeping pad with adequate R-value (see Gear section) is the first fix. The second fix is the layering system inside the sleeping bag.
The bedtime layering routine for kids:
- Change into dry base layers before getting into the sleeping bag — moisture from the day’s activity conducts cold.
- Add a fleece layer (long-sleeve fleece top and fleece pants) over the base layer.
- Add wool or synthetic socks — feet are the first thing to get cold.
- Add a knit hat — children lose a disproportionate amount of body heat through their heads.
- Zip the sleeping bag fully and tuck the collar snugly around the neck.
If a child wakes up cold: Add a second layer on top of the sleeping bag — an extra blanket or your own sleeping bag laid flat over them. Warm a hand warmer packet (the disposable kind) and place it at the foot of the sleeping bag, not directly against skin.
Parent communities consistently recommend starting this routine 30 minutes before actual bedtime — give kids time to wind down with a story or quiet activity before expecting them to sleep in an unfamiliar place.
The Bin System: Camp Organization That Actually Works
Experienced camping families — particularly those who document their setups in communities like r/camping — consistently recommend one organizational principle above all others: bins by function, not by person.
The system is simple. Before the trip, pack everything into labeled, stackable plastic bins:
| Bin | Contents |
|---|---|
| Shelter Bin | Tent, stakes, mallet, tarp, rope/paracord |
| Sleep Bin | Sleeping bags, sleeping pads, pillows (compressed) |
| Kitchen Bin | Stove, fuel canisters, cookware, utensils, camp soap |
| Food Bin (dry) | Non-perishable food, spices, foil, zip bags |
| Safety Bin | First aid kit, insect repellent, sunscreen, headlamps, batteries |
| Kids’ Activity Bin | Scavenger hunt supplies, games, books, art supplies |
| Snack Bin | Kid-accessible snacks (see Snack Bin System above) |
At the campsite, each bin goes to its zone — kitchen bin near the stove, sleep bin in the tent, activity bin at the picnic table. Setup takes 20 minutes instead of an hour of digging through bags.
Pro Tip: Use different colored lids or colored tape on each bin so kids can find what they need without asking. This is the system that turns 1–2 hours of chaos into a smooth arrival.
Mindset Hacks: Flexibility Is Your Best Piece of Gear
No first camping trip goes exactly according to plan. The families who love camping after their first trip are the ones who decided before leaving home that imperfect is fine — even good.
Three mindset reframes that experienced camping parents consistently recommend:
- Lower the bar deliberately. The goal of the first trip isn’t a perfect outdoor experience. It’s one successful night under the stars. If you achieve that, the trip was a success — regardless of what else went wrong.
- Embrace the “camping story.” Every mishap becomes a story. The rain, the forgotten can opener, the child who slept sideways and kicked everyone — these are the stories your family will tell for years. Reframe problems as material.
- Plan for one thing to go wrong. Not because something will definitely go wrong, but because having mentally rehearsed a problem makes it less catastrophic when it happens. “What if it rains?” and “What if someone gets a blister?” are questions worth answering before you leave home.
The families who camp most successfully aren’t the most experienced. They’re the most flexible. Bring that flexibility with you — it’s lighter than any gear item and more valuable than all of them combined.
Camping Safety Essentials Every Family Needs to Know {#safety}
A safe trip is the foundation everything else is built on. This section covers the three safety areas where first-time family campers most often lack information: campfire rules, wildlife and food storage, and first aid basics. All recommendations in this section are backed by guidance from the National Park Service (NPS), the Centers for Disease Control and Prevention (CDC), and the American Academy of Pediatrics (AAP).
Campfire Safety Rules for Families
Campfire safety is non-negotiable, and the rules are simple enough that children can learn them before the trip.
Core campfire rules (source: National Park Service campfire guidelines):
- Build fires only in designated fire rings — never on bare ground or near low-hanging branches
- Keep fires small — a fire 2–3 feet across is sufficient for cooking and warmth
- Maintain the “arm’s length” rule for children — no child stands closer to the fire than their arm’s length, no exceptions
- Never leave a fire unattended — assign one adult as fire monitor whenever the fire is lit
- Drown the fire completely before sleeping — pour water until the hissing stops, stir the ashes, pour again. If it’s too hot to touch, it’s too hot to leave.
- Check local fire restrictions before your trip — many campgrounds have seasonal burn bans, especially in dry conditions. Check with your campground host or the park’s website.
Teach children the “stop, drop, and roll” rule before the trip. It takes two minutes and gives kids a concrete action plan — which reduces panic if something goes wrong.
Wildlife Awareness and Food Storage
Wildlife encounters are rare but require preparation. The most effective wildlife prevention strategy is proper food storage — because wildlife that finds food at campsites becomes habituated to humans, which creates danger for future campers and often results in the animal being euthanized.
Food storage rules:
- Store all food, coolers, and scented items (toiletries, toothpaste, lip balm) in your vehicle or in a bear canister (a hard-sided, wildlife-resistant container) when not in use — never in your tent
- Never leave food on the picnic table unattended, even briefly
- Dispose of food scraps in designated waste bins — never bury food or throw it into vegetation
- Keep your campsite clean — a clean campsite is the single most effective wildlife deterrent
The CDC recommends keeping perishable food at or below 40°F to prevent bacterial growth — pack your cooler with block ice, store raw meat at the bottom in sealed bags, and use a thermometer to verify cooler temperature on extended trips.
Wildlife encounter basics: If you encounter wildlife, stay calm, do not run, make yourself look large, and back away slowly. Never approach or feed wildlife. If you’re camping in bear country, ask the campground host about bear activity and specific local protocols before your first night.
First Aid Basics and When to Get Help
Your pre-assembled first aid kit handles most campsite injuries. The AAP recommends that families review basic first aid before any outdoor trip — specifically tick removal, blister treatment, and recognizing signs of heat exhaustion.
Common campsite injuries and responses:
- Blisters: Clean the area, apply moleskin (a padded adhesive used for blister prevention) before the blister fully forms, and avoid draining unless the blister is very large and painful.
- Tick removal: Use fine-tipped tweezers, grasp the tick as close to the skin as possible, and pull upward with steady pressure. Clean the bite area with antiseptic. Monitor for a bull’s-eye rash (a circular red rash that may indicate Lyme disease) for 30 days after the bite.
- Cuts and scrapes: Clean with water and antiseptic wipe, apply antibiotic ointment, cover with an adhesive bandage.
- Insect stings: Remove the stinger by scraping (not squeezing) with a card or fingernail. Apply a cold pack. Administer antihistamine if available and appropriate. If a child shows signs of severe allergic reaction (swelling of the face or throat, difficulty breathing) — call 911 immediately and use an epinephrine auto-injector if prescribed.
- Heat exhaustion signs: Heavy sweating, cool and pale skin, weakness, nausea. Move the child to a shaded area, remove excess clothing, apply cool wet cloths, and give small sips of water. If symptoms worsen or the child loses consciousness, call 911.
When to seek emergency help: Call 911 for any loss of consciousness, suspected broken bone, severe allergic reaction, chest pain, or any situation that feels beyond your ability to manage. Know the address of the nearest urgent care center before you leave home — save it in your phone.
Frequently Asked Questions {#faq}
What is the best age to take kids camping for the first time?
There is no single “best age” for a first camping trip — families successfully camp with infants, toddlers, and school-age children. However, most experienced camping parents recommend starting between ages 3–6, when children are old enough to participate in activities but still young enough to find everything magical. The key variable isn’t age — it’s choosing an amenity-rich campground close to home for the first trip. A 4-year-old at a KOA campground 90 minutes away is far more manageable than a 4-year-old at a remote backcountry site.
How do I keep kids warm while camping at night?
Keeping kids warm at night starts with the sleeping pad, not the sleeping bag. The cold ground pulls heat from a child’s body faster than cold air does — a sleeping pad with an R-value of at least R-2 (R-4 for shoulder seasons) is essential. Layer kids in dry base layers, a fleece mid-layer, and wool socks before zipping them into a sleeping bag rated 10°F below the expected overnight low. Add a knit hat. If a child wakes cold, lay an extra blanket over the sleeping bag and place a hand warmer at the foot of the bag (not directly against skin).
What should I pack for a family camping trip?
Pack by category: Shelter → Sleep → Kitchen → Safety → Clothing. Essential items include a family-sized tent (one size up from your headcount), sleeping bags rated to the temperature, sleeping pads for every person, headlamps, a two-burner camp stove, a 50 qt+ cooler, a first aid kit, insect repellent (10–30% DEET per AAP guidelines for children 2+ months), sunscreen (SPF 30+), and three-layer clothing per person. A complete printable checklist is available at our beginner camping checklist. The most commonly forgotten item? The can opener.
What do you do if it rains while camping with kids?
A little rain doesn’t end a camping trip — the right prep makes it an adventure. Before any trip, pack a small tarp you can rig as a canopy over the picnic table, plus a waterproof card deck, a travel board game, and a read-aloud book. These four items turn a rainy afternoon into a cozy campsite memory. If severe weather (lightning, thunderstorms) moves in, the National Park Service advises seeking shelter in a hard-sided vehicle or building and avoiding open areas, tall trees, and bodies of water until the storm passes.
How do I keep food safe while camping?
Food safety while camping follows the same rules as home: keep cold food cold and hot food hot. The CDC recommends storing perishable food at or below 40°F — use block ice in a hard-sided cooler, store raw meat at the bottom in sealed bags, and minimize cooler opening. Store all food in your vehicle or a bear canister when not cooking or eating — never in your tent. The USDA advises discarding any perishable food left out for more than two hours (one hour if temperatures exceed 90°F). A dedicated dry Snack Bin for non-perishables keeps kids fed between meals without constant cooler access.
Your First Trip Starts Now {#conclusion}
For overwhelmed first-time parent campers, family camping doesn’t have to be complicated — it has to be planned. The families who love their first camping trip aren’t the most experienced ones. They’re the ones who chose a beginner-friendly campsite within two hours of home, packed by category, prepped meals before leaving, and showed up with a handful of activities and a flexible mindset. According to the National Park Service, families who start with developed campgrounds and involve children in planning report significantly higher satisfaction on their first outdoor experiences.
The No-Tears Blueprint — Choose, Pack, Cook, Play, Adapt — isn’t a rigid checklist. It’s a framework for making confident decisions at every stage of your first trip. When you choose the right campsite, you give yourself a safety net. When you pack by category, you stop forgetting things. When you prep meals at home, camp cooking becomes simple. When you plan activities in advance, boredom never wins. And when you go in with a flexible mindset, nothing that goes wrong can ruin the trip.
Your first step is simple: open Recreation.gov or ReserveAmerica, search for a state park campground within 90 minutes of home, and book a weekend in the next 60 days. Download our beginner camping checklist, set up your tent in the backyard this weekend, and get your kids excited about their Junior Ranger badge. Everything else follows from those three actions. Your family’s first camping trip — the one your kids will talk about for years — is closer than you think.

David King
Field gear tester at Tent Explorer.