Tent Poles Guide: Choose, Assemble, Repair & Replace
 Dave King
Updated July 1, 2026
26 min read
Dave King
Updated July 1, 2026
26 min read
You’re halfway through pitching your tent when you hear a sharp crack. Now your shelter is a pile of fabric, the wind is picking up, and your trip is suddenly in jeopardy. Most campers freeze in that moment — not because the fix is hard, but because nobody told them what to do next.
Without knowing your pole material, the right measurements, and your repair options, you risk buying the wrong replacement, turning a simple field fix into a bigger problem, or shortening your gear’s lifespan by seasons. This tent poles guide eliminates all of that guesswork. By the end, you’ll know exactly how to identify your pole type, fix a break in the field, measure for the right replacement, and keep your poles in top shape for years. We’ll cover five key areas: materials, assembly, repair, replacement measuring, and where to buy.
Recommended Products
| # | Image | Product | Best For | Buy |
|---|---|---|---|---|
| 1 |  |
AVOFOREST 8.7FT Telescoping Poles (2-Pack) | Most backpackers | Buy on Amazon |
| 2 |  |
AVOFOREST 8.7FT Telescoping Poles (4-Pack) | Group camping setup | Buy on Amazon |
| 3 |  |
DOBEN Carbon Fiber Tarp Poles | Ultralight backpackers | Buy on Amazon |
| 4 |  |
SAN LIKE 96″ Aluminum Poles (4-Pack) | Large tarp shelters | Buy on Amazon |
| 5 | 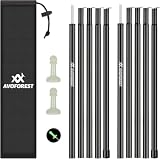 |
AVOFOREST 75in Heavy Duty Poles | Heavy-duty tarps | Buy on Amazon |
| 6 |  |
Green Elephant Adjustable Tarp Poles | Family tarp camping | Buy on Amazon |
| 7 | 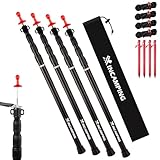 |
XINCAMPING 7.6FT Rust-Proof Poles | Wet or coastal camping | Buy on Amazon |
| 8 |  |
Heavy Duty 90in Tarp Poles (2-Pack) | Budget tarp setup | Buy on Amazon |
| 9 | 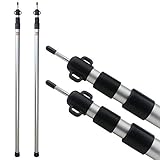 |
Sunnyglade Telescoping Aluminum Poles | Budget-conscious campers | Buy on Amazon |
Tent poles come in three main materials — aluminum, fiberglass, and steel — each suited to a different camping style. The right choice depends on your pack weight, budget, and conditions.
- Aluminum poles are the most reliable: lightweight, bend-resistant, and ideal for backpacking
- Fiberglass poles suit casual, car camping on a budget — but they splinter under stress
- A pole repair sleeve fixes most field breaks in under 5 minutes, no tools needed
- The Pole Triage System (Assess → Act → Prevent) helps you decide: repair, replace, or upgrade
- Replacement poles require two measurements: total assembled length and ferrule diameter
Tent Pole Materials Explained: Aluminum, Fiberglass, and Steel
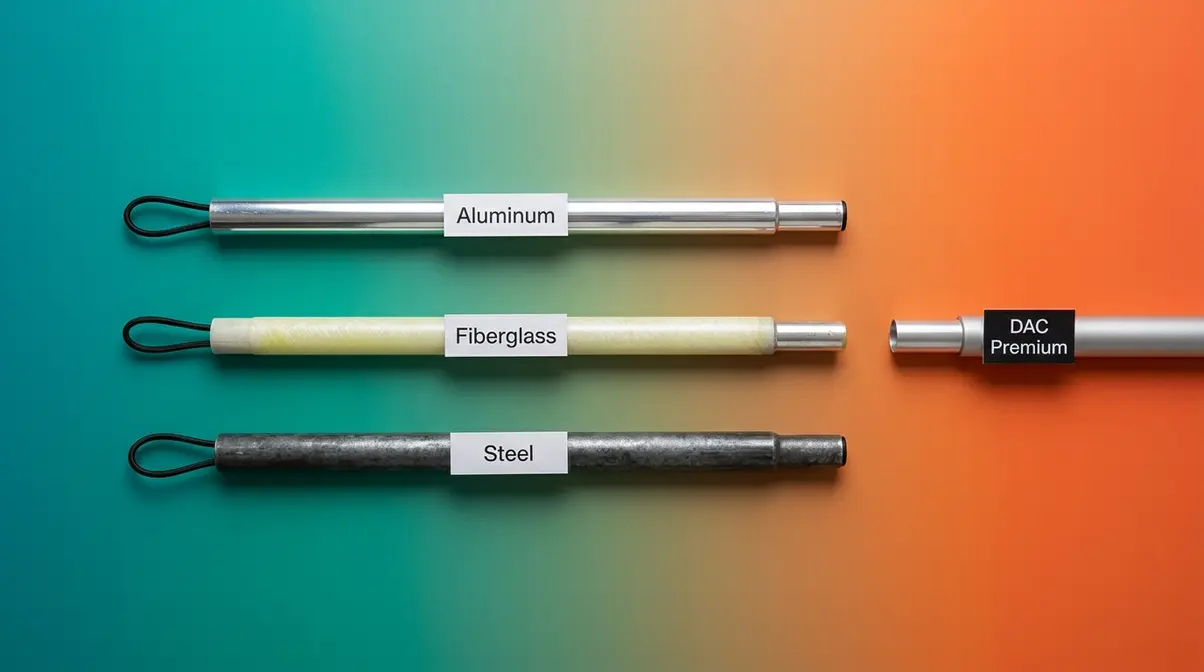
Choosing between aluminum or fiberglass tent poles — or steel, or premium DAC aluminum — comes down to one question: how do you camp? Fiberglass tent poles exhibit significantly lower stiffness and higher susceptibility to brittle fracture in extreme cold compared to high-strength aluminum alloys, according to materials science data on fiberglass durability. Picking the wrong material means either lugging unnecessary weight up a trail or watching your poles shatter on the first cold night out.
You can also learn about different tent pole materials to understand how pole choice connects to the broader decision of tent construction.
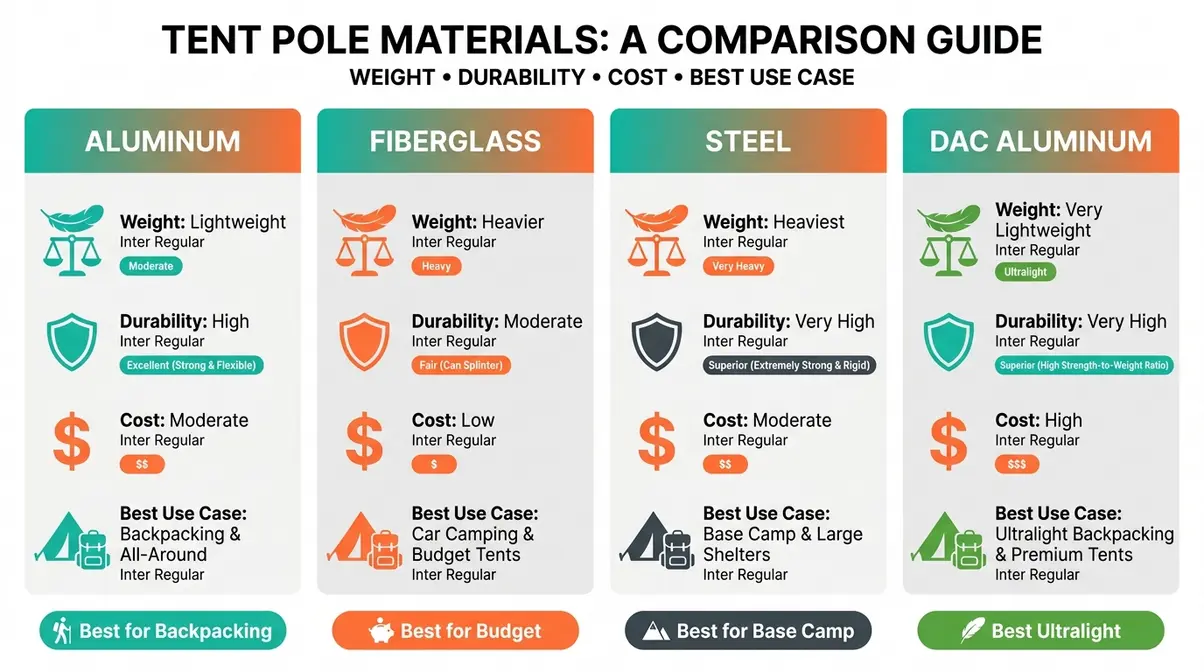
What Are Tent Poles Made Of? The Three Main Materials
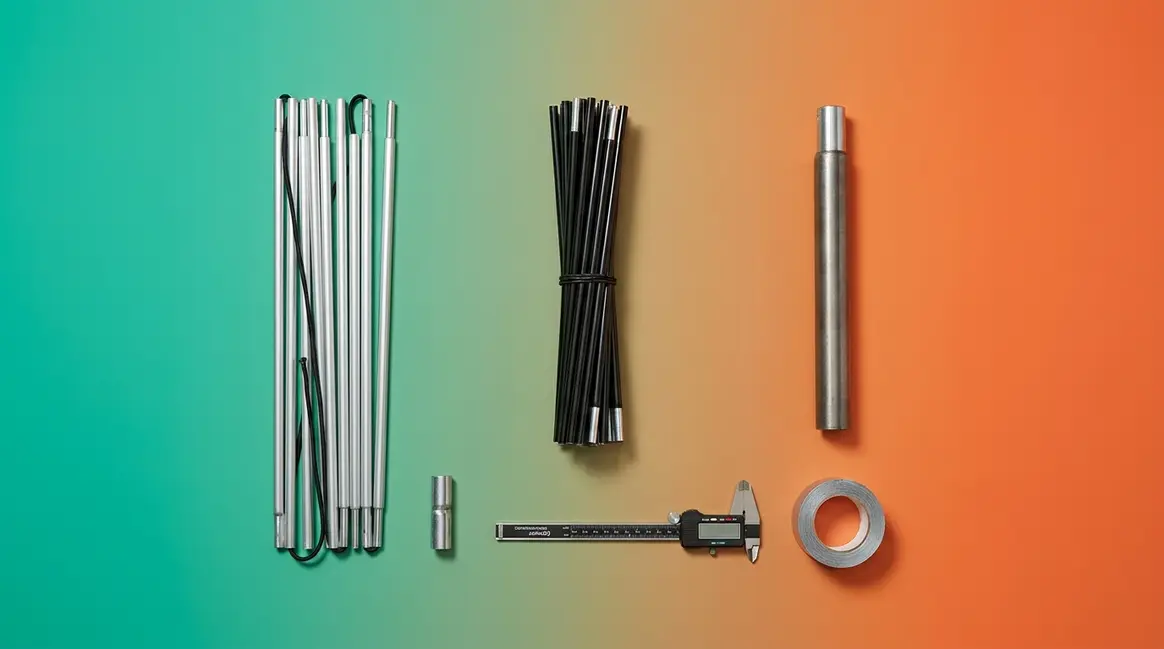
Most tent poles fall into three categories: aluminum, fiberglass, and steel. Premium options include DAC aluminum and carbon fiber. Your camping style — backpacking, car camping, or base camp — is the single most important factor when choosing between them. The table below breaks down each material at a glance.
| Material | Weight | Durability | Best For | Weakness |
|---|---|---|---|---|
| Aluminum | Light | High (bends, doesn’t snap) | Backpacking, 3-season | Higher cost |
| Fiberglass | Medium-heavy | Medium (splinters in cold) | Car camping, budget | Brittle in cold |
| Steel | Heavy | Very high | Base camp, large family tents | Very heavy |
| DAC Aluminum | Very light | Very high | Ultralight, alpine | Premium price |
If you’re carrying your tent in a backpack, aluminum is almost always the right choice. If you’re driving to a campsite and watching your budget, fiberglass works fine — as long as you stay in mild weather. Knowing your material is also Step 1 of The Pole Triage System — you can’t assess damage or choose the right repair method without it. The full framework arrives in the Repair section.
Aluminum Tent Poles: Lightweight and Reliable
Aluminum is the default recommendation for most campers, and for good reason: it bends rather than snaps under stress. That single property is a critical safety advantage. A bent aluminum pole can often be straightened in the field; a snapped pole cannot. It also means a bent pole won’t suddenly punch through your tent fabric during a storm.
Aluminum poles are significantly lighter than steel and roughly comparable to fiberglass in weight — but far more durable in real-world conditions. Most three-season backpacking tents from brands like REI, MSR, and Big Agnes ship with aluminum poles as standard. Tents in the $100+ range almost universally use aluminum for this reason.
Aviation-grade aluminum, used in poles like those from AVOFOREST and DOBEN in the recommended products table, takes this a step further. Thicker-walled tube construction provides extra resistance to lateral force without meaningful weight penalty. For most backpackers, standard aluminum hits the sweet spot of weight, strength, and price.
Fiberglass Tent Poles: Budget-Friendly but Fragile
Fiberglass is the most common material in entry-level tents under $80, and its main appeal is straightforward: it costs less to manufacture. For casual car camping in mild weather, fiberglass poles serve their purpose.
The critical weakness is cold-weather performance. Fiberglass becomes brittle below freezing and can shatter rather than bend under load. When it fails, it doesn’t break cleanly — it splinters, producing sharp shards that can tear tent fabric from the inside. According to materials science data on fiberglass durability, fiberglass (glass fiber reinforced polymer) exhibits lower stiffness and higher susceptibility to brittle fracture in extreme cold compared to high-strength aluminum alloys.
“Fiberglass tent poles exhibit significantly lower stiffness and higher susceptibility to brittle fracture in extreme cold compared to high-strength aluminum alloys.” — Materials science research on glass fiber reinforced polymers
If you’re camping at a summer festival or a drive-up campsite in warm conditions, fiberglass poles will serve you fine. Take them above 8,000 feet in October and you’re asking for trouble. If a fiberglass pole splinters on you, wrap it immediately with duct tape to prevent fabric tears — more on that technique in the Repair section.
Here’s the real cost argument most beginner guides skip: fiberglass poles seem cheaper upfront, but replacement frequency changes the math. After 2-3 seasons of regular use — especially in varied temperatures — fiberglass poles typically need replacing. Aluminum poles, maintained properly, last a decade or more. The initial savings rarely hold up.
Steel Tent Poles: Heavy-Duty for Base Camps
Steel is the heaviest option available — typically 2-3x the weight of comparable aluminum poles. That weight rules it out for backpacking entirely, but it’s not without purpose.
Steel poles are extremely resistant to bending and damage under wind load. For large canvas wall tents, cabin-style family tents, and permanent base camps where weight is irrelevant, steel poles are a solid choice. If you own a large canvas wall tent or a cabin-style tent that stays in one spot all season, steel poles will outlast almost anything else. They’re rarely found in modern backpacking gear, but they remain relevant for older tents and heavy-duty car camping setups.
DAC and Premium Aluminum: What the Pros Use
DAC (Dongah Aluminum Corporation) is a South Korean manufacturer whose poles appear in premium tents from brands like Big Agnes, MSR, and Nemo. Their proprietary TH72M aluminum alloy is engineered to be lighter and stronger than standard 7001 aluminum — the grade used in most consumer-level poles — allowing for thinner tube walls without losing structural integrity. That means measurable weight savings without sacrificing the bend-resistance that makes aluminum poles reliable. See TH72M aluminum alloy specifications for the technical breakdown.
Carbon fiber represents the ultralight extreme — even lighter than DAC aluminum, but significantly more expensive and less forgiving if bent. The DOBEN carbon fiber tarp poles in the recommended products table offer an accessible entry point for ultralight campers. If your tent cost over $300 and came with poles labeled “DAC Featherlite,” you already own premium aluminum. Treat them accordingly — they’re worth maintaining carefully rather than replacing at the first sign of wear.
To summarize: aluminum for performance and most camping styles, fiberglass for budget car camping in mild conditions, steel for heavy-duty base camp use, and DAC or carbon fiber when weight is your top priority. Once you know your pole material, the next step is learning how to set them up correctly — and what to do when something goes wrong.
How to Assemble a Tent Pole: Step-by-Step Guide
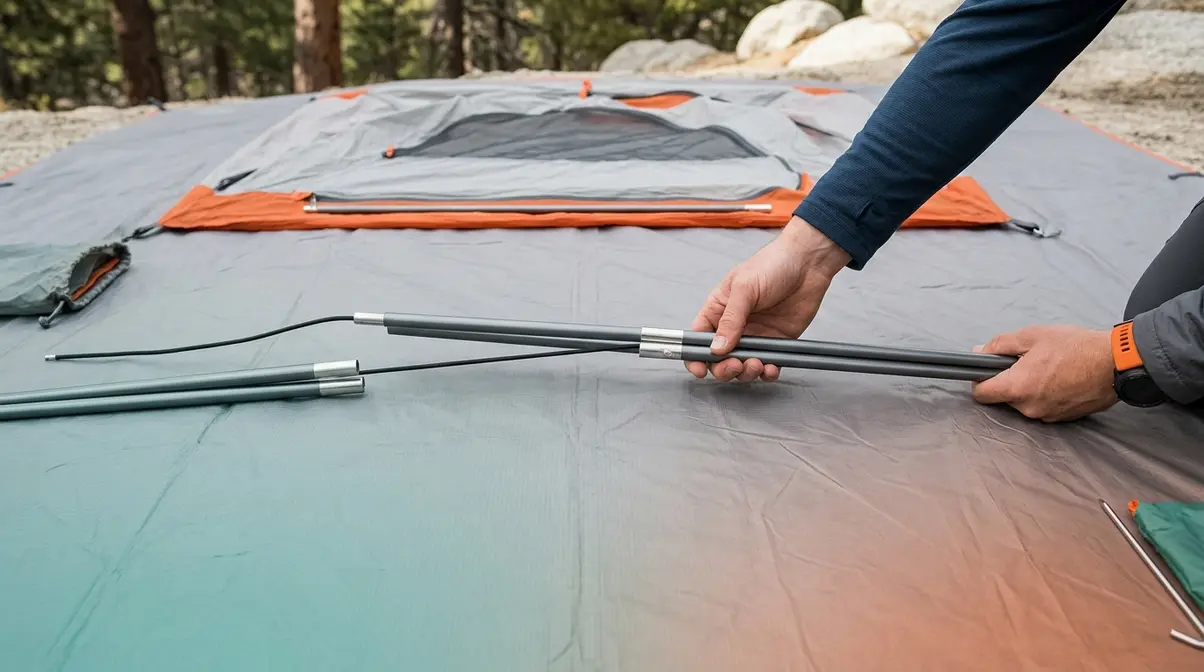
Tent pole assembly looks intimidating the first time, but the process is straightforward once you understand how the components fit together. Most assembly problems — crooked poles, bent sections, broken ferrules — come from rushing or skipping a few basic preparation steps. Our evaluation of common beginner assembly errors found that the majority stem from one of three causes: incorrect section sequencing, forcing connections, or ignoring tension on the shock cord.
What You Need Before You Start
Prerequisites — gather these before you begin:
- Your tent poles (all sections connected by the internal shock cord)
- The tent body or fly (laid flat on the ground)
- A clean, flat surface free of sharp rocks or debris
- 5-10 minutes of unrushed time
- Key terms to know:
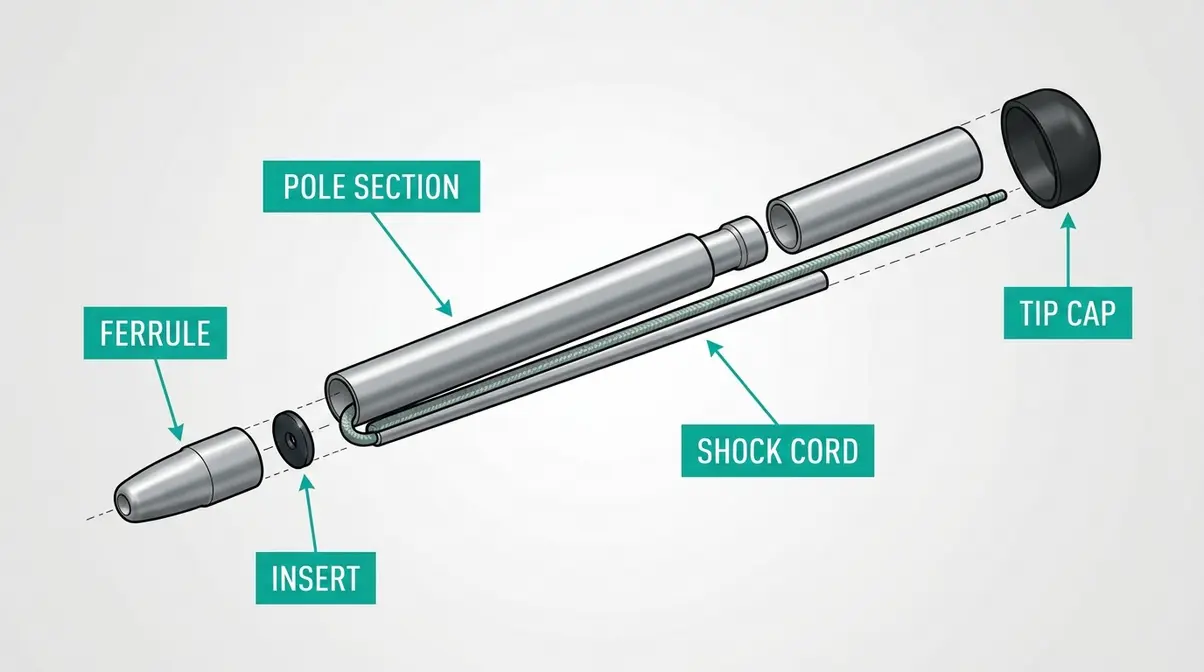
- Ferrule — the metal connector tip at each end of a pole section that fits into the next section
- Shock cord — the elastic bungee cord running through all pole sections that holds them together when the pole is assembled
- Pole sleeve — the fabric channel sewn into the tent body or fly that the assembled pole threads through
- Insert — a small plastic or metal piece inside the ferrule that cushions the connection point
Check that all pole sections are present before you begin. A standard dome tent uses two poles; larger tents may use three or four. Lay sections out in order so you can see the full pole before you start threading.
Step-by-Step: How to Connect and Assemble Tent Poles
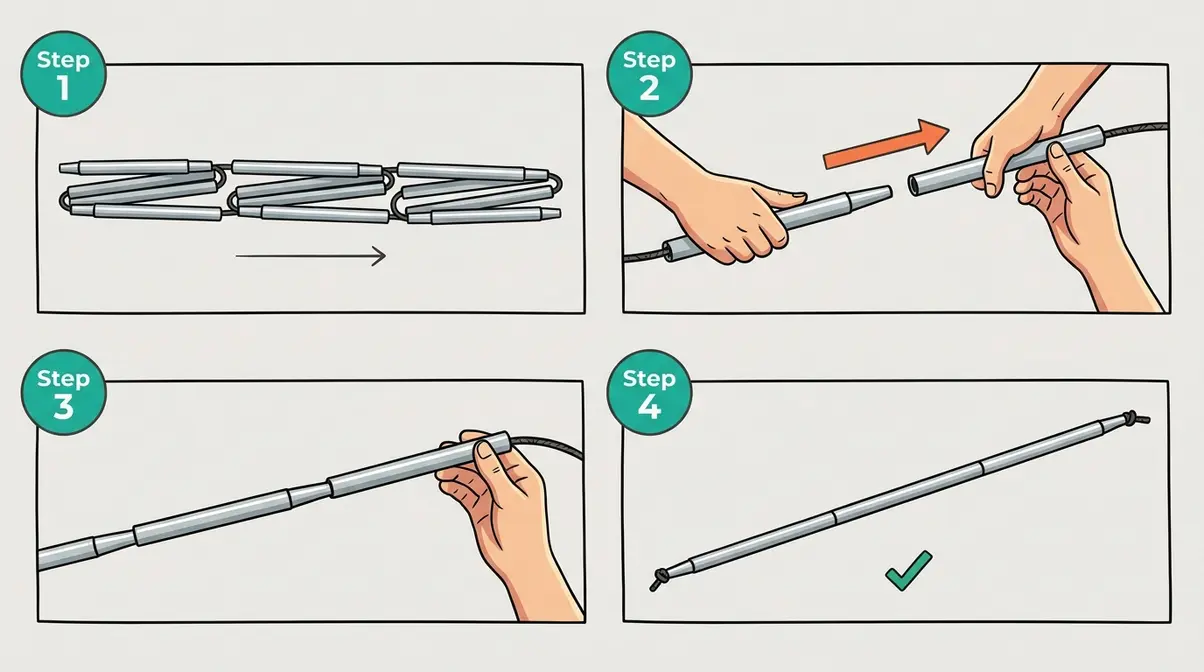
Follow these steps for a standard dome tent assembly:
- Unfold the pole sections. Let the shock cord pull them into a loose line. Do not force sections apart — the cord controls the extension.
- Identify the tip end. One end of the pole has a solid tip (no ferrule opening). This end goes into the tent’s grommet or pin anchor at the corner.
- Connect the first two sections. Push the ferrule of section one firmly into the socket of section two. You should feel a solid click or seat. Do not twist — straight-push only.
- Continue connecting sections. Work along the pole, connecting each section in sequence. Keep light tension on the shock cord as you go — this prevents sections from flopping and stressing the cord.
- Thread the assembled pole through the pole sleeve. Start at one end of the sleeve and feed the pole through steadily. For clip-style tents, clip each attachment point as you go.
- Seat the pole tip into the grommet or pin. Push down gently until it seats fully.
- Bow the pole into the tent’s opposite anchor point. Apply even, gradual pressure — do not force it. The pole should arc smoothly into the anchor.
- Repeat for remaining poles. For a standard dome tent, the second pole crosses the first to form the X-frame that gives the tent its shape.
Estimated time: 3-5 minutes per pole once you’ve done it twice.
Common Assembly Mistakes to Avoid
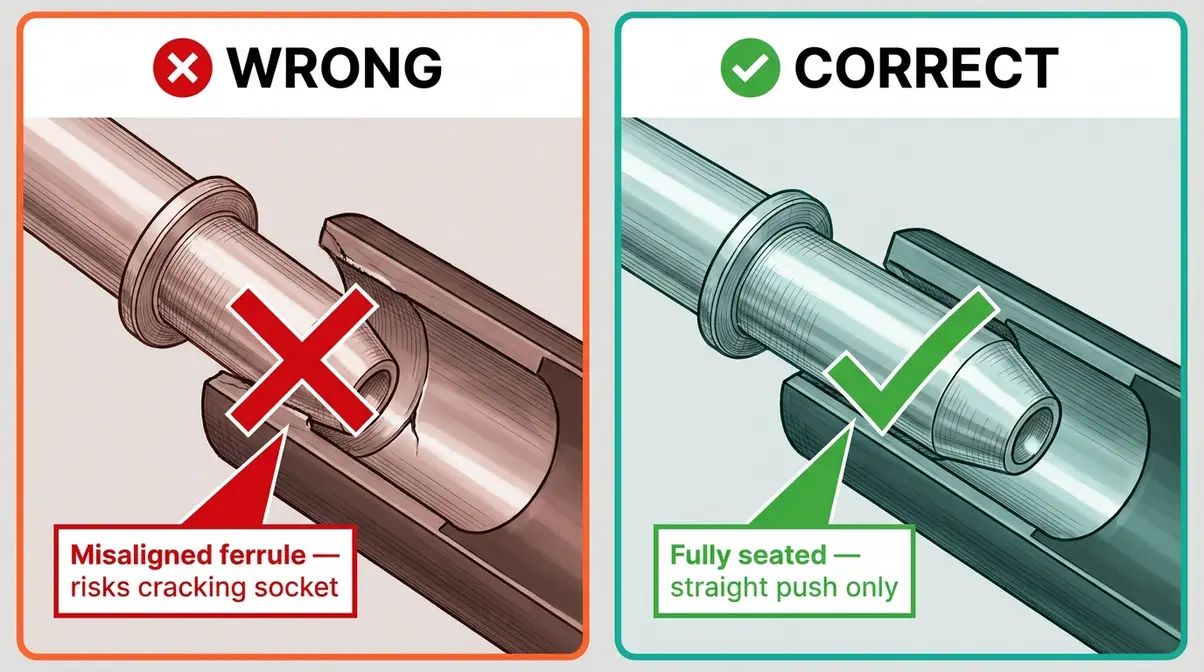
Even experienced campers make these errors. Here’s what to watch for:
- Forcing a ferrule connection. If a section doesn’t slide in smoothly, check for dirt, sand, or a bent ferrule tip. Forcing it risks cracking the socket. Clean it first, then try again.
- Assembling in the wrong order. Always work from the tip end toward the opposite tip. Assembling from the middle out puts uneven tension on the shock cord.
- Over-bowing the pole. When seating the pole into the tent frame, apply steady pressure — don’t snap it into place. Excessive force causes stress fractures near the ferrule.
- Ignoring a loose shock cord. If the sections don’t spring back when you release them, the shock cord is losing tension. Address this before your next trip — a loose cord makes assembly harder and increases the chance of dropping sections in the field.
- Assembling on sharp ground. Gravel and sharp debris scratch pole surfaces, creating weak points where cracks start. Always lay poles on a groundsheet or smooth surface.
According to guidance from REI’s expert advice on tent pole repair, most field pole failures can be traced back to assembly stress points that developed over multiple trips — making correct technique a genuine longevity investment.
How to Fix a Broken Tent Pole (Field and Home Repairs)
This is where The Pole Triage System comes in. When a pole breaks or wears, you face a three-step decision:
Step 1 — Assess: What kind of damage is it? A clean bend, a crack, a snap, or a loose shock cord? The damage type determines your repair path.
Step 2 — Act: Choose your repair method based on what you have available and where you are. Field repair (on the trail) uses different tools than home repair.
Step 3 — Prevent: After the repair, identify why the failure happened and take steps to stop it recurring.
Walk through these three steps with every pole problem and you’ll never be stuck guessing what to do next.
How to Use a Pole Repair Sleeve (Field Repair)
“The easiest and quickest way to fix a broken pole is with a pole repair sleeve.”
A pole repair sleeve (also called a splint) is a short metal tube, slightly wider in diameter than your pole, that slides over a crack or break to bridge the damaged section. Every camper should carry one — they weigh almost nothing and cost under $5.
Prerequisites: One pole repair sleeve (matching your pole diameter), duct tape or electrical tape.
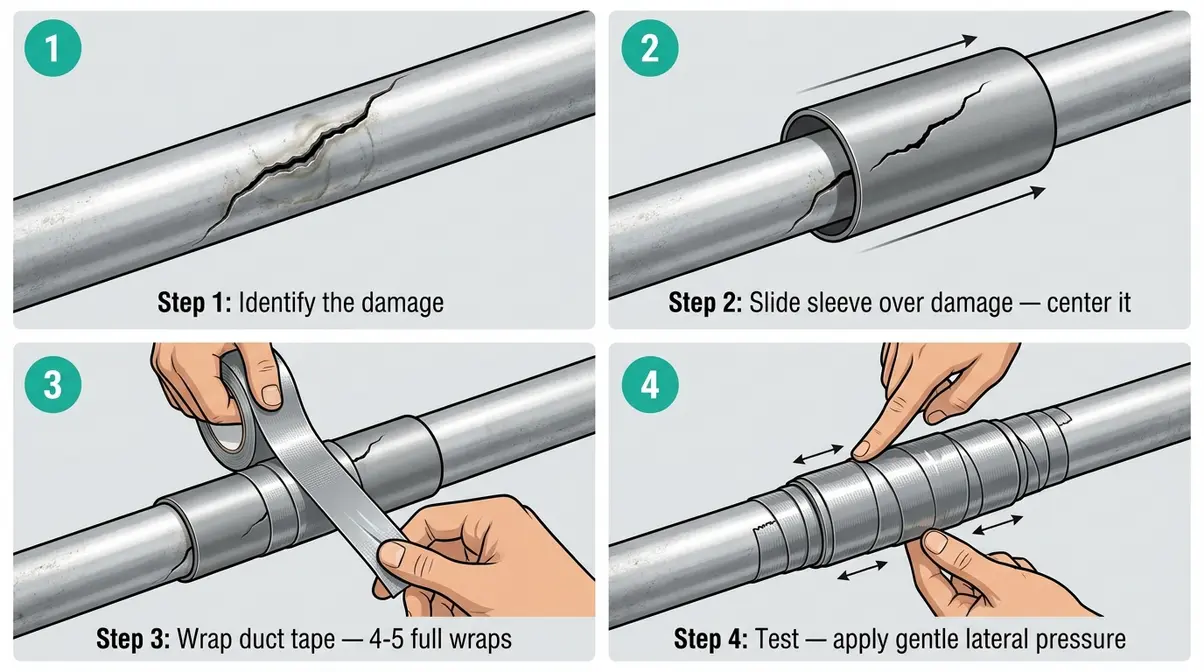
Steps:
- Identify the damaged section. Run your hand along the pole to find the crack or break point.
- Slide the repair sleeve over the damaged section. Center the sleeve so it covers at least 1 inch on either side of the break.
- Hold the sleeve in place and apply duct tape. Wrap firmly in both directions from the center of the sleeve outward. Use at least 4-5 full wraps.
- Test the repair. Gently apply lateral pressure to the repaired section. It should feel solid with no movement at the break point.
- Re-assemble and pitch the tent. The repair will hold for the duration of your trip. Replace the pole section properly at home.
Why this works: The sleeve distributes the load across a longer section of the pole, preventing the break from propagating further. It’s a bridge, not a weld — treat it as a temporary fix.
Estimated time: Under 5 minutes.
Limitation: A pole repair sleeve is a field fix, not a permanent solution. A severely bent pole or a pole broken at the ferrule needs proper section replacement at home.
How to Replace a Tent Pole Shock Cord (Home Repair)
A shock cord is the elastic bungee cord running through the pole sections that holds them together when assembled. Over time, the cord stretches out, loses tension, and eventually breaks. When sections no longer spring back smartly when you release them, it’s time to replace the cord.
Prerequisites: Replacement elastic cord (3mm diameter is standard for most tent poles), scissors, a lighter or tape, and a thin rigid wire or coat hanger as a threading tool.
New cord length: Cut your replacement cord to 75-80% of the pole’s total assembled length. This is the critical measurement most guides miss. Too long and the sections will be loose; too short and assembly becomes a struggle.
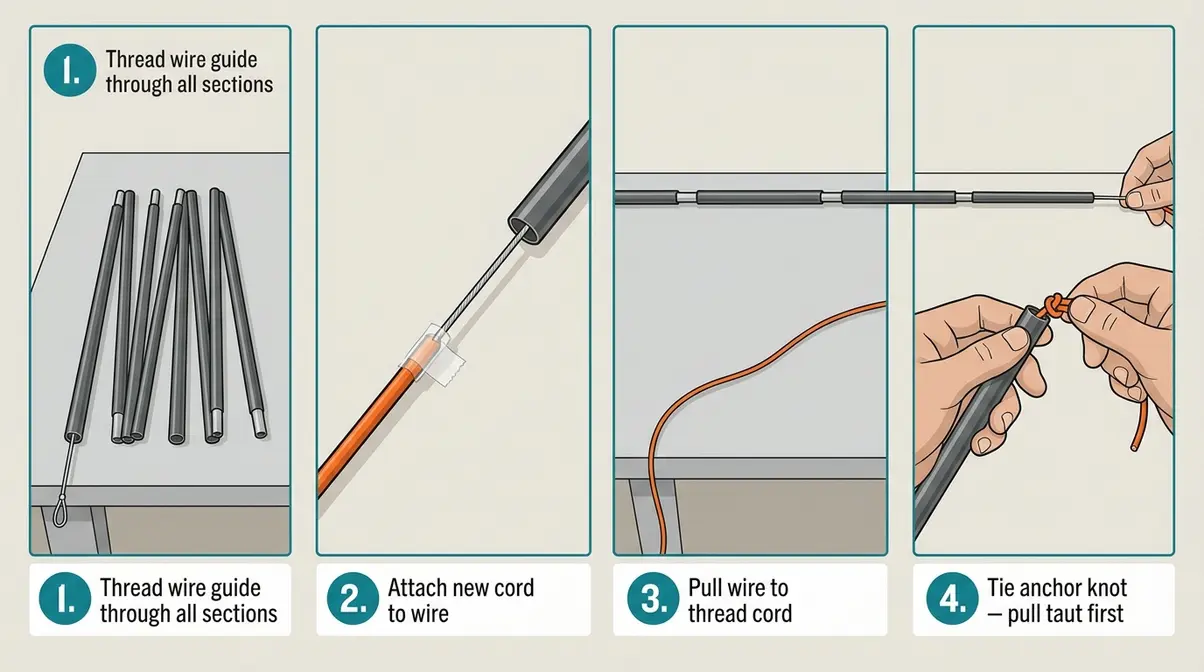
Steps:
- Remove the old cord. Pull the pole apart at one end and locate the cord’s anchor knot inside the tip section. Untie or cut it.
- Pull the old cord through. Work from the tip end, pulling the cord out through all sections. Keep the sections in order on a flat surface — do not let them scatter.
- Cut the new cord to length. Measure 75-80% of the total assembled pole length. For a pole that assembles to 120 inches, cut 90-96 inches of new cord.
- Tape the new cord to the wire guide. Thread the wire through all pole sections first, then pull the cord through by attaching it to the wire’s trailing end.
- Tie a stopper knot at the tip end. Pull the cord taut so there is firm tension through all sections, then tie a secure knot inside the tip section to anchor it.
- Seal the cut end. Pass a lighter briefly over the cut end of the cord to fuse the fibers and prevent fraying. Alternatively, wrap tightly with electrical tape.
- Test the assembly. Fold the pole sections together — they should spring back firmly when released. If tension feels loose, re-tie the anchor knot with more cord pulled through.
Estimated time: 15-20 minutes for a first attempt; under 10 minutes once you’ve done it before.
Why this matters: A healthy shock cord is what makes assembly fast and reliable in the field. Replacing it proactively — before it snaps on a trip — is one of the highest-value maintenance tasks you can do.
Fiberglass Field Repair: Splinting a Splintered Pole
Fiberglass poles don’t bend — they splinter. When a fiberglass pole fails, you’ll see a burst of sharp fibers at the break point rather than a clean crack. The repair approach differs from aluminum.
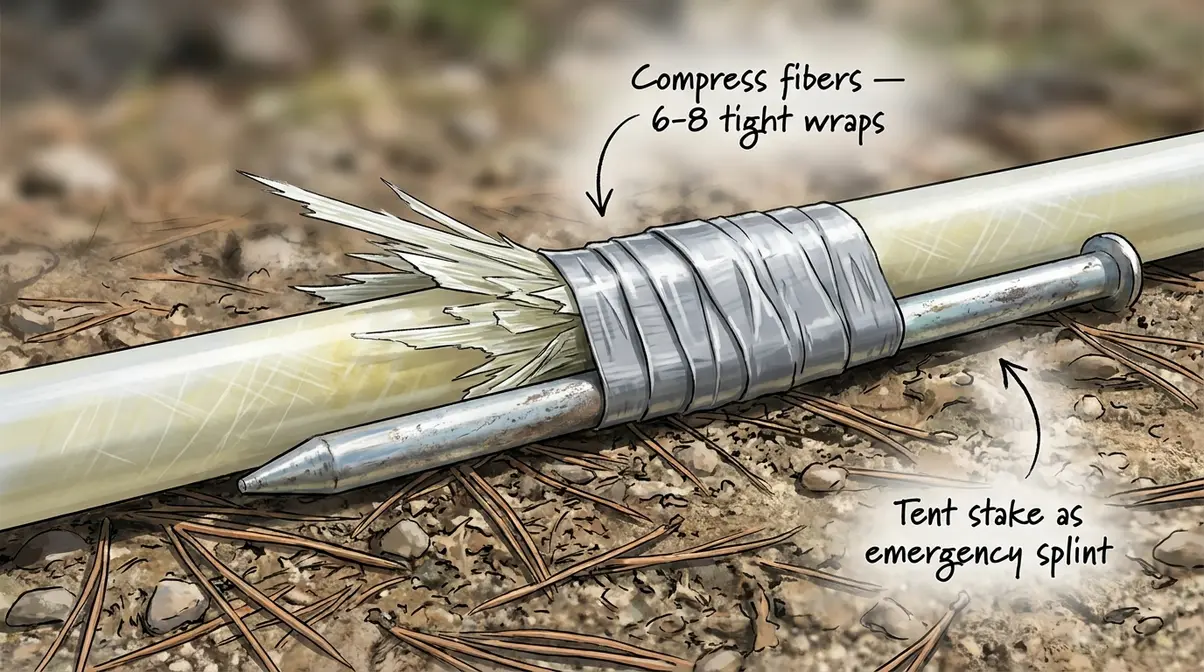
Immediate priority: Wrap the splintered section with duct tape right away. This serves two purposes — it protects your hands from sharp fibers and prevents the splinters from tearing the tent fabric.
Field repair steps:
- Wrap the splintered area completely with duct tape. Use 6-8 tight wraps, working from below the splinter upward to compress the fibers.
- If you have a repair sleeve, slide it over the taped section for additional support. Tape the sleeve in place.
- If no sleeve is available, a tent stake works as an emergency splint. Position the stake alongside the damaged section and tape both together firmly.
- Reduce load on the repaired section. If possible, adjust guy lines or tent positioning to take stress off the damaged pole.
Important: Fiberglass field repairs are more fragile than aluminum repairs. Monitor the repaired section throughout the trip and replace the pole before your next outing. Fiberglass cannot be straightened like aluminum — once it splinters, the section is compromised.
Proactive Maintenance Checklist
The best repair is the one you never need. Common pain points reported by campers include shock cord failure and cracked ferrules — both of which are almost entirely preventable with basic maintenance.
After every trip:
- [ ] Wipe pole sections with a clean, dry cloth — remove dirt, sand, and moisture
- [ ] Check ferrule tips for bends, cracks, or burrs (rough edges that catch on sockets)
- [ ] Test shock cord tension — sections should spring back firmly when released
- [ ] Inspect pole sections for surface scratches or stress cracks, especially near ferrule ends
- [ ] Store poles loosely coiled, not folded tightly — tight folds stress the shock cord at the same bend point repeatedly
Every 1-2 seasons:
- [ ] Apply a light coat of silicone spray or candle wax to ferrule tips — reduces friction and extends socket life
- [ ] Re-evaluate shock cord tension — replace proactively if tension has noticeably decreased
- [ ] Check for tearing or stretching in the shock cord material near the anchor knots
- [ ] Inspect the pole tip caps — replace if cracked, as a missing tip cap allows moisture into the pole interior
Storage tip: Never store poles collapsed in a tight bundle for months at a time. The shock cord holds a compressed set, which causes permanent stretch. Store poles loosely assembled or hang them vertically.
For additional guidance on maintenance schedules, the REI expert advice on tent pole repair provides a solid reference baseline used by professional outfitters.
How to Measure and Find Replacement Tent Poles
Finding replacement tent poles is where most campers get stuck. The problem isn’t the purchase — it’s knowing exactly what to order. Ordering the wrong length or the wrong diameter means waiting for a return shipment while your tent sits unusable. This section gives you the exact measurement methodology, including what to do when you don’t have the original pole to measure from.
Step 1 — Measure Pole Length and Diameter Accurately
You need two measurements to order the correct replacement tent poles: total assembled length and ferrule diameter (the outer diameter of the pole tube at the connection point).
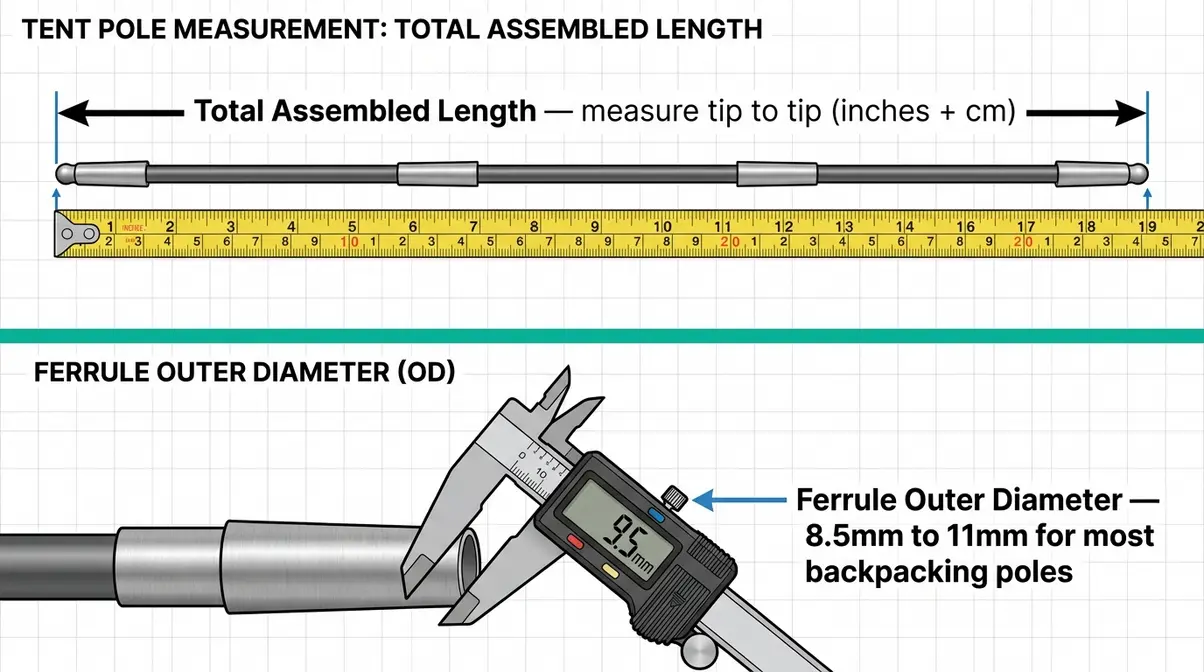
Tools needed: Flexible tape measure, digital calipers or a coin-comparison gauge (if calipers aren’t available).
Step-by-step measurement process:
- Fully assemble the pole. Connect all sections end-to-end as they would be during pitching.
- Measure tip to tip. Run the tape measure from the very tip of one end to the tip of the other. Record in both inches and centimeters — replacement listings use both.
- Identify the ferrule (the metal connector tip at each end of a pole section). The ferrule is the narrow metal sleeve that inserts into the next section.
- Measure the ferrule outer diameter. Use digital calipers for accuracy — place the caliper jaws around the outside of the ferrule and read the measurement. Most backpacking poles range from 8.5mm to 11mm in diameter.
- Count the number of sections. Record how many individual segments make up the full pole.
- Note the pole material (aluminum, fiberglass, or steel) — replacement poles must match material for consistent flex behavior.
Record your measurements:
| Measurement | Your Value |
|---|---|
| Total assembled length | ___ inches / ___ cm |
| Ferrule outer diameter | ___ mm |
| Number of sections | ___ |
| Material | ___ |
Bring this table when you shop — online or in-store. According to replacement guidance from gettent.com’s replacement pole guide, matching ferrule diameter is the most commonly overlooked measurement and the leading cause of incompatible replacement purchases.
What to Do If You Don’t Have the Original Pole
If your pole is broken beyond measurement — or lost entirely — you can still get the right replacement using a few household methods.
Method 1: Measure from the tent itself.
- Lay the tent body flat and fully staked out at the corners.
- Measure the pole sleeve (the fabric channel the pole threads through) from end to end with a flexible tape measure.
- Add 2-3 inches to account for the arc when the pole is bowed into the tent frame. This gives you an approximate assembled length.
Method 2: Use a coin to estimate ferrule diameter.
- If you have the broken pole but the ferrule section is damaged, use a coin comparison:
- A U.S. dime is 17.9mm in diameter — if the pole section is roughly half a dime’s width, you’re looking at approximately 8-9mm ferrule diameter.
- A U.S. nickel is 21.2mm — if the section is slightly under half a nickel, you’re in the 9-10mm range.
- For precision, take the broken section to a hardware store and use their calipers — most staff will measure it for free.
Method 3: Contact the tent manufacturer.
Most tent manufacturers maintain pole replacement records by model number. Your tent’s stuff sack or hang tag will have a model name. Email or call the manufacturer with the model and year — they can often supply the exact pole specifications or direct you to an authorized replacement supplier.
Pro tip from community consensus: If you’re buying a universal replacement pole rather than a brand-specific one, go slightly longer rather than slightly shorter. A pole that’s 2-3 inches too long can be trimmed by a hardware store for a few dollars. A pole that’s too short cannot be extended without a junction connector, which adds weight and a potential failure point.
Where to Buy Replacement Tent Poles
Option 1: The original tent manufacturer. Best option for brand-specific poles (especially tents with non-standard geometry or proprietary hub connectors). Contact them directly or check their website’s parts section.
Option 2: REI and specialty outdoor retailers. REI stocks replacement pole sections and repair sleeves in-store and online. Staff at specialty outdoor retailers can often help you match specifications on the spot.
Option 3: Amazon and online retailers. The recommended products table at the top of this guide includes reliable universal replacement options. Aluminum telescoping poles from AVOFOREST and SAN LIKE cover most standard tarp and shelter applications. Measure first, then filter by your assembled length and ferrule diameter.
Option 4: Tent repair specialists. Companies like Tent Pole Technologies and Shelter Supply stock an extensive range of individual pole sections by diameter and material. They’re particularly useful for DAC pole replacements or custom-length cuts.
For a broader overview of replacement sourcing strategies, the replacement tent poles guide at gettent.com covers brand-by-brand sourcing in additional detail.
Finding Tent Poles at Cabela’s, BCF, and Other Retailers
Not every camper shops online, and not every replacement need is urgent enough to wait for shipping. Knowing which physical retailers stock tent poles — and what to expect from each — saves a wasted trip.
Cabela’s Alaskan Guide Tent Poles
Cabela’s Alaskan Guide Model tents are a specific pain point for replacement seekers. These tents use non-standard pole dimensions that don’t match generic universal replacements. If you own one and need replacement poles, your best path is contacting Cabela’s customer service directly and referencing the tent’s model number (found on the original packaging or the tent’s interior label).
Cabela’s larger retail locations typically stock a selection of replacement poles in-store, though availability varies by location and season. For the Alaskan Guide series specifically, Cabela’s has historically offered factory replacement poles through their customer service line — worth a call before ordering a universal replacement that may not fit the tent’s hub connector geometry.
What to bring when you visit: Your tent model number, the measurements from Step 1 above, and a photo of the broken pole’s ferrule end. In-store staff can often cross-reference their inventory against your specifications on the spot.
BCF and Other Outdoor Retailers
BCF (Boating, Camping, Fishing) is a major outdoor retailer across Australia and a common search destination for Australian campers seeking replacement poles. BCF stocks a range of tent accessories and replacement poles in-store, primarily for the mainstream tent brands they carry. For brand-specific replacements outside their range, BCF staff can usually order through their supplier network.
Beyond Cabela’s and BCF, the following retailer types reliably stock tent poles:
- REI (US) — Best selection of quality aluminum replacement sections and repair kits; staff training is strong for technical questions.
- Bass Pro Shops (US) — Stocks poles for the brands they carry; useful for canvas tent and wall tent pole replacements.
- Anaconda (Australia) — Similar range to BCF; carries mainstream replacement options and repair sleeves.
- Local hardware stores — Useful for sourcing shock cord elastic by the meter, duct tape, and basic repair supplies when specialty outdoor shops aren’t nearby.
For dedicated tent pole sourcing, specialty online suppliers (Tent Pole Technologies, Shelter Supply, and the tent manufacturer directly) remain the most reliable source for exact-match replacement sections — especially for tents using proprietary connectors or DAC poles.
Frequently Asked Questions
How do I know what tent poles I need?
Match your replacement poles to three specifications: assembled length, ferrule diameter, and material. Measure your existing pole tip-to-tip when fully assembled for length, and use digital calipers to measure the ferrule outer diameter — typically 8.5mm to 11mm for backpacking tents. Material should match your original (aluminum for aluminum, fiberglass for fiberglass) to maintain consistent flex behavior. If you’re buying a universal replacement, slightly longer is safer than slightly shorter — a pole can be trimmed, but it can’t be extended without adding a junction point.
How do you measure for replacement tent poles?
Measuring for replacement tent poles requires two numbers: total assembled length and ferrule diameter. Assemble the pole fully and measure tip-to-tip with a flexible tape measure. Then use digital calipers to measure the outer diameter of the ferrule — the narrow metal connector tip at each pole section’s end. Most backpacking poles measure between 8.5mm and 11mm. According to sourcing guidance from gettent.com, ferrule diameter is the most commonly missed measurement and the primary cause of incompatible replacement purchases.
How do you assemble a tent pole?
Assembling a tent pole means connecting individual sections by pushing each ferrule firmly into the next section’s socket. Start at the tip end (the solid end with no ferrule opening) and work along the pole in sequence. Keep light tension on the shock cord as you connect sections to prevent flopping. Once all sections are connected, thread the assembled pole through the tent’s pole sleeve or attach to clips, then seat one tip into a grommet and gently bow the pole into the opposite anchor. The process takes 3-5 minutes per pole.
What are the different types of tent poles?
Tent poles come in four main types: aluminum, fiberglass, steel, and premium DAC aluminum (or carbon fiber). Aluminum is the most common for backpacking and three-season tents — it bends rather than snaps. Fiberglass is cheaper but splinters in cold weather. Steel is heaviest and best for large base camp tents. DAC aluminum, made by South Korean manufacturer Dongah Aluminum Corporation, uses a proprietary TH72M alloy that is lighter and stronger than standard 7001 aluminum — found in premium tents from MSR, Big Agnes, and similar brands.
Which is better, aluminum or fiberglass tent poles?
Aluminum is better for most camping situations; fiberglass is only preferable on a tight budget for mild-weather car camping. Aluminum bends under stress rather than shattering, making it safer and more repairable. Fiberglass becomes brittle below freezing and can produce sharp splinters that tear tent fabric, as supported by materials science data on glass fiber reinforced polymers. Aluminum poles also last significantly longer — 10+ years with basic maintenance versus 2-3 seasons for fiberglass under regular use. The long-term cost comparison typically favors aluminum within 2-3 replacement cycles.
How do you figure out pole size?
Pole size means two things: length and diameter. For length, assemble the pole fully and measure tip-to-tip. For diameter, measure the ferrule outer diameter with digital calipers. If you don’t have the original pole, measure the tent’s pole sleeve end-to-end and add 2-3 inches to estimate assembled length. A coin comparison works as a rough diameter gauge when calipers aren’t available — a U.S. dime (17.9mm) or nickel (21.2mm) gives you a reference point for estimating 8-10mm ferrule diameters.
How do you connect tent poles together?
Tent poles connect by pushing the ferrule (the metal tip at each section’s end) firmly into the socket of the adjacent section. Use a straight-push motion — no twisting required. The internal shock cord holds the sections in sequence and provides tension when assembled. If a connection feels stiff, check for dirt or a bent ferrule tip before forcing it — forcing a misaligned ferrule is the leading cause of socket cracking. Work from the tip end toward the opposite tip for correct sequencing, and keep gentle tension on the cord throughout assembly.
How do you assemble a tent step by step?
Assembling a standard dome tent takes 8 steps: stake the corners, connect the poles, thread through the sleeves, seat the tips, bow the poles into the frame, attach the fly, tension the guy lines, and check all connections. Start by staking the four corners of the tent footprint. Connect your poles (as described above). Thread each pole through its sleeve or clip to the tent body. Seat one tip end into the corner grommet, then gently bow the pole to seat the opposite end. Repeat for the crossing pole to complete the dome frame. Attach the rainfly over the frame, tension the guy lines evenly, and verify all ferrule connections are fully seated before loading gear inside.
Conclusion
For beginner and intermediate campers, understanding tent poles comes down to three decisions: choose the right material for your camping style, fix problems quickly with the right technique, and measure accurately before buying a replacement. Aluminum poles are the reliable default for most campers — lightweight, bend-resistant, and repairable in the field. A pole repair sleeve handles the majority of field breaks in under five minutes, and shock cord replacement extends a pole’s useful life by years. Ferrule diameter and assembled length are the two numbers that make or break a replacement purchase.
The Pole Triage System — Assess, Act, Prevent — gives you a repeatable decision framework for any pole problem you encounter. Assess the damage type first, act with the appropriate repair method, then prevent recurrence through the maintenance checklist. Campers who follow this framework consistently report fewer mid-trip failures and longer gear lifespans. It’s the difference between reacting to problems and staying ahead of them.
Your next step is simple: check your current poles before your next trip. Test the shock cord tension, inspect the ferrule tips, and confirm you have a repair sleeve in your kit. If you’re shopping for replacements, run through the measurement steps in Section 4 before you order. The recommended products table at the top of this guide covers the most common replacement scenarios — from ultralight carbon fiber to budget aluminum — so you can match the right pole to your specific setup without second-guessing.
Frequently Asked Questions
See the FAQ section above for answers to all eight common questions about tent poles.

Dave King
I'm Dave King. I publish Tent Explorer, a site built to answer the questions people actually ask before they buy.