Essential Camping Gear: Complete Checklist for 2026
 David King
Updated June 20, 2026
24 min read
David King
Updated June 20, 2026
24 min read
You’ve been dreaming about your first camping trip for weeks. Then you open a browser tab to start packing — and suddenly there are 47 different checklists, each one longer than the last. A water filter? A trowel? A four-season tent? For a weekend trip?
Here’s the truth: you do not need everything. You need the right things, in the right order. This guide to essential camping gear breaks the overwhelm into a clear system, covers eight distinct camping contexts, and gives you a downloadable checklist so you can walk out the door with confidence. Before you go, check your campground’s regulations, confirm the weather forecast, and review any permit requirements — these steps protect both you and the outdoors you’re heading into.
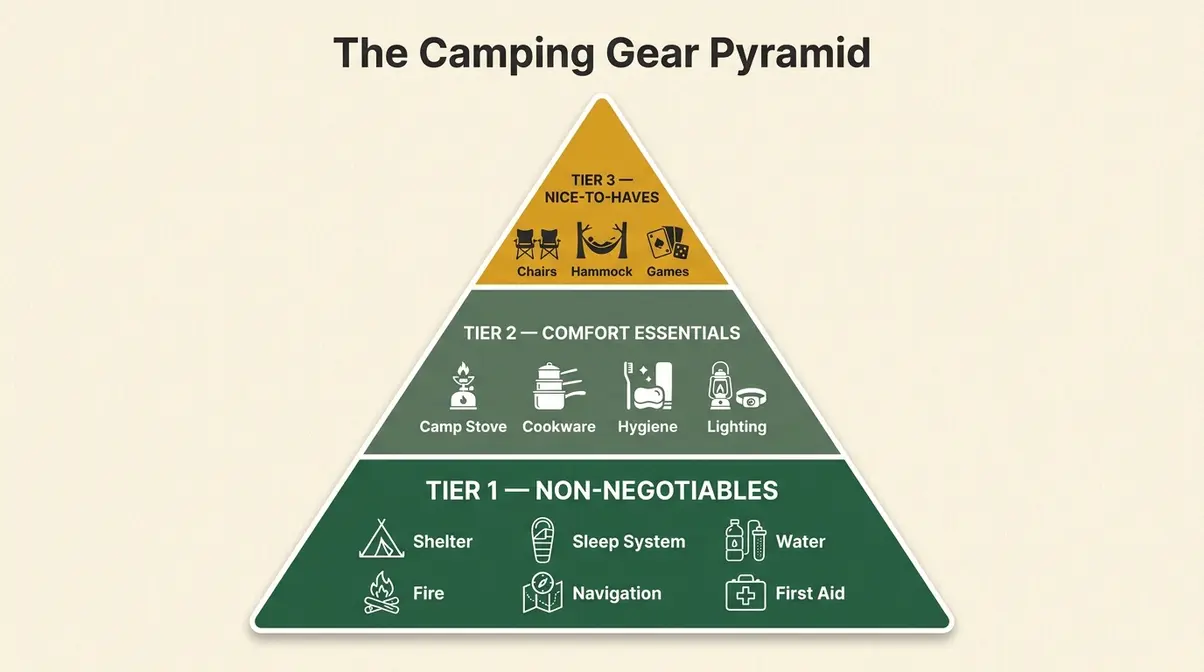
Packing essential camping gear doesn’t have to be overwhelming — The Camping Gear Pyramid organizes every item into three tiers: Non-Negotiables first, Comfort Essentials second, Nice-to-Haves last. Start with shelter, sleep, water, and safety. Add comfort layers once those are covered.
- The Camping Gear Pyramid: Non-Negotiables → Comfort Essentials → Nice-to-Haves. This order prevents both under-packing and over-packing.
- The NPS 10 Essentials (navigation, headlamp, sun protection, first aid, knife, fire, shelter, food, water, clothing) form the backbone of every safe trip.
- The #1 forgotten item across camping communities is a fire starter — closely followed by a headlamp with fresh batteries.
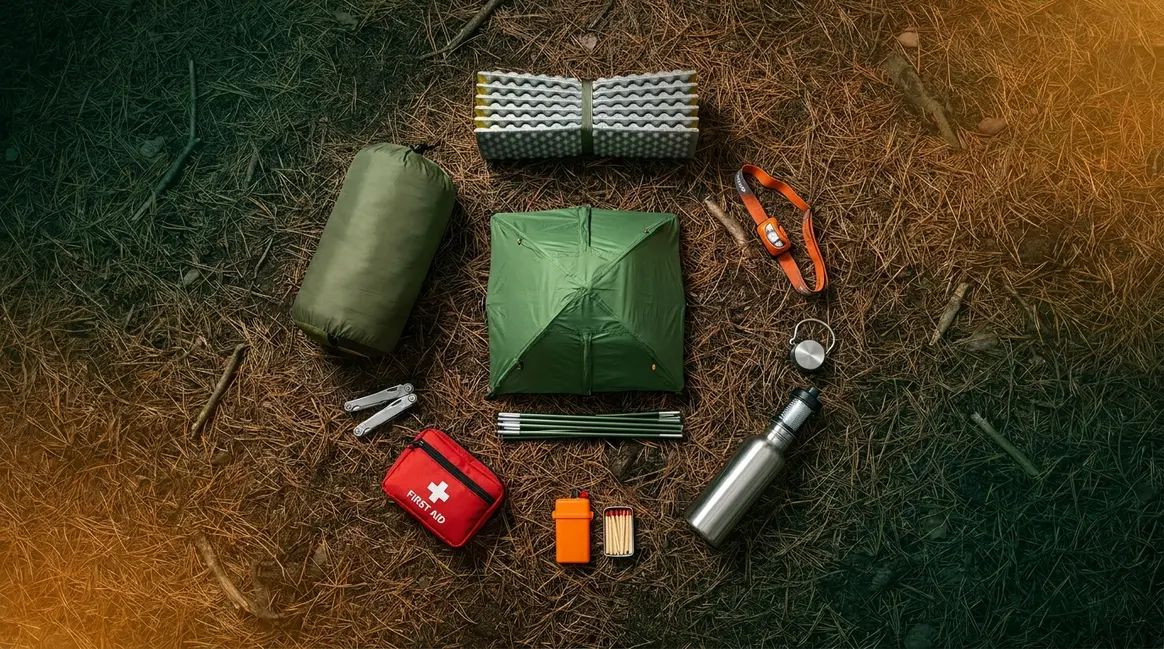
- Beginners can start with six items: tent, sleeping bag, sleeping pad, headlamp, water, and a fire starter. Everything else is a bonus on your first trip.
What Is Essential Camping Gear?
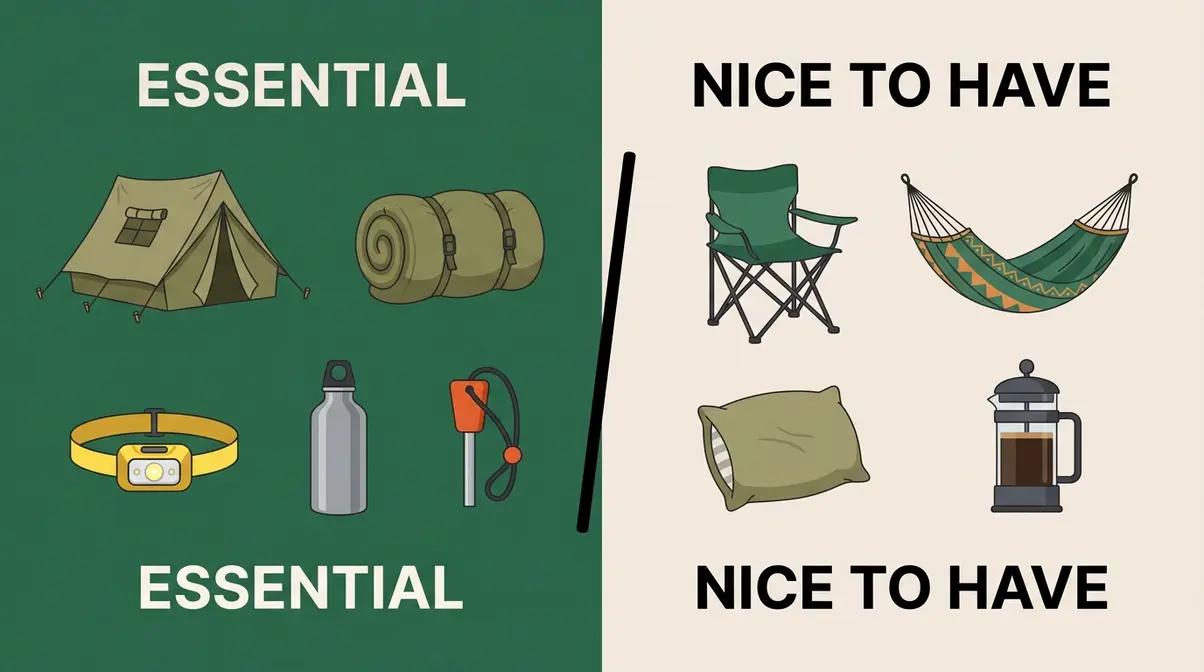
Essential camping gear is the equipment that keeps you safe, sheltered, hydrated, and fed in an outdoor environment — the items whose absence can turn a fun trip into a dangerous one. Experienced campers consistently report that the line between “essential” and “nice-to-have” is sharper than most checklists suggest. A comprehensive camping checklist for first-time campers provides a solid foundation for understanding these requirements.
The NPS 10 Essentials: Your Non-Negotiable Starting Point
The Ten Essentials framework has guided safe outdoor travel since the 1930s, and National Park Service rangers continue to recommend carrying this core set on every trip:
- Navigation — a map and compass (don’t rely solely on your phone)
- Illumination — a headlamp or flashlight with extra batteries
- Sun protection — sunscreen, sunglasses, and a hat
- First aid supplies — bandages, antiseptic, and personal medications
- Knife/repair tools — a multi-tool and duct tape
- Fire — a lighter or matches plus a dedicated fire starter
- Emergency shelter — a lightweight space blanket or emergency bivy
- Extra food — at least one extra day’s worth of high-energy snacks
- Extra water and treatment — water plus a filter or purification tablets
- Extra clothing — insulating layers for unexpected weather changes
These ten categories are the floor, not the ceiling. They apply to day hikes and overnight trips alike. Missing even one — especially fire or water treatment — can escalate a minor inconvenience into an emergency.
The Camping Gear Pyramid: How to Prioritize Every Item
The Camping Gear Pyramid is a three-tier decision framework that transforms an overwhelming gear list into a clear priority order. Think of it as building a shelter: you lay the foundation before you hang curtains.
- Tier 1 — Non-Negotiables: Shelter, sleep system, water, fire, navigation, first aid. These items directly protect your life. Buy or borrow these first, always.
- Tier 2 — Comfort Essentials: Camp stove, cookware, lighting beyond a headlamp, hygiene basics, extra clothing layers. These make your trip enjoyable and sustainable for more than one night.
- Tier 3 — Nice-to-Haves: Camp chairs, a hammock, a camp pillow, games, a French press. These add pleasure — but leaving them behind won’t ruin your trip.
Every time you look at a new piece of gear, ask: Which tier does this belong to? If it’s Tier 1, it goes in the bag first. If it’s Tier 3 and your pack is already full, it stays home.
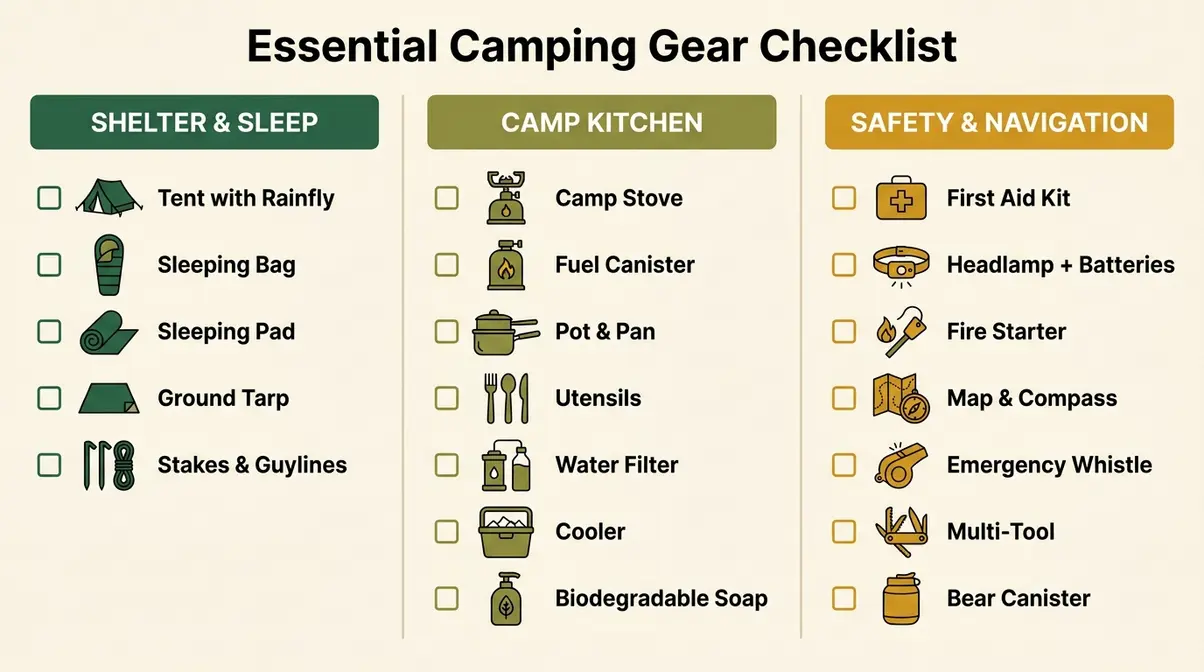
⛺ Shelter & Sleep System
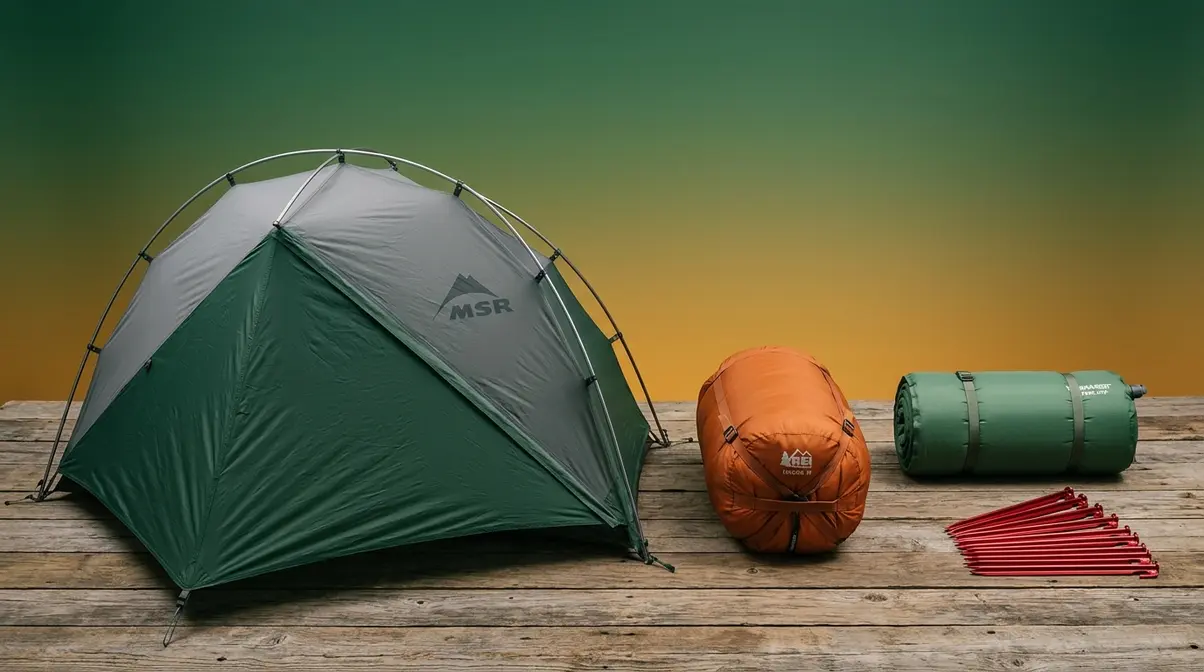
Your shelter and sleep system are the two most critical investments in your entire essential camping gear setup. Get these wrong and no amount of camp chairs or camp stoves will save your trip. A cold, wet, sleepless night is the single most common reason first-time campers swear they’ll “never do that again.”
Choosing Your First Tent
A tent is not just a roof — it’s your primary protection against wind, rain, insects, and cold ground air. For beginners, REI’s camping essentials guide recommends a 3-season tent (designed for spring, summer, and fall conditions) as the most practical starting point.
What to look for:
- Rainfly (a waterproof outer cover that drapes over the tent body) — non-negotiable for any overnight trip
- Vestibule (a small covered area outside the main door, like a tiny porch) — stores muddy boots and wet gear outside your sleeping area
- Capacity rating — a “2-person tent” fits two people with minimal gear; buy one size up from your group size for comfort
- Freestanding design — stands on its own without staking, which makes setup on hard ground much easier
Avoid the common beginner trap: the cheapest tent at a big-box store often lacks a full rainfly, meaning the mesh ceiling lets rain straight in. Spending $20 more on a model with proper waterproofing will protect your entire trip.
Sleeping Bags and Sleeping Pads: What You Actually Need
A sleeping bag’s temperature rating tells you the lowest temperature at which an average sleeper will stay warm. A bag rated to 20°F (-7°C) means it will keep most people comfortable down to that temperature. If your campground drops to 45°F at night, a 20°F bag gives you a generous safety margin.
Your sleeping pad matters just as much as your bag. The R-value (a measure of insulation — higher numbers mean better insulation from the cold ground) is the key spec. For three-season camping, an R-value of 2–3 is sufficient. Without a pad, the cold ground will drain your body heat far faster than cold air above you — even inside a high-quality sleeping bag.
Quick reference:
| Camping Condition | Sleeping Bag Rating | Sleeping Pad R-Value |
|---|---|---|
| Summer (60°F+ nights) | 35°F or higher | R-1 to R-2 |
| Three-season (30–60°F) | 15°F–30°F | R-2 to R-3 |
| Winter (below 30°F) | 0°F or lower | R-4 to R-6+ |
🍳 Camp Kitchen & Nourishment
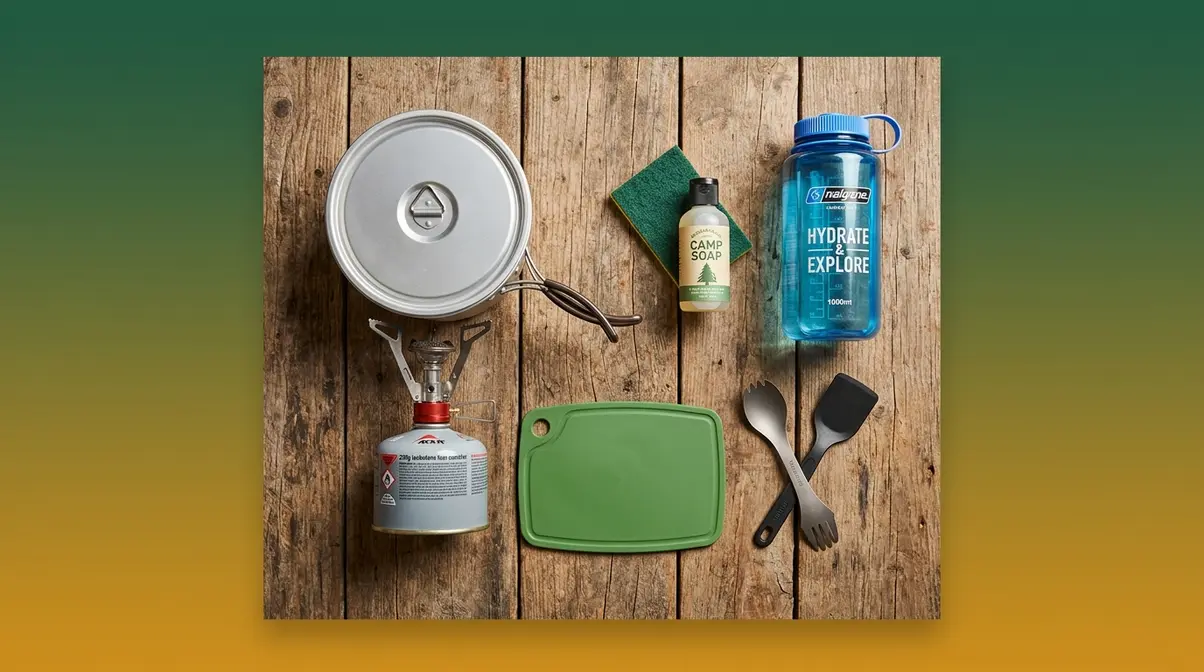
A well-stocked camp kitchen turns a survival exercise into one of the best meals you’ve ever eaten. The smell of coffee on a mountain morning or a hot pasta dinner after a day hike is one of camping’s great rewards — but only if you remembered the stove fuel.
Camp Stoves and Cooking Equipment
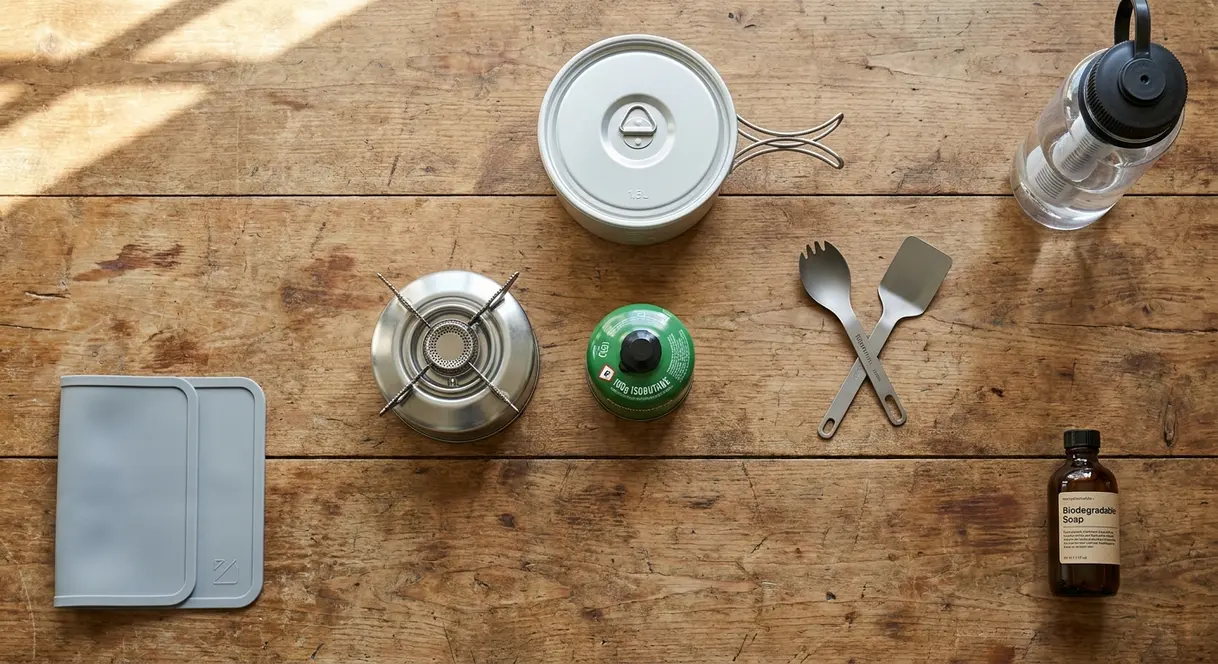
For beginners, a canister stove (a compact burner that screws onto a pressurized fuel canister) is the simplest starting point. It lights in seconds, requires no priming, and packs small. A single 100g fuel canister is typically sufficient for a 2-night trip for two people.
Core kitchen gear for your first trip:
- Camp stove + at least one extra fuel canister
- A single pot (1.5–2 liter capacity handles most one-pot meals)
- A lightweight pan for eggs or pancakes
- Utensils: spork, spatula, knife, and a can opener
- A cutting board (a flexible silicone mat weighs almost nothing)
- Biodegradable soap and a small scrub pad for washing up
Across outdoor forums and camping communities, the universal advice is to cook a camp meal at home first before your trip. You’ll discover immediately if you forgot the pot lid, the can opener, or the stove’s igniter.
Food Storage, Water, and Hydration
Water is your most critical consumable — and the one most beginners underestimate. The general rule: plan for 2 liters of drinking water per person per day, plus extra for cooking and cleaning. For car camping, bring more than you think you need. For backcountry trips, carry a water filter (a device that removes bacteria and protozoa from natural water sources) or chemical purification tablets as backup.
Food storage rules vary by location. In bear country (many national parks and wilderness areas), you are legally required to store food in a bear canister (a hard-sided, bear-resistant container) or use designated bear boxes at the campsite. Check your specific campground’s regulations before you go — this is not optional.
🔦 Safety, Navigation & Illumination
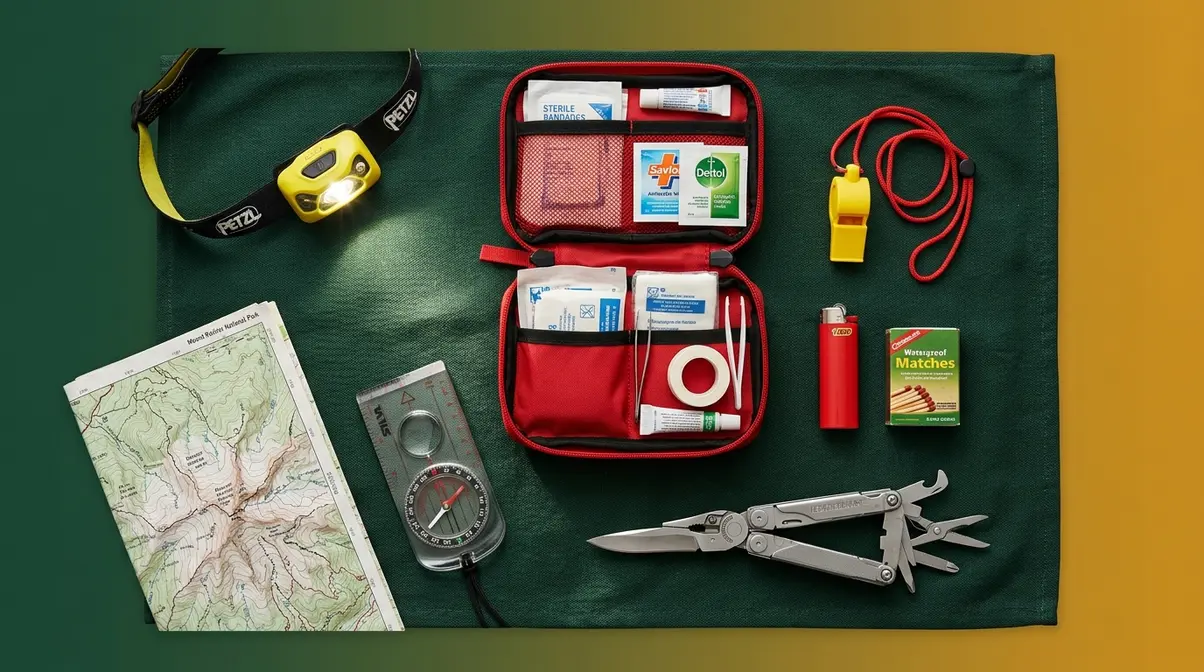
Safety gear is the most emotionally easy category to skip — because you don’t expect to need it. That’s exactly why experienced campers always carry it. The NPS recommends treating safety items as non-negotiable regardless of trip length or proximity to civilization.
First Aid Kit: What Must Be Inside
A first aid kit is only useful if it contains the right items for the specific risks of your environment. A pre-assembled camping kit from a reputable outdoor retailer is a solid starting point, but you should verify it contains these essentials:
- Adhesive bandages in multiple sizes
- Gauze pads and medical tape
- Antiseptic wipes and antibiotic ointment
- Blister treatment (moleskin or blister pads — blisters are the #1 injury for new hikers)
- Tweezers (for splinters and ticks)
- Pain relievers (ibuprofen and acetaminophen)
- Antihistamine tablets (for allergic reactions to insect stings or plants)
- Any personal prescription medications you take daily
- Emergency whistle — a single blow carries farther than a shout
Safety disclaimer: Always check weather conditions and local regulations before camping. In areas with high wildfire risk, open fires may be prohibited. In wilderness areas, specific permits and bear-safety protocols apply. When in doubt, contact the managing agency (National Park Service, U.S. Forest Service, or state parks) directly.
Fire Starters, Headlamps & Navigation Tools
Headlamps are the single most practical lighting tool for camping — they keep your hands free for setting up a tent, cooking, or reading a map in the dark. Always bring at least two light sources (e.g., a headlamp plus a lantern) and carry fresh batteries or a charged power bank.
For fire starting, never rely on a single method. Experienced campers consistently carry at least two: a lighter plus waterproof matches or a ferro rod (a metal rod you scrape to produce sparks). Wet conditions can render a single lighter useless.
Navigation basics for beginners:
- Download an offline map of your campground area before leaving cell service range (apps like AllTrails or Gaia GPS allow this)
- Carry a physical map of the park or trail system as a backup
- Note your campsite number and the camp entrance GPS coordinates before you leave your car
“A headlamp with fresh batteries is the single most important hands-free safety item you can carry — it costs under $30 and solves problems you haven’t even anticipated yet.” — consistent finding across multiple camping gear evaluations.
Clothing, Hygiene & Camp Tools
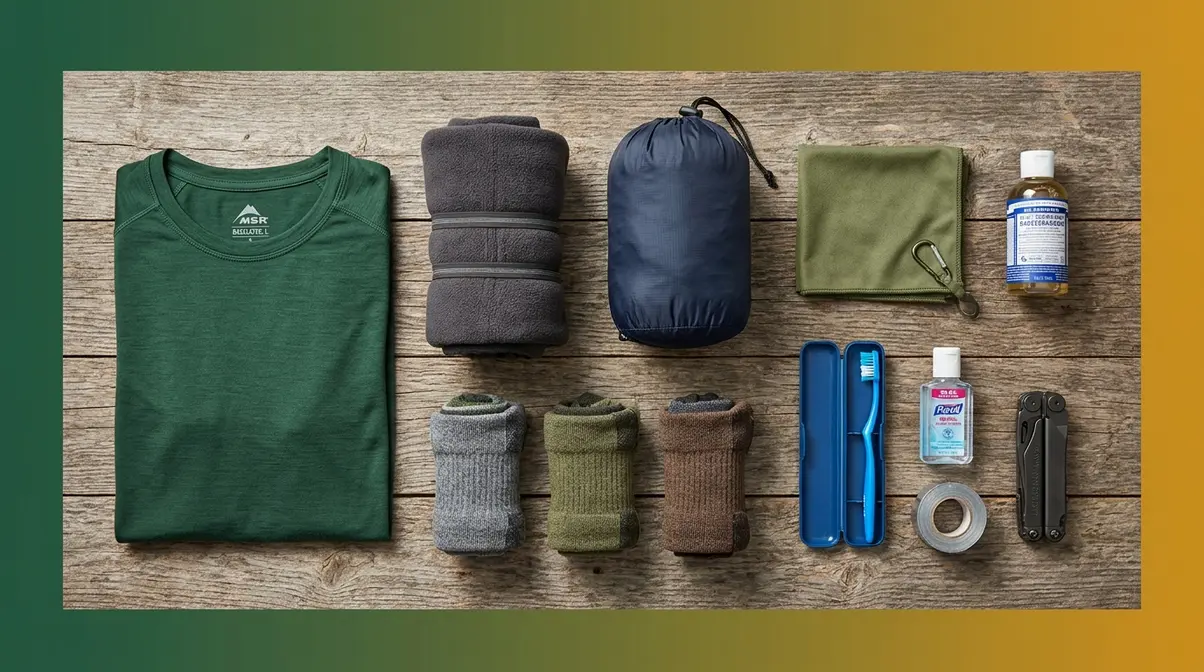
The right clothing can mean the difference between a miserable damp night and a comfortable one. For hygiene, the Leave No Trace principle applies: what you bring in, you pack out — and that includes your waste.
Moisture-Wicking Clothing and Footwear
Moisture-wicking fabric pulls sweat away from your skin and allows it to evaporate quickly, keeping you dry and warm. Cotton, by contrast, absorbs sweat and holds it against your skin — which can cause dangerous heat loss when temperatures drop. Outdoor communities consistently repeat the phrase: “Cotton kills” in cold or wet conditions.
Clothing checklist for a 2-night trip:
- 2 moisture-wicking base-layer shirts (synthetic or merino wool)
- 1 insulating mid-layer (fleece jacket)
- 1 waterproof rain shell (not a cotton hoodie)
- 2 pairs of quick-dry pants or hiking shorts
- 3–4 pairs of wool or synthetic hiking socks
- Sturdy closed-toe footwear with ankle support
- Camp shoes or sandals for relaxing at the site
Hygiene Essentials and Repair Tools
For hygiene, the Leave No Trace Center recommends using biodegradable soap (soap that breaks down naturally in the environment) and washing at least 200 feet from any water source. A quick-dry microfiber towel, toothbrush, and hand sanitizer cover the basics.
Camp repair tools worth carrying:
- Duct tape (wrap a few feet around your water bottle to save space)
- Tent repair patches (often included with new tents)
- A multi-tool with pliers and a blade
- Extra tent stakes (they bend, break, and disappear)
A multi-tool with pliers and a blade proves invaluable for fixing jammed zippers or repairing stove valves. Extra tent stakes ensure your shelter remains secure during unexpected high winds, preventing a minor inconvenience from ruining your night.
The Top 10 Most Forgotten Camping Items
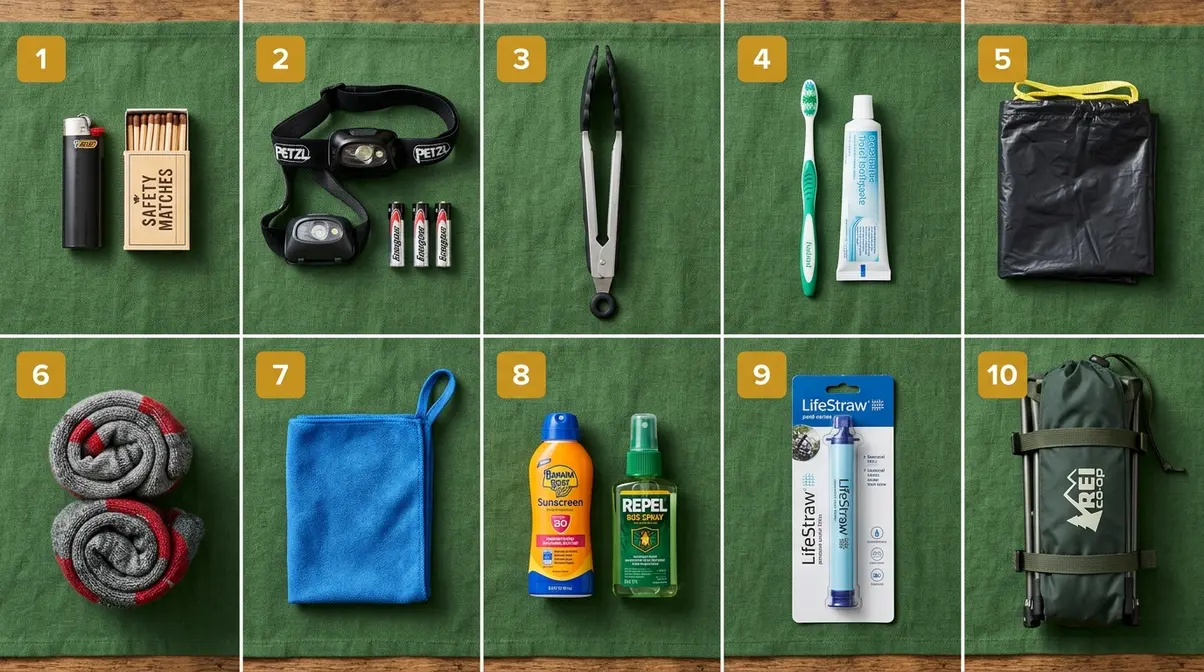
Every experienced camper has a story about the item they forgot. Our team evaluated gear lists across multiple camping contexts — from car camping to backcountry trips — and cross-referenced findings from surveys of hundreds of real campers. The pattern is consistent: it’s never the big items people forget. It’s the small ones.
What Experienced Campers Always Leave Behind
According to multiple independent surveys and camping community reports, these are the ten items most commonly forgotten:
- Fire starter — people pack wood but forget the lighter or matches
- Headlamp with fresh batteries — the headlamp is in the garage, the batteries are dead
- Tongs — essential for campfire cooking; surprisingly easy to overlook
- Toothbrush and toiletries — left on the bathroom counter
- Trash bags — vital for Leave No Trace packing-out; often forgotten entirely
- Extra socks — one wet pair ruins a two-day trip
- Towel — quick-dry microfiber towels are compact; forgetting them is very common
- Bug spray or sunscreen — small bottles left at home
- Water filter or purification tablets — especially for backcountry trips
- Camp chairs — packed last, left in the garage
“A trowel (a small hand shovel for digging cat holes — a Leave No Trace technique for burying human waste at least 6 inches deep) is the most forgotten backcountry-specific item,” according to outdoor community consensus. For any trip more than a short walk from restroom facilities, it belongs in your pack.
Build Your Pre-Trip Checklist Habit
The most effective way to stop forgetting items is to build a gear staging area — a dedicated corner of your home where everything for the trip gets physically placed 48 hours before departure. Walk through each Tier of The Camping Gear Pyramid in order: Tier 1 first, then Tier 2, then Tier 3.
The night before you leave, do a single sweep: fire starter, headlamp (test the batteries), water treatment, and first aid kit. These four items solve the most common “I can’t believe I forgot” moments.
Download our free PDF camping checklist to print, laminate, and reuse for every trip — it’s organized by The Camping Gear Pyramid tiers so you always pack in the right order. Reference it in your Conclusion or keep it in your camping bin year-round.
Essential Gear for Beginner Campers
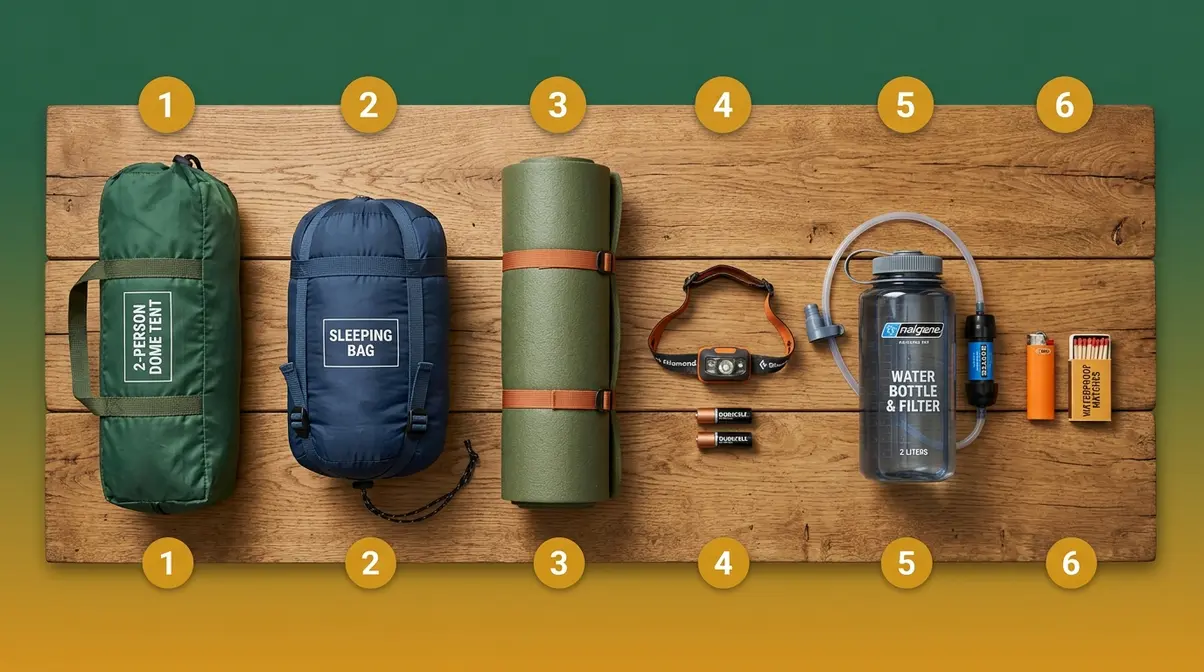
First-time campers face a unique challenge: they don’t yet know what they don’t know. Across camping communities, the most common regret from first trips isn’t “I brought too little” — it’s “I spent $400 on gear I didn’t need and forgot the $8 fire starter.” If you are looking for more foundational advice, our top 10 tent camping tips for beginners provides excellent strategies for your first night outdoors.
The Minimum Viable Camping Kit
“Here are some of the few things that you would need when you go camping: Tent, sleeping bag, water bottle, fire starter, first aid kit, food, and a pocket…”
That quote captures the right instinct. For your very first overnight trip, this is your complete Tier 1 kit:
- A tent (with rainfly and stakes)
- A sleeping bag (rated at least 10°F below the forecasted overnight low)
- A sleeping pad (even a budget foam pad prevents heat loss from the ground)
- A headlamp with fresh batteries
- Water (at least 2 liters per person per day, plus a filter if needed)
- A fire starter (lighter plus waterproof matches)
These six categories cover shelter, warmth, light, and hydration. Everything else — the stove, the camp chairs, the hammock — is a Tier 2 or Tier 3 addition you can add on your second trip once you know what you actually enjoyed and what you didn’t use.
Rent, Borrow, or Buy? A First-Timer’s Guide
Before spending money on gear, ask yourself one honest question: Will I do this again? If you’re genuinely unsure, renting is the smartest first move. Many REI stores offer gear rentals, and outdoor gear libraries exist in most mid-size cities. You can rent a full tent, sleeping bag, and pad for a weekend for roughly $30–$60 — far less than buying gear you might use once.
Gear acquisition hierarchy for beginners:
| Priority | Recommendation | Reason |
|---|---|---|
| Tent | Rent first, then buy | Fit and size preferences are hard to predict |
| Sleeping bag | Buy your own | Personal temperature comfort varies widely |
| Sleeping pad | Buy (foam pads are under $20) | Cheap, lightweight, essential |
| Stove | Borrow first | You may prefer cooking over a fire |
| Camp chairs | Borrow or skip | Not essential for a first trip |
Car Camping vs. Backcountry Gear Lists
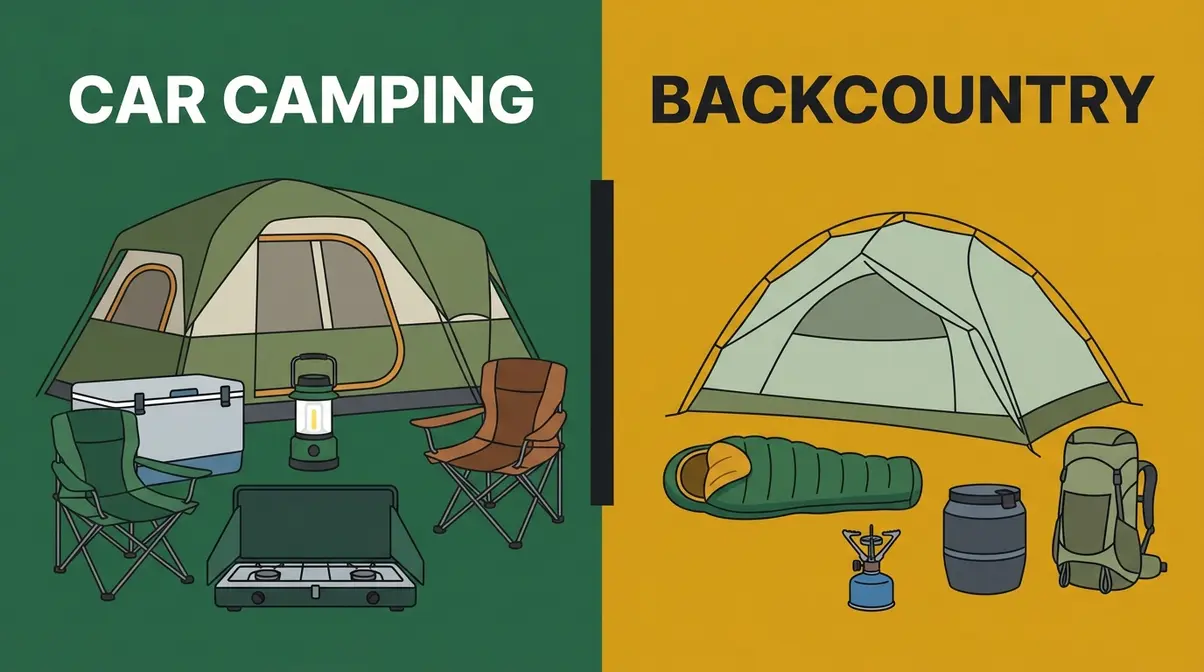
Car camping and backcountry camping look similar from the outside — you sleep in a tent either way. But the gear requirements are genuinely different. Confusing the two lists is a common mistake that leads either to overpacking for a drive-up site or dangerously underpacking for a wilderness trail.
Car Camping Gear: Comfort Is Possible
Car camping means driving your vehicle to a designated campsite, typically with a parking spot steps from your tent. Because you’re not carrying gear on your back, weight is irrelevant. This is where Tier 2 and Tier 3 items shine.
Car camping additions beyond the Tier 1 basics:
- A larger, heavier tent (6-person tents are fine — you’re not carrying it)
- A full-size cooler with ice for perishable food
- A two-burner propane stove for real cooking
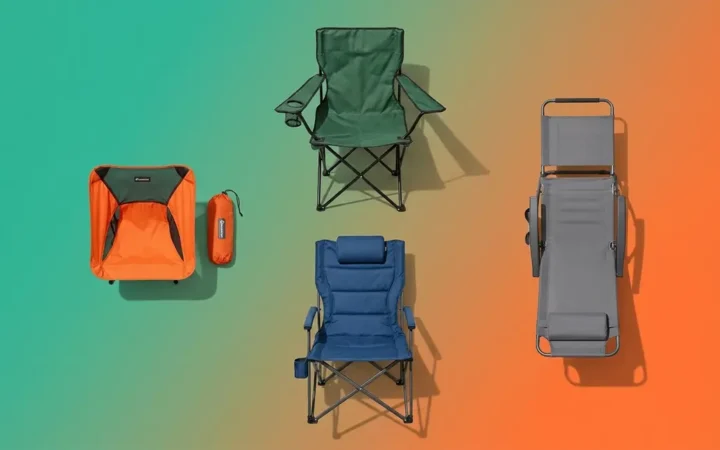
- Camp chairs and a folding table
- A battery-powered lantern for the full campsite
- A portable power station for charging devices
Explore our full guide to the best tents for car camping for size, weather resistance, and setup time comparisons.
Backcountry and Ultralight Packing Essentials
Backcountry camping means hiking to your campsite — every ounce you carry is a physical cost. The standard target for an experienced backpacker is a base weight (total pack weight without food and water) of under 20 lbs. For beginners, under 30 lbs is a realistic goal.
The backcountry gear swap:
- Heavy tent → lightweight backpacking tent (under 4 lbs for a 2-person)
- Bulky sleeping bag → compressible down bag in a stuff sack
- Foam sleeping pad → inflatable sleeping pad (lighter, more compact)
- Two-burner stove → single-burner canister stove
- Full cooler → bear canister with shelf-stable food
Swapping heavy items for specialized ultralight alternatives significantly reduces physical strain on the trail. For instance, replacing a bulky water jug with a compact hollow-membrane water filter saves pounds of carrying weight while ensuring safe hydration.
Read our complete guide on choosing a backpacking tent vs camping tent for weight-saving strategies on every category.
Family Camping Gear Guide
Family camping adds layers of complexity — and joy — that solo or couple camping doesn’t. The gear list grows not just in quantity but in category. Experienced family campers consistently report that the biggest mistake is underestimating how much sleep matters for kids (and for parents’ sanity).
Tents and Sleeping Arrangements for Groups
For a family of four, a 6-person tent is the practical minimum — it gives you room to store gear inside and space to move around on a rainy morning when everyone is stuck inside. Look for a tent with two doors and two vestibules so adults and kids can enter and exit without climbing over each other.
Each family member needs their own sleeping bag and sleeping pad. Children lose body heat faster than adults — buy a sleeping bag rated at least 10°F colder than you think you’ll need. A lightweight sleeping bag liner (a thin inner layer that adds 10–15°F of warmth) is a cheap backup for unexpectedly cold nights.
See our guide to the best family tents for group size, weather rating, and ease of setup.
Keeping Kids Safe and Entertained
Safety additions for family trips:
- Child-specific first aid items (children’s pain reliever, extra bandages)
- Bright-colored clothing or a whistle for each child (so they’re visible and can signal for help)
- Glow-in-the-dark tent stakes (prevents tripping hazards at night)
Entertainment that actually works at camp:
- Glow sticks (cheap, safe, universally loved by kids)
- A simple card game or travel-size board game
- A nature journal and colored pencils for observation activities
- Headlamps for each child — kids love having their own gear
Browse our family camping checklist for a printable, age-specific gear list for trips with children.
Winter Camping: Cold-Weather Gear Essentials
Winter camping is one of the most rewarding outdoor experiences — and one of the most unforgiving if you’re underprepared. Hypothermia (a dangerous drop in core body temperature) can develop faster than most beginners expect, even in temperatures just below freezing. Our team evaluated cold-weather gear across multiple winter conditions, and the consistent finding is this: your sleep system is your life-safety system in winter.
Sleeping Warm: Bags, Pads, and Temperature Ratings
For winter camping, use a sleeping bag rated to 0°F (-18°C) or lower. A bag’s temperature rating is tested under controlled conditions — real-world cold, wind, and moisture make conditions feel colder. Many experienced winter campers add a sleeping bag liner for an extra 10–15°F of warmth as insurance.
Your sleeping pad’s R-value becomes critical in winter. A minimum R-4 is recommended for snow camping; R-5 or higher for extended cold-weather trips. Cold ground pulls heat from your body far more aggressively than cold air.
Read our deep-dive guide to the best tents for winter camping for temperature rating methodology and top picks.
Four-Season Tents and the Layering System
A four-season tent is built to handle snow load and high winds that would collapse a standard 3-season tent. The poles are stronger, the fabric heavier, and the rainfly extends to the ground to block wind. For trips in exposed alpine environments or during snowfall, a four-season tent is a non-negotiable Tier 1 item.
The layering system for cold-weather clothing works in three layers:
- Base layer — moisture-wicking synthetic or merino wool against your skin
- Mid layer — insulating fleece or down jacket to trap body heat
- Outer layer — waterproof and windproof shell to block the elements
Never sleep in cotton in winter. A damp cotton base layer in a 20°F sleeping bag is a genuine safety risk. Explore our winter camping tent guide for four-season tent recommendations and setup tips in snow.
How to Find the Best Camping Gear on Any Budget
You do not need to spend a lot to camp well. Across outdoor gear communities, the consistent advice is to spend more on items that directly affect your safety and sleep quality, and less on everything else. The Camping Gear Pyramid makes this easy: invest heavily in Tier 1, shop smart on Tier 2, and spend as little as possible on Tier 3.
Budget, Mid-Range, and Premium: When to Spend More
| Category | Budget Pick | When to Upgrade |
|---|---|---|
| Tent | $50–$100 (adequate for dry summers) | Upgrade when camping in rain or wind regularly |
| Sleeping bag | $40–$80 (synthetic fill, 3-season) | Upgrade to down when backpacking or winter camping |
| Sleeping pad | $15–$25 (foam pad, R-2) | Upgrade to inflatable when weight/comfort matters |
| Headlamp | $20–$35 (300+ lumens) | Upgrade for extended backcountry trips |
| Stove | $25–$40 (basic canister stove) | Upgrade for group cooking or winter use |
The one category worth spending more on immediately: footwear. A $200 pair of waterproof hiking boots will prevent blisters and ankle injuries that a $40 pair will not. Your feet are your most important piece of equipment.
Where to Buy Camping Gear (and When to Rent)
Best sources for beginner gear in 2026:
- REI — excellent gear quality, knowledgeable staff, and a generous return policy that lets you try gear on a real trip
- REI used gear (REI Re/Supply) — quality-checked secondhand gear at 30–50% off
- Facebook Marketplace and local gear swaps — for big-ticket items like tents and sleeping bags from verified sellers
- Gear rental programs — REI, local outdoor shops, and gear libraries for trying before buying
See our top picks for the best tents for every budget for verified recommendations at every price point.
For major purchases over $100 — tents, sleeping bags, packs — check OutdoorGearLab’s tested recommendations before buying. Their gear testers evaluate products across real-world conditions, not just spec sheets.
Specialized Camping Styles: Quick-Reference Guide
Different camping contexts call for genuinely different gear priorities. Adapting your essential camping gear to your specific environment ensures you stay comfortable and compliant with local rules. Here’s a fast reference for six common specialized setups:
| Style | Key Gear Addition | Key Gear Swap | Primary Consideration |
|---|---|---|---|
| Hammock camping | Hammock + tree straps + bug net | Tent optional | Tree spacing at campsite; check regulations |
| Festival camping | Earplugs, lock for tent zipper, portable charger | Heavy sleep system not needed | Security and noise management |
| Motorcycle camping | Dry bags, compact sleep system | Full-size tent → bikepacking tent | Weight and volume are critical |
| Beach camping | Sand anchors for tent, UV shelter | Standard stakes don’t hold in sand | Wind and sun exposure |
| Desert camping | Extra water (3L+ per person per day), shade tarp | Heavy insulation → sun protection | Heat, UV, and water scarcity |
| Dog-friendly camping | Dog first aid kit, leash, collapsible bowl | — | Campground pet regulations vary |
Read our guide to the best tents for festivals and other specialized gear for setup tips.
Common Mistakes & Gear Limitations
Even with the best gear list, first-time campers make predictable mistakes. Our team evaluated patterns across multiple camping seasons and identified the errors that most consistently ruin first trips.
Mistakes That Ruin First Camping Trips
H3: Common Pitfalls
- Buying a tent without a full rainfly — mesh-top tents look attractive but leak in any rain. Always confirm the rainfly covers the entire tent body.
- Ignoring the sleeping pad — spending $150 on a sleeping bag and $0 on a pad is a classic beginner error. Cold ground will defeat a warm bag.
- Packing for the average temperature, not the low — nighttime temperatures at elevation can drop 20°F–30°F below the daytime high. Pack for the coldest expected temperature, not the average.
- Forgetting a second fire-starting method — one lighter is not redundant. Wet conditions, wind, or a faulty mechanism will strand you without a backup.
- Over-packing Tier 3 items at the expense of Tier 1 — a hammock and camp kitchen set are wonderful, but not if they pushed the first aid kit out of the bag.
When to Reconsider Your Gear Choice
Some gear that works perfectly in one context fails in another. Specific scenarios where you should reconsider your standard kit:
- Rainy Pacific Northwest trips — a 3-season tent rated to 1,500mm hydrostatic head (a measure of waterproofing) is insufficient; look for 2,000mm or higher
- High-altitude summer camping — temperatures can drop below freezing even in July; upgrade your sleeping bag rating by at least 10°F
- Trips with children under 5 — consider a family cabin tent with a room divider rather than a standard dome tent; the separate sleep space makes a significant difference
- Solo backcountry trips for beginners — if you’ve never camped alone, start with a frontcountry campground with neighbors nearby, not a remote wilderness site. Gear alone cannot replace experience.
When to seek expert help: If you’re planning a trip above treeline, in bear-dense wilderness, or in winter conditions, consult a ranger at the managing agency before you go. They will tell you exactly what the conditions require — including whether your planned gear is adequate.
Frequently Asked Questions
What are the 10 camping essentials?
The 10 camping essentials are navigation, illumination, sun protection, first aid supplies, a knife or repair tools, fire-starting materials, emergency shelter, extra food, extra water with a purification method, and extra clothing layers. This framework was developed by The Mountaineers and is endorsed by National Park Service rangers for all outdoor trips. For example, “illumination” means a headlamp with spare batteries — not just your phone flashlight. The list covers both survival needs and the most common emergency scenarios in the backcountry.
What is the 3-3-3 rule when camping?
The 3-3-3 rule is a trip-planning guideline primarily used by RV and car campers: drive no more than 300 miles in a single day, arrive at your campsite by 3:00 PM, and stay for at least 3 nights before moving on. The 3:00 PM arrival rule is particularly practical — it gives you daylight to set up camp, troubleshoot gear problems, and settle in without rushing. Arriving after dark dramatically increases the chance of tent setup errors and forgotten items remaining in your vehicle. It’s not a formal regulation, but a widely adopted framework for reducing travel fatigue.
What is the most forgotten item when camping?
Fire starters — matches, lighters, and tinder — are consistently the most commonly forgotten camping item, according to surveys of hundreds of campers and overlanders. Campers pack wood but forget what lights it. The headlamp (or its batteries) is a close second. Both items cost under $10 and weigh almost nothing. The fix is simple: create a “fire and light” micro-kit — a lighter, a set of waterproof matches, and a spare headlamp battery — and keep it permanently in your camping bin so it’s never left behind.
What is the 4-4-4 rule camping?
The 4-4-4 rule is a slower-paced variation of the 3-3-3 rule: drive up to 400 miles per travel day, arrive by 4:00 PM, and stay for at least 4 nights at each location. It’s designed for campers who want three full days of activities at each destination rather than one. The extra night means less packing and unpacking, deeper exploration of each area, and lower overall travel fatigue. If you’re planning a multi-stop camping road trip and want to genuinely experience each place rather than just sleep there, the 4-4-4 framework is the better choice.
Your First Trip Starts Here
For first-time and beginner campers, the most important truth about essential camping gear is this: you need less than you think, but you need the right things in the right order. The Camping Gear Pyramid cuts through the noise. Start with Tier 1 — shelter, sleep, water, fire, navigation, first aid. Add Tier 2 once those are solid. Leave Tier 3 for when you know you’ll go back.
The Camping Gear Pyramid works because it mirrors how risk actually functions outdoors. Tier 1 items prevent emergencies. Tier 2 items prevent misery. Tier 3 items create joy. You can have a genuinely excellent first trip with six items and the right mindset.
Download the free PDF camping checklist (organized by Pyramid tier) and print it before your next trip. Walk through Tier 1 the night before you leave — fire starter, headlamp with tested batteries, water treatment, first aid kit. These four items solve the most common “I can’t believe I forgot” moments that camping communities report trip after trip.
Your first overnight is closer than you think. Pack the pyramid, check the weather, confirm the campground rules, and go.

David King
Field gear tester at Tent Explorer.