This blog post may contain affiliate links. As an Amazon Associate I earn from qualifying purchases.
Imagine you’re in the midst of a beautiful camping trip, surrounded by nature’s wonders. Everything seems perfect until you notice a tear in your tent.
Panic sets in as you wonder how you’ll manage to keep your sanctuary safe and dry. But don’t worry – repairing a torn tent is easier than you might think. This guide is here to help you, step-by-step, so you can fix the problem quickly and continue enjoying the great outdoors.
With a few simple tools and techniques, you can restore your tent to its former glory. So, let’s dive in and ensure your camping adventure remains uninterrupted and memorable.
Credit: theexpertcamper.co.uk
Common Causes Of Tent Damage
Tents often get damaged by harsh weather, sharp objects, and improper storage. Patching small tears with repair kits is effective. Regular inspection helps in identifying early signs of wear.
When you’re out on a camping adventure, a torn tent can quickly become a major inconvenience. Understanding the common causes of tent damage can help you prevent mishaps and prolong the life of your tent. Let’s explore some of the reasons why your tent might get damaged and how you can avoid them.
Environmental Factors
Nature is beautiful, but it can also be harsh on your gear. Wind can whip up unexpectedly, causing poles to snap or fabric to tear. A friend once had his tent ripped apart during a sudden storm, teaching a valuable lesson about always securing the tent with strong stakes and guy lines. Rain and snow add weight and pressure, potentially leading to leaks or collapse. Ensure your tent is pitched in an area with good drainage to prevent water accumulation. It’s also wise to check the weather forecast before your trip and prepare accordingly.
Wear And Tear
Over time, even the best tents can show signs of wear and tear. Zippers might get stuck, seams can become loose, and fabric may thin out. Regular inspections can help you spot these issues early. Think about how many times you’ve set up and taken down your tent. Each cycle adds stress to the materials. Use a gentle hand when handling your tent, and always follow the manufacturer’s instructions to minimize stress on the fabric and poles.
Improper Storage
Improper storage is a silent tent killer. Storing a wet or dirty tent can lead to mold and mildew, which weakens the fabric. Make it a habit to clean and dry your tent thoroughly before packing it away. Avoid stuffing your tent into a tight space. This can cause creases and weaken the material over time. Consider using a larger storage bag to keep your tent in good shape and ready for the next adventure. Have you ever wondered how many camping trips a properly cared-for tent can survive? It all boils down to treating your tent with care and attention. By understanding these common causes of damage, you’re well on your way to many more nights under the stars, worry-free.
Also Read: How to Set Up a Tent in the Rain
Identifying The Type Of Tear
Understanding the tear type is crucial for effective tent repair. Tears differ in size and location, requiring specific fixes. Identifying these details helps in choosing the right patch or adhesive, ensuring a secure and lasting repair.
Identifying the Type of Tear in your tent is crucial for choosing the right repair method. Imagine you’re out in the wild, and you notice a tear in your tent fabric. Knowing whether it’s a rip, seam damage, or zipper issue can save you from a sleepless night. Each type of tear demands a unique approach. By understanding the specific damage, you can ensure a more efficient repair and extend your tent’s life.
Rips And Tears
Rips and tears are the most common types of tent damage. They often occur due to sharp objects or excessive force. Picture this: you accidentally trip over your tent’s guy line, causing a rip in the fabric. In such cases, a patch kit can be your best friend. These kits usually contain adhesive patches that are easy to apply. Always carry one on your camping trips—it’s a small investment with big returns.
Seam Damage
Seam damage often results from prolonged exposure to tension or weather elements. You might notice this when you see water seeping through the seams during a rainy night. This issue can be tackled with seam sealers. Applying seam sealer strengthens the seams, preventing further leaks. Check your tent seams regularly to spot early signs of wear and tear.
Zipper Issues
Zipper issues can be frustrating, especially when you can’t close your tent properly. Consider a scenario where the zipper is stuck or not aligning. A simple fix might involve cleaning the zipper teeth with a toothbrush or applying a zipper lubricant. If the zipper is broken, you may need a replacement slider. Don’t let a faulty zipper ruin your camping experience—address it promptly. Understanding these types of tears and their solutions is essential. Which type of tent damage have you faced before? Share your experiences and solutions. Each tear tells a story, and your approach to fixing it could inspire fellow adventurers.
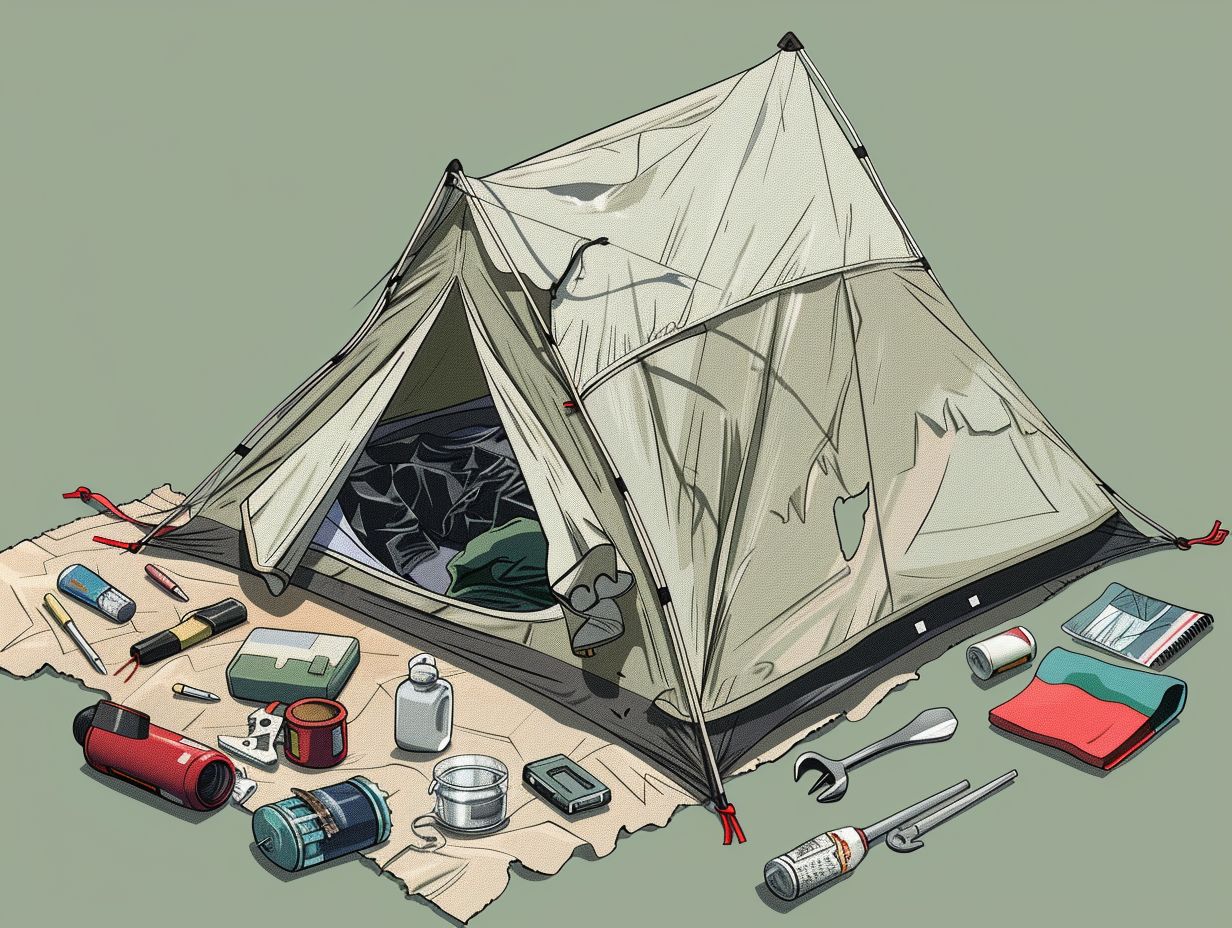
Essential Repair Tools
Repairing a torn tent can feel daunting, but with the right tools, it’s manageable. Essential repair tools provide the backbone for effective tent maintenance. These tools help fix tears, ensuring your camping experience remains pleasant and hassle-free.
Adhesive Tapes
Adhesive tapes are crucial for quick fixes. They offer a temporary solution when immediate repairs are needed. Look for strong, waterproof tapes. These tapes hold up against moisture and wind. Applying them is simple. Clean the torn area, then press the tape firmly over the tear.
Patch Kits
Patch kits are handy for durable repairs. They come with fabric patches and adhesive. Choose kits that match your tent’s material. Begin by cleaning the tear. Apply the adhesive to the patch. Press the patch onto the tear and let it dry. This repair is sturdy and long-lasting.
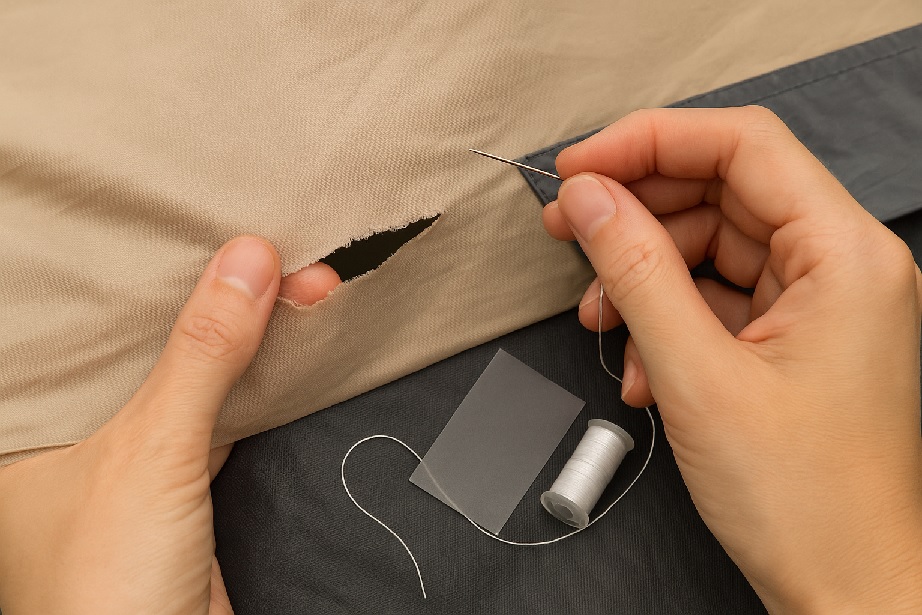
Sewing Supplies
Sewing supplies are essential for permanent fixes. Keep needles and strong thread in your repair kit. Use a needle suited for your tent’s fabric. Stitching over the tear provides a secure hold. Reinforce the stitches with seam sealer for added protection. Sewing may take time but ensures durability.
Temporary Fixes
Quick solutions for a torn tent include using duct tape or a tent repair kit. Patch small holes with tape and seal edges. For larger tears, apply a fabric patch from the repair kit for temporary protection.
When you’re out camping, a torn tent can feel like a major setback. But don’t worry; there are ways to keep your adventure going without packing up and heading home. Temporary fixes can be a lifesaver, providing quick solutions that ensure your shelter remains functional. Whether you’re dealing with a small tear or a larger rip, having a few tricks up your sleeve can make all the difference.
Duct Tape Solutions
Duct tape is a camper’s best friend. Its versatility and strength make it ideal for quick repairs. To fix a tear, start by cleaning and drying the area around the rip. Moisture or dirt can reduce the tape’s adhesive power. Once the area is prepared, cut a piece of duct tape slightly larger than the tear. Press it firmly over the rip, smoothing out any air bubbles. For added durability, apply tape on both sides of the fabric if accessible. In a pinch, layering multiple strips can reinforce larger tears. This method might not last forever, but it can hold up through a rainy night or a windy afternoon. Have you ever used duct tape for an unexpected fix? It can be surprisingly effective!
Emergency Patching
Emergency patch kits can be a lifesaver in the wilderness. These kits are compact and easy to use. They often come with adhesive-backed patches that are designed for outdoor fabrics. To apply a patch, clean the tent fabric around the tear thoroughly. Once clean, peel the backing off the patch and press it over the tear. Make sure to apply even pressure to ensure a strong bond. These patches are designed to withstand the elements, offering a more robust solution than duct tape alone. Consider keeping a patch kit in your gear—it’s a small investment for peace of mind. Both duct tape and emergency patches are simple yet effective ways to manage unexpected rips. The next time your tent faces an unplanned tear, you’ll be ready. What’s your go-to method for emergency repairs?
Permanent Repair Techniques
Repairing a torn tent ensures it lasts longer and remains functional. Permanent repair techniques are vital for a durable fix. They provide a strong solution for any tear. Let’s explore some effective methods to keep your tent in top shape.
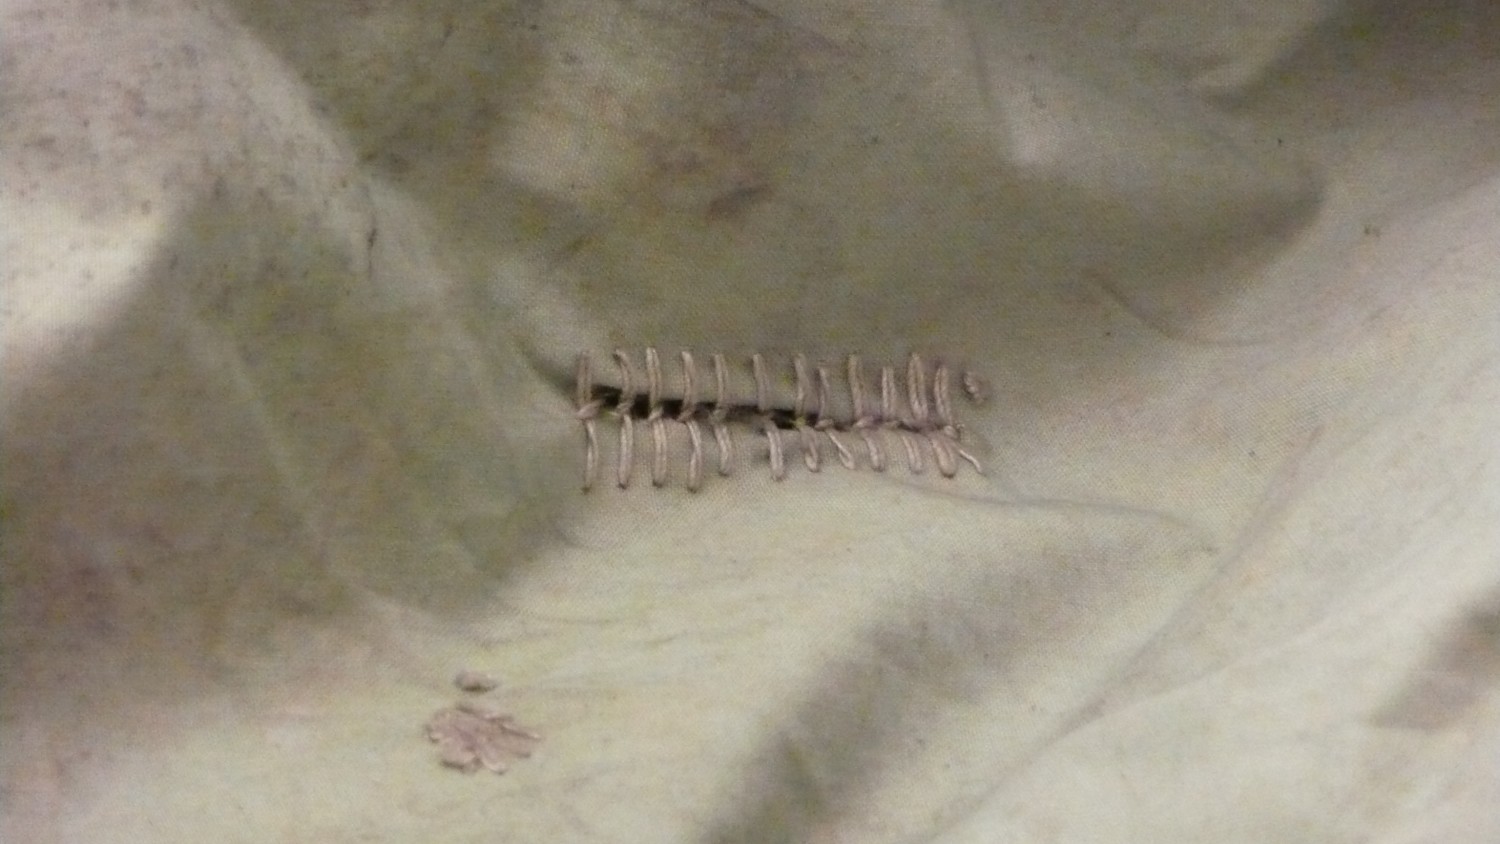
Sewing And Stitching
Sewing is a reliable method for tent repair. Use a strong, UV-resistant thread. A needle suitable for heavy fabric is necessary. Start by cleaning the torn area. Align the edges of the tear carefully. Sew the edges together with a straight stitch. Double stitch the seam for extra strength. Knot the thread securely to finish.
Using Repair Patches
Repair patches offer a quick fix for tent tears. Choose a patch with adhesive backing. Clean the area around the tear. Allow it to dry completely. Cut the patch to fit the tear size. Ensure the patch extends beyond the tear. Press the patch firmly over the tear. Smooth out any bubbles or wrinkles. Let the adhesive bond for a few hours.
Seam Sealing
Seam sealing prevents water leaks through tent seams. Choose a seam sealer compatible with your tent fabric. Clean and dry the seams before applying. Use a brush to apply the sealer along the seams. Ensure even coverage for full protection. Allow the sealer to dry fully before packing the tent. Seam sealing maintains a waterproof tent, essential for camping comfort.
Credit: www.dryguywaterproofing.com
Preventative Measures
Preventing tent damage ensures lasting adventures. Simple actions can keep your tent intact. Regular checks, proper storage, and choosing the right materials are key. These steps help maintain your tent’s strength and durability.
Regular Maintenance
Check your tent for small damages after each trip. Minor tears grow if left unattended. Clean the tent thoroughly before storage. This prevents mold and weak spots. Inspect seams and zippers for wear and tear. Repair them immediately to avoid bigger issues.
Proper Storage
Store your tent in a cool, dry place. Avoid damp areas to prevent mold growth. Roll the tent loosely to maintain its shape. Use a breathable bag for storage. This prevents moisture build-up and material degradation.
Choosing Durable Materials
Select tents made of robust materials. Strong fabrics resist tears and punctures. Opt for reinforced seams for added strength. Consider tents with ripstop technology. They prevent small tears from spreading. Quality materials extend your tent’s lifespan.

Credit: www.youtube.com
Frequently Asked Questions
How Do You Fix A Torn Tent Seam?
To fix a torn tent seam, clean the area first. Use a needle and strong thread for stitching. Apply seam sealer over the stitches for added protection. Let it dry completely before packing. This ensures the repair is durable and waterproof.
What Materials Are Needed For Tent Repair?
For tent repair, you’ll need a repair kit, seam sealer, and adhesive tape. A needle and strong thread are essential for stitching. Scissors and a clean cloth are useful for preparing the area. These materials help ensure a strong, lasting repair.
Can Duct Tape Repair A Tent Tear?
Duct tape can temporarily fix a tent tear. Clean the torn area and apply the tape smoothly. It provides an immediate solution, but not a long-term fix. For a permanent repair, use a patch kit or seam sealer. This ensures better durability and weather resistance.
How To Patch A Large Hole In A Tent?
To patch a large hole, clean the area first. Use a patch kit designed for tents. Apply adhesive to the patch and press it firmly over the hole. Allow it to dry completely. This method ensures the patch is secure and waterproof, extending the tent’s lifespan.
Conclusion
Repairing a torn tent is easier than you might think. Start by gathering the right tools. A patch kit can save your trip. Clean the area around the tear well. This helps the patch stick better. Use strong adhesive for a lasting fix.
Test your repair before heading out. You want to avoid surprises in the wild. Regular checks can prevent future damage. Keep your tent in top shape with simple maintenance. With these tips, your tent will serve you well on many adventures.
Enjoy the outdoors with confidence and peace of mind.
